 by
by Creating a rainbow children’s crochet set is a wonderful and vibrant project! The key to a “rainbow” set is simply incorporating the colors of the rainbow (red, orange, yellow, green, blue, indigo, violet/purple) into your chosen crochet items.
Here’s a detailed guide on how to approach making a rainbow children’s crochet set, focusing on easy patterns suitable for beginners, along with ideas for different items you can include:
What to Make in a Rainbow Children’s Crochet Set
You can make a variety of items for a complete set. Here are some popular and beginner-friendly ideas:
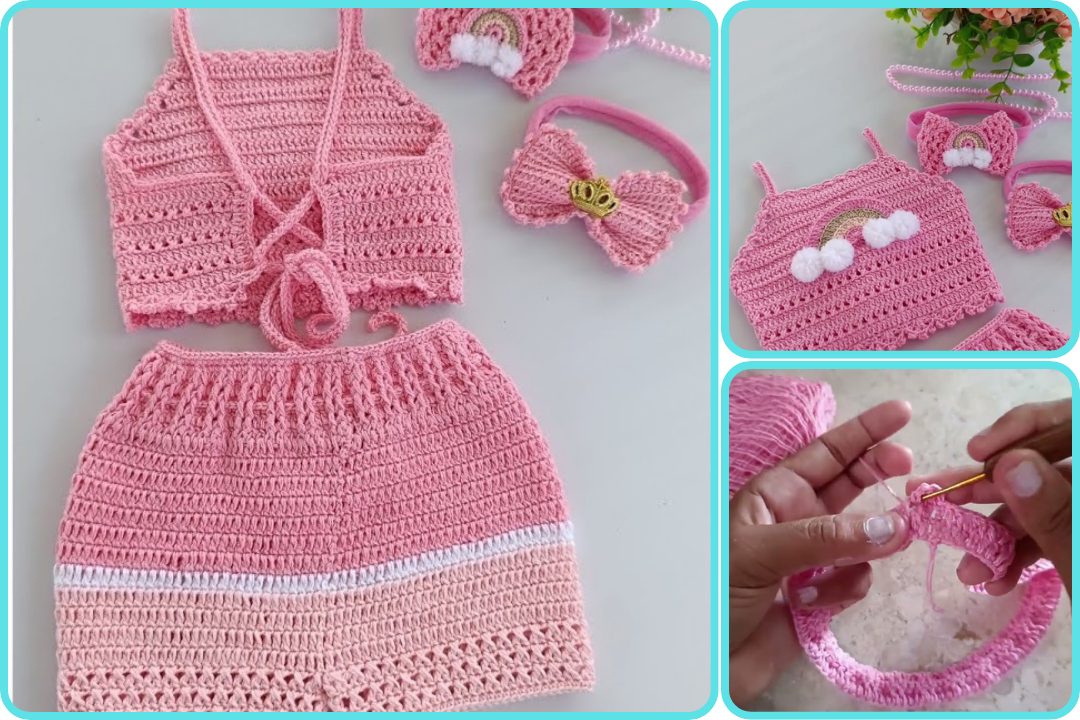
- Dress or Tunic: A classic and adorable choice. You can make a striped rainbow dress or a dress with a rainbow-colored skirt.
- Cardigan or Sweater: A cozy addition, perfect for layering.
- Hat: Beanie, sun hat, or even a whimsical animal hat with rainbow stripes.
- Blanket/Lovey: A comfort item that showcases the rainbow colors beautifully.
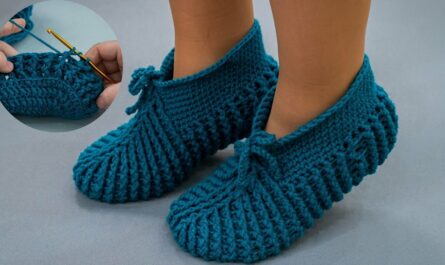
- Booties/Slippers: Small and quick to make.
- Headband/Hair Accessories: Simple and fun.
- Small Toy (Amigurumi): A rainbow-colored animal or a simple rainbow shape.
- Diaper Cover/Shorts: Great for warmer weather.
Materials You’ll Need
- Yarn:
- Colors: You’ll need yarn in at least 6-7 rainbow colors (red, orange, yellow, green, blue, indigo, violet/purple). You can also add pink or white for clouds/accents.
- Fiber: For children’s items, choose soft, washable yarns. Acrylic, cotton, or a cotton blend are excellent choices. Merino wool can also be lovely but might require handwashing.
- Weight: Light worsted (DK/weight 3) or worsted weight (Aran/weight 4) are common and versatile for children’s clothes. Check your pattern for specific recommendations.
- Quantity: Buy at least one skein of each rainbow color. You’ll likely use more of a main color (like white if you’re making stripes) or a dominant color in a dress.
- Crochet Hook:
- Size: Match the hook size to your yarn weight and the pattern’s recommendation. Common sizes for DK/worsted yarn are 4.0mm (G/6) to 5.5mm (I/9).
- Scissors: For cutting yarn.
- Yarn Needle (Tapestry Needle): Essential for weaving in the many ends you’ll have with color changes, and for seaming if necessary.
- Measuring Tape: For checking gauge and garment dimensions.
- Stitch Markers: Very useful for marking the beginning of rounds, especially when working with stripes.
- Buttons/Snaps (Optional): If your chosen pattern includes openings for cardigans or dresses.
- Embroidery Floss/Safety Eyes (Optional): If making amigurumi toys.
General Approach to Rainbow Crocheting
The beauty of a rainbow set is in the color changes. Most easy patterns for children’s wear will involve:
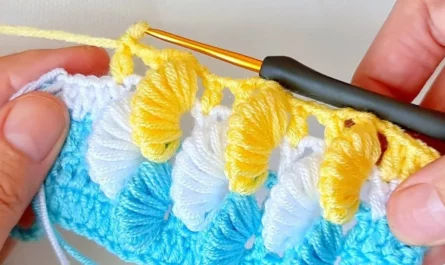
- Simple Stitch Patterns: Single crochet (sc), half double crochet (hdc), and double crochet (dc) are your best friends.
- Stripes: The easiest way to incorporate rainbow colors. You’ll change colors every 1-3 rows/rounds.
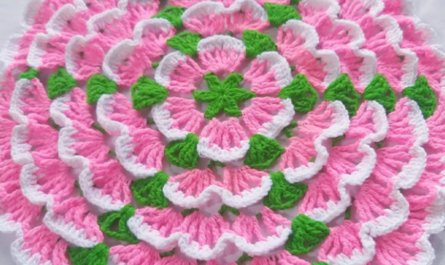
- Granny Squares/Circles: You can make individual rainbow-colored granny squares/circles and then join them to create larger items like blankets, vests, or even parts of a dress.
Key Steps for Making a Rainbow Crochet Set
1. Choose Your Patterns & Plan Your Set
- Select items: Decide what you want to include in your set (e.g., a dress and a hat, or a blanket and booties).
- Find “Easy” Patterns: Search online (Ravelry, Pinterest, LoveCrafts, crochet blogs) for “easy crochet children’s dress,” “beginner crochet baby hat,” “rainbow crochet blanket,” etc.
- Prioritize simple construction: Look for patterns that are worked in simple shapes (like rectangles or circles) or in the round, reducing the need for complex shaping or seaming.
- Consider size: Choose patterns appropriate for the child’s age/size you’re making the set for.

2. Gather Your Rainbow Yarn
- Choose your rainbow order: The classic order is Red, Orange, Yellow, Green, Blue, Indigo, Violet. You can also customize it, e.g., using a lighter blue or adding pink.
- Consider yarn weight consistency: Ensure all your chosen colors are the same weight of yarn for consistent fabric drape and gauge.
3. Make a Gauge Swatch (Crucial!)
As with any garment, gauge is key for size and fit.
- Follow the gauge instructions for each pattern you choose.
- Use the recommended hook size for your chosen yarn and pattern.
- Adjust your hook if your swatch is too big or too small until your gauge matches.
4. How to Change Colors Seamlessly (for Stripes)
This is vital for a clean rainbow look.
- The last yarn over: When you’re making the last stitch of a row/round in your current color, instead of pulling through the last loops with that color, drop the current color and pick up the new color. Pull the new color through to complete the stitch.
- Carry the yarn (optional, for short distances): If you’re changing colors frequently (e.g., every row) and don’t want too many ends to weave in, you can “carry” the unused yarn along the top of your stitches, crocheting over it. This is usually best for 2-3 colors, as it can make the fabric too thick with more.
- Cut and weave (most common for rainbow): For a rainbow, you’ll likely cut the old color after a few rows/rounds and weave in the ends later. This creates the cleanest look. Always leave a tail of at least 6 inches for weaving in.
5. Crocheting Each Item (General Steps)
Example: Rainbow Striped Dress/Tunic
- Bodice:
- Start with a foundation chain in your first rainbow color.
- Work in rows or rounds, following your pattern for shaping the neckline and armholes.
- Change colors every 1-3 rows/rounds to create the rainbow stripes.
- If working in rows, remember to turn your work at the end of each row and chain up for the next. If working in rounds, join with a slip stitch and chain up.
- Skirt:
- Attach yarn to the bottom edge of the bodice.
- Work in rounds, continuing the rainbow stripe pattern.
- Increase stitches evenly in the early rounds of the skirt to create a gentle flare. The pattern will guide you on increase frequency.
- Continue until desired length is reached.
- Sleeves (if applicable):
- Attach yarn to the armhole opening.
- Work in rounds or rows, creating rainbow stripes.
- Finishing: Add edging to neckline/sleeves, sew seams (if any), and most importantly, weave in all those rainbow ends neatly!
Example: Rainbow Hat
- Crown: Start with a magic ring or chain 2 and work stitches into the first chain. This creates a closed circle.
- Increase: Follow your pattern’s increase instructions to create a flat circle for the top of the hat. Change colors every 1-2 rounds.
- Body: Once the crown is the desired diameter, stop increasing and continue crocheting in rounds until the hat reaches the desired depth.
- Brim (optional): Add a brim using single crochet, ribbed stitches, or another desired texture.
- Finishing: Weave in ends.
Example: Rainbow Blanket (Stripes or Granny Squares)
Stripes:
- Foundation Chain: Chain the desired width of your blanket in your first rainbow color.
- Work in Rows: Work in rows using a simple stitch (e.g., double crochet or half double crochet).
- Color Changes: Change colors every few rows (e.g., 2-5 rows per color) to create bold rainbow stripes.
- Finishing: Once the desired length is reached, fasten off and weave in all ends. Add a border if desired (e.g., a simple single crochet border or a ripple border).
Granny Squares:
- Make individual squares: Crochet multiple small granny squares. You can make each round of a granny square a different rainbow color, or make solid color squares in each rainbow shade.
- Join squares: Use a slip stitch, single crochet, or a yarn needle to seam the squares together to form your blanket.
- Border: Add a border around the entire blanket for a polished finish.
Tips for a Successful Rainbow Children’s Crochet Set
- Organize your yarn: Keep your rainbow colors in order so you can easily grab the next one.
- Consistent tension: Try to maintain consistent tension, especially when changing colors, to keep your fabric even.
- Weave in ends as you go: This is a lifesaver for multi-colored projects. Weave in the ends of each color as you finish with it, rather than waiting until the very end.
- Blocking: For garments and blankets, blocking (gently wetting and shaping your finished piece, then letting it dry) can make a huge difference in evening out stitches and improving drape.
- Personalize it: Add a little embroidered cloud, a small sun appliqué, or tassels in rainbow colors for extra charm.
- Safety first: If making items for babies or very young children, ensure all components (especially buttons or small embellishments) are securely attached and pose no choking hazard. Avoid loose strings or ties.
With a little patience and a love for color, you’ll create a beautiful and cherished rainbow crochet set for the special child in your life!
Watch video: