 by
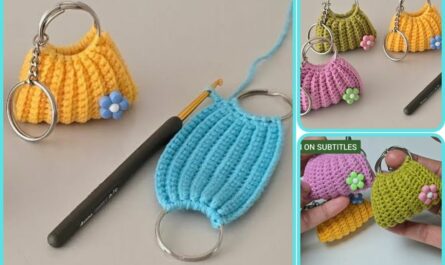
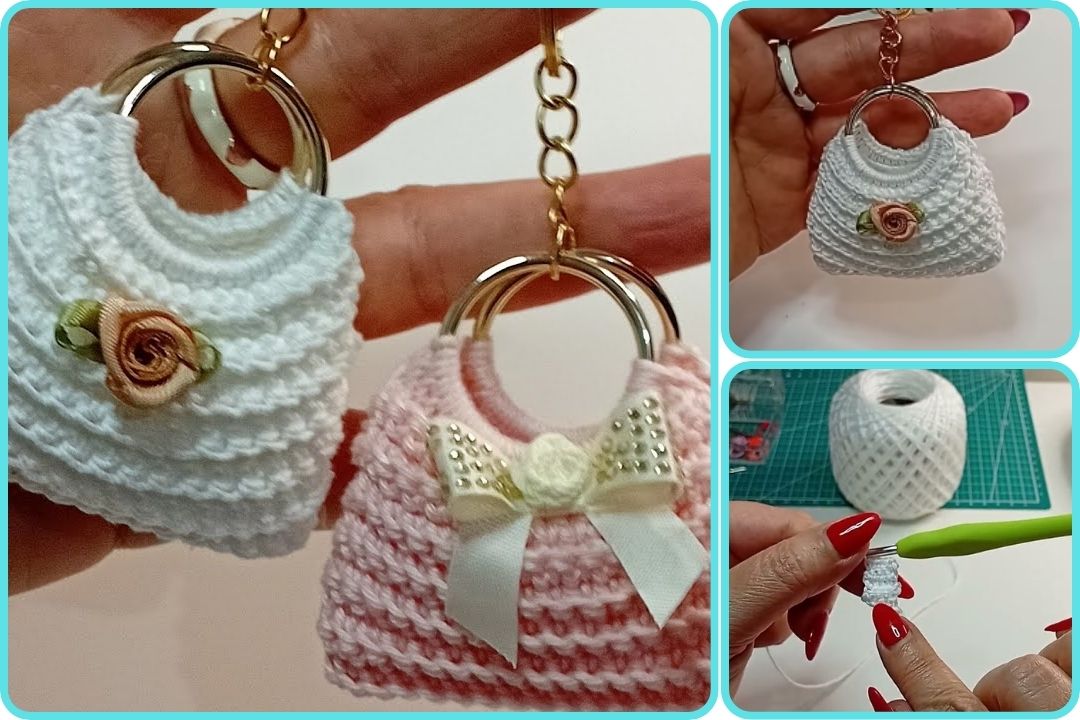
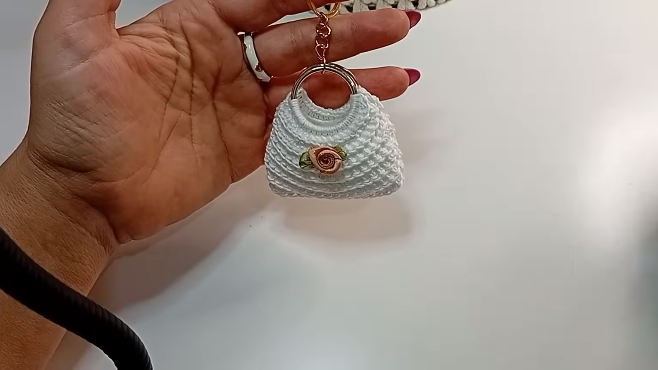
by Sure! Here is a detailed tutorial on how to make a Mini Crochet Key Holder Purse – great for beginners and a fun, quick project for anyone who enjoys crocheting. This small accessory is perfect for holding keys, coins, or even small earbuds, and makes a thoughtful handmade gift.
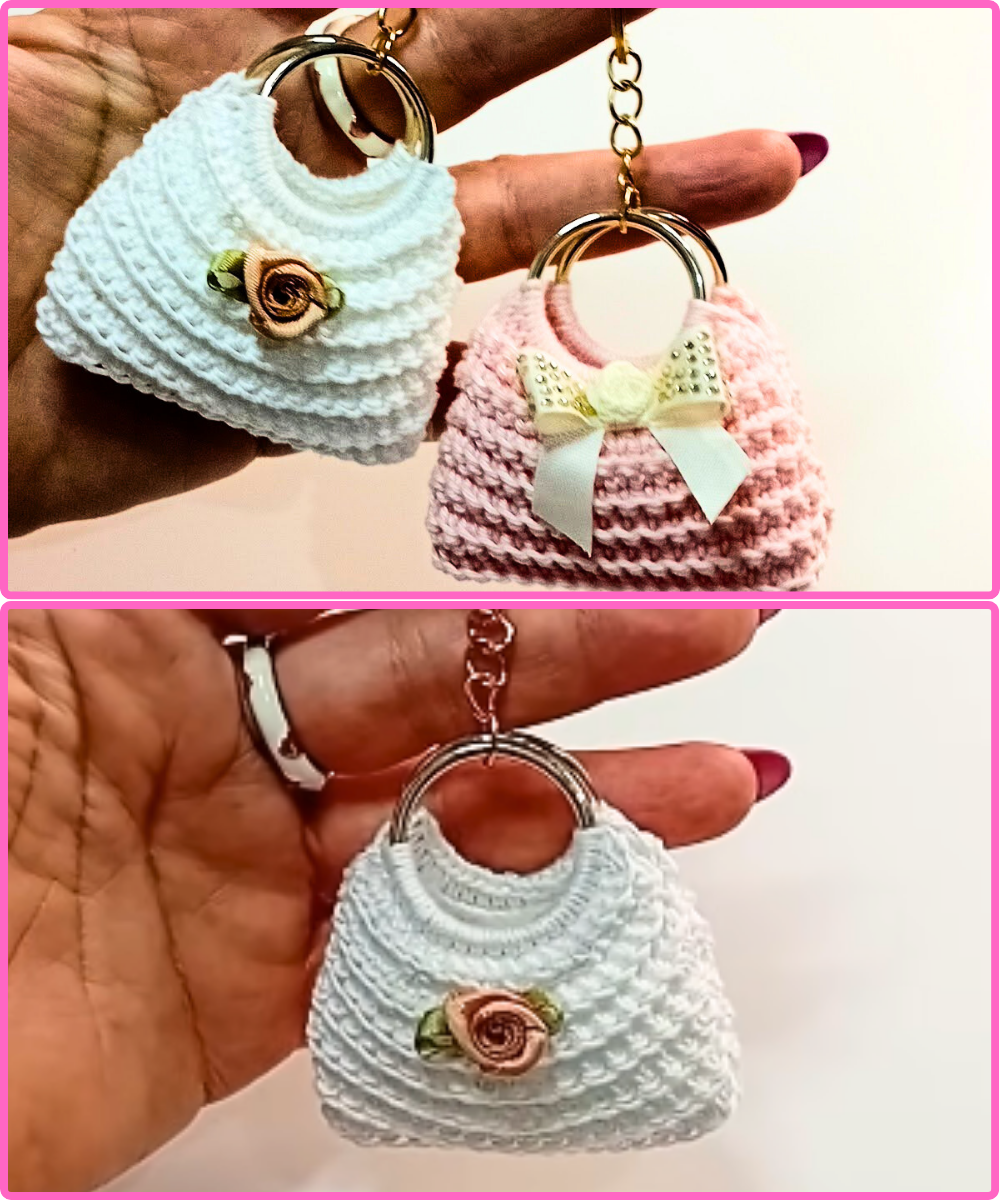
🧵 TUTORIAL: MINI CROCHET KEY HOLDER PURSE
✨ Project Overview:
-
Skill Level: Beginner to Intermediate
-
Time Required: 1 to 2 hours
-
Techniques Used: Magic ring, single crochet, increase, decrease, slip stitch
-
Size: Approx. 2.5 to 3 inches (can be adjusted)
🧶 Materials Needed:
-
Yarn: Cotton or acrylic yarn (DK or worsted weight)
-
You can choose any color(s) you like.
-
-
Crochet Hook: 3.0mm to 4.0mm (depending on your yarn weight)
-
Key Ring or Lobster Clasp
-
Zipper or Button (Optional): For closure
-
Yarn Needle: For weaving in ends
-
Scissors
-
Stitch Marker (optional)

📏 Abbreviations (US Terms):
| Abbreviation | Meaning |
|---|---|
| MR | Magic Ring |
| SC | Single Crochet |
| INC | Increase (2 SC in 1 st) |
| DEC | Decrease (SC2tog) |
| SL ST | Slip Stitch |
| CH | Chain |
| ST(S) | Stitch(es) |
🧩 Instructions:
🔹 STEP 1: Start the Base (in the round)
-
Create a Magic Ring, and make 6 SC into the ring.
(6 sts) -
Round 2: INC in each stitch around.
(12 sts) -
Round 3: (SC in next st, INC in next st) repeat around.
(18 sts) -
Round 4: (SC in next 2 sts, INC) repeat around.
(24 sts) -
Round 5: (SC in next 3 sts, INC) repeat around.
(30 sts)
(You can stop increasing here, or continue a few more rounds depending on how wide you want the purse.)
🔹 STEP 2: Build the Body
-
Rounds 6–12: SC in each stitch around without increasing.
(Work in a spiral or join each round with a SL ST)-
You can add stripes or color changes here if desired.
-
Adjust the number of rounds for height.
-
🔹 STEP 3: Shape the Flap
-
Row 1: SC in next 15 stitches, turn.
(Working flat now, not in the round) -
Row 2: DEC, SC across to last 2 stitches, DEC, turn.
-
Row 3–5: Repeat Row 2 until 5–6 stitches remain.
-
Row 6: SC across.
-
Optional: CH 5 to form a button loop, then SL ST to last stitch.
🔹 STEP 4: Finishing
-
Fasten off, leaving a long tail.
-
Sew in ends with a yarn needle.
-
Attach a button if you made a loop, or sew in a small zipper or snap.
-
Sew or crochet a loop or ring holder at the top of the back of the purse.
-
Example: CH 10, join with SL ST to form a loop, then sew securely.
-
-
Attach to your key ring or lobster clasp.

🎨 Customization Ideas:
-
Add a small flower or appliqué to the front.
-
Embroider initials.
-
Use variegated yarn for a colorful look.
-
Line the inside with fabric for a neater finish.
🧺 Care Instructions:
-
Hand wash in cold water, lay flat to dry.
-
If acrylic, it’s generally machine washable – but avoid heat.
Watch video: