by
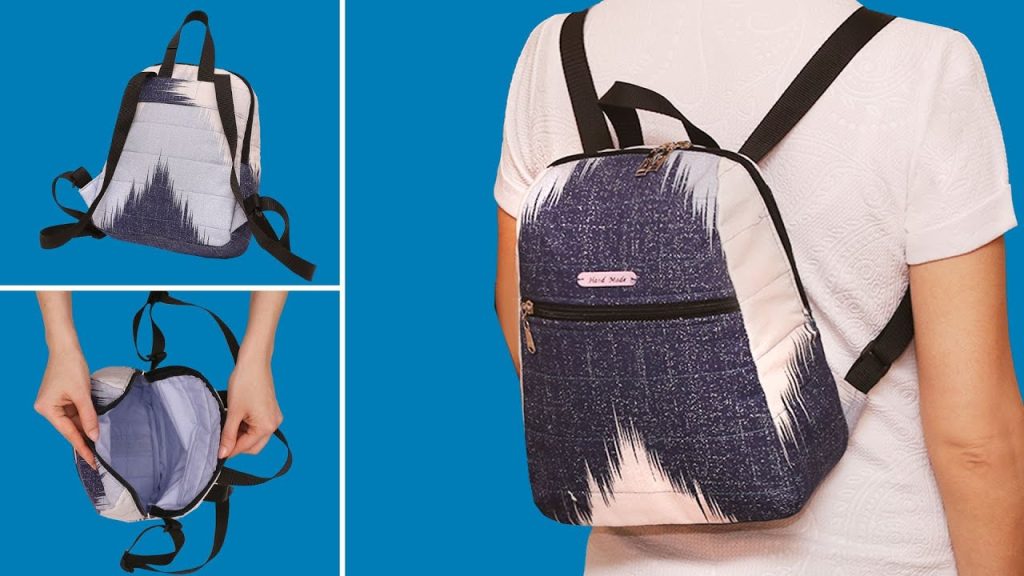
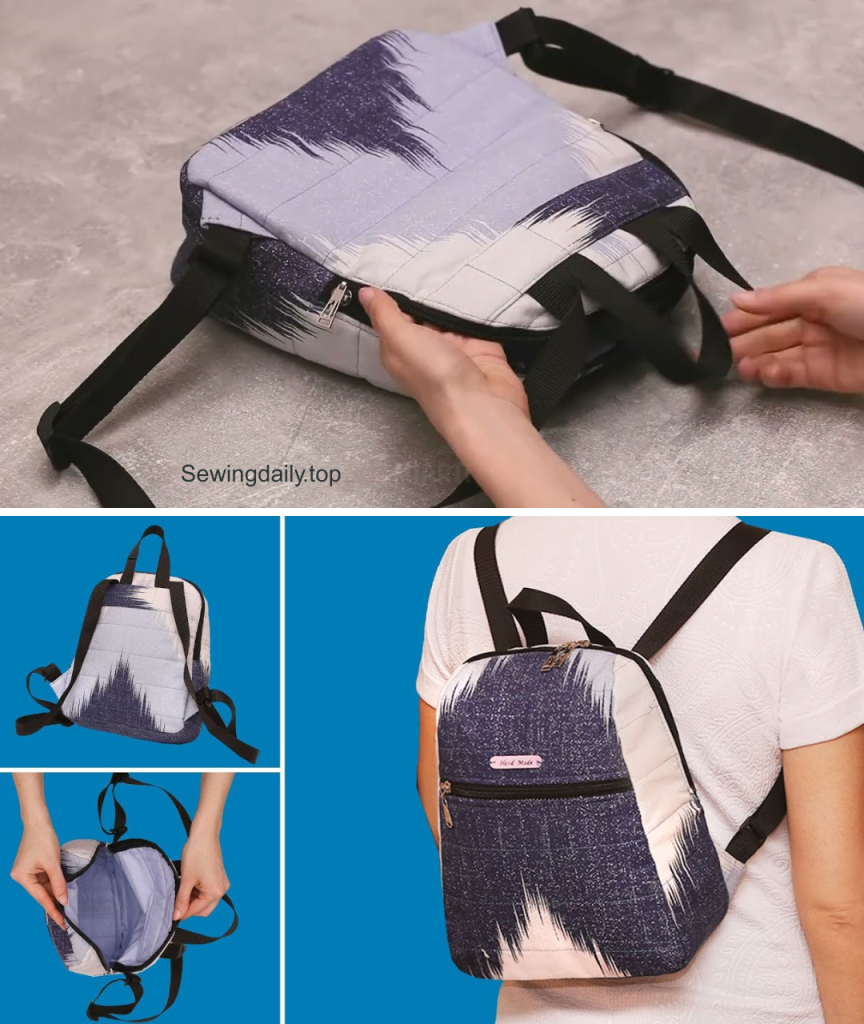
by Hello, quick-sew superstars and travelers on the go! Are you ready for a backpack pattern that delivers maximum style and structure with minimal fuss? I’m excited to share the pattern for the Quilted Commuter Rucksack—a clean, rectangular bag that skips the fiddly lining process by using double-sided quilted fabric and decorative bias tape to finish the seams. This is truly one of the easiest rectangular backpacks you can sew!
Inspired by a fantastic tutorial on simplified backpack construction, this design emphasizes speed and a sophisticated finish. It features a sturdy main body, simple construction, and a cinch-and-buckle top closure for security.
Grab your favorite pre-quilted fabric, your robust webbing, and let’s stitch up a stylish, structured rucksack in an afternoon!
Why You’ll Love Making This Rucksack:
- No Lining Required: Using double-sided quilted fabric and bias tape eliminates the need to sew a separate lining, dramatically cutting down the project time.
- Instant Structure: Quilted fabric provides natural padding and stiffness, giving the bag a professional, structured shape without heavy interfacing.
- Simplified Gusset: The bag is constructed using a single rectangular base/side panel, making 3D assembly straightforward.
- Clean Finish: Bias tape turns raw seams into neat, durable internal features.
What You’ll Need:
- Main Fabric: 1.5 yards of Double-Sided Quilted Fabric (e.g., quilted cotton, quilted denim).
- Accent/Pocket Fabric: 1/2 yard of coordinating cotton or canvas (for pocket lining and strap anchors).
- Webbing/Straps: 3 yards (2.7 meters) of 1.5-inch wide cotton or nylon webbing.
- Bias Tape: 6 yards (5.5 meters) of 5 cm (2-inch) wide double-fold bias tape. Extra-wide bias tape is essential for covering seam allowances and edges neatly.
- Hardware:
- 2 x 1.5-inch slide adjusters (tri-glides).
- 2 x 1.5-inch rectangular rings (D-rings are also acceptable).
- 1 x 1.5-inch buckle set (male and female parts).
- 1 x Drawstring/Cinch Cord (1 yard of paracord or rope).
- Tools:
- Sewing Machine (with heavy-duty needle and walking foot recommended for quilted fabric).
- Iron, Ruler, and Fabric Marker/Chalk.
- Heavy-duty thread.
- Pins and heavy-duty clips.
Measurements & Cutting List
The final bag size will be approximately 11 inches wide x 15 inches high x 4 inches deep. All measurements include a 1/2-inch (1.2 cm) seam allowance.
| Piece | Fabric | Dimensions (Width x Height) | Quantity | Notes |
| A: Main Panels | Quilted Fabric | 12 in. x 16 in. | 2 | Front and Back of the bag. |
| B: Gusset Strip | Quilted Fabric | 40 in. x 5 in. | 1 | Sides and Bottom (4+11+4+21 extra length for turn and fold). |
| C: Flap | Quilted Fabric | 10 in. x 8 in. | 1 | Top fold-over closure. |
| D: Drawstring Casing | Cotton Fabric | 34 in. x 2 in. | 1 | Long strip for the top drawstring channel. |
| E: Strap Anchors | Webbing/Cotton | 4 in. x 1.5 in. | 2 | Bottom loops for hardware (if using cotton, cut 4 in. x 4 in. and fold/sew). |
| F: Webbing Straps | Webbing | 35 in. x 1.5 in. | 2 | Main adjustable strap length. |
| G: Flap Strap (Buckle) | Webbing | 15 in. x 1.5 in. | 1 | Strap for securing the flap. |
Construction: Building the Quilted Commuter Rucksack
Part 1: Preparing Details and Straps
- Bottom Strap Anchors (E): If using webbing, loop the webbing through the rectangular ring, fold over, and stitch a secure square/X-box near the ring. If using cotton fabric, cut the 4″x4″ strips, fold in half, fold raw edges in, and topstitch to create a 1.5-inch strap, then secure the rings.
- Strap Assembly (F): Thread one end of each 35-inch webbing strap (F) through the slot on a slide adjuster. Fold the end over and sew securely. The other end of the strap will connect to the ring later.
- Flap Buckle (G): Attach the female part of the buckle to one end of the 15-inch webbing strap (G). Stitch securely.

Part 2: Assembling the Outer Shell
- Attach Anchors (E): On the bottom edge of the (A) Back Panel, pin the raw ends of the Strap Anchors (E) 3 inches in from each corner. Baste securely.
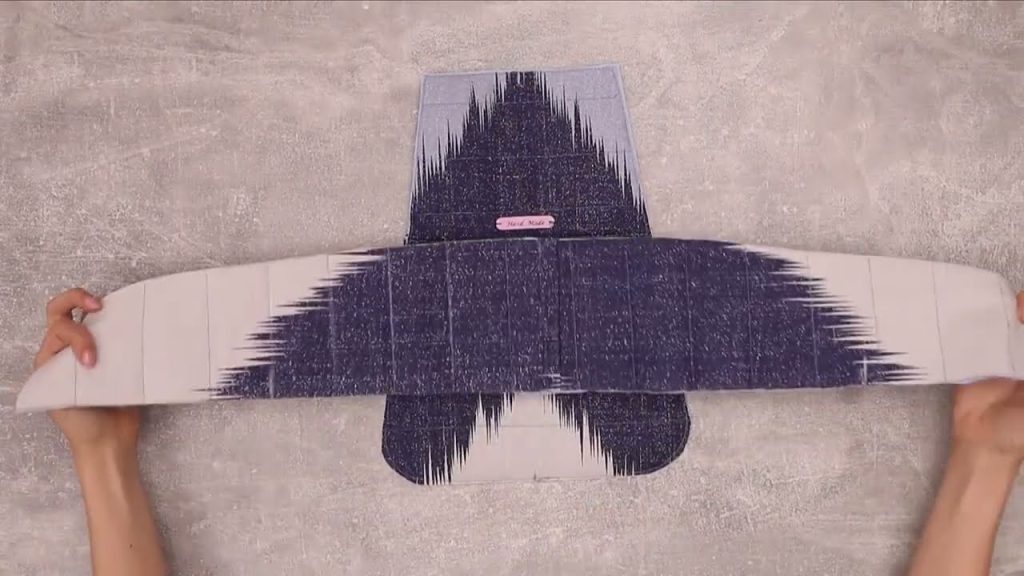
- Attach Gusset (B): Pin the long (B) Gusset Strip to the perimeter of the (A) Front Panel, matching the center of the gusset (the 11-inch section) to the center of the bottom edge. Pin around the three sides (bottom and two sides). Sew with a 1/2-inch seam allowance.
- Finish Seam: Open the seam allowance on the inside. Encase the raw edges of this seam entirely with the 5 cm wide bias tape, folding the tape over the seam allowance and topstitching down. This is the interior finish.
- Complete the Outer Shell: Pin the remaining raw edges of the Gusset Strip (B) to the (A) Back Panel, ensuring the Strap Anchors (E) are securely basted in the seam. Sew with a 1/2-inch seam allowance.
- Finish Seam: Finish this second seam allowance with the 5 cm wide bias tape (Repeat Step 3). Your main bag body is now complete with clean, finished interior seams.
Part 3: Cinch Top and Flap Closure
- Prepare Drawstring Casing (D): Fold the (D) Casing Strip in half lengthwise (to 34 in. x 1 in.). Press. Open and fold each long raw edge into the center fold line. Press again. Topstitch along both edges.
- Attach Casing: Pin the casing strip to the inside of the bag opening, 1.5 inches down from the top edge. Stitch the casing down along both top and bottom edges, leaving the short ends of the casing open for the drawstring.
- Insert Drawstring: Thread your paracord or rope through the casing channel. Knot the ends.
- Prepare Flap (C): Take the (C) Flap. Sew the male part of the buckle to the bottom center of the flap. Finish all four raw edges of the flap with the 5 cm wide bias tape (this gives a beautiful, clean edge).
- Attach Flap: Pin the Flap to the center top edge of the Back Panel (over the webbing anchor/strap area). Stitch securely using two rows of stitching.
Part 4: Final Straps
- Attach Top Straps (F): Pin the unsecured end of the two 35-inch Webbing Straps (F) to the top edge of the Back Panel, just under the Flap’s attachment point (about 3 inches in from the side seams). Sew securely.
- Connect Bottom Straps: Run the free ends of the webbing straps (F) down and loop them through the rectangular rings on the bottom anchors (E). The straps should now connect the top to the bottom anchors, creating the adjustable harness.
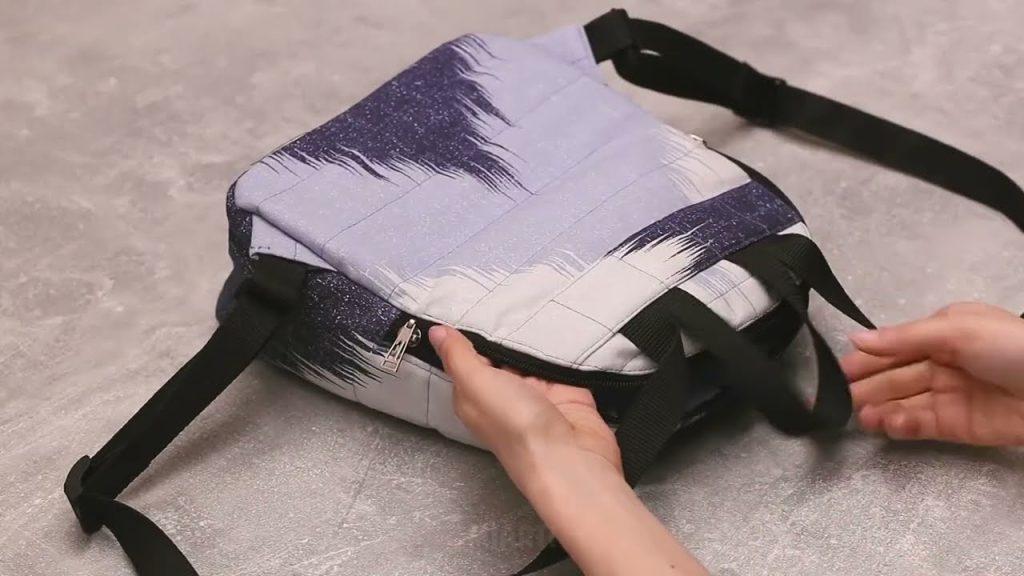
Congratulations! Your Quilted Commuter Rucksack is complete—a sturdy, stylish, and incredibly easy-to-sew rectangular backpack!
Video tutorial: