by
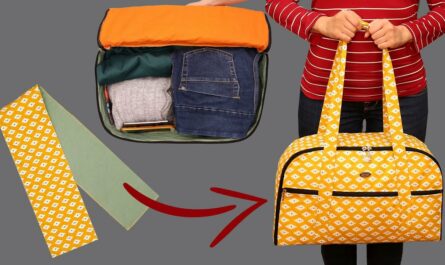
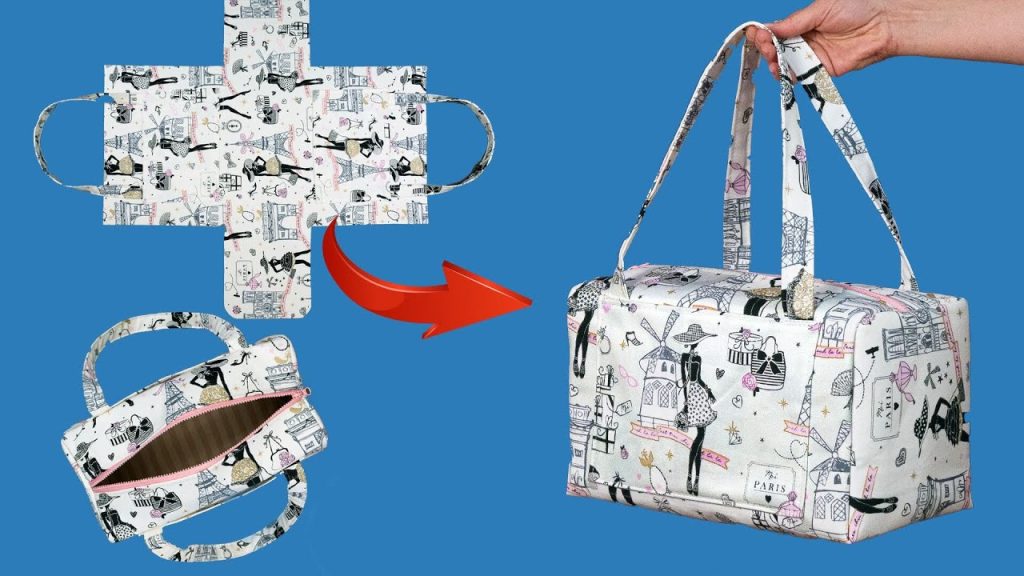
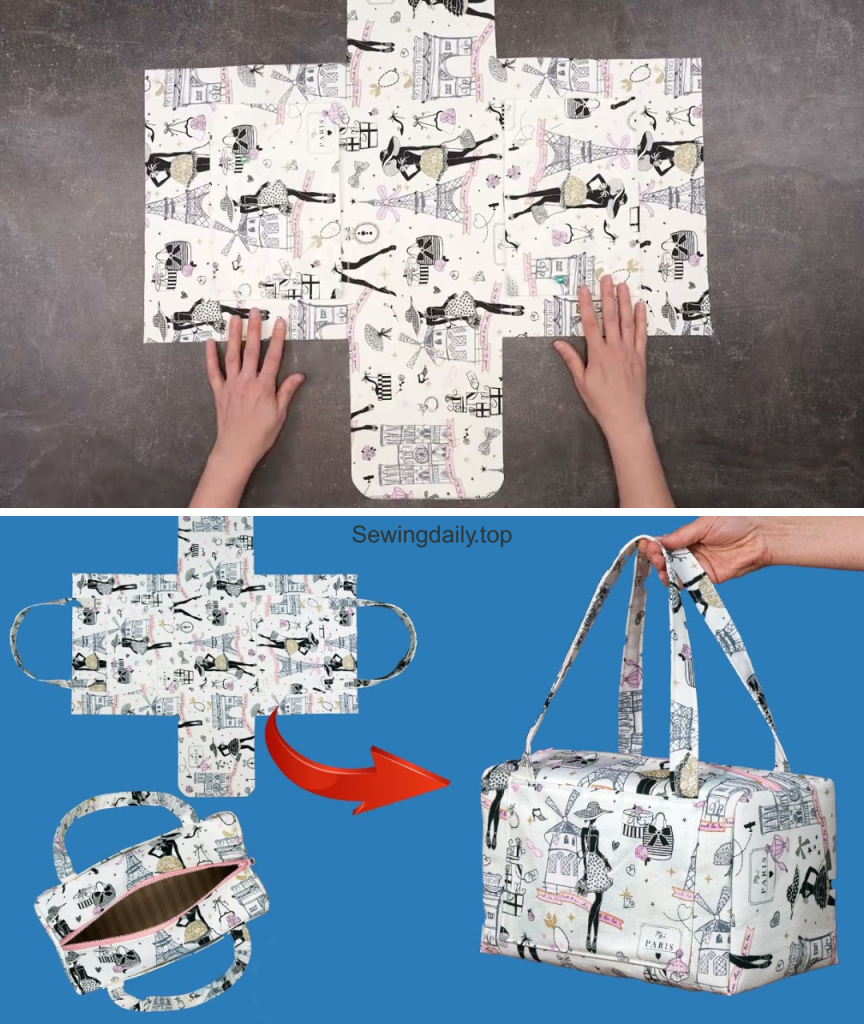
by Imagine creating a perfectly structured, standing tote bag with a seamless bottom, a wide-open top, and a sleek profile—all built from a single, brilliantly cut and folded piece of fabric! This detailed tutorial, inspired by the incredibly simple yet effective method in the “A few people know this is the easiest way to sew a bag!” video from Miarti – Reuse, will guide you through creating this unique shopper. The brilliance of this design is its hyper-efficient use of a single, stabilized panel, resulting in a bag that looks custom-made and highly professional.
Get ready to transform one large rectangle of fabric into a sturdy, stylish accessory that’s perfect for shopping, carrying books, or everyday use!
Why This “Seamless Structure Shopper” Will Be Your New Go-To Pattern
This design is a masterclass in geometric efficiency, offering several compelling reasons to make it your next sewing project:
- Zero Bottom Seam: The bag is constructed from a continuous piece, meaning there are no seams along the base for ultimate durability and a clean look.
- Structured & Crisp: The mandatory use of thick felt/fusible fleece ensures the bag stands tall and maintains a sophisticated, boxy shape.
- Minimal Cutting: The main body requires cutting only one large rectangle and then strategically shaping the corners.
- Fast Assembly: By skipping traditional side and bottom panels, the construction focuses on quick, effective seams.
- Beginner-Friendly: While the initial marking requires precision, the stitching involves only straight lines.
Materials & Cutting List:
The measurements are derived directly from the method shown in the tutorial video. Precision in cutting and marking is key!
| Piece | Fabric | Dimensions | Notes | Video Ref. |
| Main Body Exterior | Sturdy Cotton/Canvas | 71 cm x 68 cm | Needs heavy interfacing. | |
| Main Body Interfacing | Thick Felt/Wadding | 71 cm x 68 cm | Essential for structure. | |
| Lining Fabric | Chintz or Cotton | 71 cm x 68 cm | ||
| Strap | Contrasting Fabric | 55 cm x 10 cm | Can be pieced together. | |
| Binding/Trim | Bias Tape/Fabric Strip | ~200 cm x 4 cm | For finishing the top edge. | |
| Basic Tools: Sewing machine, heavy-duty needle, ruler, fabric marker, pins/clips, and iron. |
Step-by-Step Tutorial: Crafting Your “Seamless Structure Shopper”
This tutorial is broken down into four key phases: preparation and marking, shaping the exterior, constructing the handle/lining, and the final finishing. All seam allowances are 1 cm unless otherwise stated.
Phase 1: Preparation and Geometric Marking
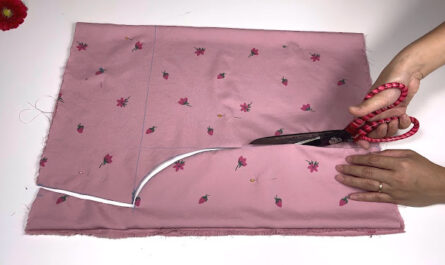
The entire bag’s shape is determined by precise marking and cutting of the large panel.
- Stabilize the Exterior: Iron the Thick Felt/Wadding onto the wrong side of the 71 cm x 68 cm Exterior Fabric piece. Fuse it securely to create one rigid panel.
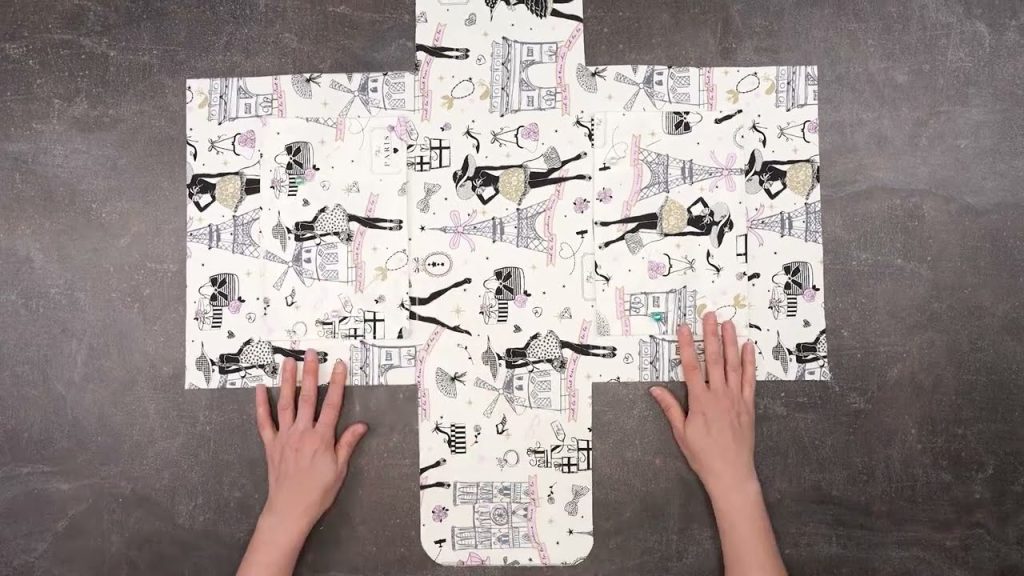
- Fold and Mark: Fold the stabilized panel in half along the 71 cm length (the bag height), creating a piece that measures 35.5 cm x 68 cm.
- Define the Base & Sides: Along the 68 cm width (the top opening/base), measure and mark 9 cm in from the side edges. This 9 cm is the depth of your boxed base.
- Shape the Corners (The Key Cut): At the two folded corners (the bottom of the bag):
- Measure 19 cm down the folded edge (the bag height).
- Measure 19 cm across the raw side edge (the bag width).
- Mark and cut out a 19 cm x 19 cm square from each of these two bottom corners. This is the cut that defines the bag’s boxy shape and side seam placement.
- Cut Lining: Repeat the same geometric cuts (19 cm x 19 cm squares) on the two bottom corners of the Lining Fabric.
Phase 2: Shaping and Stitching the Exterior Body
The pre-cut shapes are stitched to form the 3D exterior shell.
- Stitch the Side/Base: Open the main exterior panel (which now has large cuts in the bottom corners). Bring the two raw side edges of the cut-out section together, matching them up, right sides facing.
- Sew the New Seam: Stitch a straight seam down the side of the bag, effectively boxing the corner and creating the side of the bag in a single, strong line. Repeat this for the second side cut.
- Result: Your exterior bag should now be a three-dimensional pocket with a continuous bottom fold and two side seams. Turn the exterior bag right side out and set aside.
Phase 3: Constructing the Handle and Lining
The strap and lining are prepared for final integration.
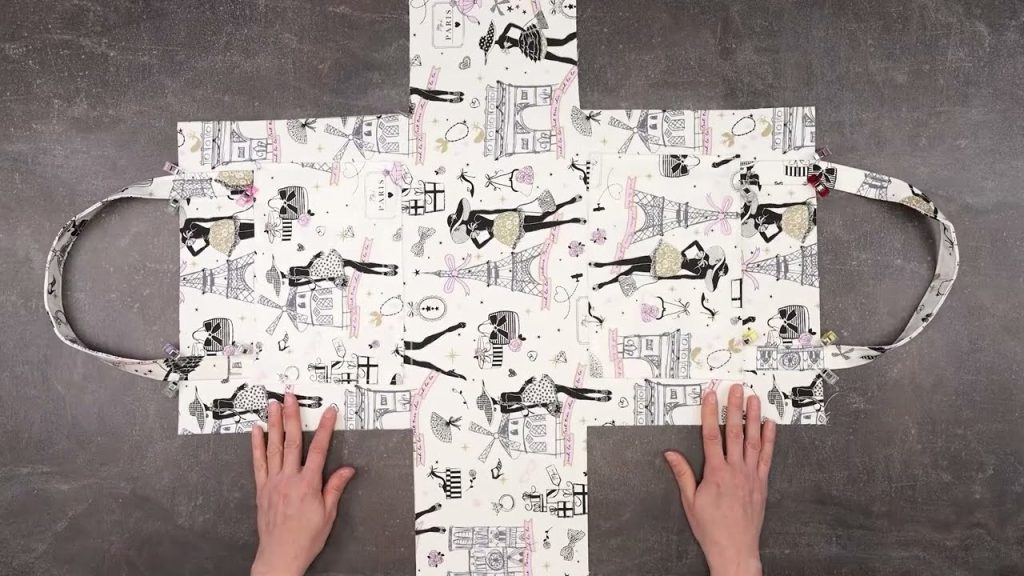
- Prepare Strap: Take the 55 cm x 10 cm Strap piece. Fold it in half lengthwise, right sides together, and stitch the long edge. Turn the strap right side out and press flat. Topstitch along both long edges for strength and a neat finish.
- Sew the Lining: Place the 71 cm x 68 cm Lining Fabric (with the 19 cm x 19 cm corner cuts) right sides together.
- Stitch the two side seams closed, using the same method as the exterior (folding the corner cut to align the raw edges).
- Crucially, leave a 15 cm turning opening along one of the side seams of the lining.
- Baste Handle: Turn the Exterior Bag wrong side out. Position the raw ends of the handle onto the top raw edge of the bag, centering them on the front panel (or placing them 10 cm in from the side seams). Baste the handle ends to the top raw edge with a 0.5 cm seam allowance.
Phase 4: Final Assembly and Finishing
The two bags are joined, turned, and finished with a decorative binding.
- Join Exterior and Lining: Keep the Exterior Bag wrong side out (with the handle basted). Keep the Lining Bag right side out.
- Slide the lining bag into the exterior bag. The two bags should now be wrong sides together.
- Align the top raw edges perfectly. Pin all around the top perimeter.
- Stitch Top Perimeter: Stitch all around the top raw edge with a 1 cm seam allowance.
- Turn and Close: Pull the entire bag right side out through the turning hole left in the lining side seam. Stitch the lining hole closed (by machine or hand). Push the lining neatly inside the exterior bag.
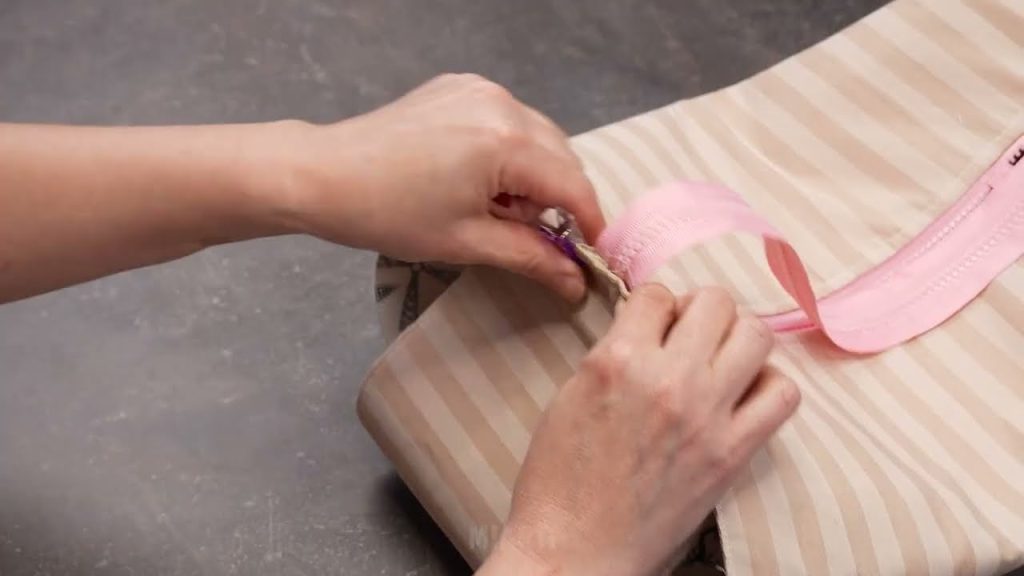
- Apply Bias Binding: The final touch is binding the top edge for a decorative and durable finish.
- Pin the Bias Binding strip to the top perimeter, aligning the raw edge of the binding with the raw top edge of the bag (which is now folded over).
- Stitch the binding on one side, wrap it over the top edge, and stitch it down on the inside, fully enclosing the raw seam allowance. This gives the bag a highly finished, structured look.

Your unique “Seamless Structure Shopper” is complete! Enjoy your incredibly durable, stable, and geometrically simple tote bag.
Video tutorial: