 by
by Certainly! Here’s a detailed and creative step-by-step tutorial based on the fun and catchy theme:
🎒 “Grab Your Bag and Come On!”
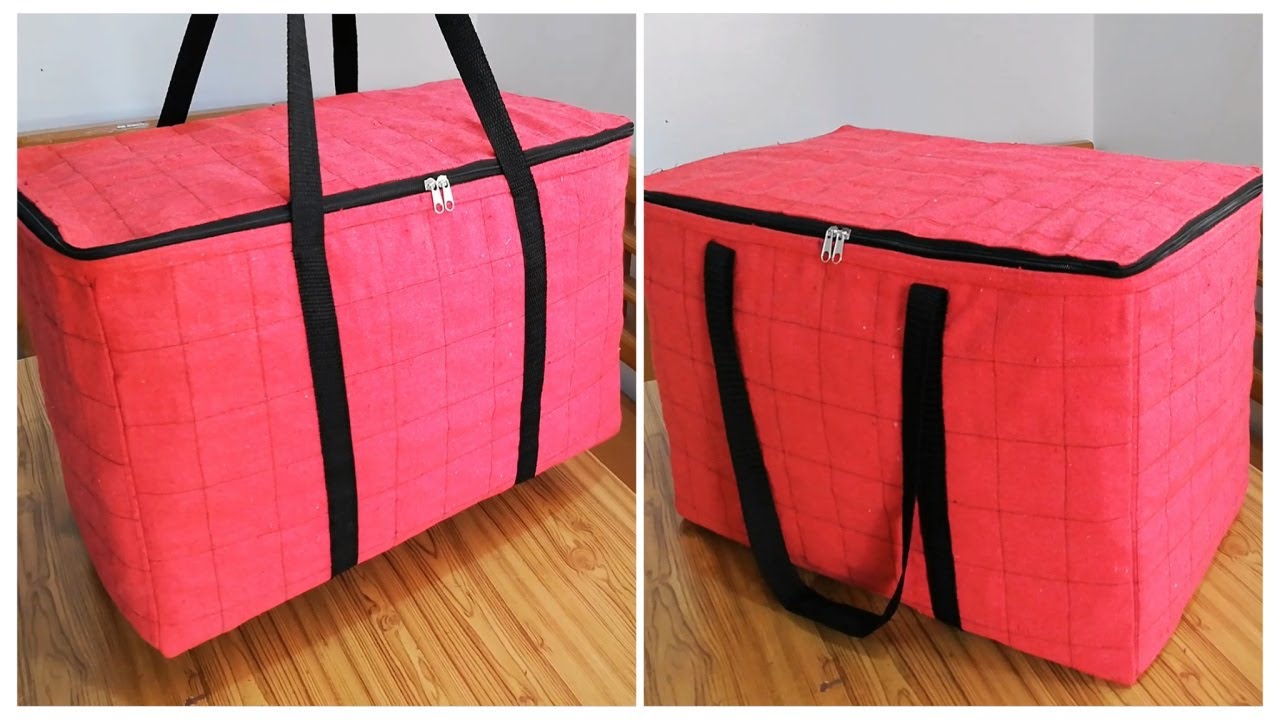
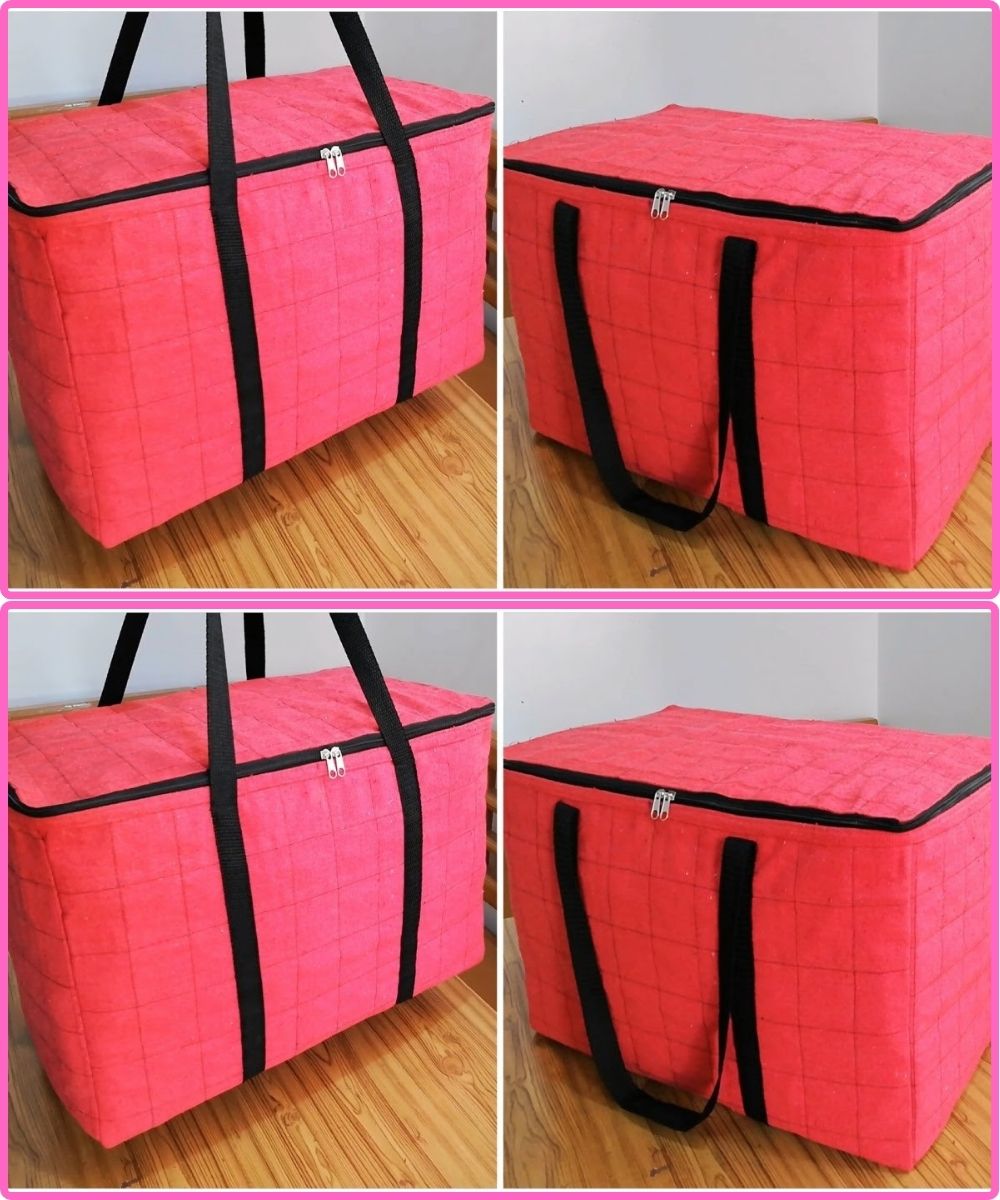
🧵 DIY Easy Fabric Bag Tutorial – Perfect for Beginners!
This project is inspired by the phrase “Grab your bag and come on!”—and that’s exactly what we’ll make: a quick, stylish, and functional fabric bag that you can grab on the go. Whether you’re heading to the market, the beach, school, or simply need storage, this lightweight fabric tote bag is a great project to sew at home.
🧷 Project Overview:
| Feature | Details |
|---|---|
| 🧵 Skill Level | Beginner |
| 🕒 Time Needed | 1 to 1.5 hours |
| 📐 Size | Approx. 14″ x 15″ (Adjustable) |
| 👜 Type | Open-top tote bag with handles |
| 👝 Optional | Add pockets, lining, or closure for extra function |
✂️ Materials Needed:
| Material | Quantity | Notes |
|---|---|---|
| Main fabric (cotton/canvas/denim) | 1/2 yard | For outer body |
| Optional lining fabric | 1/2 yard | For durability & clean interior |
| Fabric for straps | Two strips 20” x 2” | Or use cotton webbing |
| Thread | As needed | Matching or contrasting |
| Iron-on interfacing (optional) | 1/2 yard | For structure |
| Sewing machine, scissors, pins, iron | — | Standard sewing tools |

📐 Cutting Guide:
| Piece | Size | Quantity |
|---|---|---|
| Outer Bag Panels | 15” tall x 14” wide | 2 |
| Lining (optional) | Same as above | 2 |
| Handles | 20” x 2” | 2 |
🧶 Instructions:
✅ Step 1: Prepare the Fabric
-
Press your fabric flat.
-
Fuse interfacing to the wrong side of the outer panels (optional for stiffness).
-
Cut all pieces according to the size chart above.
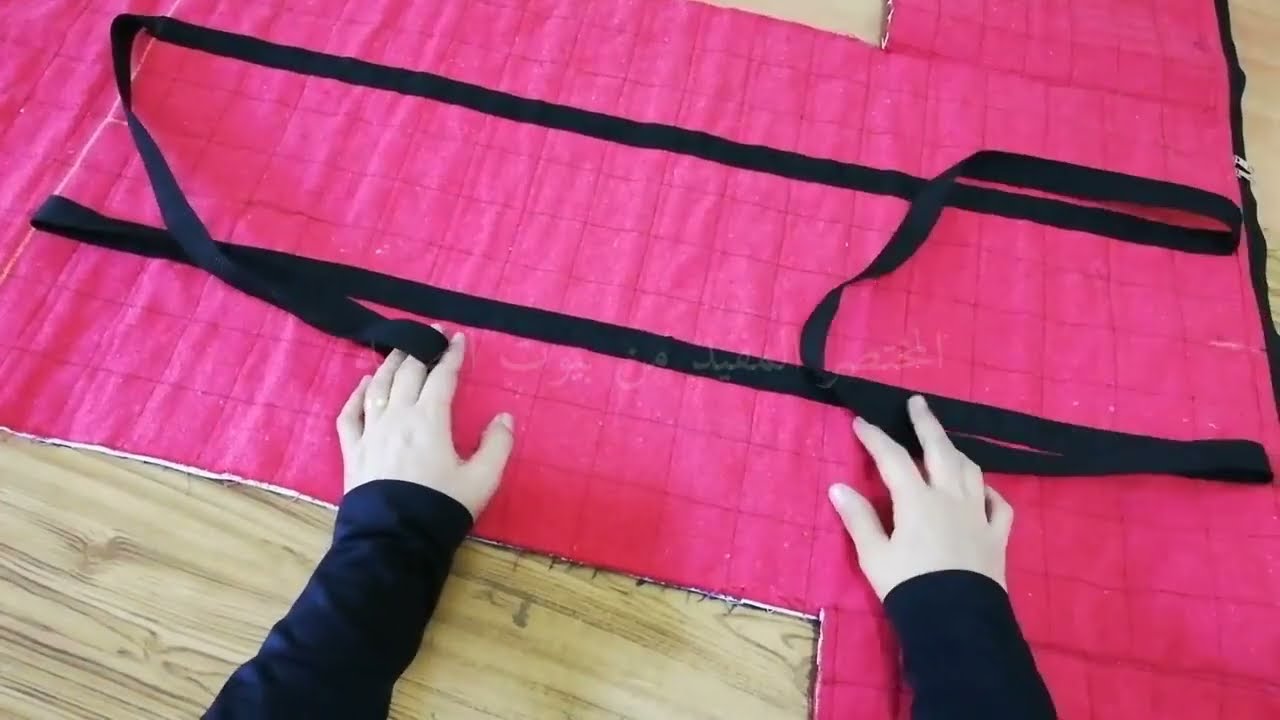
✅ Step 2: Make the Bag Handles
-
Fold the long edges of each 20” x 2” strip inward ½”.
-
Fold in half again lengthwise and press (like bias tape).
-
Topstitch both sides to secure.
💡 Tip: You can also use ready-made cotton webbing or ribbon for the handles.
✅ Step 3: Assemble the Outer Bag
-
Place the two outer panels right sides together.
-
Sew down the sides and bottom using a ½” seam allowance.
-
Press seams open.
✅ Step 4: (Optional) Add Depth – Box the Corners
-
At each bottom corner, flatten into a triangle.
-
Measure 2” from the tip and draw a straight line.
-
Sew across the line and trim the tip.
💡 This adds depth so the bag can hold more.
✅ Step 5: (Optional) Sew the Lining
-
Repeat Steps 3 & 4 with lining fabric.
-
Leave a 3″ opening in the bottom seam for turning later.
✅ Step 6: Attach Handles
-
Turn the outer bag right side out.
-
Pin one end of each handle 3” from each side seam, raw edges aligned with the top.
-
Baste the handles in place.
✅ Step 7: Combine Lining & Outer Bag
-
Place the outer bag inside the lining (right sides together).
-
Align and pin the top edges.
-
Sew all the way around the top edge using a ½” seam.
✅ Step 8: Turn the Bag
-
Pull the bag right side out through the gap in the lining.
-
Push the lining inside the bag and press everything flat.
✅ Step 9: Topstitch the Top Edge
-
Sew a neat line all the way around the top edge of the bag.
-
This keeps the lining in place and adds a professional finish.
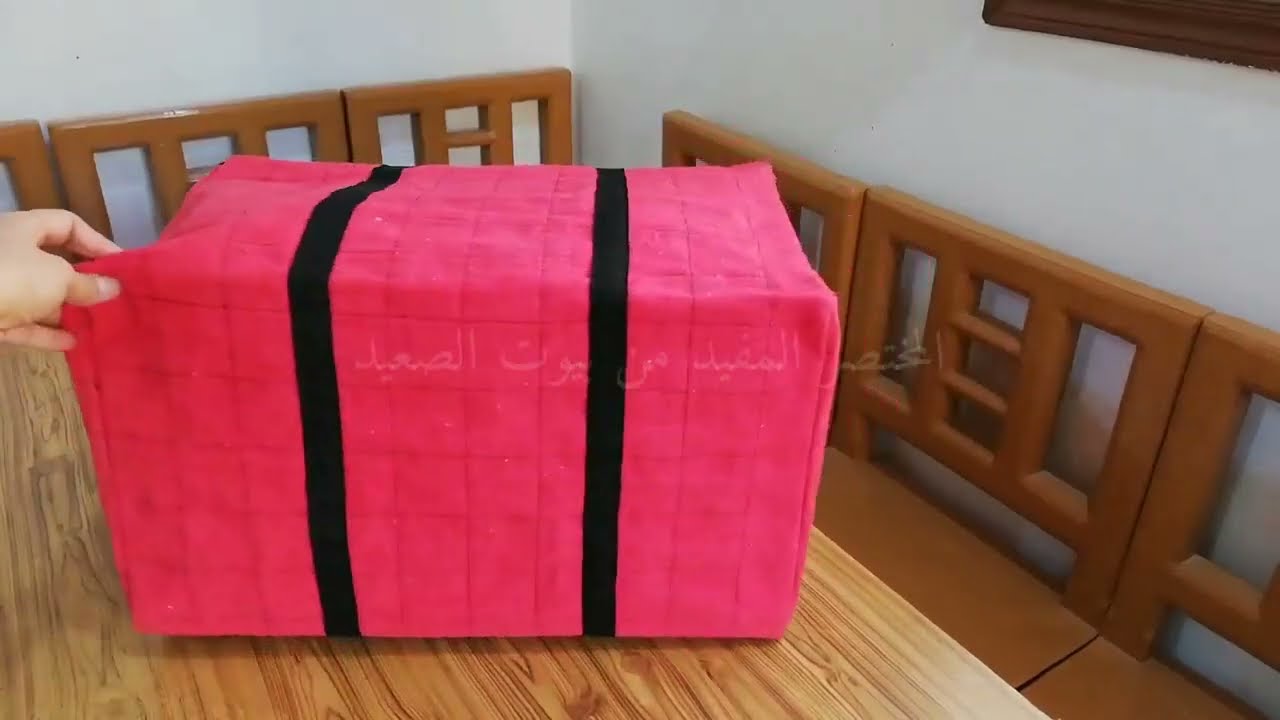
🎉 DONE! Now You Can:
-
Grab your bag and come on! 🏃♀️
-
Use it for errands, books, shopping, or even as a gift bag.
-
Customize it with pockets, appliqués, stencils, or patches!
🧼 Care Instructions:
-
Machine wash cold (if cotton).
-
Air dry or tumble dry low.
-
Iron if needed.
🌟 Bonus Ideas:
| Idea | How to Add It |
|---|---|
| Inside Pocket | Sew a patch pocket onto the lining before assembling |
| Magnetic Snap | Add it before sewing lining and outer together |
| Embroidery | Decorate front panel before construction |
| Reversible | Use two outer fabric layers instead of lining |
Would you like:
-
A printable pattern?
-
A visual step-by-step image guide?
-
A no-sew version using glue or fusing tape?
Let me know how you want to customize your bag!
Watch video: