 by
by Turning an old pair of jeans into a brand-new, stylish bag is a fantastic way to upcycle and create a unique accessory. This project is surprisingly easy and perfect for anyone with basic sewing skills. By following these steps, you’ll transform a forgotten piece of clothing into a functional and fashionable tote.
Materials You’ll Need:
- An old pair of denim jeans
- Lining fabric (a sturdy cotton or similar material works well)
- A zipper (at least 50 cm long)
- Webbing or old belt material for the handles (or you can use denim scraps)
- Sewing machine and thread (denim thread is recommended for durability)
- Fabric scissors
- Pins or sewing clips
- Ruler or measuring tape
- Iron (optional, but helpful)
Step 1: Prepare and Cut the Main Pieces
First, you need to dismantle the jeans and cut out the main components of your bag. Lay your jeans flat and cut off the legs. You can use the legs, the upper thigh area, and even the back pockets for this project.
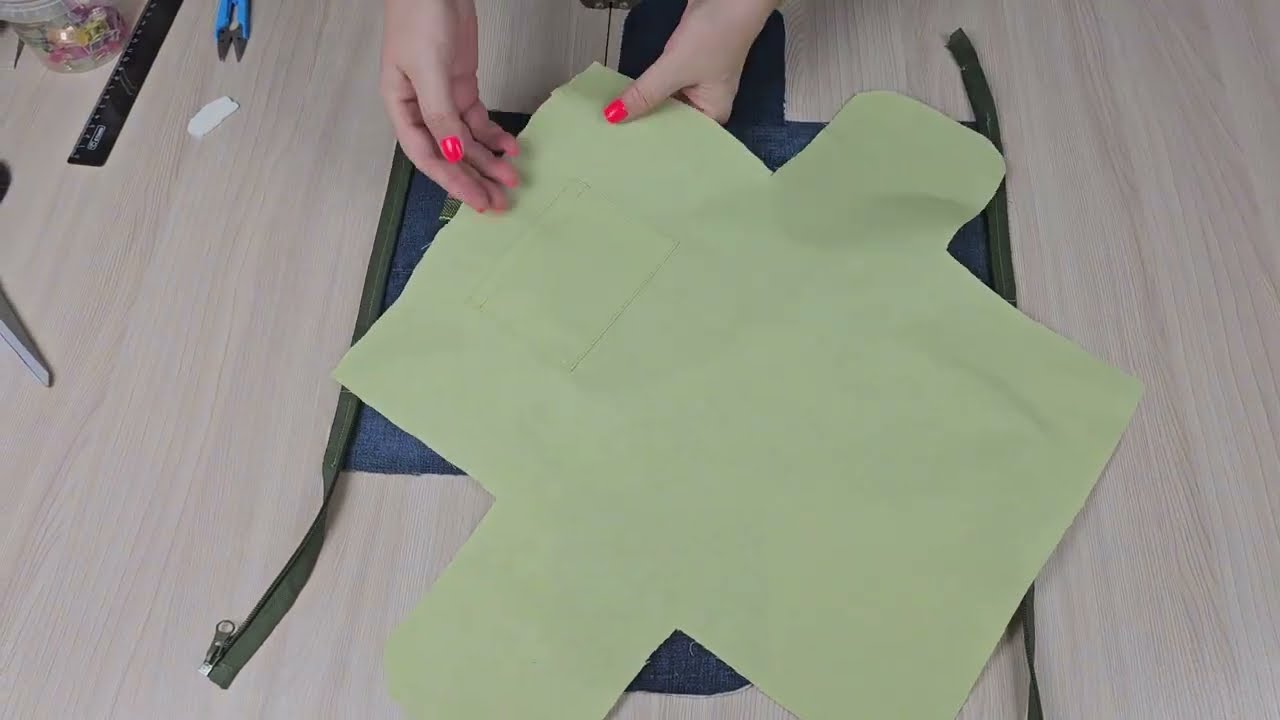
- Main Body: From the denim, cut two rectangular pieces measuring 30 cm x 50 cm. These will form the front and back of your bag.
- Side Panels/Base: Cut two smaller pieces measuring 13 cm x 14 cm from the remaining denim. These will be used for the sides of the bag.
Step 2: Add Pockets for Style and Function
One of the great things about this project is that you can reuse the pockets from the jeans!
- Carefully cut off a few of the back or front pockets from the jeans.
- The tutorial video suggests rounding the bottom corners of the pockets for a softer look.
- Position the pockets onto one of the 30×50 cm main body pieces. Pin them in place.
- Using your sewing machine, stitch the pockets onto the denim, leaving the top opening unstitched. Make sure to do a backstitch at the beginning and end of each seam to secure it.
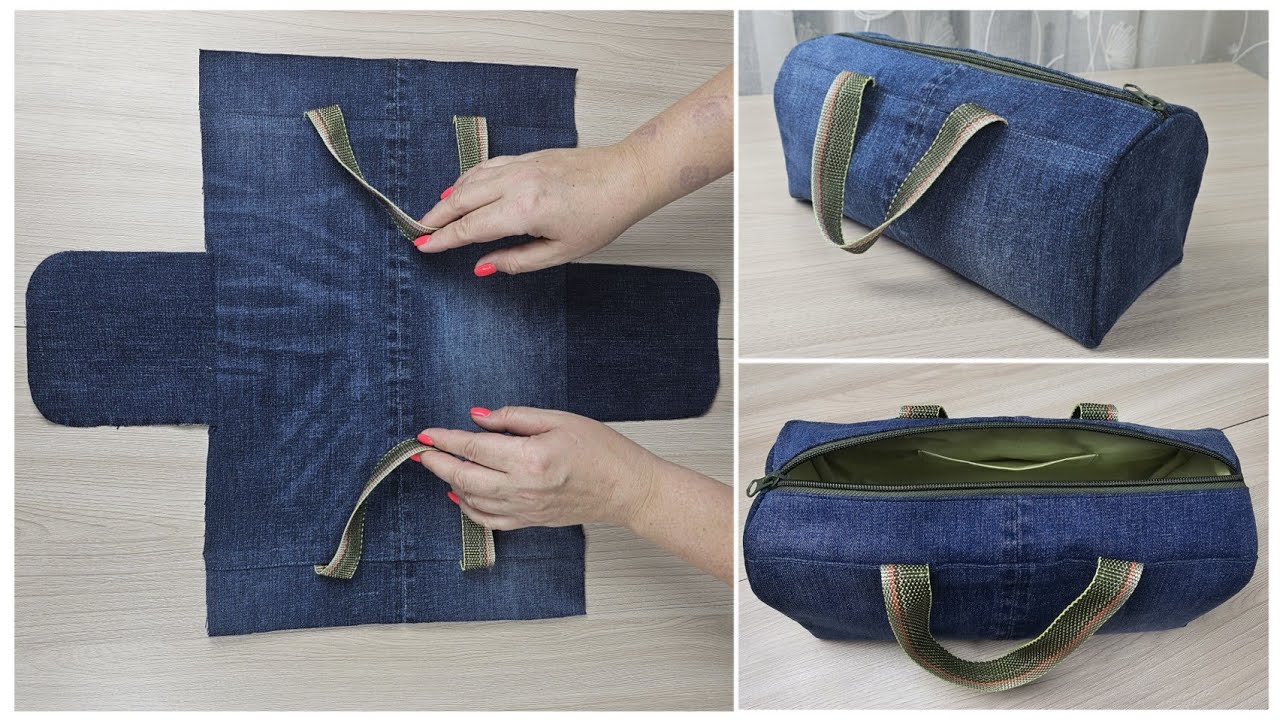
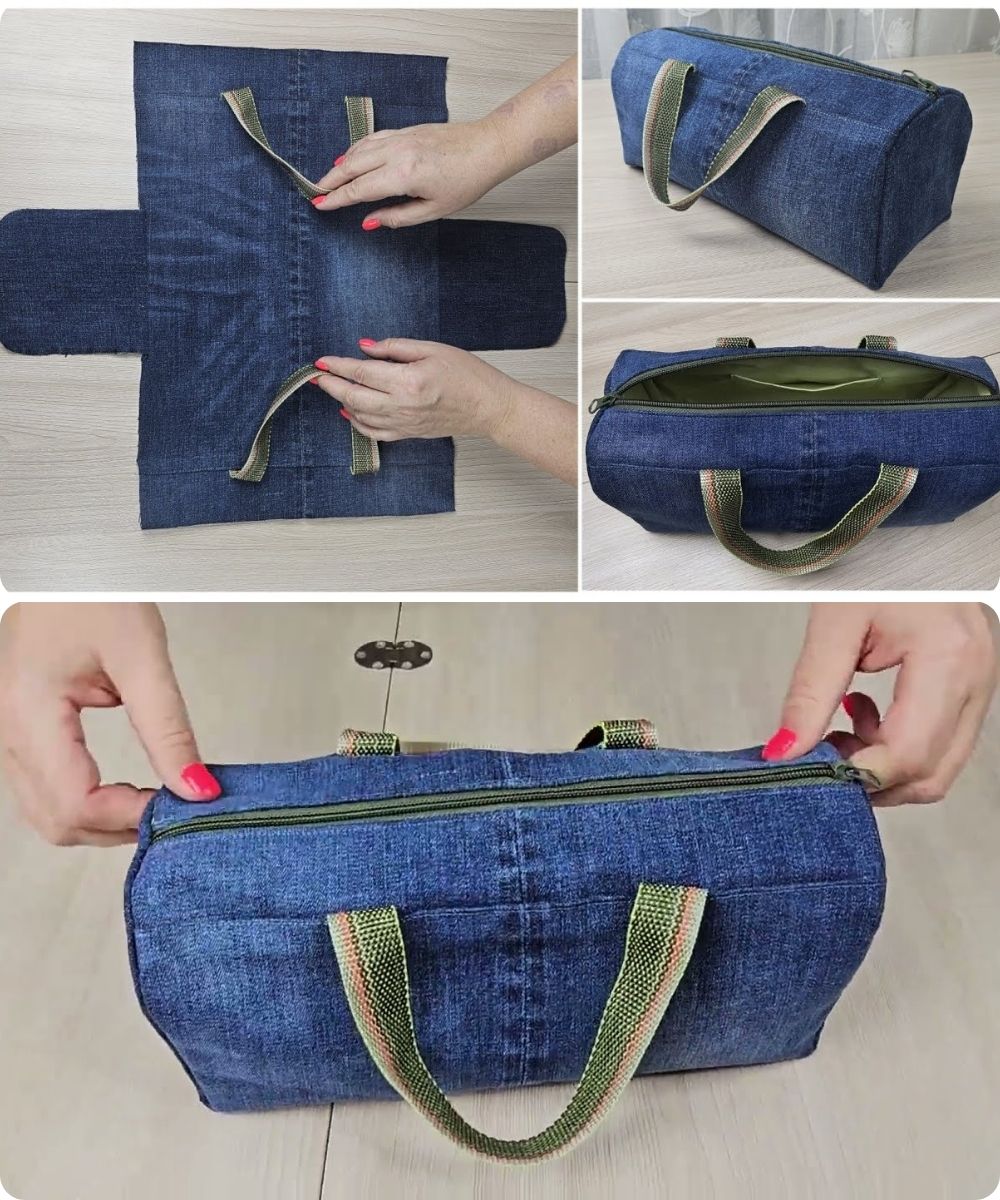
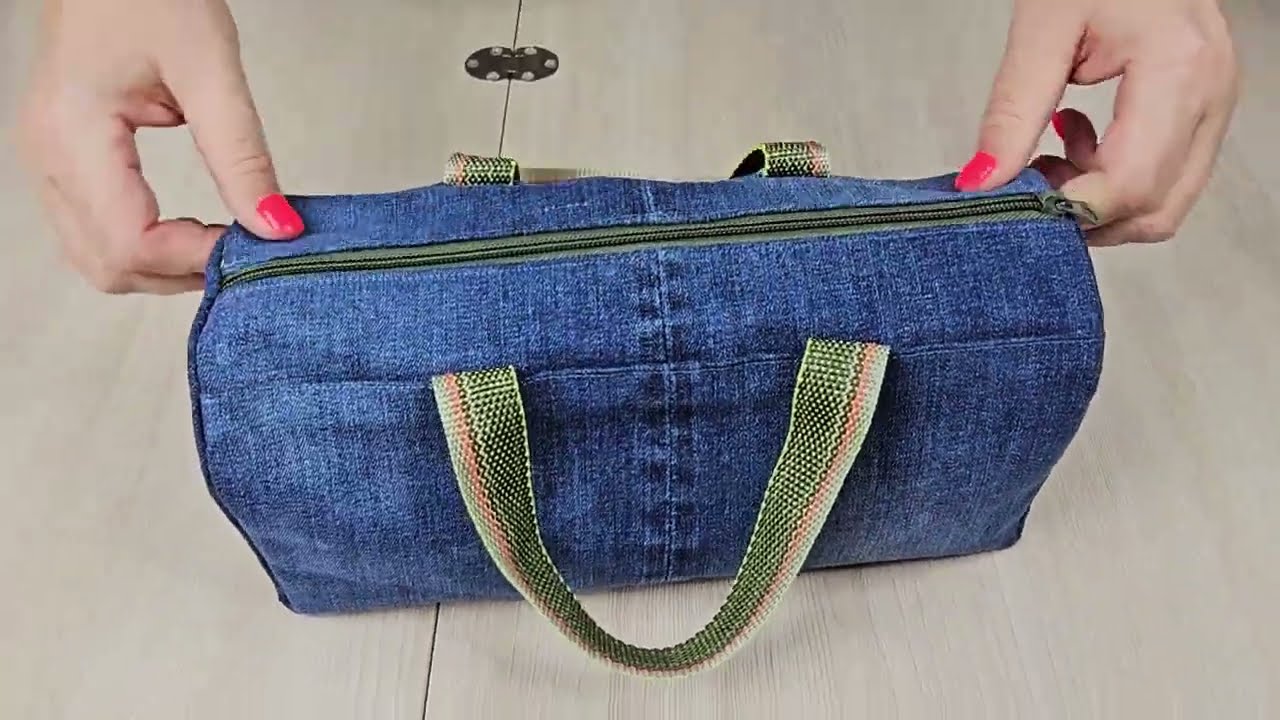
Step 3: Attach the Handles
The handles are a crucial part of the bag’s design. You can use pre-made webbing straps, an old belt, or create your own handles from the remaining denim.
- Cut two pieces of strap material, each measuring approximately 2.5 cm x 30 cm.
- Position one handle on the front main body piece and the other on the back main body piece. Place them symmetrically, about 10-15 cm in from the side edges.
- Pin the handles in place.
- Sew the handles onto the denim using a box stitch or an ‘X’ stitch for extra reinforcement. This will ensure they can hold up to daily use.
Step 4: Install the Zipper
This step brings the bag together and gives it its secure closure.
- Take the main zipper and one of the 30×50 cm denim pieces (the one with the pockets and handle).
- Align the top edge of the denim with one side of the zipper. Pin it securely in place.
- Using a zipper foot on your sewing machine, sew the zipper to the denim.
- Repeat this process for the other main body piece, attaching it to the other side of the zipper. When you’re done, the zipper should connect the two large denim panels.
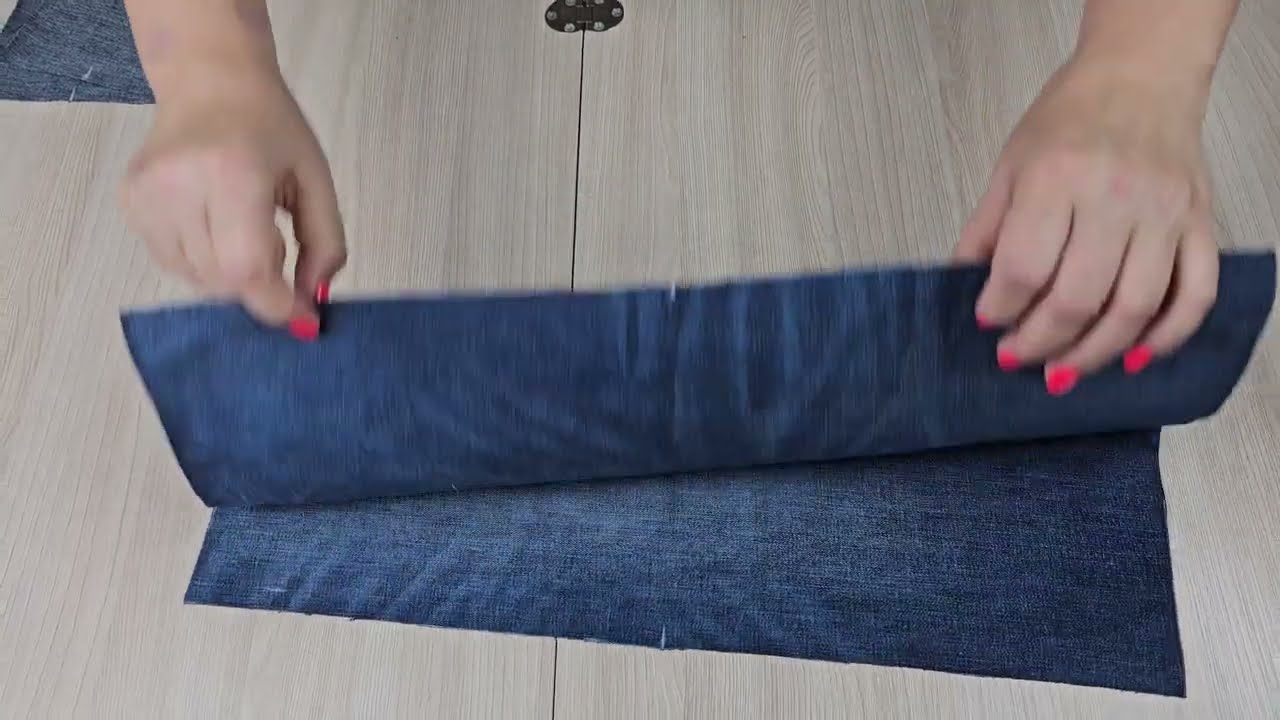
Step 5: Assemble the Bag’s Structure
Now it’s time to turn your flat pieces into a three-dimensional bag.
- Fold the denim so that the right sides are facing each other. Pin the side edges together.
- Sew the side seams, creating a tube-like shape.
- Take the two smaller 13×14 cm pieces (the side panels) and attach them to the bottom of the bag. Pin and sew them to the main body to create a flat base. This will give your bag structure and depth.
Step 6: Create and Install the Lining
The lining gives your bag a clean, professional finish and provides more storage.
- Using the same dimensions as your main denim pieces, cut out two large rectangles and two smaller side pieces from your chosen lining fabric.
- Sew the lining pieces together in the same way you assembled the denim bag in Step 5. You can also sew some small pockets into the lining fabric for extra storage.
- Place the lining inside the denim bag, with the wrong sides of the lining and the right sides of the denim facing each other. The bag should look “finished” on the inside.
- At the top of the bag, where the zipper is, fold the raw edges of the lining and denim inward. Pin them together so that they are flush with the zipper.
- Sew a final topstitch all around the opening to secure the lining and give the bag a clean, finished look.
Final Touches
Turn your bag right side out, make sure all the seams are pushed out, and trim any loose threads. You’ve now successfully upcycled an old pair of jeans into a unique, handmade zipper bag that’s both stylish and practical!
Watch video: