 by
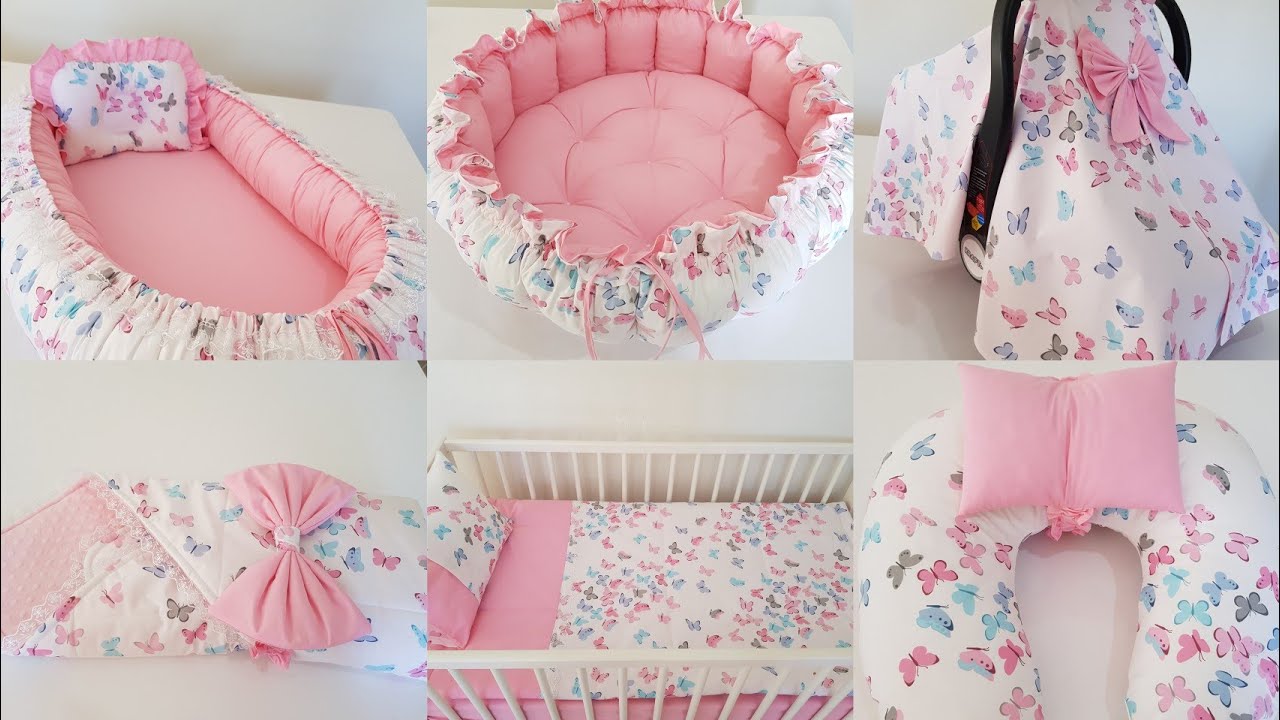
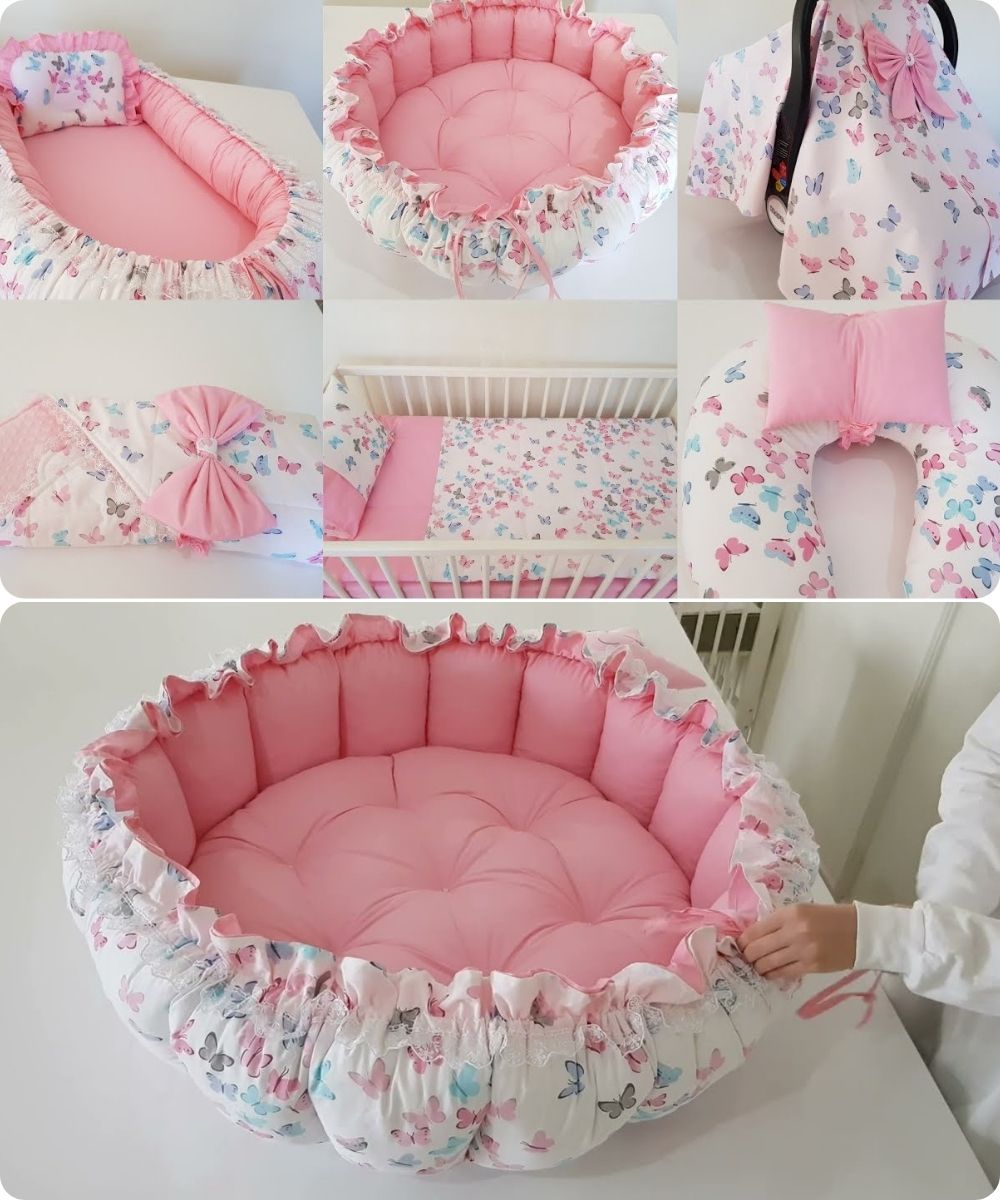
by A “Babynest Set with Pink Butterfly” (Pembe Kelebekli Babynest Seti) is a lovely and popular handmade item for a baby’s nursery. It’s a collection of coordinated bedding and accessories that provides a cozy and secure sleeping or lounging space for a newborn. While the name specifically mentions pink butterflies, the general principles of making a babynest set apply to any theme or color.
This guide will provide a detailed overview of the components of a typical babynest set and the general steps to create them.
What is a Babynest Set?
A babynest set is a coordinated collection of items, usually including:
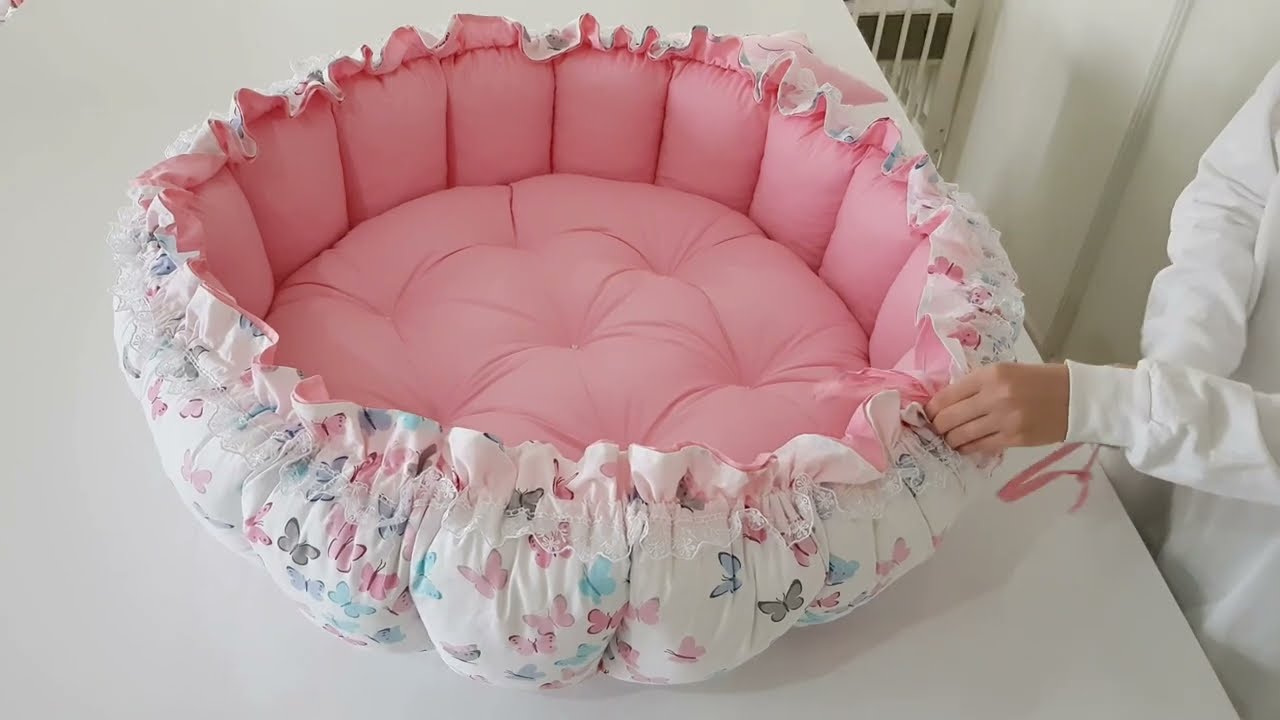
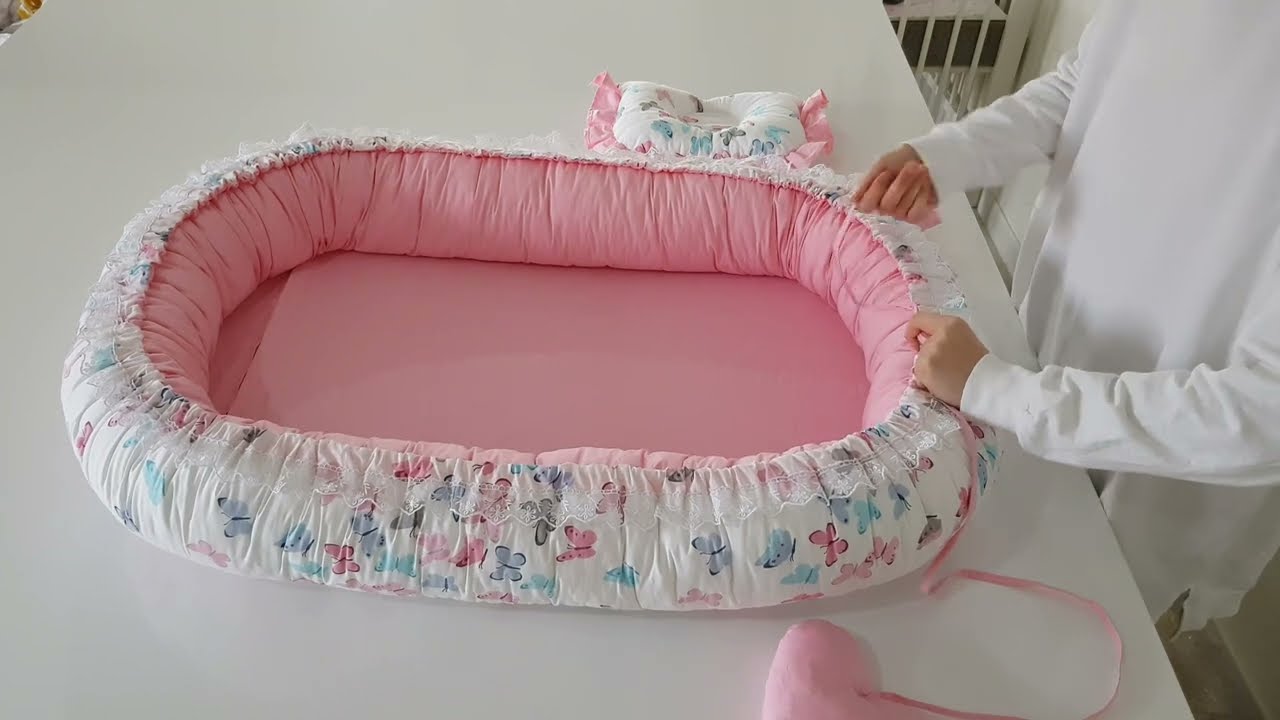
- The Babynest (or Sleep Pod): This is the main item. It’s an oval-shaped mattress with a raised, padded bumper all around. The purpose of the bumper is to create a snug, womb-like environment that helps a baby feel secure. It’s often used for co-sleeping (with extreme caution and supervision), supervised lounging, or as a portable bed.
- Butterfly Pillows: These are small, decorative pillows shaped like a butterfly. They are a charming addition to the set and are typically placed in the babynest for aesthetics.
- Crown Pillow: A small, decorative pillow shaped like a crown.
- Flat Pillow: A simple, rectangular pillow for the baby’s head.
- Blanket or Quilt: A small, matching blanket.
General Supplies You Will Need
- Fabric: The main fabric should be soft, breathable, and ideally 100% cotton. This is best for a baby’s delicate skin. You’ll need two different fabrics for the babynest itself (one for the inside and one for the outside), and coordinating fabrics for the pillows and blanket. The theme, like “pink butterflies,” will determine your fabric choices.
- Filling/Stuffing: You’ll need hypoallergenic fiberfill for the bumper of the babynest and for the pillows. For the mattress pad of the babynest, a piece of foam or a thick layer of batting is a good option.
- Sewing Machine: A sewing machine is essential for this project.
- Sewing Essentials: This includes scissors, a measuring tape, pins, and thread that matches your fabric.
- Drawstring/Cord: For the babynest bumper, you’ll need a long drawstring or thick cord to gather and tighten the sides.
- Sewing Pattern: You’ll need a sewing pattern for the babynest and the pillows. You can find many free printable patterns and tutorials online, particularly on platforms like YouTube and Pinterest. Search for terms like “babynest sewing pattern,” “DIY baby nest,” or “baby cocoon tutorial.”
Step-by-Step Guide to Making the Babynest
The babynest is the most complex piece of the set. Here is a general breakdown of the process:
- Print and Cut the Pattern:
- Find a suitable babynest pattern online. Many are designed to be printed on several sheets of paper and taped together.
- Cut out the fabric pieces according to the pattern. You will typically need to cut two large oval pieces for the main body (one for the outside, one for the inside) and a long, rectangular piece for the bumper.
- Sew the Main Body:
- Place the two oval fabric pieces right sides together.
- Sew them together, leaving an opening at the bottom where the drawstring will be threaded. This will be the “pocket” for the mattress.
- Turn the fabric right side out and iron it flat.
- Insert your foam or batting for the mattress pad and sew the opening closed.
- Sew and Stuff the Bumper:
- Take the long rectangular fabric piece and fold it in half lengthwise, right sides together.
- Sew along the long edge and one short end, leaving the other short end open for stuffing.
- Turn the fabric right side out.
- Stuff the bumper with a generous amount of fiberfill, making sure it’s firm and even.
- Sew the opening closed.
- Attach the Bumper:
- This is a crucial step. You’ll need to sew the stuffed bumper around the perimeter of the oval mattress.
- Many patterns have you attach the bumper to the mattress pad, creating a channel for a drawstring.
- Once the bumper is attached, you’ll thread your drawstring through the channel, and the ends will be at the foot of the babynest. Pulling the drawstring will gather the bumper, giving the babynest its classic snug shape.
Making the Pillows and Blanket
Making the pillows and blanket is much simpler.
- Pillows:
- Use your chosen butterfly, crown, and flat pillow patterns.
- Cut out two pieces of fabric for each pillow.
- Place them right sides together, sew around the edges, leaving an opening.
- Turn them right side out, stuff them with fiberfill, and sew the opening closed with a neat, hand-stitched seam.
- Blanket:
- The simplest blanket is a double-sided flannel or minky blanket.
- Cut two pieces of your chosen fabric to the desired size.
- Place them right sides together and sew around the edges, leaving a small opening.
- Turn the blanket right side out and sew the opening closed. You can top-stitch around the entire edge for a finished look.
By following these general instructions, you can create a beautiful and unique handmade babynest set. Remember to prioritize safety by always supervising your baby while they are in the babynest and ensuring all materials are non-toxic and breathable.
Watch video: