 by
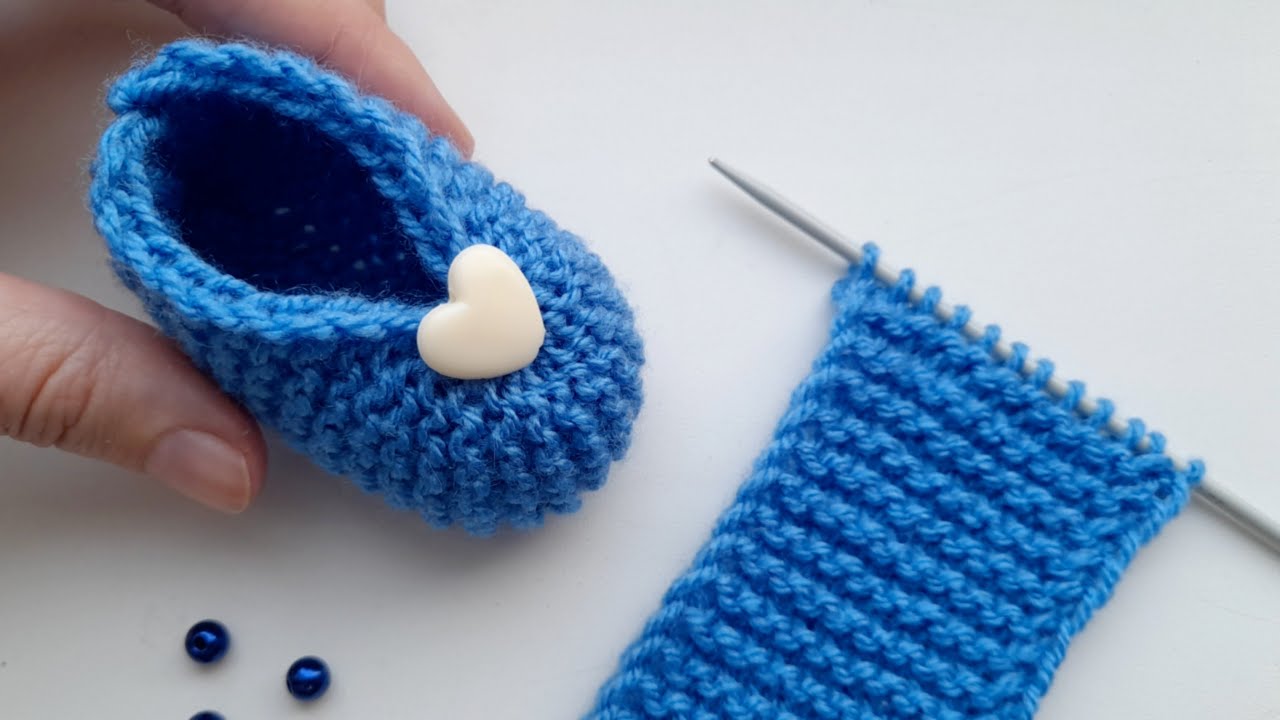
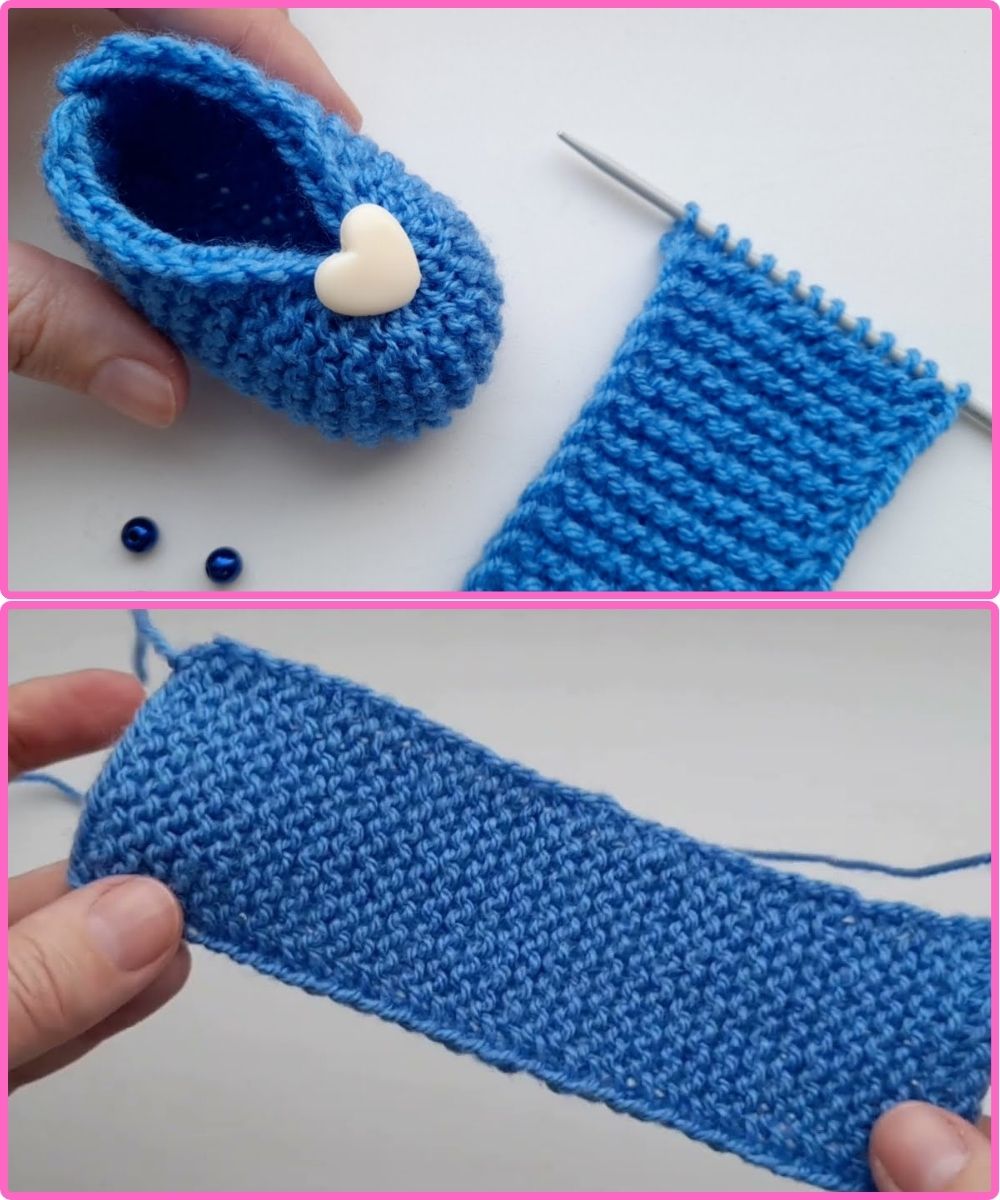
by Knitting baby booties is a quick, easy, and incredibly rewarding project, perfect for beginners and a great way to use up leftover yarn. The best part? You can create an adorable, heartfelt gift for a new baby in just a few hours.
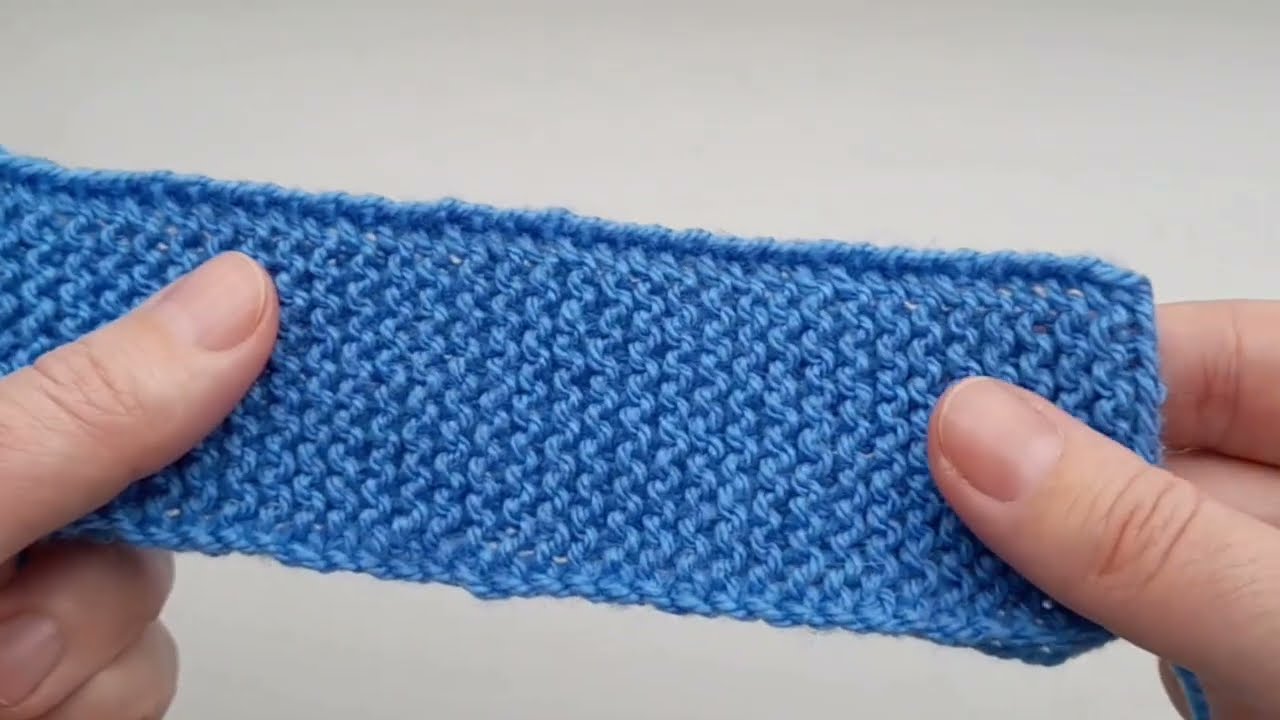
The most popular and beginner-friendly patterns for baby booties are often knitted flat on two straight needles, using simple stitches like garter stitch or stockinette. This method avoids the need for circular needles or complex techniques like turning a heel. After knitting a single flat piece, you simply fold and seam it to create the bootie shape.
Key Materials
- Yarn: A soft, washable yarn is essential for baby items. Look for a yarn that is specifically labeled “baby yarn” or is a sport, DK (double knitting), or worsted-weight yarn. Acrylic or a washable wool blend are excellent choices. You’ll only need a small amount, typically less than one skein.
- Knitting Needles: The needle size will depend on your yarn weight and the pattern’s gauge. A common size is US 6 (4.0 mm) or US 7 (4.5 mm) for a worsted-weight yarn. Using straight needles is recommended for the simplest patterns.
- Tapestry Needle: This is crucial for seaming the bootie together and weaving in the loose ends.
- Scissors: For cutting the yarn.
A General Overview of a Simple Flat-Knit Pattern
While there are many variations, a basic flat-knit baby bootie pattern follows a similar structure:
- Cast On: You’ll start by casting on a specific number of stitches, typically between 28 and 40 stitches, depending on the desired size (newborn, 0-3 months, etc.).
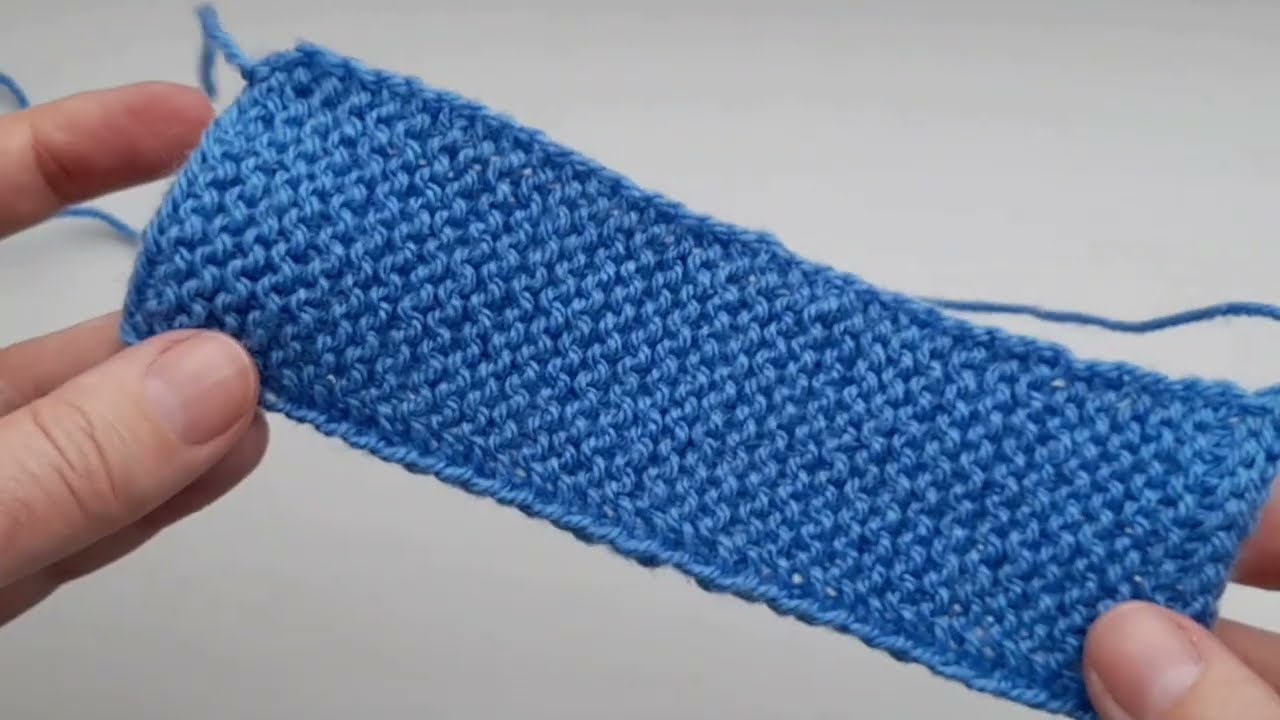
- Knit the Sole and Sides: The first section of the project is often a simple rectangle or slightly shaped piece, typically worked in garter stitch (knitting every row) to create a flat, stretchy, and reversible fabric. This forms the sole and sides of the bootie.
- Shape the Toe: The next part of the pattern involves a few rows of decreasing stitches to create the rounded toe of the bootie. Common decreases include “knit two together” (k2tog).
- Work the Ankle/Cuff: The final section is the top of the bootie, which can be a simple garter or stockinette stitch, or a ribbed pattern (like knit 2, purl 2) for a snug, stretchy fit around the baby’s ankle.
- Cast Off: Once you’ve completed the last row, you’ll cast off all the stitches.
- Assembly: This is where the magic happens! You’ll use your tapestry needle to seam the flat knitted piece into a bootie. The seam typically runs from the toe up the top of the foot and then along the back of the heel. The cast-on and cast-off tails can be used for seaming, so leave them long.
Tips for Success
- Practice Your Stitches: Make sure you are comfortable with the basic knitting stitches required by your pattern, such as cast on, knit, purl, and knit two together.
- Check Your Gauge: This is a crucial step to ensure the booties fit the newborn. Before you start the full project, knit a small swatch (e.g., 4×4 inches) and compare your stitches per inch to the pattern’s recommendation. If you have too many stitches, use a larger needle; if you have too few, use a smaller one.
- Don’t Pull Too Tight: Keep your tension consistent but not too tight. A baby’s feet need a comfortable, non-restrictive fit.
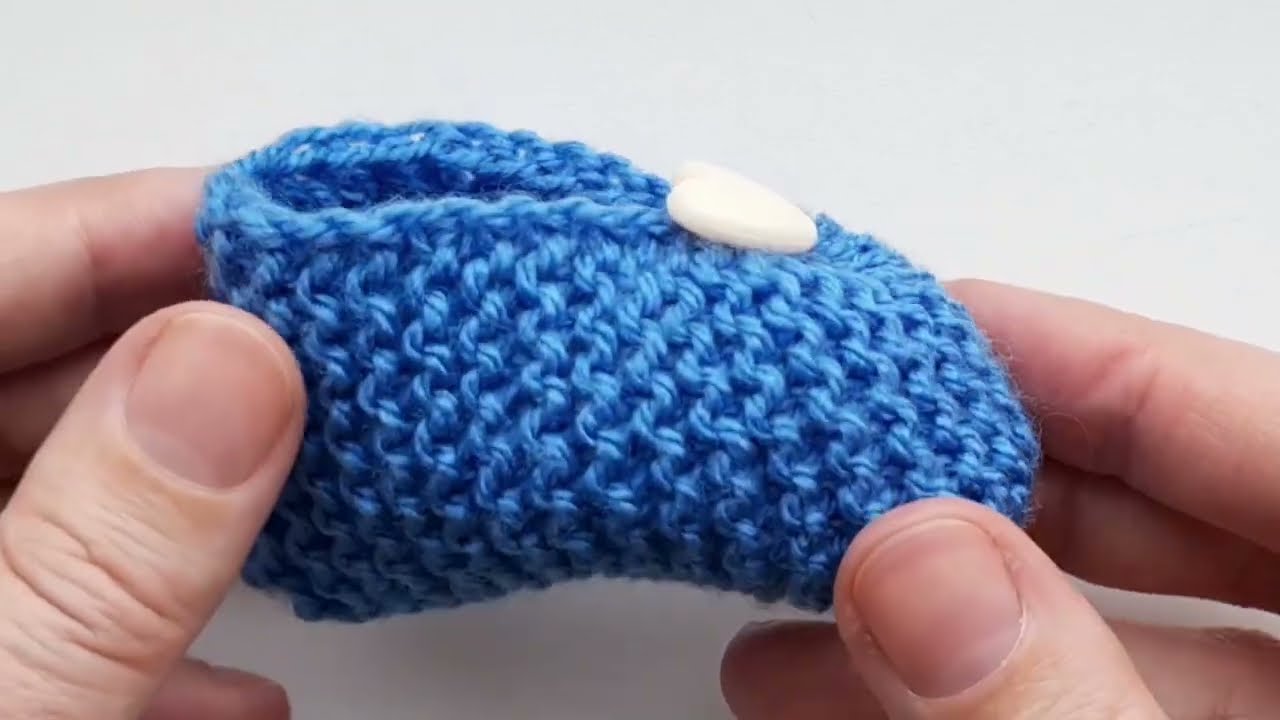
- Mind Your Seams: When seaming, try to create a neat, flat seam to avoid any bumps that might irritate the baby’s delicate skin. The mattress stitch is a great technique for an invisible seam.
- Add Embellishments: Once the booties are finished, you can add a personalized touch. Sew on a small ribbon, a tiny bow, or even a pom-pom to the top for a little extra cuteness.
By following a simple pattern and these tips, you’ll be able to knit a precious, handmade pair of baby booties that will be a cherished keepsake for years to come.
Watch video: