by
by Absolutely! Here’s a detailed, step-by-step guide on how to make a very beautiful ladies handbag — from cutting to stitching — that looks professional but is doable at home with simple materials and a basic sewing machine.
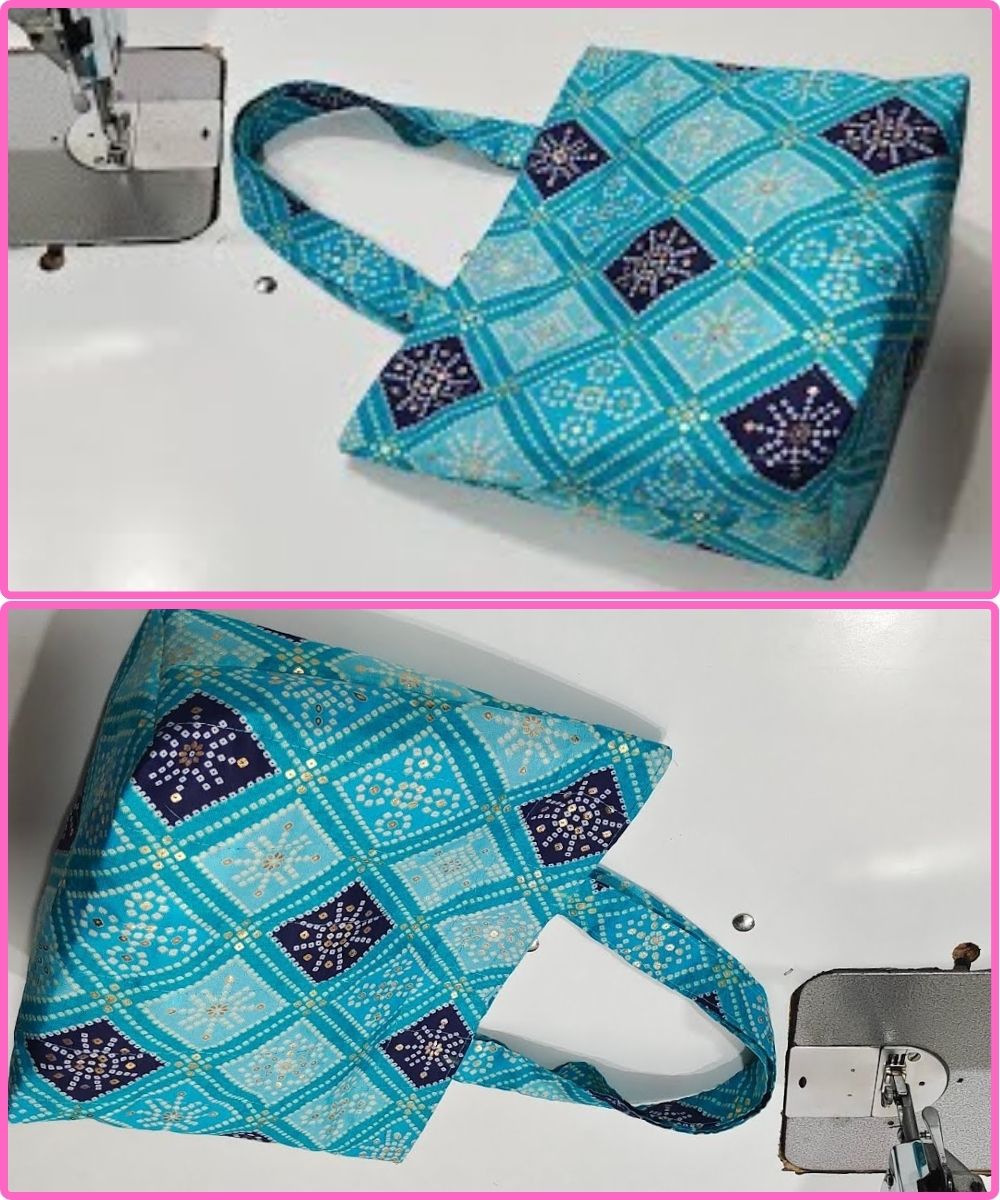
👜 How to Make a Very Beautiful Ladies Handbag (Cutting & Stitching Guide)
🧵 Project Overview:
| Feature | Details |
|---|---|
| ✂️ Type | Structured Shoulder/Hand Bag |
| 🧵 Skill Level | Confident Beginner to Intermediate |
| ⏱ Time Needed | 2–4 hours |
| 📐 Size | Approx. 12” W × 9” H × 4” D |
| 💼 Purpose | Everyday handbag, formal events, or gift |
🧷 Materials Needed:
| Material | Quantity | Purpose |
|---|---|---|
| Main Fabric (canvas, denim, faux leather, or cotton) | ½ yard | Outer body |
| Lining Fabric (cotton or polyester) | ½ yard | Inner side |
| Interfacing (fusible, medium or heavy weight) | ½ yard | Structure & firmness |
| Thread | 1 spool | Matching or contrast |
| Handles/Straps | 2 strips (20” x 2”) or ready-made straps | Carrying the bag |
| Magnetic Snap or Zipper | 1 | Closure |
| Decorative accessories (optional) | Lace, button, piping, embroidery | For style |
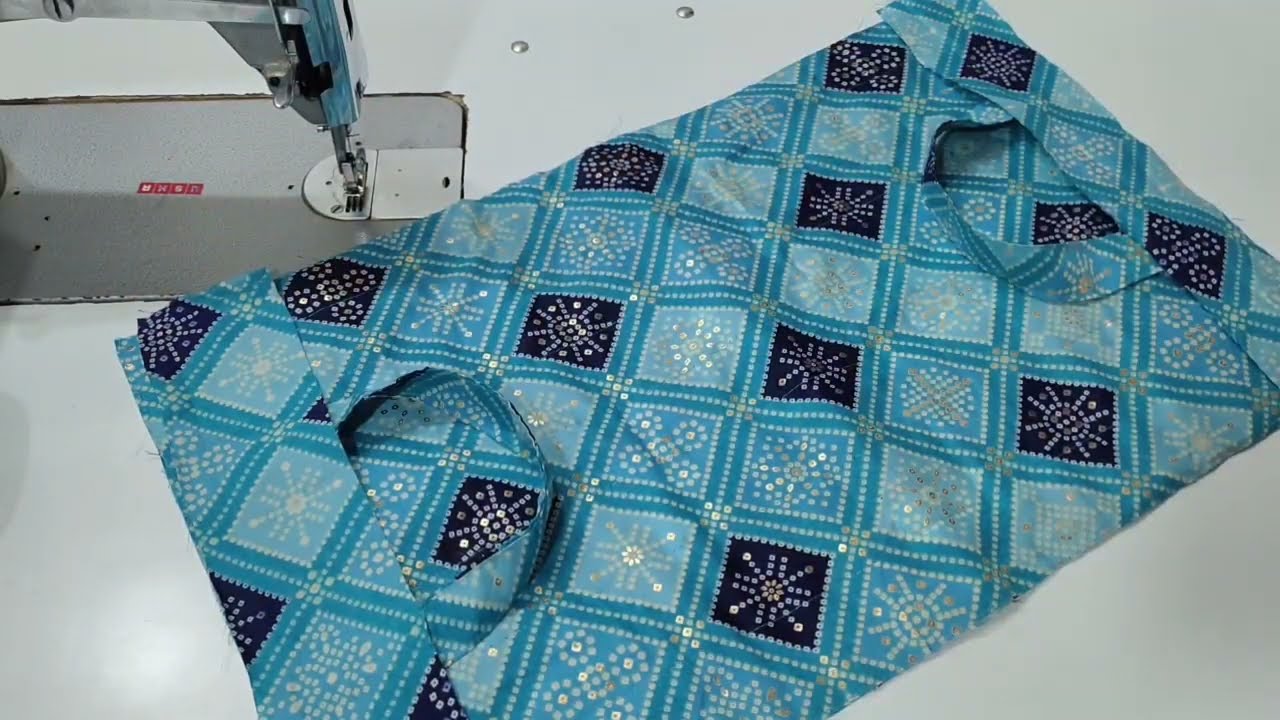
📐 Cutting Guide:
| Part of Bag | Size (inches) | Quantity | Notes |
|---|---|---|---|
| Front & Back Body | 13” x 10” | 2 outer + 2 lining + 2 interfacing | |
| Side Panels | 4” x 10” | 2 outer + 2 lining + 2 interfacing | |
| Bottom Panel | 13” x 4” | 1 outer + 1 lining + 1 interfacing | |
| Inner Pocket | 6” x 8” | 1 lining fabric | |
| Handles | 20” x 2” | 2 (or use leather straps) |
🧶 Step-by-Step Stitching Instructions:
✅ Step 1: Prepare Your Pieces
-
Iron all fabrics.
-
Fuse interfacing to the wrong side of the outer fabric pieces.
-
If using heavy interfacing, trim seam allowances off the interfacing before fusing to reduce bulk.
✅ Step 2: Make the Inner Pocket
-
Fold the 6″ x 8″ lining fabric in half (right sides together).
-
Sew around the edges, leaving a 2” gap to turn.
-
Turn right side out, press, and topstitch one folded edge.
-
Sew onto the lining panel, centered and 3″ from the top.
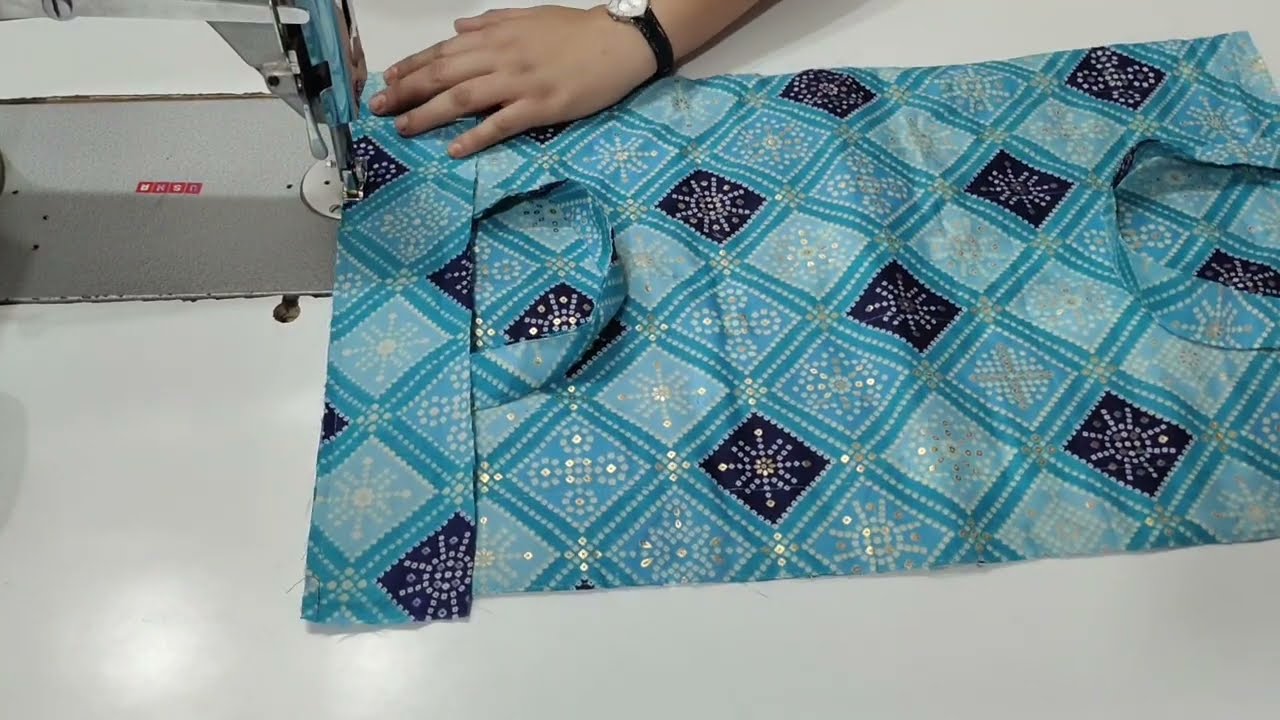
✅ Step 3: Assemble the Outer Bag
-
Sew the side panels to the front and back pieces (right sides together).
-
Sew the bottom panel to connect the two side panels.
-
Your outer bag body should now look like an open box.
-
Press all seams open or flat.
✅ Step 4: Repeat for Lining
-
Follow the same steps as for the outer bag body.
-
Leave a 4-inch opening at the bottom seam of the lining for turning the bag later.
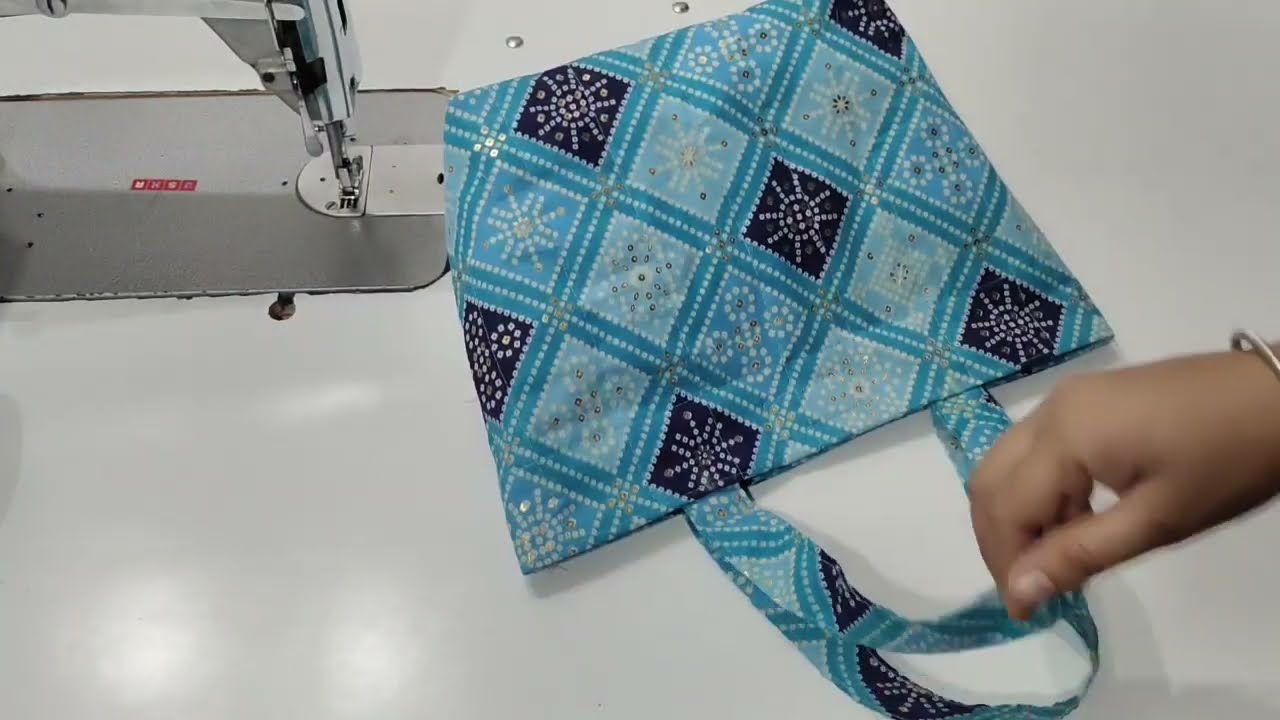
✅ Step 5: Attach the Handles
-
Fold each strap in half lengthwise.
-
Fold raw edges inward, press, and topstitch both sides.
-
Mark 3” in from each side of the front and back panels.
-
Pin the straps 1” below the top edge (make sure they’re not twisted).
-
Baste in place.
💡 Optional: Add D-rings and detachable handles for a more fashionable look.
✅ Step 6: Join Lining and Outer Bag
-
Place the outer bag inside the lining (right sides facing).
-
Align top edges and pin all around.
-
Sew around the top edge using a ½” seam allowance.
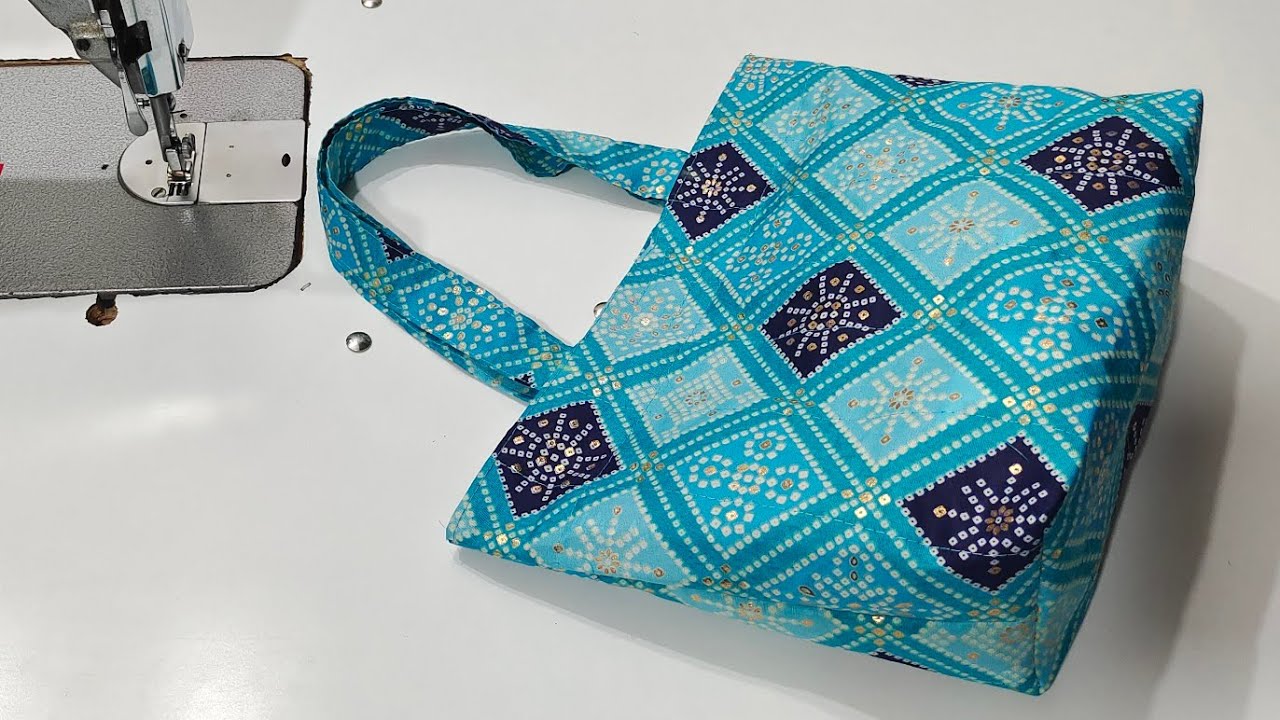
✅ Step 7: Turn the Bag
-
Pull the outer bag through the gap in the lining.
-
Push the lining inside and press the top edge.
-
Topstitch around the top edge to secure it neatly.
✅ Step 8: Add Closure
-
Attach the magnetic snap or sew in a zipper at the top center.
-
You can also add a button loop or flap as closure.
✅ Step 9: Finishing Touches
-
Stitch the lining opening closed.
-
Press the entire bag gently.
-
Add decorative details: a fabric bow, charm, tassel, or embroidery.
🎀 Optional Styling Ideas:
| Decoration | How to Use It |
|---|---|
| Lace or piping trim | Sew into top seams or around edges |
| Quilting | Add texture to outer panels before assembling |
| Appliqué or patch | Sew onto the front panel |
| Metal feet or studs | Add at the bottom for durability |
🧼 Care Instructions:
-
If made with cotton: Hand wash or gentle machine wash, air dry.
-
If made with faux leather: Wipe clean with damp cloth.
-
Do not iron directly on synthetic fabrics – use a pressing cloth.
👜 Your Beautiful Bag is Ready!
You now have a professional-looking, handmade ladies handbag that’s perfect for daily use or as a personalized gift. This basic structure can be adapted for:
-
Mini handbags
-
Crossbody bags (with long straps)
-
Laptop sleeves
-
Shopping totes
Watch video: