 by
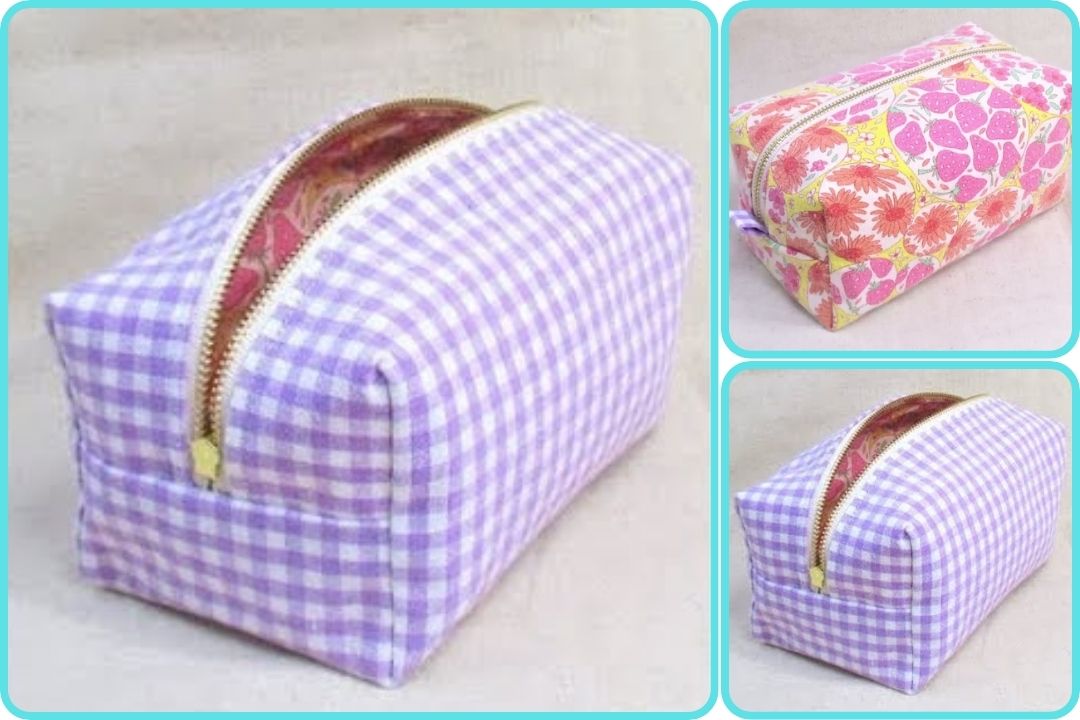
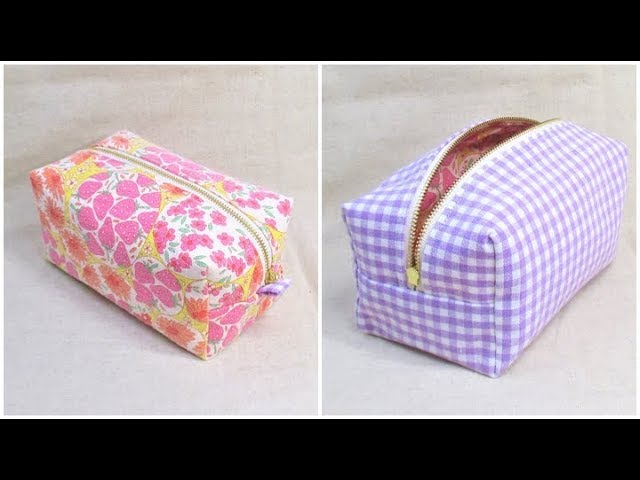
by Absolutely! Here’s a detailed, step-by-step guide on how to make a box pouch without a pattern — a super fun and practical sewing project. Box pouches are ideal for storing cosmetics, stationery, travel items, or even as handmade gifts. The best part? You don’t need a printed pattern!
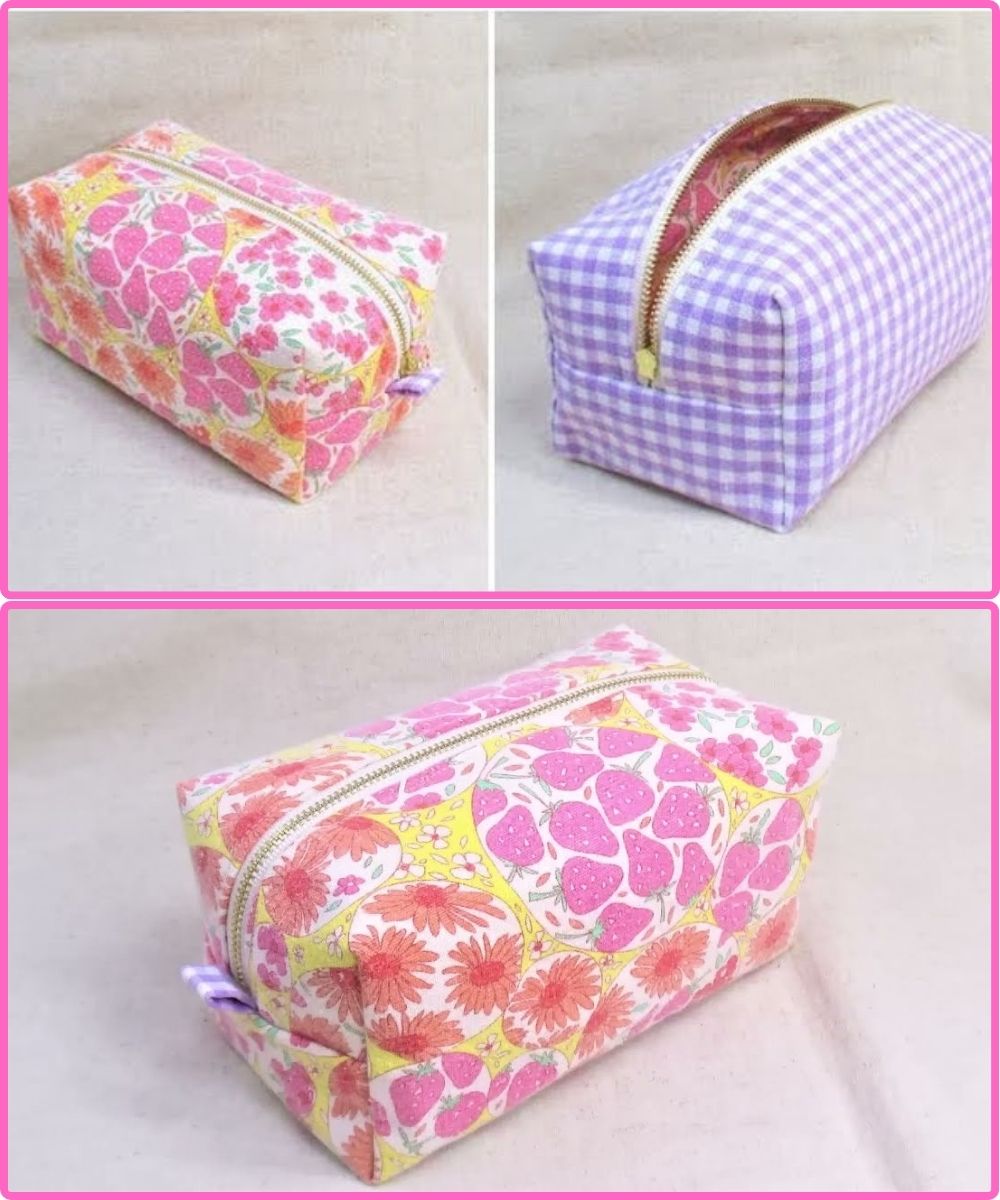
🧵 How to Make a Box Pouch (No Pattern Needed!)
🧰 Materials Needed:
-
Outer fabric – cotton, canvas, faux leather, etc. (1 piece, approx. 10” x 14”)
-
Lining fabric – cotton or waterproof lining (1 piece, same size)
-
Fusible interfacing (optional for structure, same size as outer fabric)
-
Zipper – 10” or longer (nylon zippers are easiest to sew)
-
Sewing machine
-
Thread – coordinating or contrasting
-
Pins or clips
-
Fabric scissors or rotary cutter
-
Iron
-
Ruler
-
Optional: Ribbon or fabric tabs for zipper ends
✂️ Step-by-Step Instructions
Step 1: Cut and Prep Your Fabric
-
Cut 1 piece outer fabric: 10″ x 14″
-
Cut 1 piece lining fabric: 10″ x 14″
-
Cut 1 piece fusible interfacing (if using): 10″ x 14″
-
Iron interfacing to the wrong side of the outer fabric
✅ Tip: You can adjust these measurements. The longer the length, the longer the pouch; the wider the width, the taller and chunkier it gets!
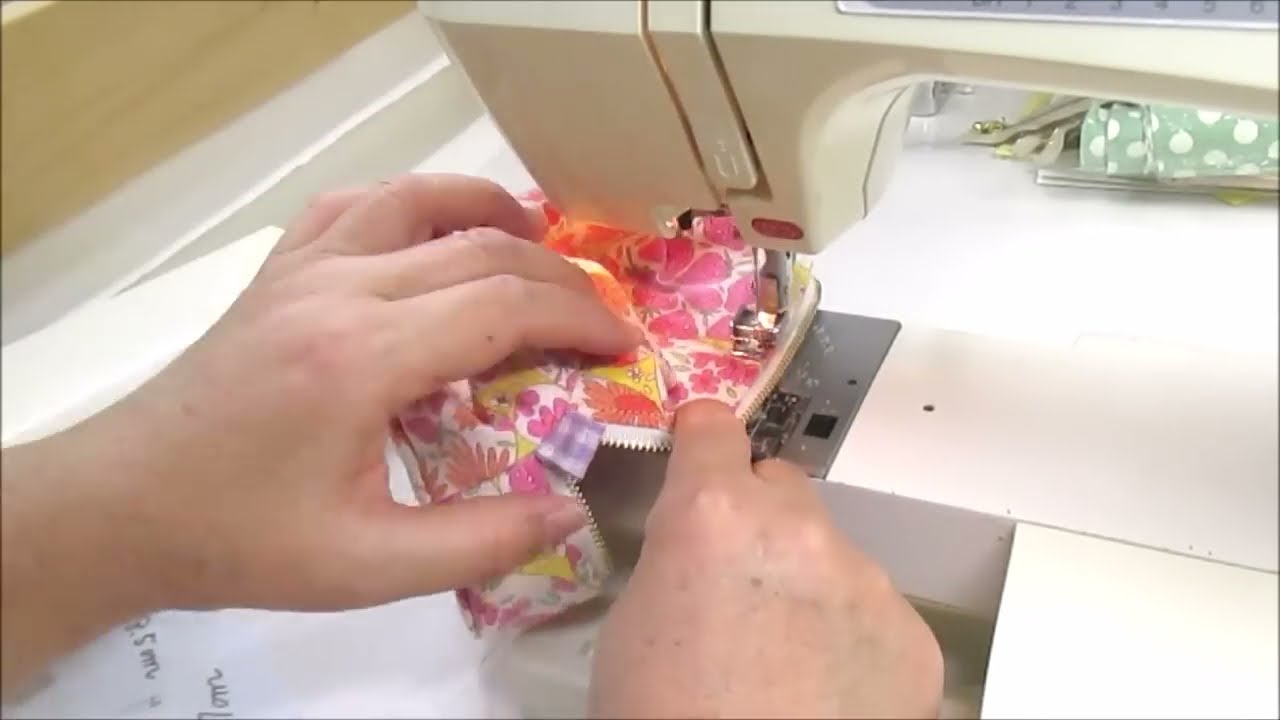
Step 2: Attach the Zipper
-
Place the zipper face down along one short edge of the outer fabric (right side up).
-
Place the lining fabric (right side down) on top, sandwiching the zipper.
-
Clip or pin in place.
-
Sew along the edge using a zipper foot.
-
Flip both fabrics away from the zipper and press.
-
Repeat on the other short side: outer fabric on bottom, zipper face down, lining on top. Sew and press again.
Step 3: Sew the Sides
-
Open the zipper halfway (very important!).
-
Fold the pouch so the outer fabrics are right sides together, and the lining fabrics are together, with the zipper teeth aligned in the middle.
-
Pin or clip the side edges.
-
Sew both side seams with a ⅜” seam allowance. You can backstitch over the zipper area to secure it.
-
Trim any excess zipper.
Step 4: Box the Corners
-
At each corner, flatten the fabric so the side seam and bottom fold form a triangle.
-
Measure about 1.5” to 2” from the point and mark a straight line across.
-
Sew along this line to create the box shape.
-
Cut off the triangle tips, leaving a ¼” seam allowance.
✅ Repeat this step on all 4 corners (2 outer + 2 lining).
Step 5: Finish the Lining
-
Leave a 3” gap in the bottom seam of the lining side (or seam the entire thing and unpick a few stitches after sewing).
-
Turn the pouch right side out through this gap.
-
Push out all the corners neatly.
-
Sew the lining gap closed (by hand or with a machine stitch).
-
Tuck the lining into the pouch and give it a good press!
🎀 Optional Add-ons:
-
Add fabric tabs or ribbon pulls at the zipper ends for easier opening.
-
Use contrasting fabric for lining or a pop of color.
-
Add a handle or wrist strap to one side.
-
Customize with labels, patches, or embroidery.
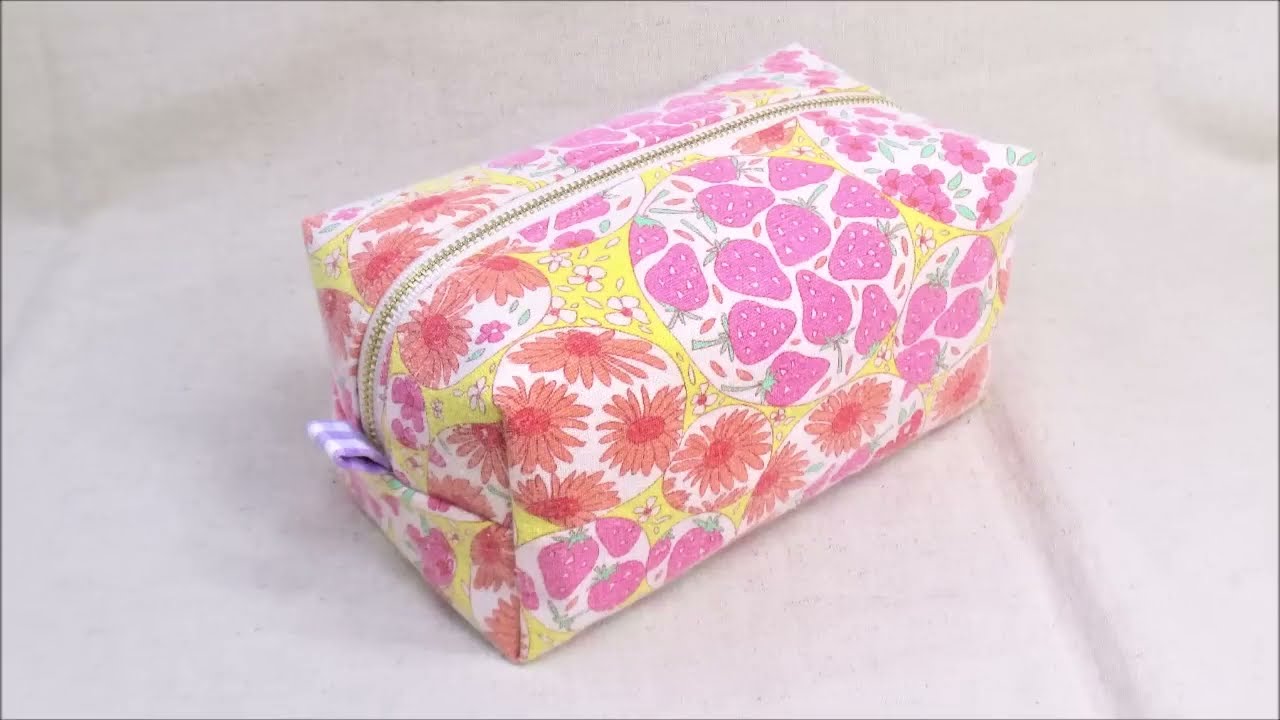
🧡 You’re Done!
You’ve made a box pouch — no printed pattern needed, just measurements and some creativity. You can now experiment with different sizes or materials (like waterproof fabric or denim).
Would you like a printable version, or help designing a custom size (like pencil case, toiletry, or makeup bag dimensions)?
Watch video: