 by
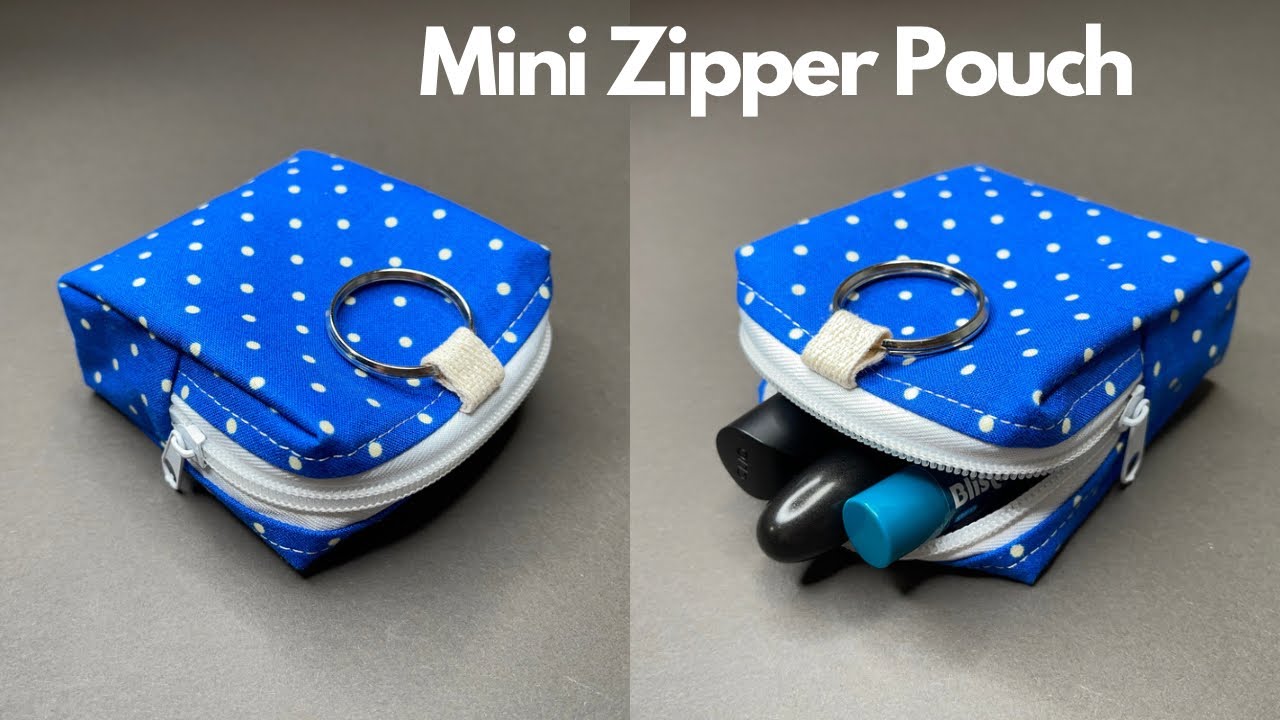
by Sure! Here’s a detailed guide on how to sew a cute zipper pouch — perfect for beginners or as a quick sewing project. This pouch can be used for makeup, coins, stationery, or as a gift!

🧵 How to Make ❤️ How to Sew a Cute Zipper Pouch
🧰 Materials Needed:
-
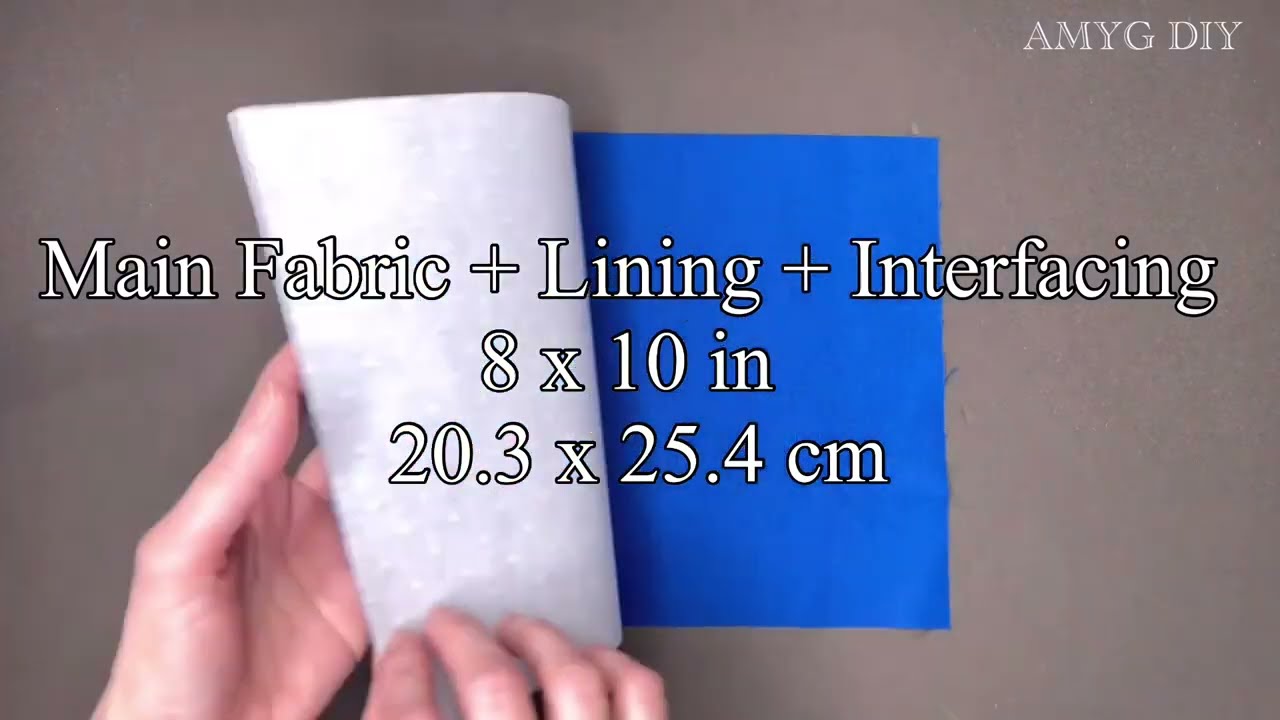
Outer fabric – cotton or canvas (2 pieces, e.g., 8” x 5”)
-
Lining fabric – cotton (2 pieces, same size as outer)
-
Zipper – 7” or 8” nylon or metal zipper
-
Sewing machine
-
Thread – matching or contrasting
-
Scissors or rotary cutter
-
Pins or clips
-
Iron
-
Optional: Interfacing (fusible) for structure
✂️ Step-by-Step Instructions:
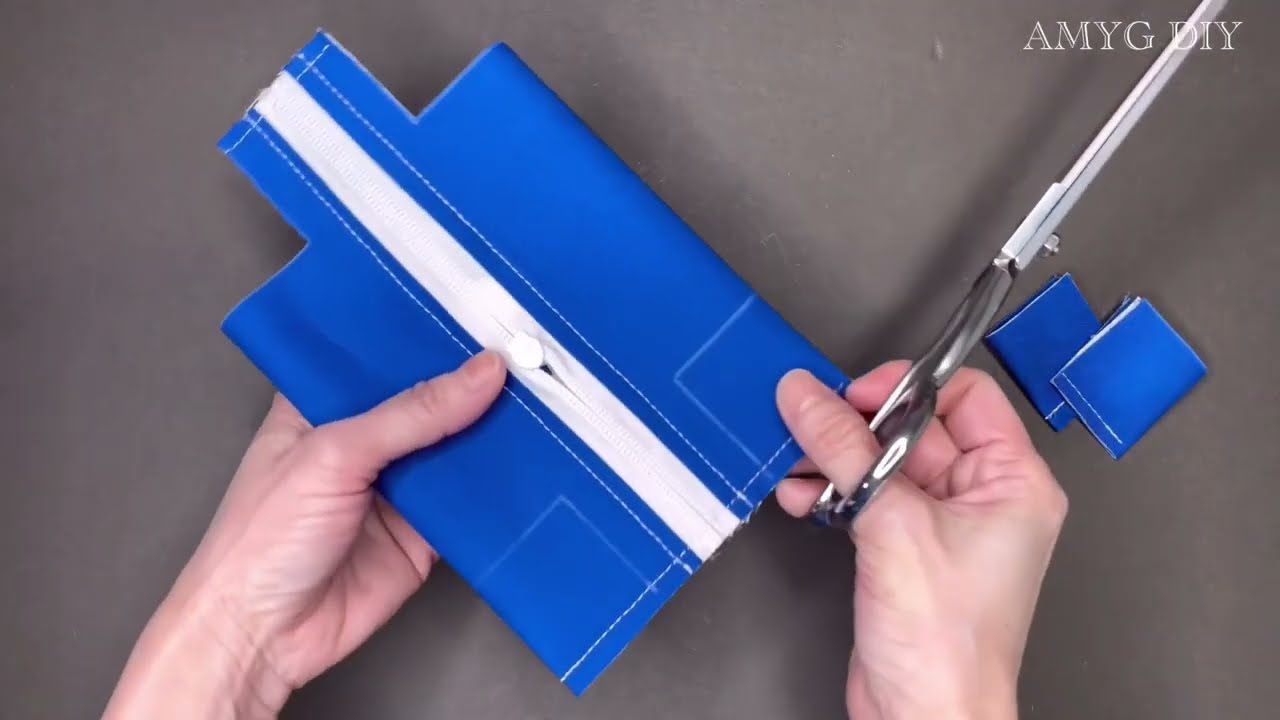
Step 1: Prepare Your Pieces
-
Cut 2 outer fabric pieces (8” wide x 5” tall)
-
Cut 2 lining fabric pieces (8” x 5”)
-
Cut 2 pieces of interfacing (8” x 5”), and fuse them to the wrong side of each outer piece (optional for added structure)
Step 2: Attach the Zipper
-
Lay one outer fabric piece right side up.
-
Place the zipper right side down along the top edge of the fabric.
-
Lay a lining piece right side down on top, aligning all top edges.
-
Pin or clip in place.
-
Using a zipper foot, sew along the top edge through all three layers.
-
Flip both fabrics away from the zipper and press with an iron.
-
Repeat the same steps for the other side of the zipper with the remaining outer and lining pieces.
Step 3: Topstitch the Zipper
-
Topstitch along both sides of the zipper to keep the fabric from catching in the teeth.
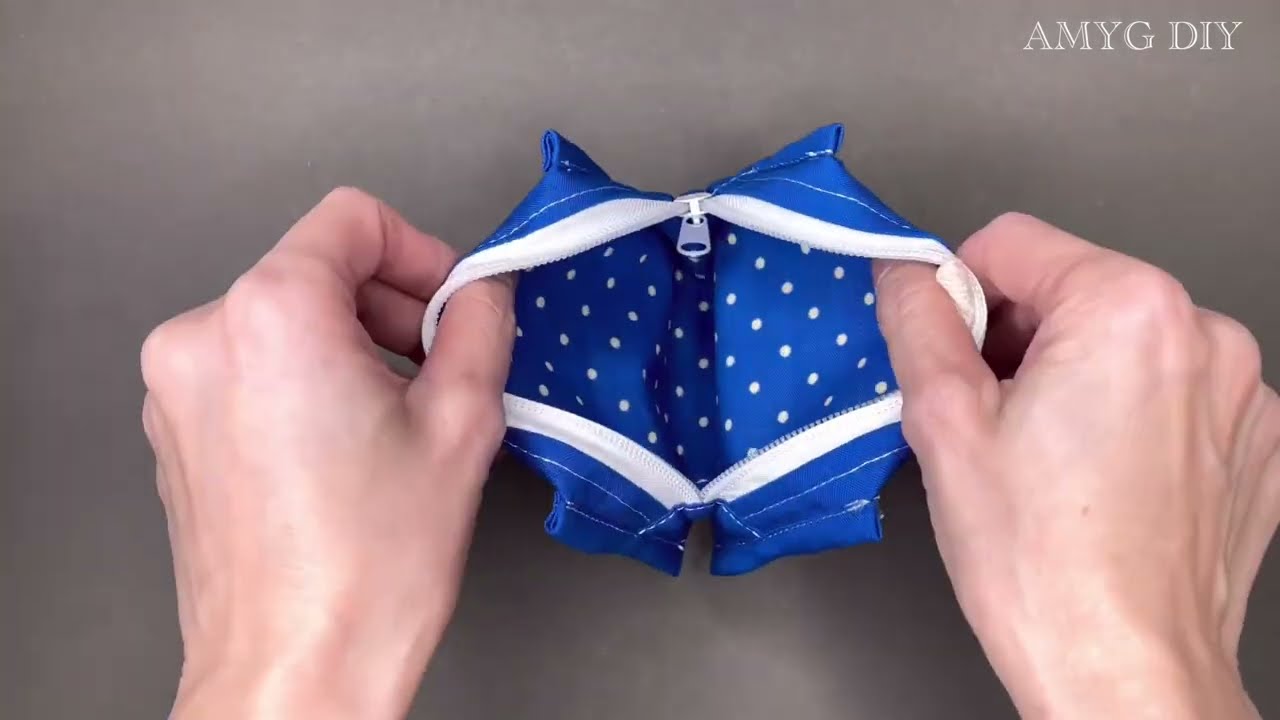
Step 4: Sew the Pouch
-
Open the zipper halfway (very important!).
-
Match the outer pieces right sides together and the lining pieces right sides together.
-
Pin around the edges, making sure to nest the zipper seam and push it toward the lining side.
-
Sew around the entire pouch, leaving a 2-3” gap at the bottom of the lining for turning.
-
Clip the corners and trim the excess zipper if needed (metal zippers require care!).
Step 5: Turn & Finish
-
Turn the pouch right side out through the gap in the lining.
-
Push out the corners neatly.
-
Sew the lining gap closed with a small seam (by hand or machine).
-
Push the lining into the pouch and press everything neatly.
🎀 Optional Add-ons:
-
Add a fabric pull tab or ribbon loop at one end of the zipper.
-
Use a decorative zipper or printed lining for fun surprises.
-
Add quilting or embroidery to the outer fabric before assembling.
🧡 You’re Done!
You’ve just made a cute zipper pouch — great for personal use or handmade gifts. Once you’re comfortable, try making different sizes, adding pockets, or experimenting with shapes!
Would you like a printable version, pattern template, or a video tutorial link as well?
Watch video: