 by
by Crocheting a baby hat or bonnet is a fantastic project for beginners, as they are relatively small, quick to make, and don’t require complex shaping. There are two main styles that are typically very easy: the classic round beanie and the more old-fashioned bonnet. Here’s a detailed guide on how to make both, focusing on beginner-friendly techniques:
Understanding the “Easy” Concept for Baby Hats/Bonnets:
- Top-Down Construction: Many easy hats are worked in rounds from the top (crown) down, meaning you start with a small circle and gradually increase to form the head shape. This eliminates seaming the top.
- Simple Stitches: Using basic stitches like single crochet (sc), half double crochet (hdc), or double crochet (dc) makes the process straightforward.
- Minimal Shaping: Baby hats and bonnets often don’t require intricate shaping. For hats, it’s mostly about increasing for the crown and then working straight for the body. For bonnets, it might involve working a flat rectangle and then seaming or adding ties.
Materials You’ll Need:
- Yarn:
- Weight: DK (Double Knitting) or Light Worsted (#3) is ideal for most baby hats, offering softness and good drape. Worsted Weight (#4) can also be used for a warmer, slightly thicker hat.
- Fiber: Choose soft, baby-friendly yarns like acrylic, cotton, or a blend. Look for yarns that are machine washable for easy care.
- Quantity: Typically one skein (around 100-200 yards) is enough for a newborn to 12-month size.
- Crochet Hook: The size will depend on your yarn weight and desired gauge. A common starting point is a 4.0mm (G) or 5.0mm (H) hook. Always check your chosen pattern’s recommendation.
- Stitch Marker: Essential for marking the beginning of each round when working in the round.
- Yarn Needle (Tapestry Needle): For weaving in ends.
- Scissors: For cutting yarn.
- Ribbon or Cord (for bonnets): Optional, for ties.
General Steps for an Easy Crochet Baby Beanie (Top-Down):
This is a very common and simple method for a baby hat.
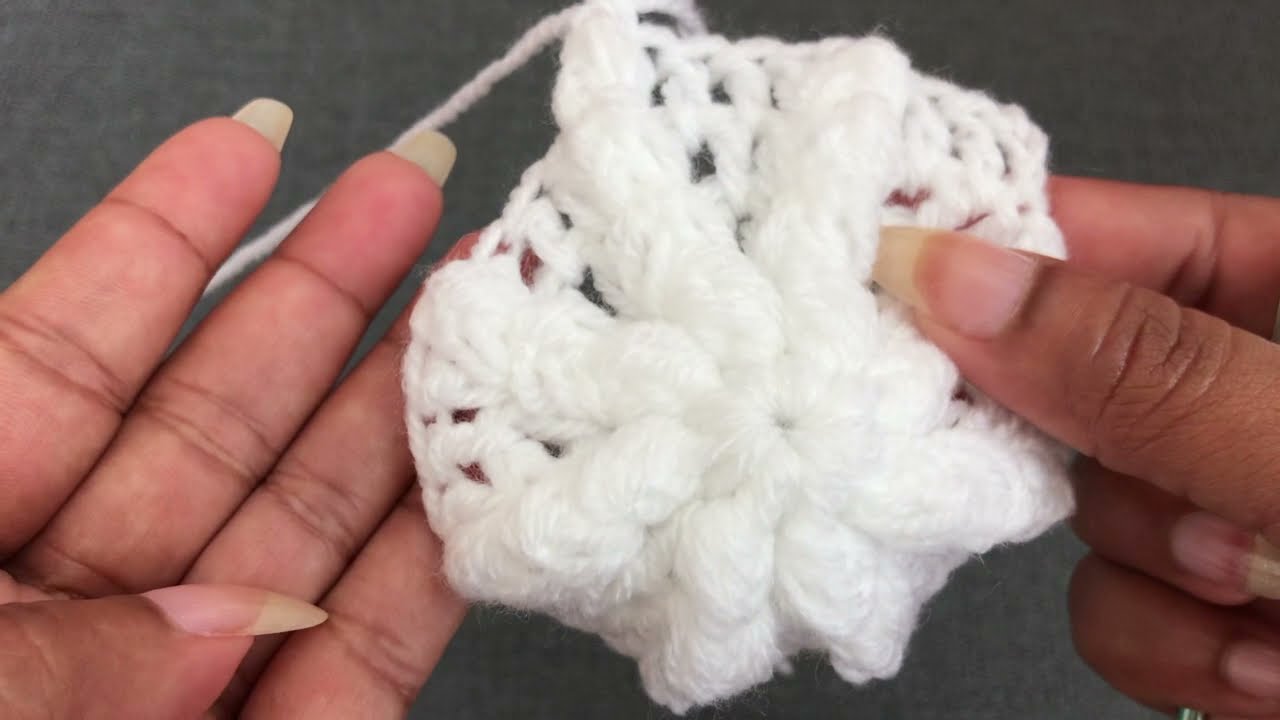
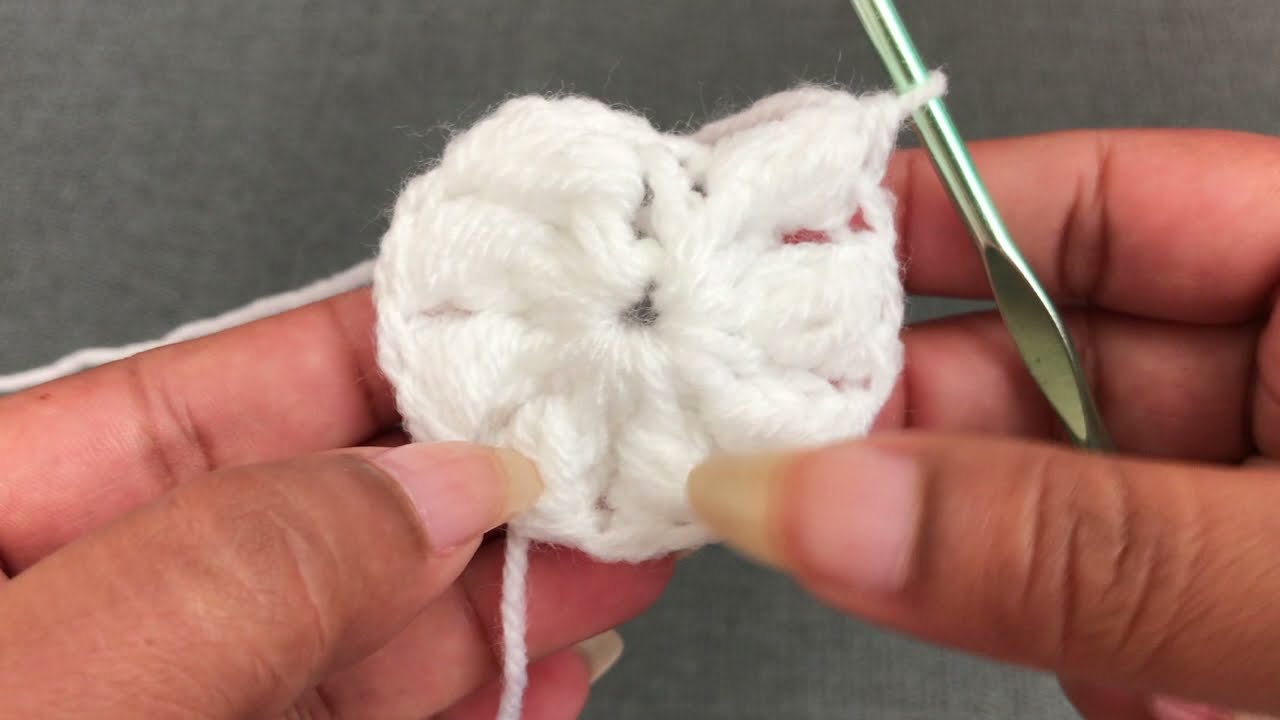
Phase 1: Creating the Crown (Flat Circle)
- Magic Ring (or Chain 2 method):
- Magic Ring (Recommended): This creates a tight, closed center, preventing a hole at the top of the hat.
- Make a loop with your yarn, insert hook into the loop, yarn over, pull up a loop. Chain 1.
- Work your first round of stitches (e.g., 10-12 double crochets) into the magic ring.
- Pull the tail of the magic ring tight to close the circle.
- Chain 2 Method: Chain 2, then work your first round of stitches into the first chain stitch (the one furthest from your hook). This leaves a small hole in the center.
- Magic Ring (Recommended): This creates a tight, closed center, preventing a hole at the top of the hat.
- Increasing Rounds: The key to a flat circle (the crown of your hat) is to increase evenly in each round.
- Round 1: (Using Magic Ring example) Ch 2 (counts as first dc, or not, depending on pattern), work 11 dc into magic ring. Join with sl st to top of starting ch-2 (or first dc if ch-2 doesn’t count). (12 dc)
- Round 2: Ch 2. 2 dc in each stitch around. Join with sl st. (24 dc)
- Round 3: Ch 2. 2 dc in first stitch, 1 dc in next stitch. Repeat from * around. Join with sl st. (36 dc)
- Round 4: Ch 2. 2 dc in first stitch, 1 dc in next 2 stitches. Repeat from * around. Join with sl st. (48 dc)
- Continue Increasing: You’ll continue this pattern: in each increasing round, you add one more single stitch between your “2 dc in one stitch” increase.
- Round 5: 2 dc, dc in next 3
- Round 6: 2 dc, dc in next 4
- …and so on.
- Stop Increasing: You stop increasing when your flat circle reaches the target diameter for the hat size you’re making.
- Newborn: Approx. 4.5 – 5 inches (11.5 – 12.5 cm)
- 3-6 Months: Approx. 5 – 5.5 inches (12.5 – 14 cm)
- 6-12 Months: Approx. 5.5 – 6 inches (14 – 15 cm)
- Tip: Place the flat circle on the top of the baby’s head (or a doll/head form) to gauge if it’s wide enough.
Phase 2: Working the Body of the Hat (No Increases)
- Straight Rounds: Once your crown is the correct diameter, you will stop increasing. Simply work one stitch into each stitch around for subsequent rounds.
- Ch 2 (or 1, if using hdc/sc), 1 dc (or hdc/sc) in each stitch around. Join with sl st.
- Length: Continue working these straight rounds until the hat reaches the desired length from the top of the crown to the bottom edge.
- Newborn: Approx. 5 – 5.5 inches (12.5 – 14 cm)
- 3-6 Months: Approx. 5.5 – 6 inches (14 – 15 cm)
- 6-12 Months: Approx. 6 – 6.5 inches (15 – 16.5 cm)
- Tip: If you’re unsure, it’s better to make it slightly longer, as babies grow quickly!
Phase 3: Finishing (Optional Brim)
- Simple Edge: For a clean finish, you can work one or two rounds of single crochet (sc) around the bottom edge.
- Ribbed Brim (Optional): For a stretchy, classic beanie brim:
- Work a round of half double crochet (hdc) or double crochet (dc).
- For the next few rounds, work in back loop only (BLO) of hdc/dc, or alternate front post/back post double crochet (fpdc/bpdc) for a more defined rib.
- Fasten Off: Cut your yarn, leaving a tail, and pull it through the last loop on your hook to secure.
- Weave in Ends: Use your yarn needle to neatly weave in all loose ends.
General Steps for an Easy Crochet Baby Bonnet:
Many easy bonnets are made from a simple rectangle that is then seamed and ties are added.
Phase 1: Crocheting the Main Rectangle
- Starting Chain: Determine the desired depth of your bonnet (from the forehead over the top of the head to the nape of the neck). Chain enough stitches to achieve this length. For a newborn, this might be around 25-35 chains, but check a pattern for specific measurements.
- First Row: Work your chosen stitch (e.g., hdc or dc) into the second chain from the hook (or third for dc) and across the row. Ch 1 (or 2 for dc) and turn.
- Subsequent Rows: Continue working in rows, using your chosen stitch, until the rectangle is long enough to go from ear to ear, across the top of the head.
- Newborn: Approx. 8-10 inches (20-25 cm) long
- 3-6 Months: Approx. 9-11 inches (23-28 cm) long
- 6-12 Months: Approx. 10-12 inches (25-30 cm) long
- You want it long enough so that when folded in half, it covers the top and sides of the head comfortably.
Phase 2: Shaping and Seaming
- Fold and Seam: Fold your rectangle in half lengthwise. You will now seam one of the shorter ends. This seam will become the back of the bonnet, at the top of the head.
- You can use a slip stitch (sl st) seam: Insert your hook through both loops of the stitch on one side and both loops of the corresponding stitch on the other side, then sl st.
- Alternatively, you can use a yarn needle and stitch the seam together with a mattress stitch or whip stitch for a less visible join.
- Bottom Edge: The remaining unseamed long edge will be the opening for the face.
Phase 3: Adding the Face Opening Border and Ties
- Attach Yarn: Join your yarn to one corner of the face opening.
- Work Border: Work a round or two of single crochet (sc) or your preferred edging stitch around the entire face opening of the bonnet. This creates a neat edge and provides a base for ties.
- Creating Ties:
- Chain Ties: At each bottom corner of the bonnet (where the face opening meets the neck), chain a long length (e.g., 40-60 chains) for the tie. Work slip stitches back down the chain to make it sturdier. Fasten off.
- Crocheted Cords: You can also crochet separate cords using a chain or a slip stitch cord technique and then attach them to the corners.
- Ribbon: Thread a satin or grosgrain ribbon through stitches along the bottom edge for ties.
- Weave in Ends: Neatly weave in all loose yarn tails.
Tips for Beginners:
- Consult Size Charts: Baby head circumference and hat length/depth measurements are widely available online. Search for “crochet baby hat size chart” to help you choose the right dimensions.
- Gauge Swatch: Although small, taking the time to make a gauge swatch will ensure your hat turns out the correct size.
- Yarn Choice Matters: Soft, non-irritating yarns are best for babies. Avoid scratchy fibers.
- Stitch Markers: Use a stitch marker to mark the first stitch of each round when working hats in the round, so you know when to join.
- Video Tutorials: If you’re a visual learner, search YouTube for “easy crochet baby hat for beginners” or “crochet baby bonnet step by step.” Many patterns come with video tutorials.
- Practice Basic Stitches: Ensure you are comfortable with chaining, slip stitch, single crochet, half double crochet, and double crochet before starting.
- Don’t Stress About Perfection: Your first few projects might have imperfections, and that’s perfectly normal! The joy is in the handmade gift.
With these detailed instructions and tips, you’ll be able to crochet an adorable baby hat or bonnet with ease!
Watch video: