 by
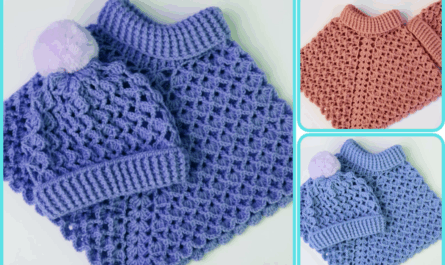
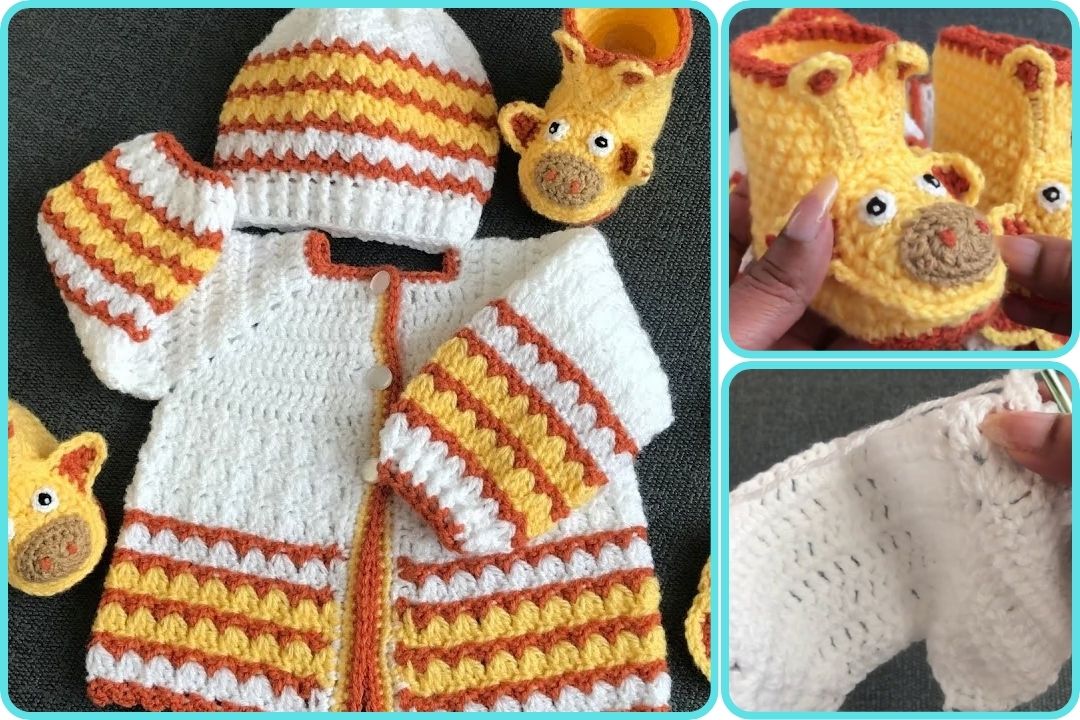
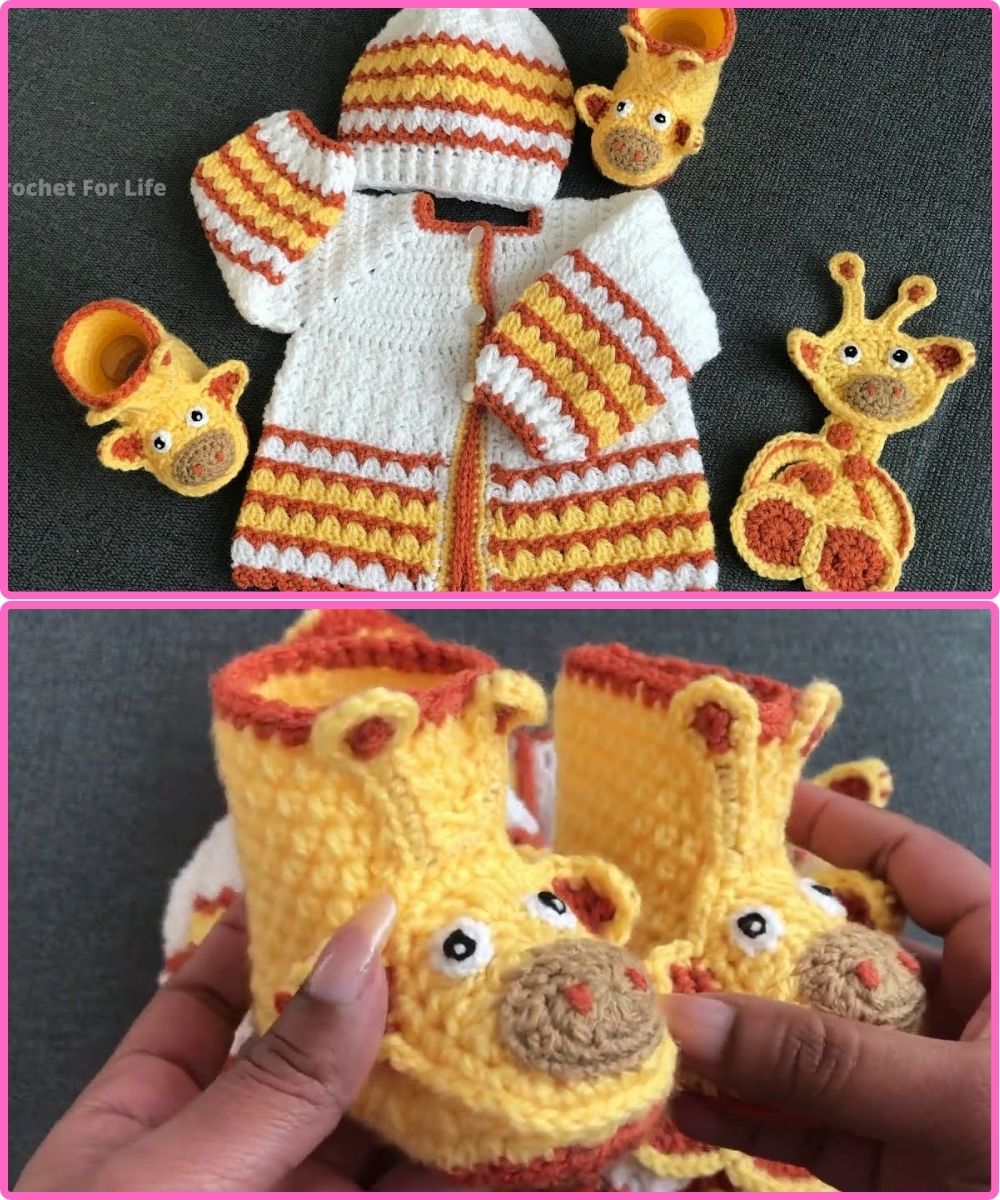
by Crocheting a baby cardigan is a rewarding project, especially for beginners, as many patterns are designed to be simple and quick. The “Crochet for Life Cardigan” often refers to a style that is easily adaptable for various sizes, allowing you to create cardigans for a growing baby or even adjust for older children and adults by simply modifying the starting chain and increases.
Here’s a detailed guide on how to make an easy crochet baby cardigan, focusing on common techniques that make it beginner-friendly:
Understanding the “Easy” Concept: Top-Down & Hexagon Cardigans
Many easy baby cardigan patterns are worked top-down and in one piece, which eliminates the need for sewing seams. The most popular and arguably easiest method is the hexagon cardigan.
Why the Hexagon Cardigan is Easy:
- No Seams: You start with a small hexagon shape that forms the back and grows to incorporate the sleeves and front panels.
- Simple Increases: The hexagon shape is created by increasing stitches at specific corners, which is straightforward to master.
- Customizable: Once the basic hexagon yoke is formed, you can easily adjust the body and sleeve length to fit any size.
Materials You’ll Need:
- Yarn:
- Weight: DK (Double Knitting) or Light Worsted (#3) yarn is commonly recommended for baby items as it’s soft and creates a nice drape. You can also use Worsted Weight (#4) for a slightly thicker cardigan.
- Fiber: Choose soft, baby-friendly yarns like acrylic, cotton, or a blend. Look for yarns that are machine washable for easy care.
- Quantity: This will depend on the size you’re making, but generally 150-300 yards for a newborn to 12-month size. Check the pattern for specific recommendations.
- Crochet Hook: The hook size will depend on your yarn weight and desired gauge. A common starting point is a 4.0mm (G) or 5.0mm (H) hook for DK or worsted weight yarn. Always check your chosen pattern’s recommended hook size.
- Stitch Markers: Very helpful for marking increase points and the separation of sleeves/body.
- Yarn Needle (Tapestry Needle): For weaving in ends.
- Scissors: For cutting yarn.
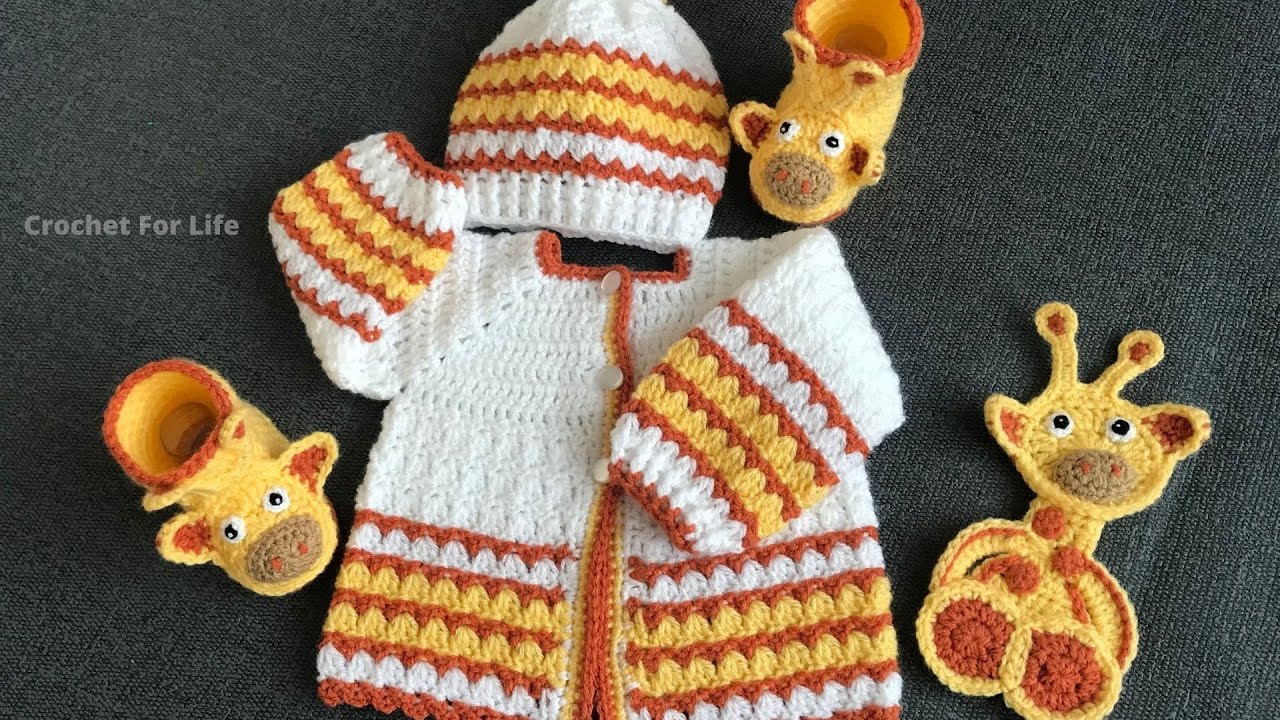
- Buttons (Optional): For closure, usually 3-5 buttons depending on the size.
Basic Crochet Stitches Used:
- Chain (ch): The foundation of your project.
- Slip Stitch (sl st): Used for joining rounds and finishing.
- Single Crochet (sc): A basic, short stitch.
- Half Double Crochet (hdc): A stitch taller than sc, shorter than dc.
- Double Crochet (dc): A common, taller stitch.
- Double Crochet 2 Together (dc2tog) or Decrease: Used to reduce stitches.
General Steps for a Top-Down Hexagon Baby Cardigan:
While specific stitch counts will vary by pattern and size, the general construction process is as follows:
Phase 1: Creating the Yoke (The Hexagon)
- Starting Chain: Begin with a chain of stitches long enough to comfortably fit around the baby’s neck. The number of stitches will vary based on size (e.g., around 40-60 stitches for newborn to 12 months). Join with a slip stitch to form a ring.
- Establish Corners: In the first few rows, you’ll create 6 “corners” where you will consistently increase stitches. These corners define the hexagon shape.
- A common way to do this is to place a series of stitches (e.g., 2 dc, ch 2, 2 dc) into specific stitches in your starting chain, with a certain number of stitches (e.g., 5-8 dc) between each corner. Place stitch markers in your chain-2 spaces at the corners.
- Increasing Rounds: Continue working in rounds (or rows, if you prefer to work flat and then seam, but top-down is easier). In each corner, you will work an increase.
- Typical Increase: For double crochet, you might do (2 dc, ch 2, 2 dc) into the chain-2 space of the previous round’s corner. The stitches along the straight edges between the corners will be regular dc stitches.
- Continue Increasing: Keep working rounds, increasing at each of the 6 corners, until the hexagon is large enough to form the back and sleeves. You’ll know it’s large enough when the points of the hexagon, when folded, meet comfortably under the baby’s arms with enough room for the body.
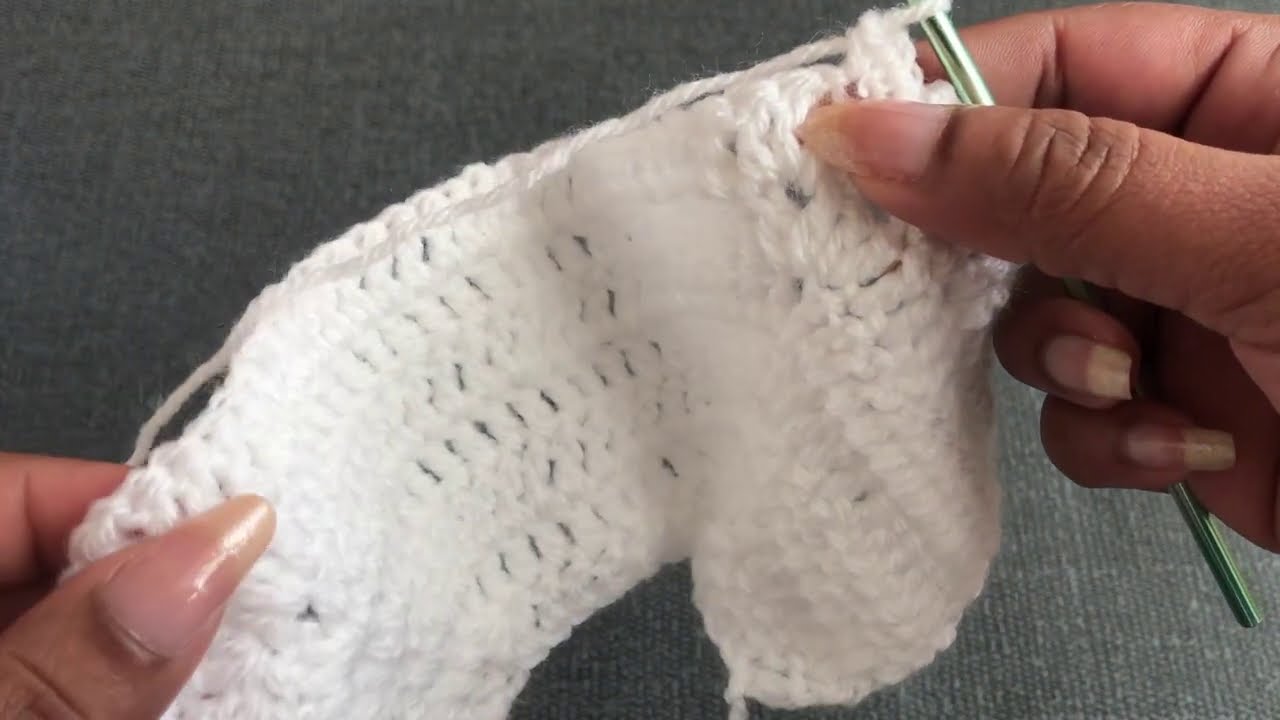
Phase 2: Separating for Sleeves and Body
- Mark Armholes: Once your yoke is the desired size, you will identify the stitches that will form the armholes. You’ll typically have stitches for:
- Front Panel 1
- Sleeve 1
- Back Panel
- Sleeve 2
- Front Panel 2
- Use stitch markers to clearly define these sections.
- Chain for Armpit: When you reach the first corner that will become an armpit, you will usually skip the stitches for the sleeve and chain a few stitches (e.g., 3-5 chains) to create the underarm opening. Then, you’ll continue crocheting into the stitches of the back panel. Repeat for the second sleeve.
- Join for Body: After skipping both sleeve sections and chaining for the armpits, you will join the two front panels and the back panel to work the body of the cardigan in one continuous piece.
Phase 3: Working the Body
- Continuous Rounds/Rows: Continue working in rounds or rows (depending on your pattern’s instructions) for the body of the cardigan. You can use simple stitches like double crochet or half double crochet for the body.
- Length: Continue until the cardigan reaches the desired length for the baby.
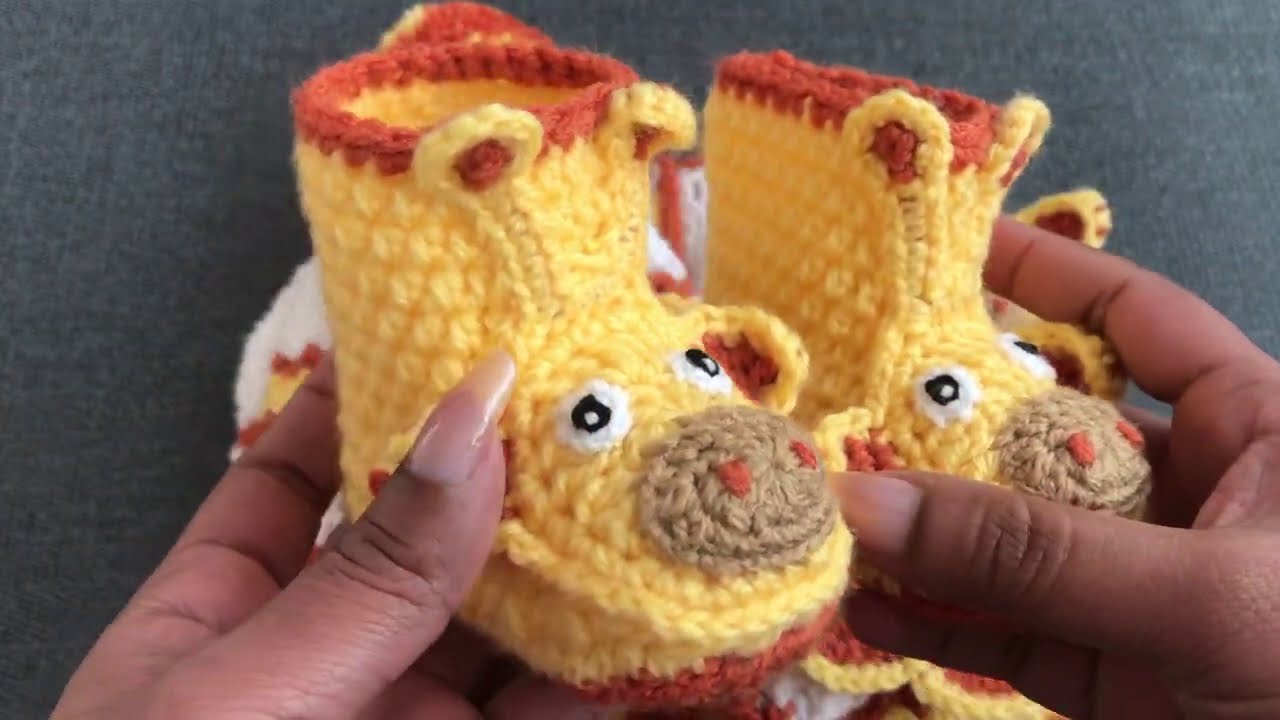
Phase 4: Working the Sleeves
- Attach Yarn: Join your yarn to one of the armholes you created.
- Work in Rounds: Work in rounds around the armhole, creating the sleeve.
- Decrease (Optional): You can decrease stitches periodically to taper the sleeve towards the wrist, or simply work straight if you prefer a wider sleeve.
- Cuff (Optional): Finish the sleeve with a few rounds of ribbing (e.g., front post/back post double crochet or half double crochet in the back loop only) for a neat cuff. Repeat for the second sleeve.
Phase 5: Finishing Touches
- Edging (Optional but Recommended): Work an edging around the entire opening of the cardigan (front panels and neckline). This often involves a few rows of single crochet or a decorative stitch. This also provides a sturdy edge for buttons.
- Buttonholes: If you’re adding buttons, you’ll need to incorporate buttonholes into one of the front edgings. This is usually done by chaining a few stitches and skipping an equal number of stitches in the row below.
- Buttons: Sew on your chosen buttons to the opposite front panel, aligning them with the buttonholes.
- Weave in Ends: Carefully weave in all loose yarn tails with your yarn needle for a neat finish.
Tips for Beginners:
- Watch Tutorials: YouTube is an excellent resource for visual learners. Search for “easy crochet baby cardigan tutorial” or “hexagon baby cardigan crochet.” Many “Crochet for Life” channels also offer step-by-step videos.
- Choose a Simple Pattern: Start with a pattern that uses basic stitches and a clear, repetitive stitch pattern.
- Gauge Swatch: Before you begin, crochet a small square (a “gauge swatch”) using your chosen yarn and hook. Measure it to ensure your stitch count and row count per inch match the pattern’s recommendations. This is crucial for achieving the correct size.
- Stitch Markers are Your Friends: Use them to mark the beginning of rounds, increase points, and the separation of sections.
- Don’t Be Afraid to Undo: Crochet is very forgiving. If you make a mistake, simply unravel (frog it!) and try again.
- Practice Basic Stitches: Make sure you’re comfortable with chain, slip stitch, single crochet, and double crochet before starting.
- Read the Entire Pattern First: Get a general understanding of the construction before you pick up your hook.
By following these general steps and tips, you’ll be well on your way to crocheting beautiful and practical baby cardigans!
Watch video: