 by
by Here is a detailed, beginner-friendly guide on How to Make Easy Crochet Granny Squares Slippers. You can use this as a blog post, project write-up, or tutorial.
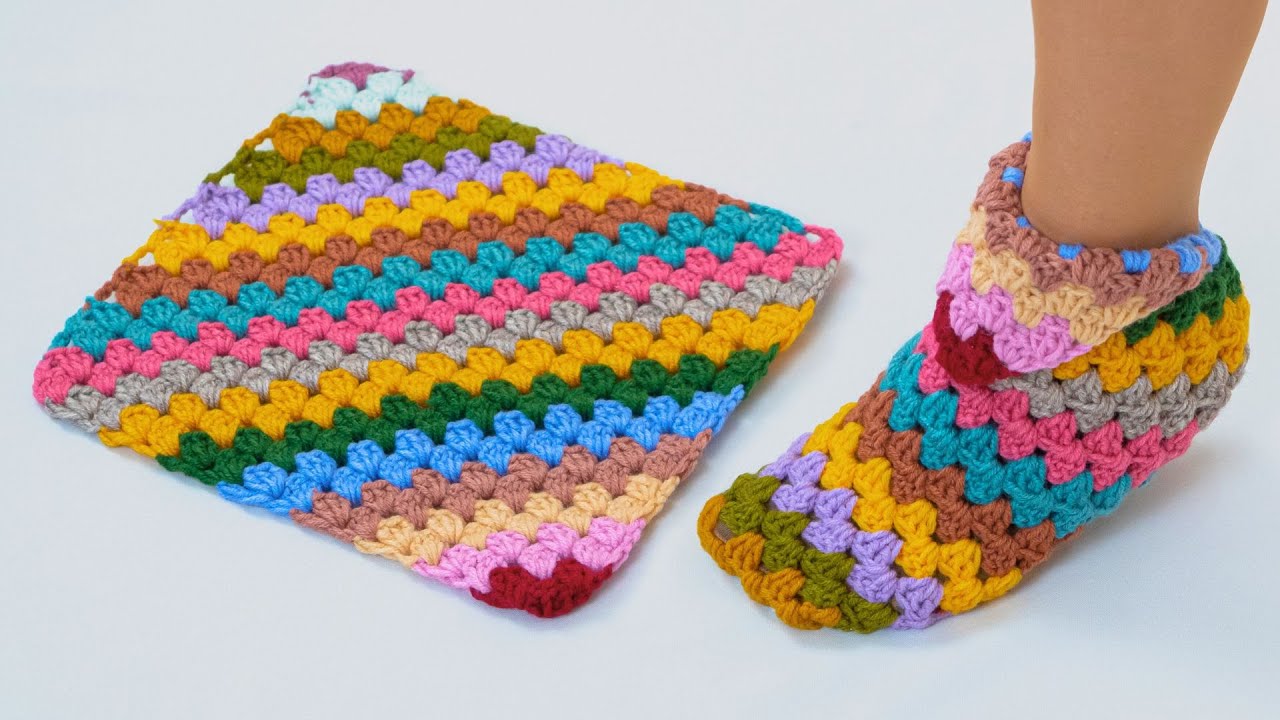
How to Make Easy Crochet Granny Squares Slippers
Crochet granny square slippers are a cozy, stylish, and beginner-friendly project. Made from simple granny squares, these slippers are quick to create and perfect for using leftover yarn. With just basic crochet skills, you can make warm slippers for yourself or as thoughtful handmade gifts.
Materials Needed
Before starting, gather the following supplies:
-
Yarn: Medium-weight (worsted) yarn works best. Acrylic or wool blends are durable and warm.
-
Crochet Hook: Size 4.5–5.5 mm (depending on your yarn and tension)
-
Yarn Needle: For sewing pieces together and weaving in ends
-
Scissors
-
Optional: Non-slip fabric or puff paint for the soles
Basic Crochet Skills Required
You should be familiar with:
-
Chain stitch (ch)
-
Slip stitch (sl st)
-
Single crochet (sc)
-
Double crochet (dc)
-
Working in the round
These slippers are beginner-friendly and use the classic granny square pattern.
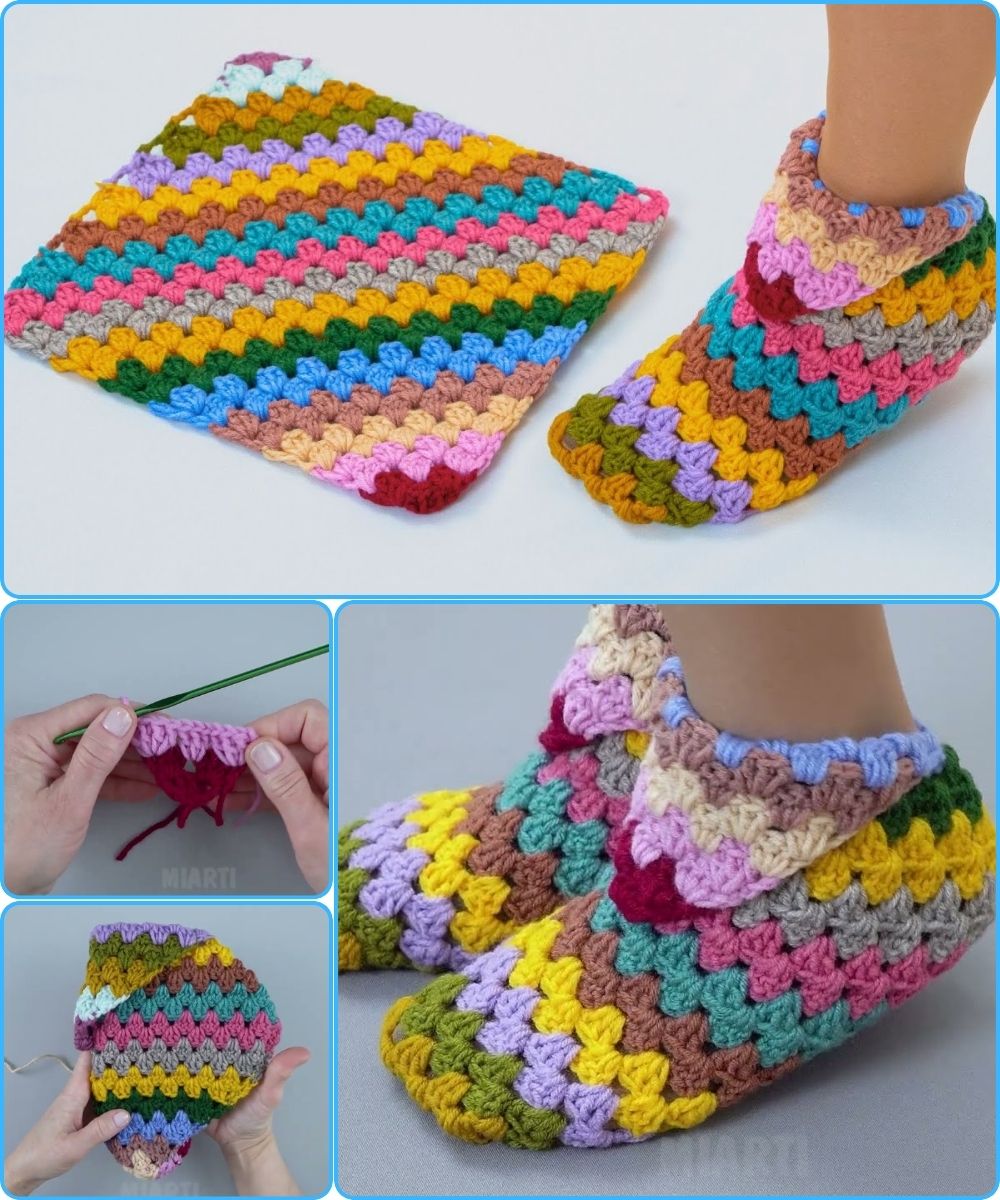
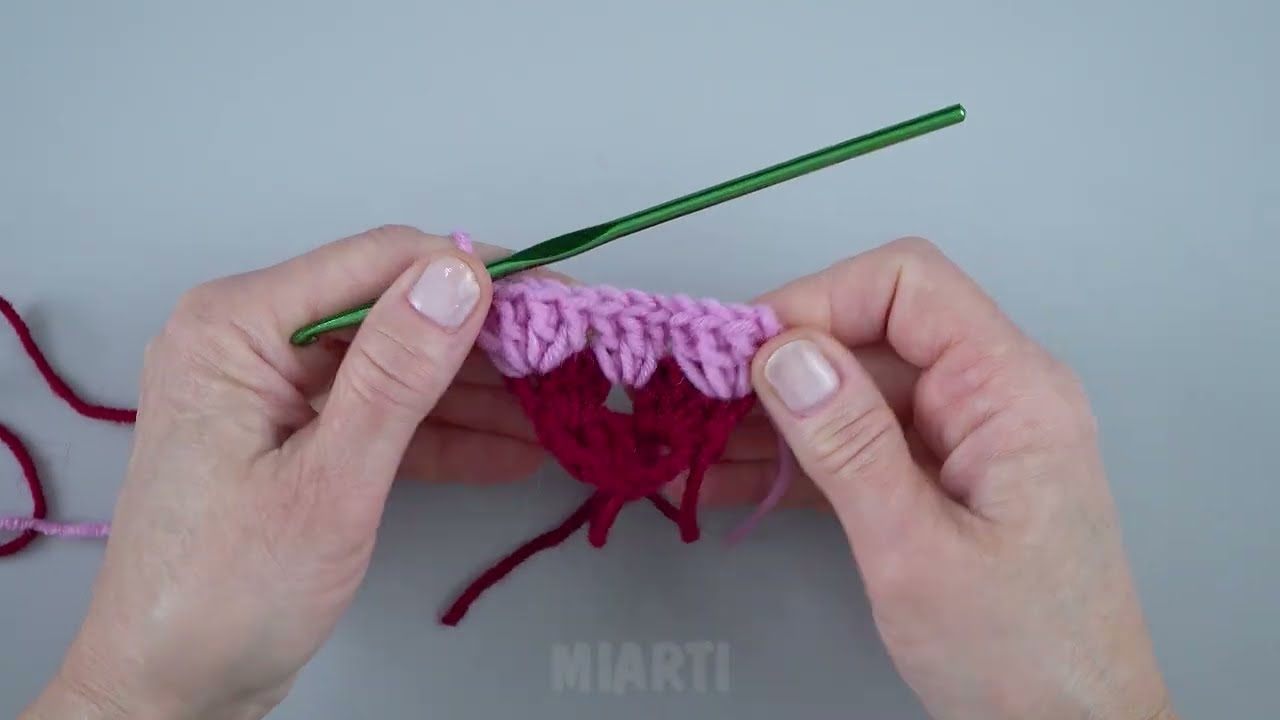
Step 1: Make the Granny Squares
Each slipper is made from two granny squares, so you’ll need four squares total for one pair.
How to crochet a basic granny square:
-
Start with a magic ring (or ch 4 and join with a sl st).
-
Round 1: Ch 3 (counts as first dc), 2 dc into the ring, ch 2.
Repeat (3 dc, ch 2) three more times.
Join with a sl st to the top of ch 3. -
Round 2: Sl st into the next corner space. Ch 3, 2 dc, ch 2, 3 dc.
In each remaining corner, work (3 dc, ch 2, 3 dc).
Join with a sl st. -
Round 3 (optional): Repeat Round 2 to increase square size for larger feet.
Fasten off and weave in ends.
Tip: For adult sizes, squares are usually 4–5 inches wide. Adjust by adding rounds if needed.
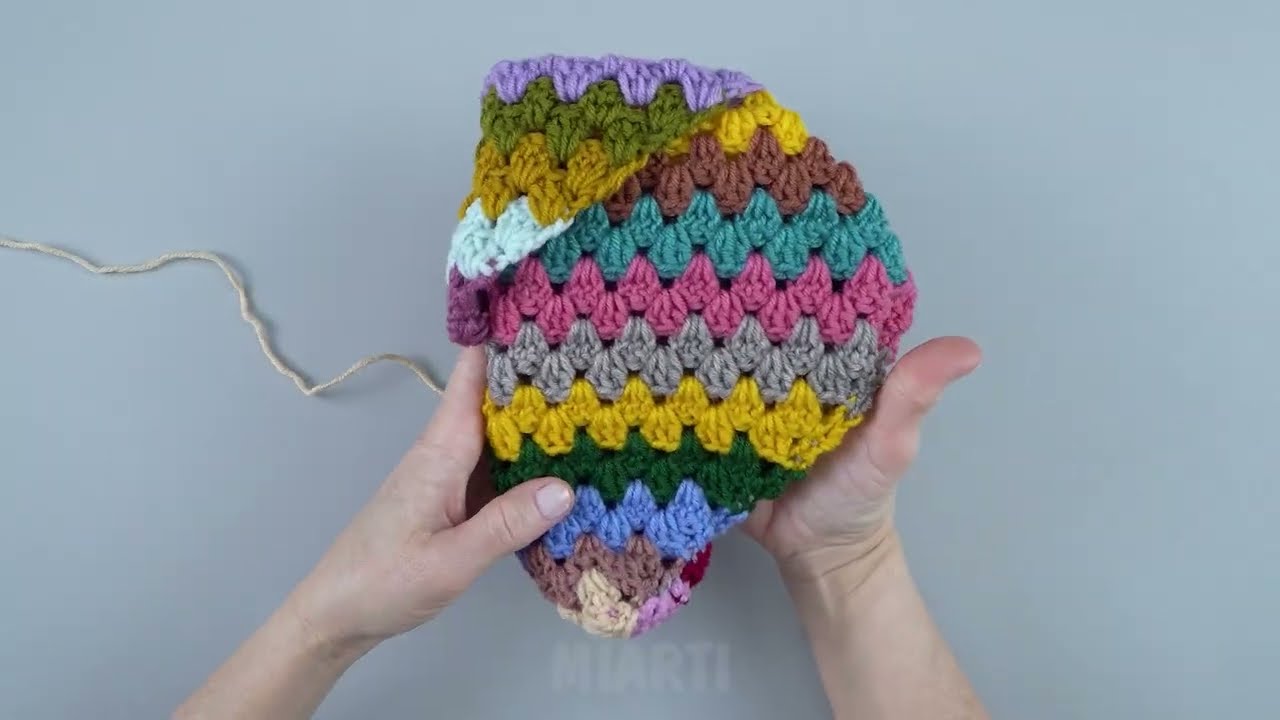
Step 2: Shape the Slippers
Each slipper uses two granny squares.
-
Fold one square diagonally to form a triangle.
-
Place the second square flat underneath the folded one.
-
Align edges to create a slipper shape, with the folded square forming the toe.
This creates a cozy, sock-like fit once stitched together.
Step 3: Join the Squares
Using a yarn needle and matching yarn:
-
Stitch along the edges where the squares meet.
-
Sew the heel closed, leaving an opening for your foot.
-
Use a whip stitch or mattress stitch for a neat finish.
Repeat for the second slipper.
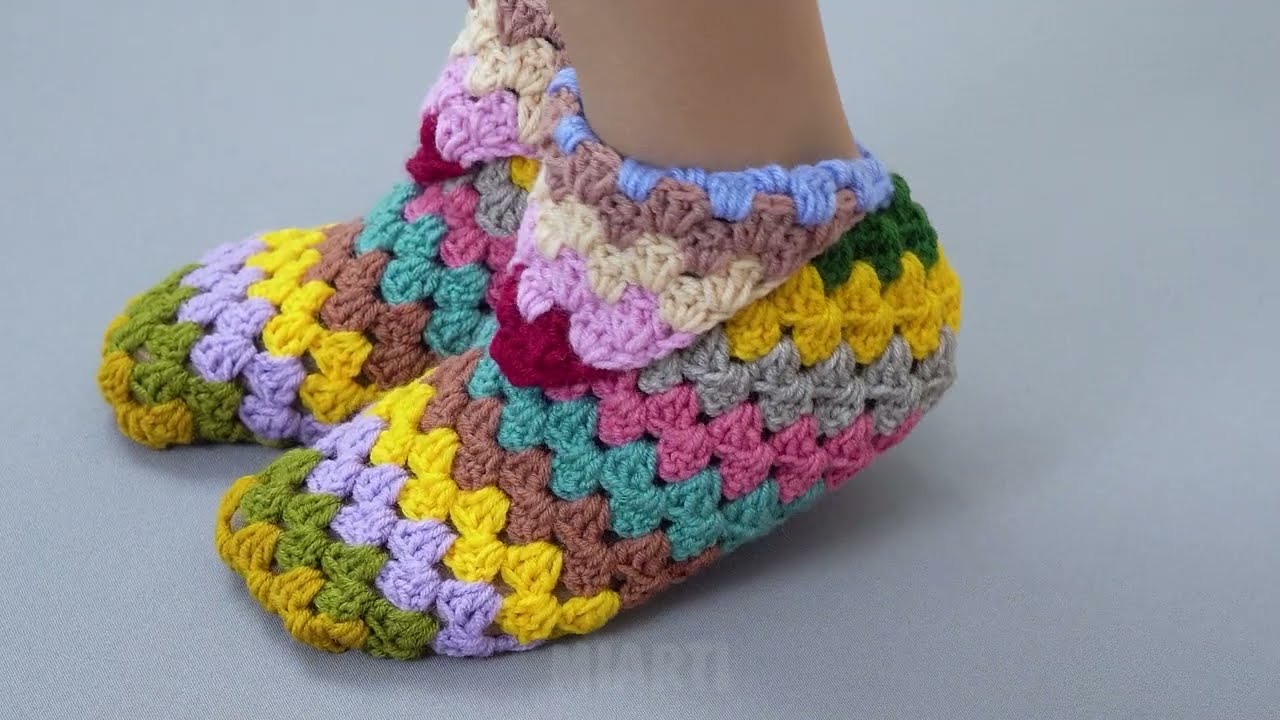
Step 4: Add a Border (Optional but Recommended)
To improve fit and durability:
-
Attach yarn at the opening of the slipper.
-
Work single crochet evenly around the opening.
-
Join with a slip stitch and fasten off.
You can add extra rounds for a snugger fit or decorative look.
Step 5: Add Non-Slip Soles (Optional)
For safety and longer wear:
-
Sew a piece of non-slip fabric to the bottom
-
Or apply fabric paint or hot glue dots to the sole
Allow to dry completely before wearing.
Size Adjustments
-
Small feet: Use fewer rounds in the granny squares
-
Large feet: Add extra rounds or use thicker yarn
-
Custom fit: Try on as you assemble and adjust stitching as needed
Care Instructions
-
Hand wash or machine wash on gentle cycle
-
Lay flat to dry to maintain shape
Final Thoughts
Easy crochet granny square slippers are a wonderful project for beginners and experienced crocheters alike. They’re quick to make, customizable in color and size, and perfect for gifting or relaxing at home. Once you master the basic construction, you can experiment with colors, textures, and embellishments to create your own unique designs.
Happy crocheting! 🧶
Watch tutorial: