by
by Here’s a clear, beginner-friendly, detailed guide you can use as an article, blog post, or tutorial.
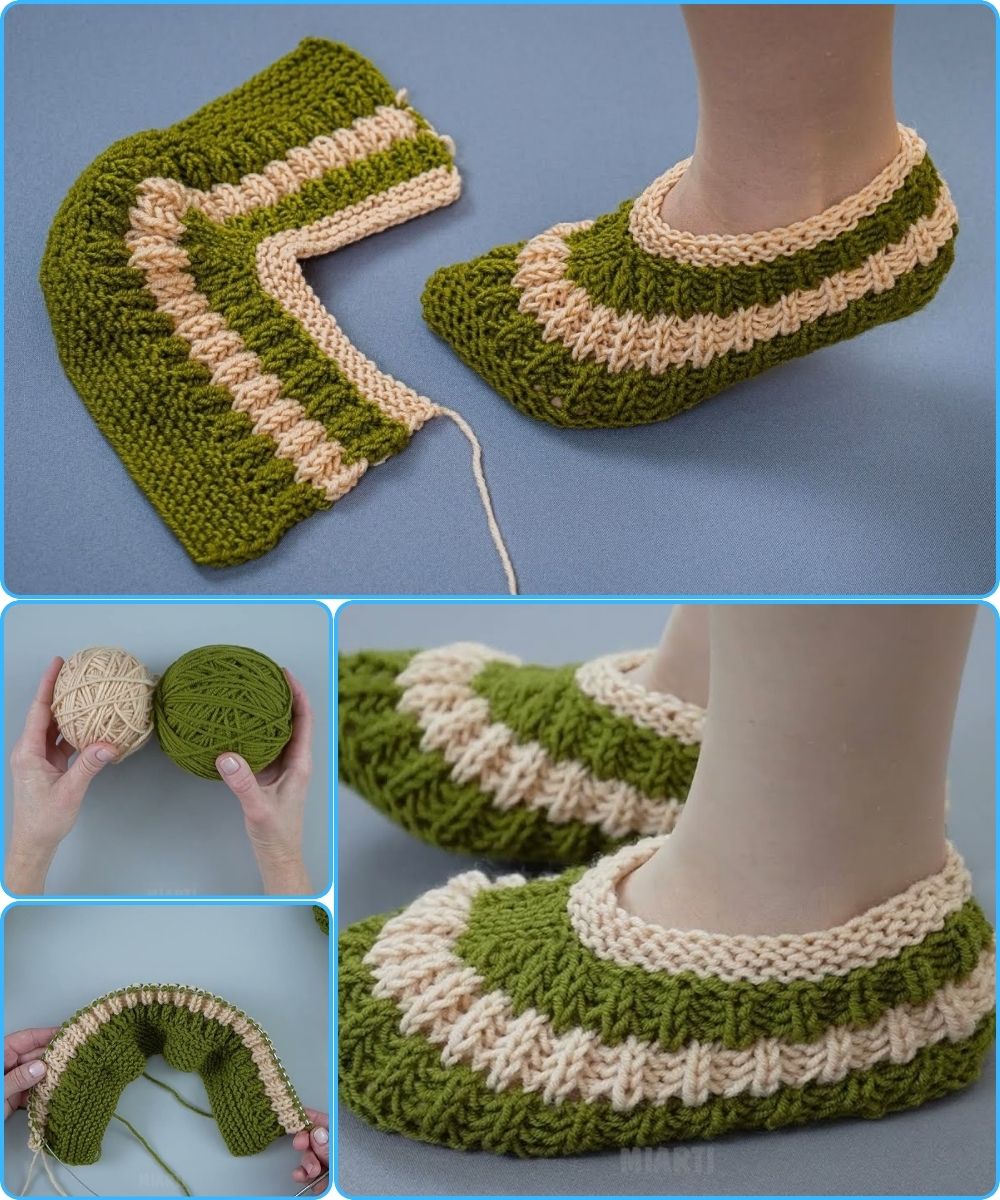
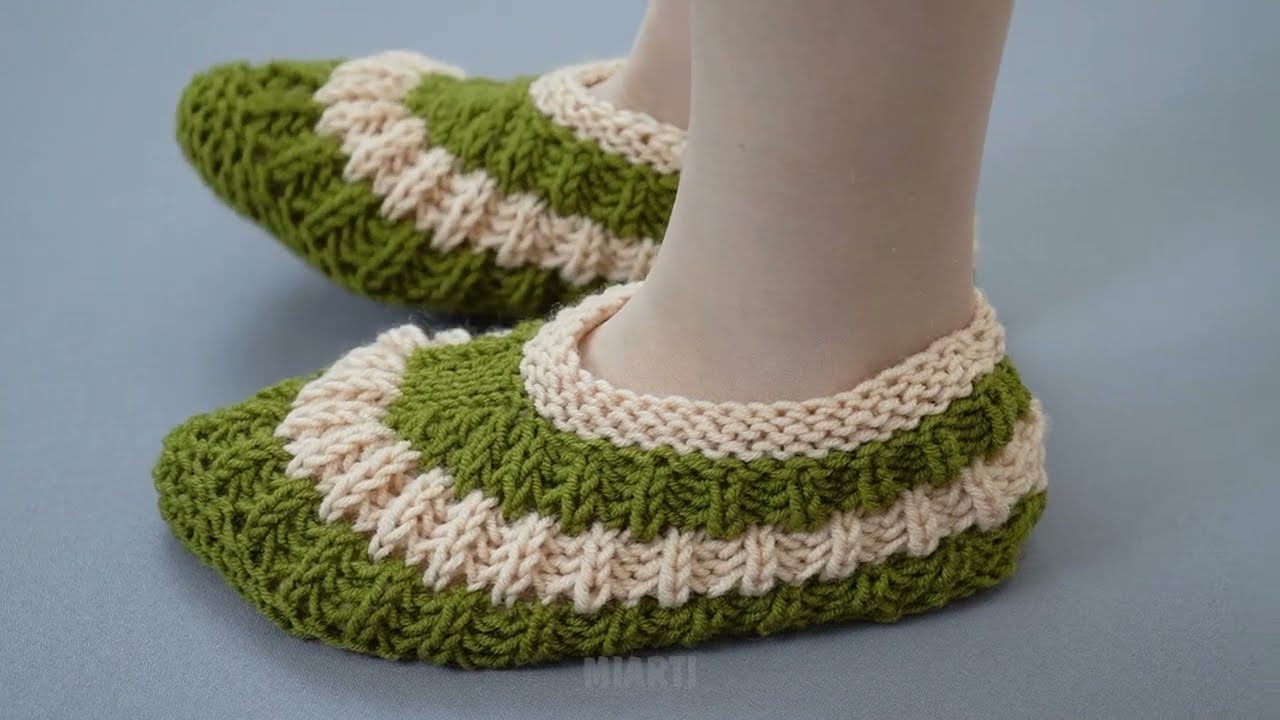
How to Make the Simplest Knitted Slippers
Even a beginner can handle it!
Knitted slippers are one of the easiest and most satisfying projects for beginners. They are quick to make, require very basic skills, and result in something warm, cozy, and useful. If you can knit and purl (or even just knit), you can make these slippers with confidence.
This simple pattern uses flat knitting, meaning you knit a rectangle and then sew it into the shape of a slipper—no complicated shaping or advanced techniques needed.
Materials You’ll Need
Before you start, gather these basic supplies:
-
Yarn: Medium-weight (worsted) yarn
Wool or wool-blend yarn is best because it’s warm and durable. -
Knitting needles: Size US 8–10 (5–6 mm) straight needles
-
Yarn needle: For sewing seams
-
Scissors
-
Measuring tape (optional but helpful)

Basic Skills Required
This project is perfect for beginners because it only requires:
-
Casting on
-
Knit stitch (or knit and purl if you prefer)
-
Binding off
-
Simple sewing
If you know how to knit a scarf, you can make these slippers.
Step 1: Cast On Stitches
Cast on 30–40 stitches, depending on your foot size and yarn thickness.
-
Smaller feet: 30–34 stitches
-
Average adult: 36–38 stitches
-
Larger feet: 40 stitches
This will determine the width of your slipper.
Step 2: Knit a Rectangle
Knit every row (this is called garter stitch) until your rectangle measures:
-
About 9 inches (23 cm) for small feet
-
About 10 inches (25 cm) for average adult feet
-
About 11 inches (28 cm) for larger feet
Tip: Garter stitch is ideal for beginners because it doesn’t curl and creates a soft, stretchy fabric.
Step 3: Bind Off
Once your rectangle reaches the desired length, bind off all stitches loosely.
Do not pull too tight—you want the slipper to be comfortable.
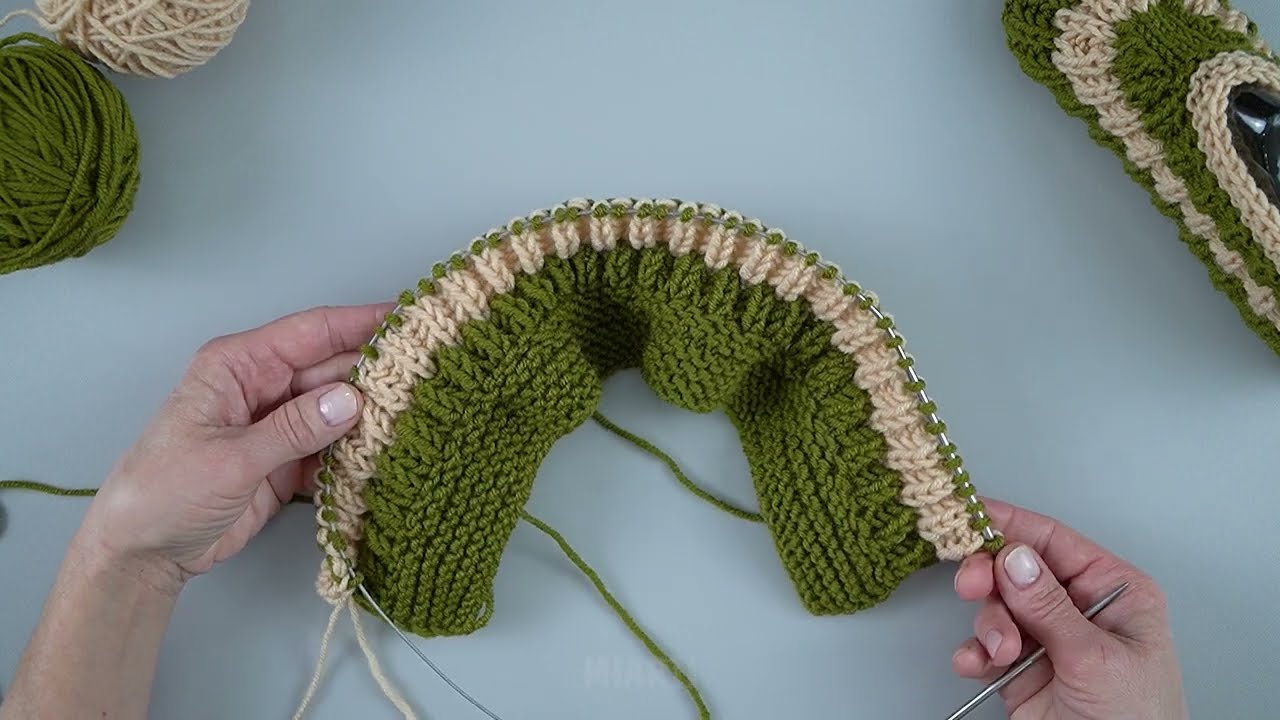
Step 4: Fold and Shape the Slipper
Lay the rectangle flat and follow these steps:
-
Fold the rectangle in half lengthwise
-
Sew the short edge together—this becomes the heel
-
At the opposite end, fold the corners inward to form a toe shape
-
Sew across the folded corners to close the toe
Turn the slipper right side out, and you’ll see the basic slipper shape!
Step 5: Make the Second Slipper
Repeat the same steps to make the second slipper. Try it on as you go to ensure both slippers are the same size.
Optional Finishing Touches
Once you’re comfortable, you can personalize your slippers:
-
Add a ribbed cuff for extra warmth
-
Sew on buttons or pom-poms
-
Use non-slip fabric paint on the soles
-
Switch colors or add stripes
Why This Pattern Is Perfect for Beginners
✔ No circular needles
✔ No complicated shaping
✔ Minimal sewing
✔ Fast results
✔ Great confidence booster
Many beginners complete their first pair in just one afternoon.
Final Thoughts
Knitted slippers are a fantastic first project because they’re forgiving, cozy, and practical. Don’t worry about perfection—handmade charm is part of the beauty. With just yarn, needles, and a little patience, you can create something warm and wonderful for yourself or as a gift.
Happy knitting! 🧶
Watch tutorial: