 by
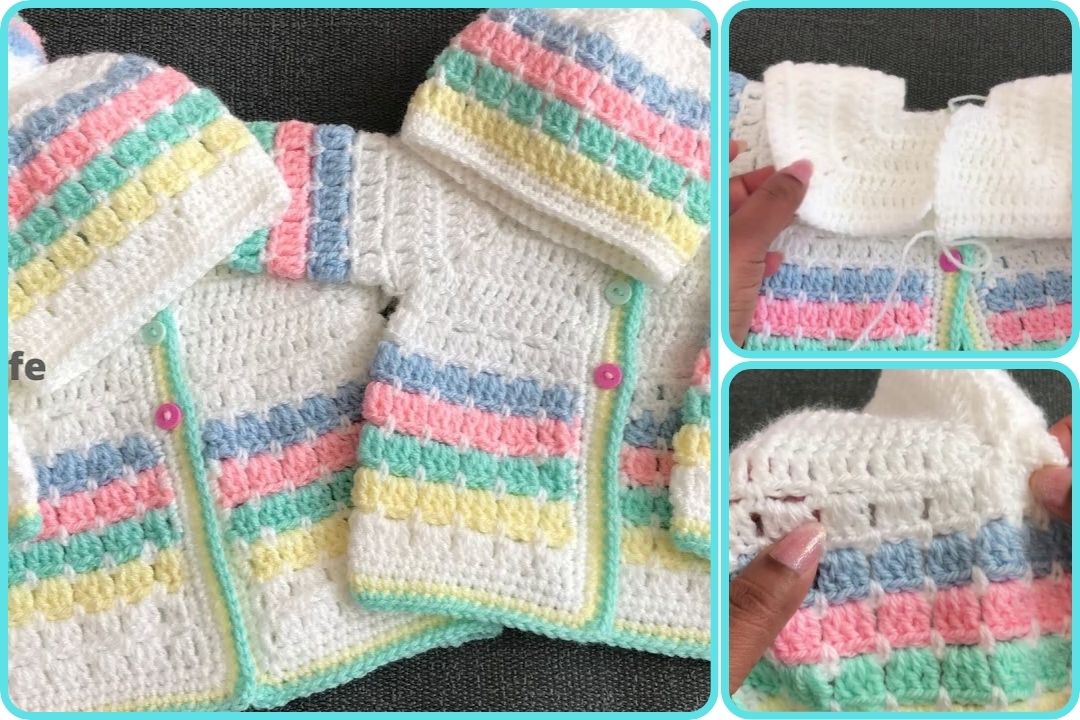
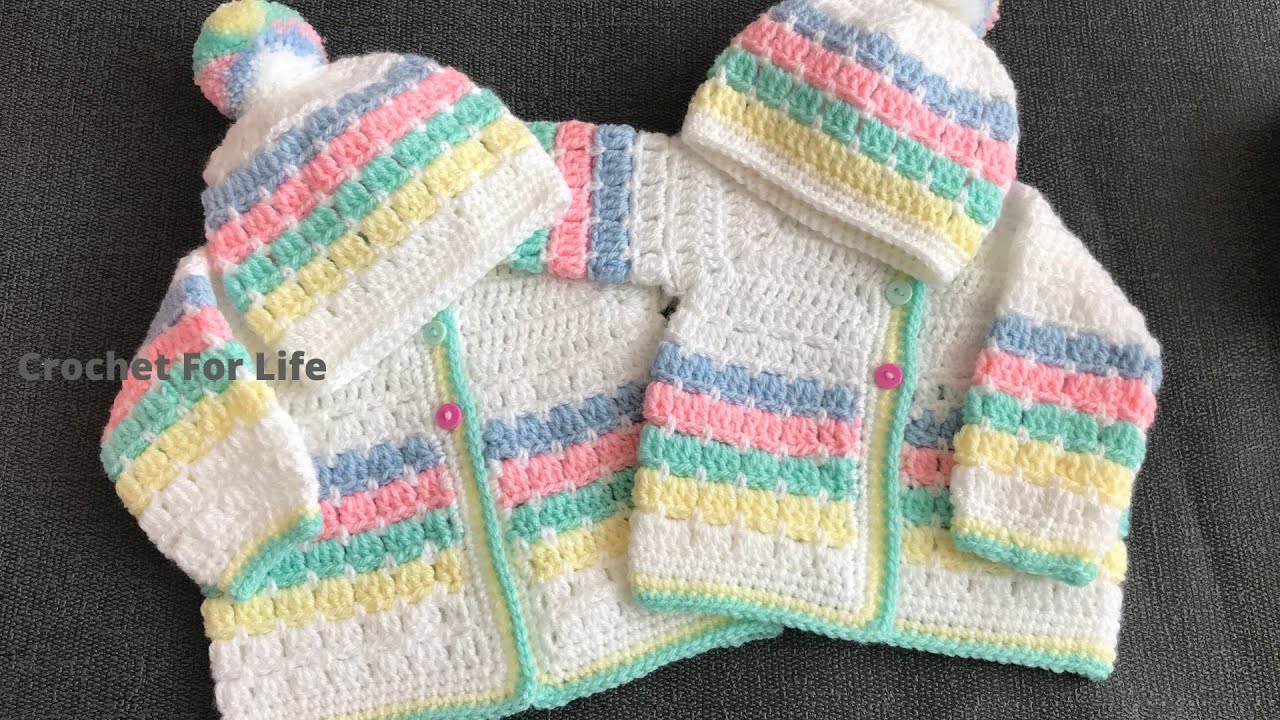
by Sure! Here’s a detailed guide on how to make a crochet baby cardigan that’s easy, fast, and perfect for beginners. This pattern is worked in one piece (top-down), so there’s minimal sewing and you can finish it quickly — often in just a few hours!

🧶 EASY & FAST CROCHET BABY CARDIGAN TUTORIAL
✅ Skill Level:
Beginner to Easy (you should know basic stitches: chain, single crochet, double crochet)
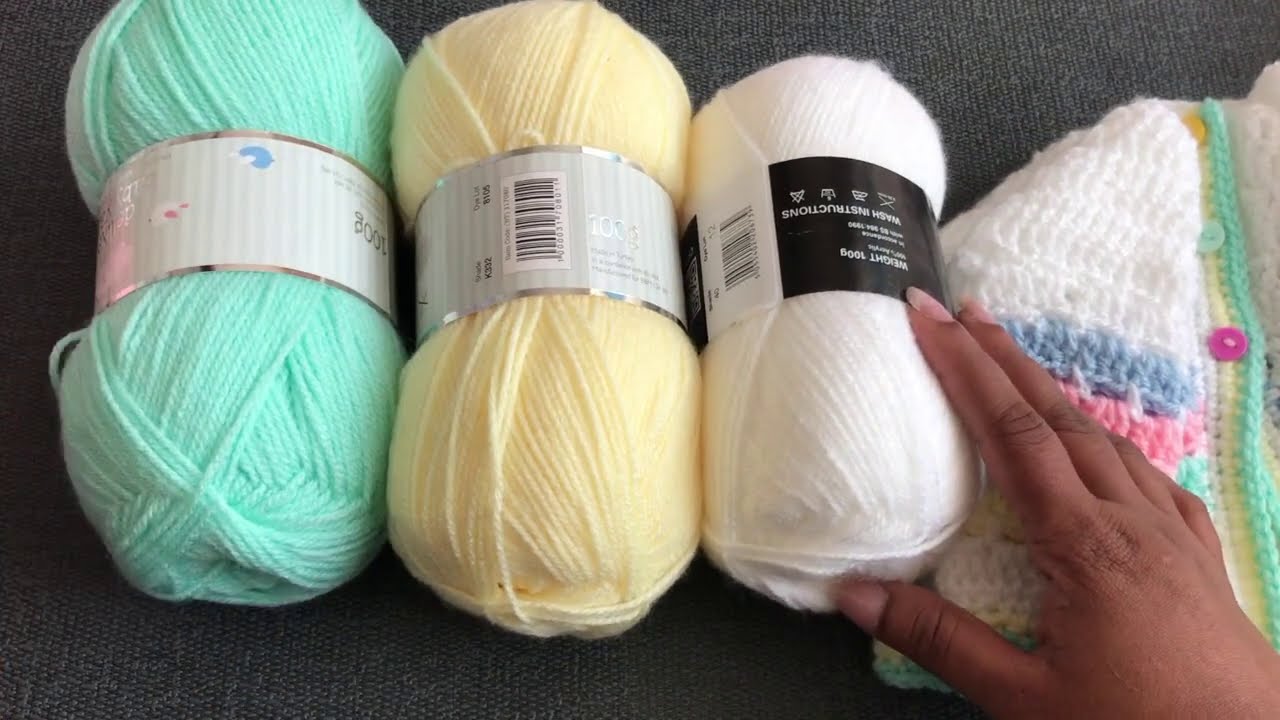
🧵 Materials Needed:
-
Yarn: DK (Light Worsted / #3) or worsted weight yarn (#4) – about 200g for a newborn to 6-month size
(Cotton or soft acrylic yarn recommended for babies) -
Hook: 4.0 mm (G/6) or 4.5 mm (7) depending on yarn and tension
-
Stitch Markers (optional, but helpful)
-
Scissors
-
Tapestry Needle
-
Buttons (3–5 small buttons, 1 cm size)
🧷 Crochet Stitches Used:
-
ch = chain
-
sc = single crochet
-
dc = double crochet
-
sl st = slip stitch
-
inc = increase (2 dc in the same stitch)
📏 Sizes:
This tutorial gives the 0–3 month size. To adjust, simply add rows to make it longer or start with a longer chain for wider sizes. Common baby cardigan sizes:
-
Newborn–3 months: chest ~16″, length ~9″
-
6–12 months: chest ~18″, length ~11″
✂️ Step-by-Step Instructions:
1️⃣ Yoke (Top Part)
You’ll crochet the cardigan top-down in rows, starting at the neckline.
💡 Foundation Chain:
-
Ch 52 (for newborn size)
-
Row 1: dc in the 4th ch from the hook, dc in each ch across (you’ll have 50 dc)
-
Turn your work.
2️⃣ Marking Raglan Increases (Dividing for Sleeves)
Row 2:
-
ch 2 (counts as first dc), dc in next 7 stitches
-
Place stitch marker (this is your first raglan point)
-
dc in next stitch (increase), ch 1, dc in same stitch again (this creates a “V”)
-
dc in next 10 stitches, place marker
-
dc, ch 1, dc (increase)
-
dc in next 12 stitches, place marker
-
dc, ch 1, dc
-
dc in next 10 stitches, place marker
-
dc, ch 1, dc
-
dc in remaining 8 stitches, turn
You’ve now marked the 4 points where you’ll increase to shape the yoke.
3️⃣ Continue Raglan Increases
-
Rows 3 to 10: Repeat the same pattern as Row 2
-
Always do dc, ch 1, dc in each ch-1 space from the previous row
-
dc in every other stitch
➡️ After about 10 rows, the piece should have taken a rectangular yoke shape with sections for front, sleeves, and back.
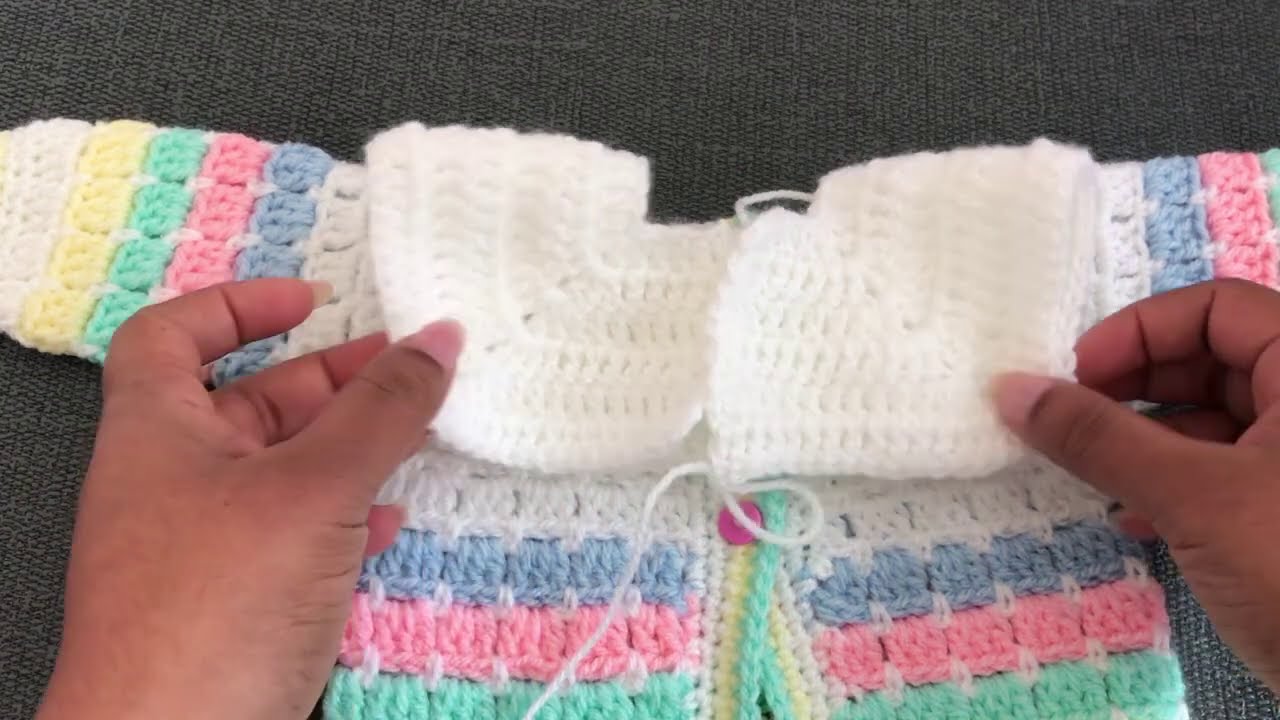
4️⃣ Separate for Body & Sleeves
Row 11:
-
Work dc across the front until you reach the first raglan ch-1 space
-
Skip all stitches for the sleeve, and jump directly to the next ch-1 space (armhole)
-
Continue dc across the back
-
Skip the second sleeve, and dc across the last front section
Now you have only the body on your hook — the sleeves are on hold.
5️⃣ Body of Cardigan
-
Rows 12–20 (or as long as you want): Work dc in each stitch across
-
Turn at the end of each row
➡️ You can add a ribbed border by switching to sc or hdc in BLO (back loop only) for the last 2 rows.
6️⃣ Sleeves (Optional or Short-Sleeve)
If you want short sleeves, you can leave them as is or just sc around the armholes for 2-3 rows.
For long sleeves:
-
Join yarn at underarm
-
Work in rounds around the armhole, using dc or hdc
-
Decrease 1 stitch every 2-3 rounds to taper the sleeve
-
Repeat until sleeve is desired length (about 5–6 inches for newborn)
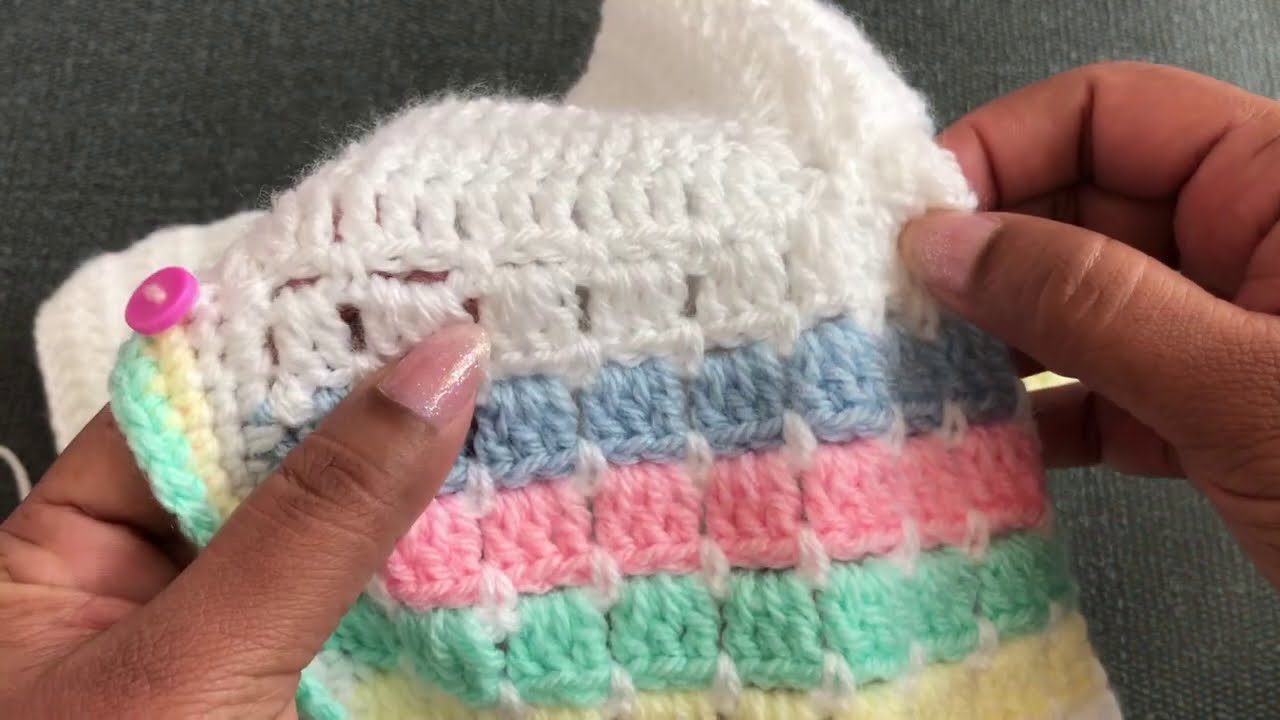
7️⃣ Neckline & Button Band
-
Work sc evenly around the neckline
-
For the button band (front opening edges), do 2 rows of sc
-
On one side, sew buttons
-
On the other side, create buttonholes by skipping 1–2 stitches and chaining 2 (repeat every few rows depending on how many buttons you want)
8️⃣ Finishing
-
Weave in all ends with a tapestry needle
-
Sew on buttons securely
-
Optional: add a decorative edging around sleeves and bottom using shell stitch or picot
🎀 Optional Embellishments
-
Crochet flower, bow, or applique
-
Contrast color for edging
-
Striped rows
🧼 Care Instructions
-
Use machine-washable yarn for easy care
-
Wash on gentle cycle and lay flat to dry
✅ Summary Pattern (Abbreviated Version)
Would you like a printable PDF version or a diagram/chart? I can also provide a video tutorial recommendation if you prefer to follow along visually.
Watch video: