 by
by Here’s a clear, detailed, beginner-friendly guide you can use for an article, school project, or blog post:
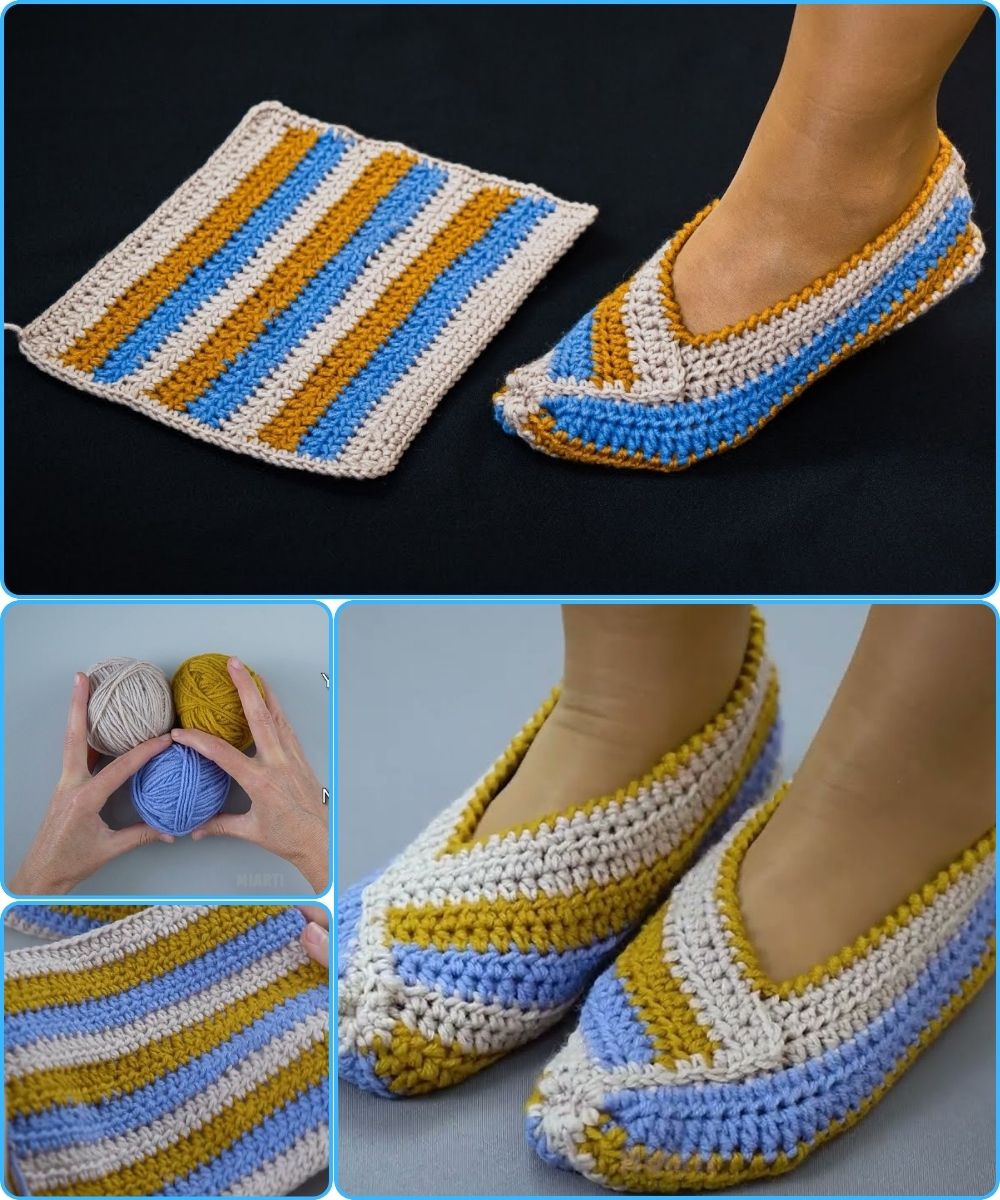
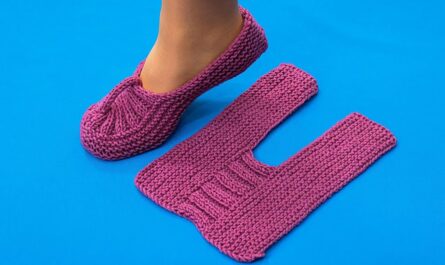
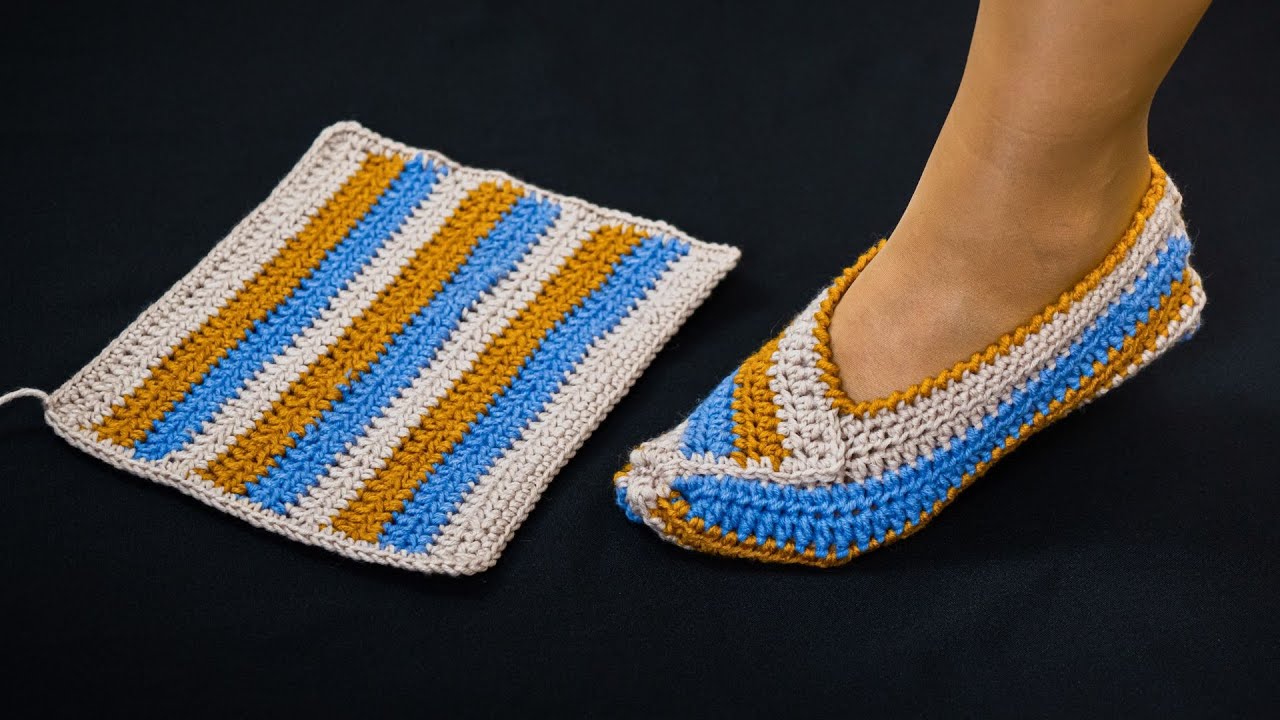
How to Make the Simplest Crochet Slippers from a Rectangle
Crochet slippers made from a rectangle are one of the easiest and fastest crochet projects, perfect for beginners. They require only basic stitches, simple shaping, and minimal measuring. Instead of complex patterns, you start with a plain rectangle and fold it into a cozy slipper shape.
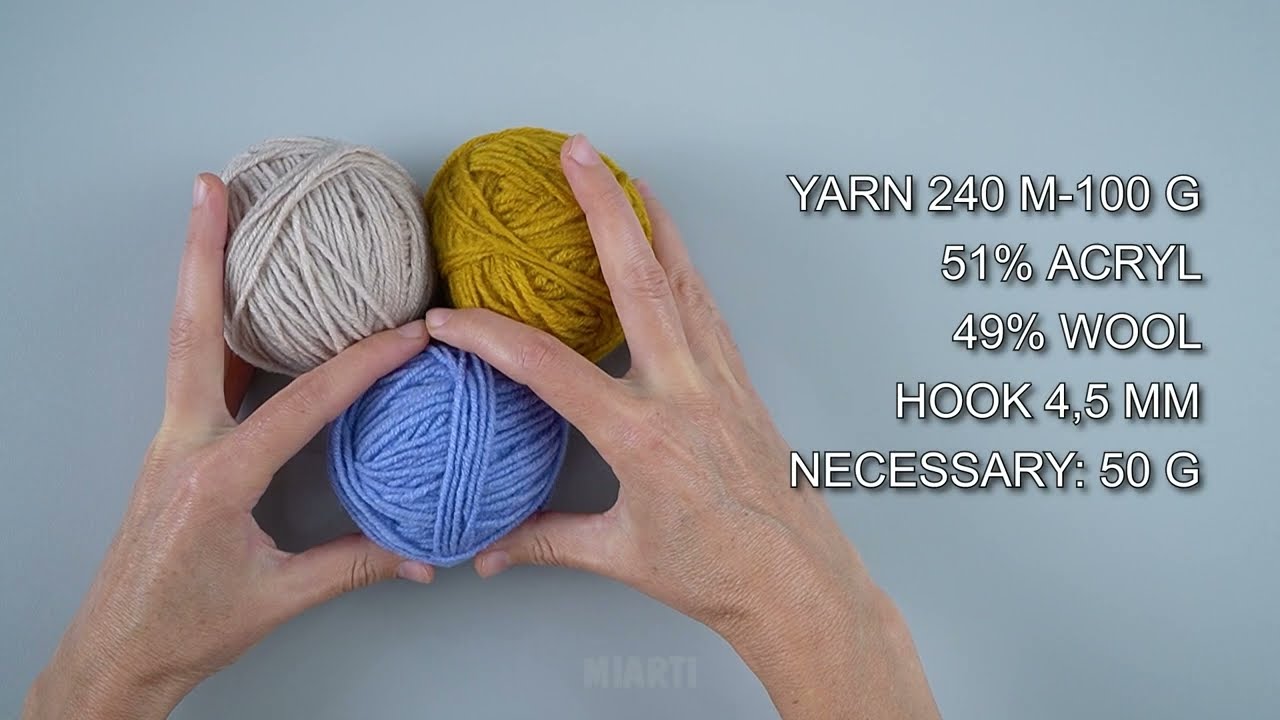
Materials Needed
-
Medium-weight yarn (worsted weight works best)
-
Crochet hook (usually 4.5–5.5 mm, depending on yarn)
-
Yarn needle
-
Scissors
-
Measuring tape (optional but helpful)
Basic Skills Required
-
Chain stitch (ch)
-
Single crochet (sc) or half double crochet (hdc)
-
Slip stitch (sl st)
-
Basic sewing with a yarn needle
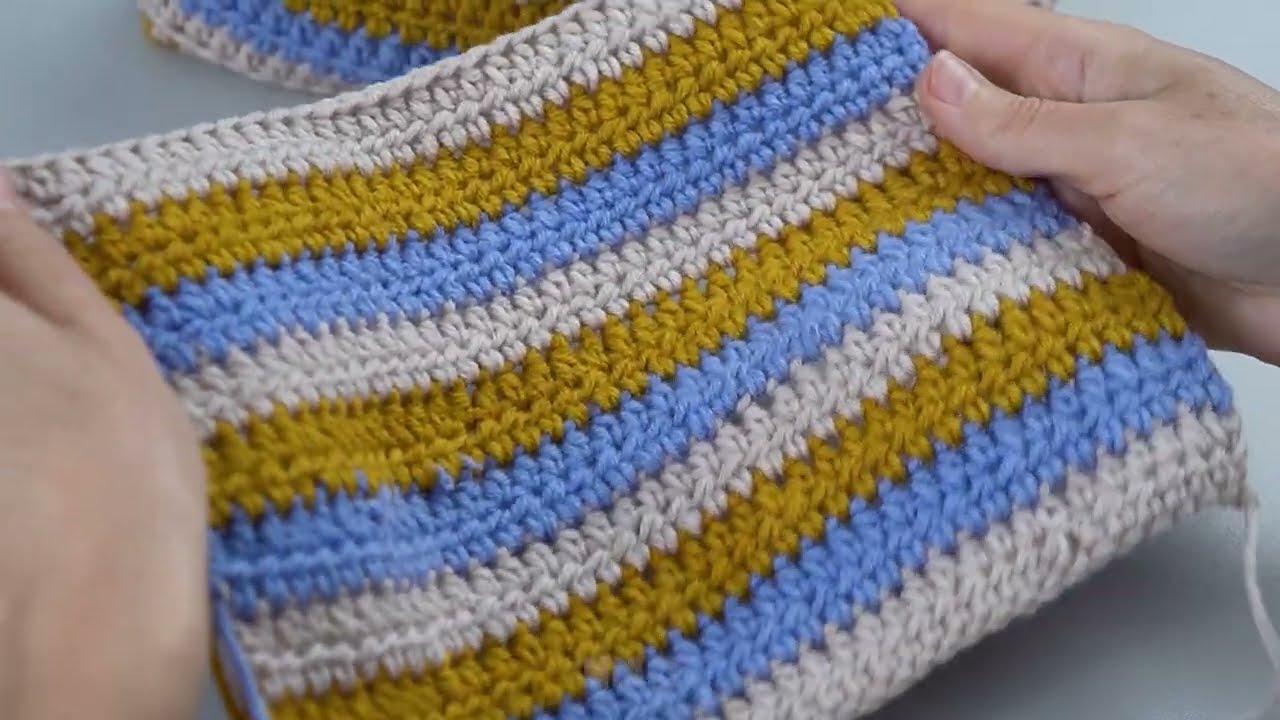
Step 1: Crochet the Rectangle
Begin by making a foundation chain that matches the length of your foot from heel to toe. For an average adult foot, this is usually between 24–26 cm (9.5–10.5 inches).
Once your chain is long enough:
-
Turn your work and crochet into the second chain from the hook.
-
Continue using single crochet or half double crochet across the row.
-
Chain one and turn at the end of each row.
-
Repeat rows until the rectangle is wide enough to wrap comfortably around your foot (about 10–12 cm / 4–5 inches).
This rectangle will form the base and sides of the slipper.
Step 2: Fold the Rectangle into Shape
Lay the rectangle flat. Now fold it:
-
Fold the rectangle in half lengthwise, so the short ends meet.
-
The folded edge will become the sole, and the open edge will become the top of the slipper.
You should now see a basic slipper shape forming.

Step 3: Seam the Heel
Using a yarn needle:
-
Sew up one short end of the folded rectangle.
-
This seam forms the heel of the slipper.
-
Secure the yarn and weave in the ends.
For a neater look, use a whip stitch or mattress stitch.
Step 4: Shape the Toe
On the opposite open end:
-
Pinch the corners inward toward the center.
-
Sew them together to create a rounded toe shape.
-
Adjust the seam to make the slipper snug but comfortable.
This step gives the slipper its classic shape.
Step 5: Finish and Customize
Turn the slipper right-side out and try it on. You can now:
-
Add a decorative border around the opening
-
Crochet a cuff for warmth
-
Attach buttons, bows, or pom-poms
-
Use slip-resistant fabric or puff paint on the sole
Repeat the process to make the second slipper.
Why This Method Is Perfect for Beginners
-
No complicated shaping
-
Minimal counting
-
Quick to finish
-
Easy to resize
-
Uses simple stitches only
This rectangle slipper method is ideal for learning crochet construction while creating something practical and cozy.
If you want, I can also:
-
Simplify this for kids
-
Turn it into a step-by-step pattern
-
Add size adjustments (kids, teens, adults)
-
Rewrite it for a school assignment or blog
Watch video: