 by
by Here is a clear, detailed, and beginner-friendly explanation you can use for an article, blog post, or project description:

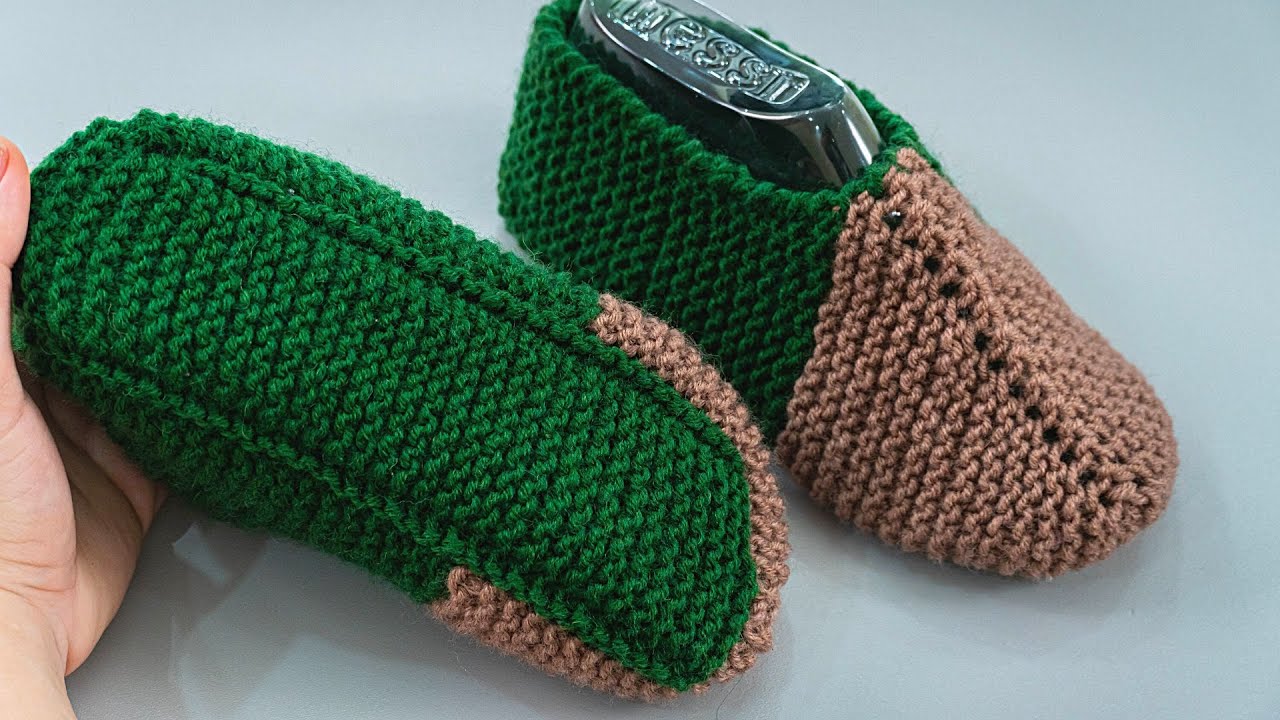
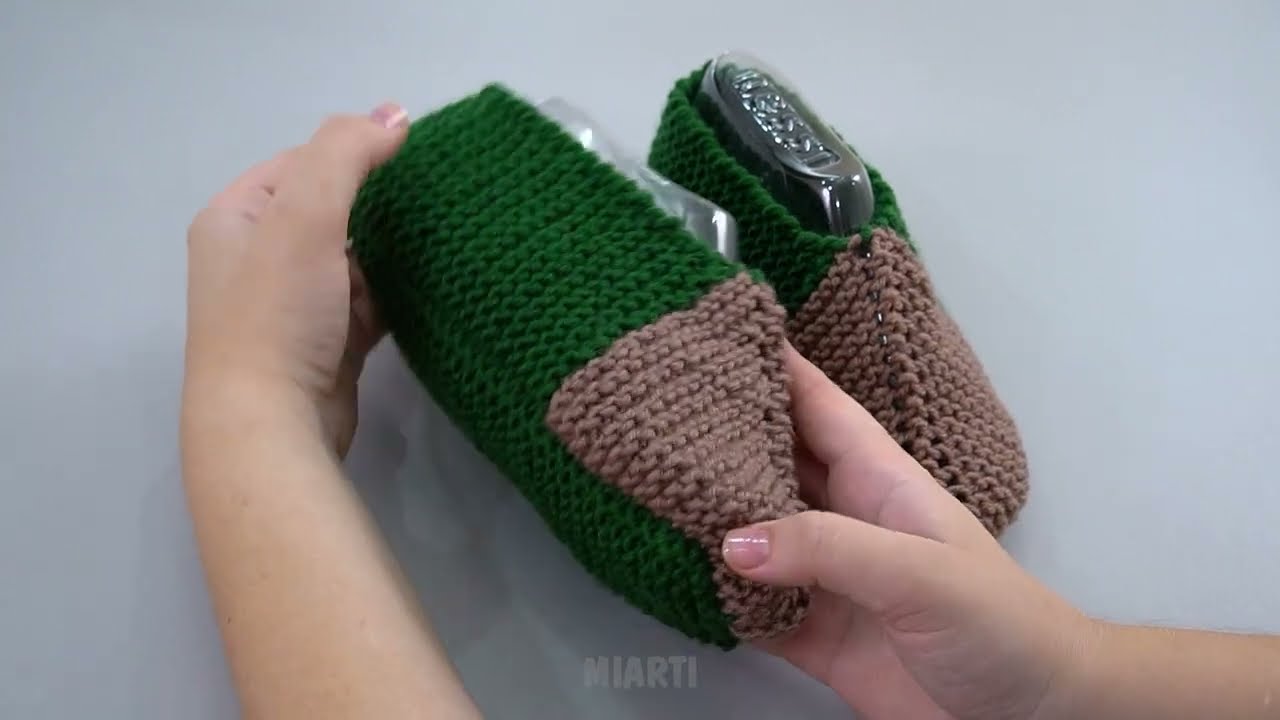
How to Make These Knitted Slippers: Simple, Comfortable, and Long-Lasting
These knitted slippers are easy to make, even for beginners, and they are designed to be warm, comfortable, and durable. With basic knitting skills and a little time, you can create slippers that will serve for a long time and make a perfect handmade gift or cozy home accessory.
Materials Needed
To make these slippers, you will need:
-
Medium or thick yarn (wool or wool blend works best for warmth and durability)
-
Knitting needles suitable for your yarn size (usually 4–6 mm)
-
Scissors
-
A yarn needle for sewing seams
-
Optional: non-slip sole material or fabric glue for extra grip
Choosing good-quality yarn is important. Strong yarn helps the slippers keep their shape and last longer, even with regular use.
Basic Knitting Skills Required
This slipper pattern is very simple and only requires basic knitting techniques:
-
Casting on stitches
-
Knit stitch
-
Purl stitch
-
Binding off stitches
Because of this, the slippers are perfect for beginners who want to practice their skills while making something useful.
Step-by-Step Process
-
Cast On
Start by casting on the required number of stitches, depending on the slipper size. The slippers are usually knitted flat, which makes the process easier. -
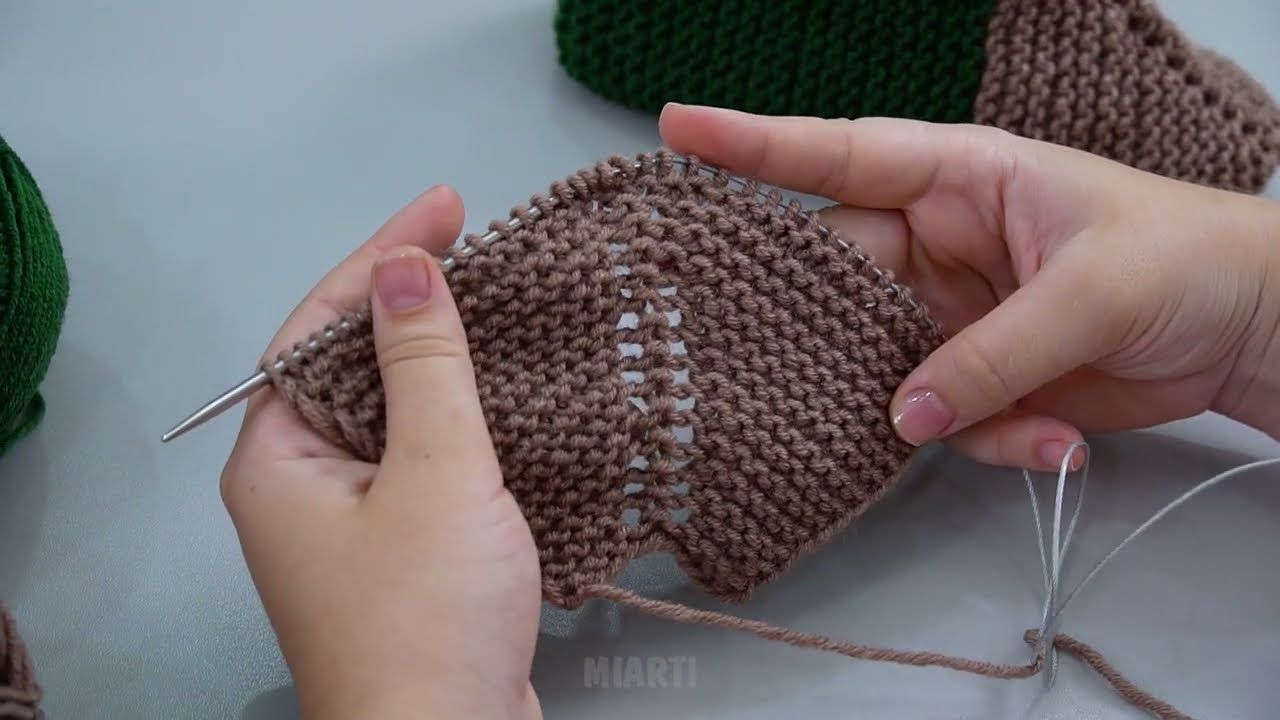
Knit the Sole
Knit back and forth in simple rows to form the sole. Using garter stitch (knitting every row) makes the sole thicker and more durable. -
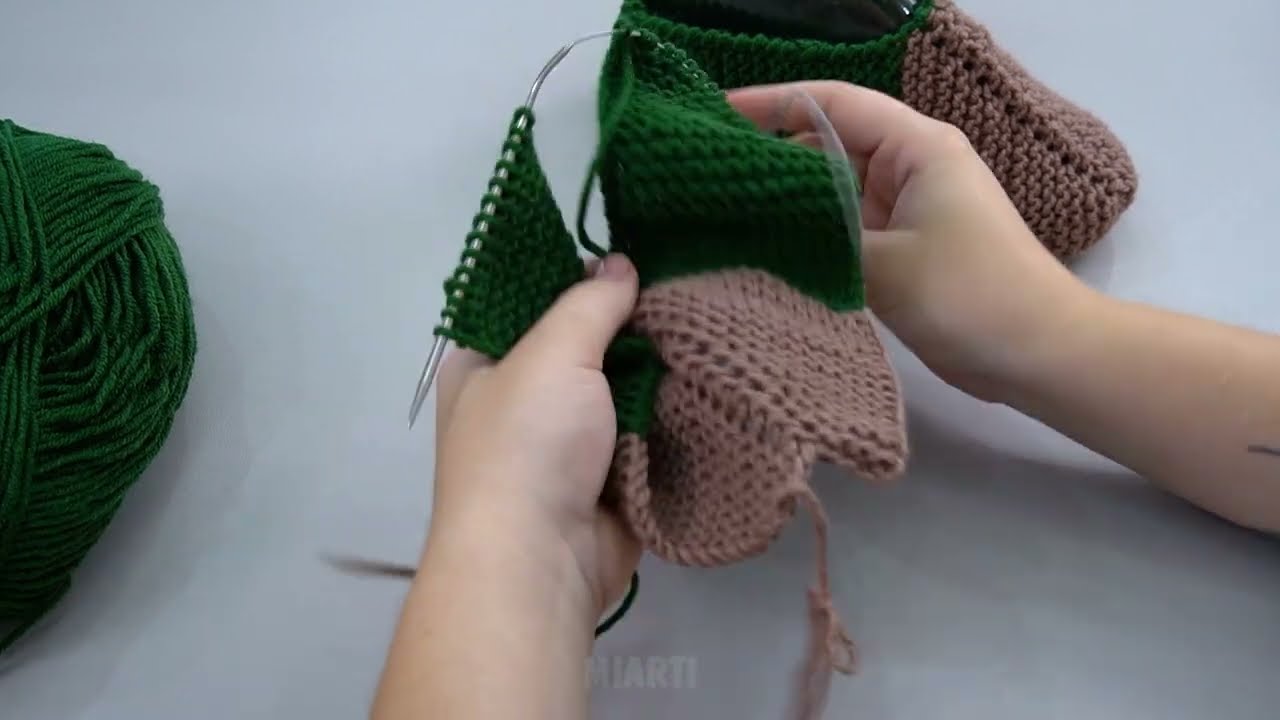
Shape the Slipper
After the sole is finished, continue knitting to create the upper part of the slipper. Simple increases or decreases help shape the slipper so it fits comfortably around the foot.
-
Bind Off
Once the desired length is reached, bind off the stitches neatly. -
Assemble the Slipper
Fold the knitted piece and sew the edges together using a yarn needle. This forms the heel and toe of the slipper. -
Finishing Touches
Weave in all loose ends. If desired, you can add decorations like buttons or pom-poms. For extra safety, apply a non-slip layer to the sole.
Why These Slippers Last a Long Time
-
Thick yarn provides strength and warmth
-
Simple stitch patterns reduce wear and stretching
-
Seam construction makes them sturdy
-
Easy repairs can be done if needed
Final Result
The finished slippers are soft, warm, and comfortable. They are perfect for wearing at home, especially during cold seasons. Because they are knitted simply and carefully, they will keep their shape and serve you well for a long time.
If you want, I can also:
-
Simplify this for kids or beginners
-
Turn it into a school project write-up
-
Add measurements for different sizes
-
Rewrite it in a more creative or professional style
Watch video: