 by
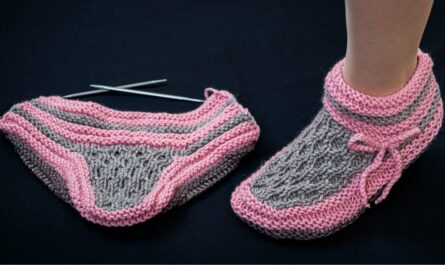
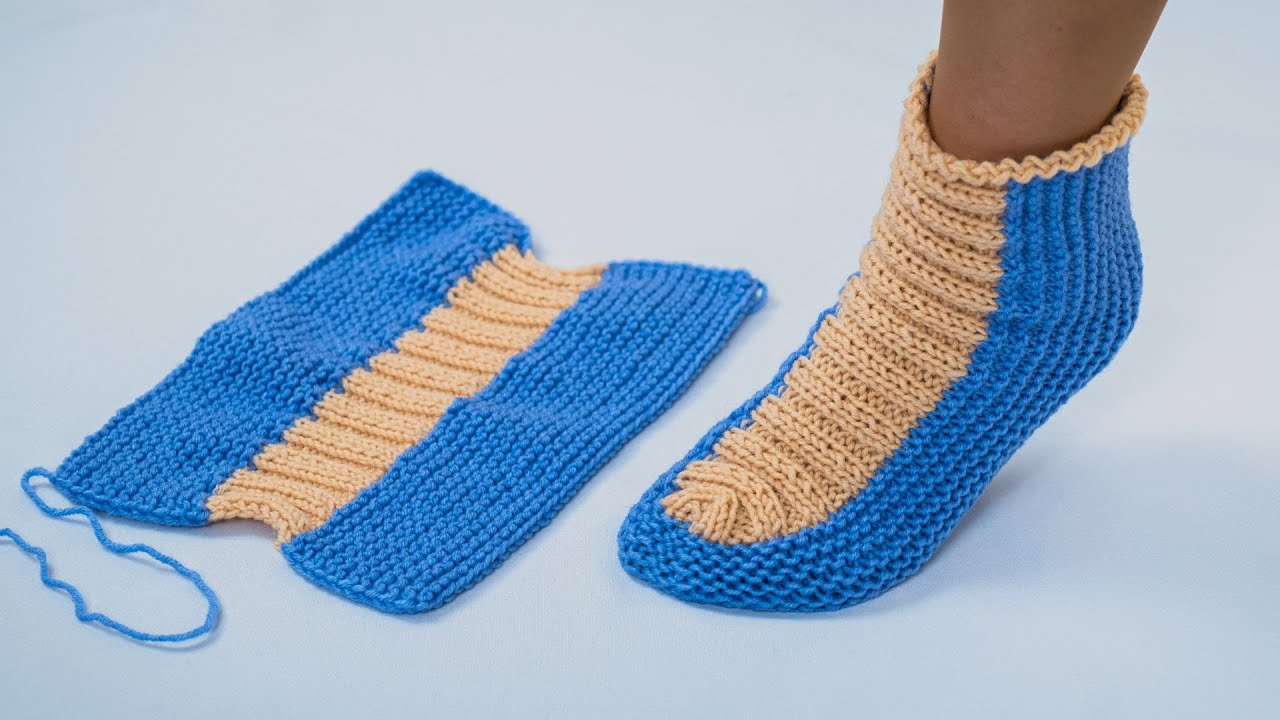
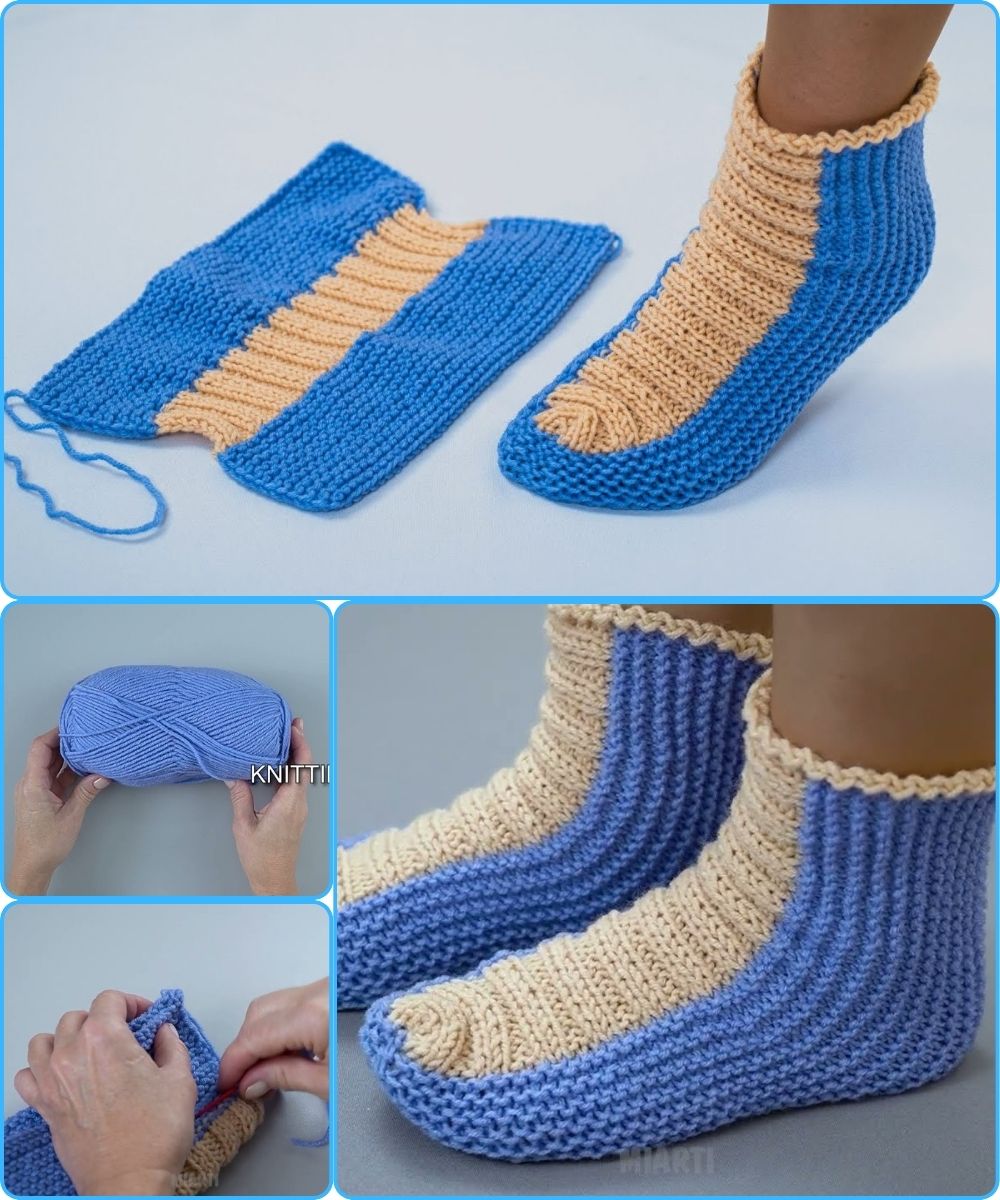
by Absolutely! Let’s break down how to make simple one-swatched knitted socks in an easy, detailed, step-by-step way. I’ll keep it beginner-friendly but clear enough so you can follow without confusion.
Materials Needed
-
Yarn: Fingering or sock-weight yarn (usually 75% wool, 25% nylon for durability).
-
Needles: Double-pointed needles (DPNs) or circular needles for magic loop; size usually 2.5–3 mm depending on yarn.
-
Tapestry needle: For weaving in ends.
-
Scissors
-
Measuring tape
Step 1: Take Measurements
To make socks that fit comfortably:
-
Foot length: Heel to tip of toes
-
Foot circumference: Around the widest part of the foot (usually around the ball of the foot)
-
Calf circumference: Optional if making crew-length socks
Step 2: Cast On
-
Use a long-tail cast-on for stretchiness.
-
Cast on around 56–64 stitches (adjust depending on size and gauge).
-
Join in the round carefully, making sure not to twist stitches.
Step 3: Knit the Cuff
-
Knit 1×1 ribbing (knit 1, purl 1) or 2×2 ribbing for elasticity.
-
Length: 2–3 inches for ankle socks; 4–6 inches for crew socks.
Step 4: Knit the Leg
-
Continue in stockinette stitch (knit every stitch in the round) until the sock reaches the desired length from cuff to heel.
-
This is the fun part—just knit in rounds!
Step 5: Heel Flap
-
Divide stitches: Put half the stitches on one needle for the heel flap (usually 28–32 stitches for a standard sock).
-
Work back-and-forth rows (not in the round).
-
Common pattern:
-
Row 1: Slip 1, knit across
-
Row 2: Slip 1, purl across
-
Repeat until heel flap is about 2–2.5 inches long or roughly half the foot length.
-
Step 6: Turn the Heel
-
Work short rows to shape the heel:
-
Knit across part of the heel flap
-
Turn work
-
Purl back across part
-
Continue decreasing at the center until a cup forms
-
Step 7: Pick Up Stitches for the Gusset
-
Pick up stitches along the sides of the heel flap.
-
Resume knitting in the round, incorporating these new stitches with the remaining foot stitches.
-
You now have gusset stitches, which help the sock fit snugly around the instep.
Step 8: Knit the Foot
-
Knit in rounds until the foot measures about 2 inches less than the total foot length (so there’s room for the toe).
Step 9: Toe Shaping
-
Decrease gradually to shape the toe:
-
Round 1: Knit 2 together at start and end of each needle
-
Round 2: Knit plain
-
Repeat until around 12–16 stitches remain.
-
-
Use Kitchener stitch to graft toe stitches together for a seamless finish.
Step 10: Finishing
-
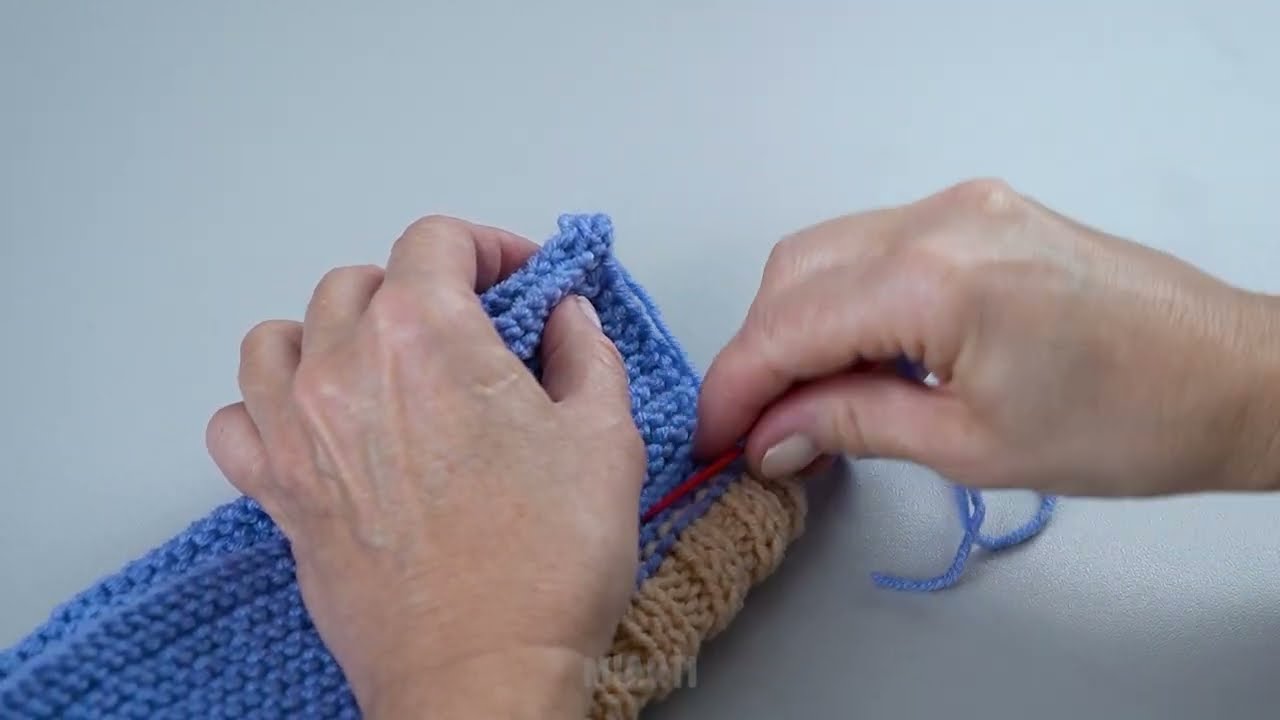
Weave in all yarn ends with a tapestry needle.
-
Block lightly if desired (optional, helps smooth stitches).
Tips for Easy Knitting
-
Use self-striping yarn for fun patterns without changing colors.
-
Use stitch markers to mark the start of rounds.
-
Practice short-row heels or afterthought heels if the traditional heel seems tricky.
If you want, I can also make a super-simple “one-swatch” pattern template that lets you knit one sock, measure, then mirror it to make the second sock—perfect for beginners who want stress-free sizing. It’s like a “plug-and-play” sock recipe.
Do you want me to make that template?
Watch video: