 by
by Absolutely! Let’s go step by step. I’ll write a detailed beginner-friendly guide on how to make knitted slippers with one swatch, including materials, techniques, and a simple pattern. These slippers are comfy, customizable, and use one rectangular swatch that’s folded and seamed. Perfect for beginners.
Materials Needed
-
Yarn: Worsted weight (medium/4) yarn – around 100–150g (depending on size). Wool or wool blend is ideal for warmth.
-
Needles: US size 8–9 (5–5.5 mm) knitting needles. Straight or circular needles, depending on your preference.
-
Tapestry needle: For weaving in ends and sewing seams.
-
Scissors
-
Measuring tape
Optional: Non-slip fabric paint or grip pads for the soles.
Gauge
Gauge isn’t critical for this pattern since it’s adjustable, but it helps to get a good fit:
-
Stockinette stitch: 18 stitches x 24 rows = 4” (10 cm) square.
You can adjust the size by adding or subtracting stitches and rows.
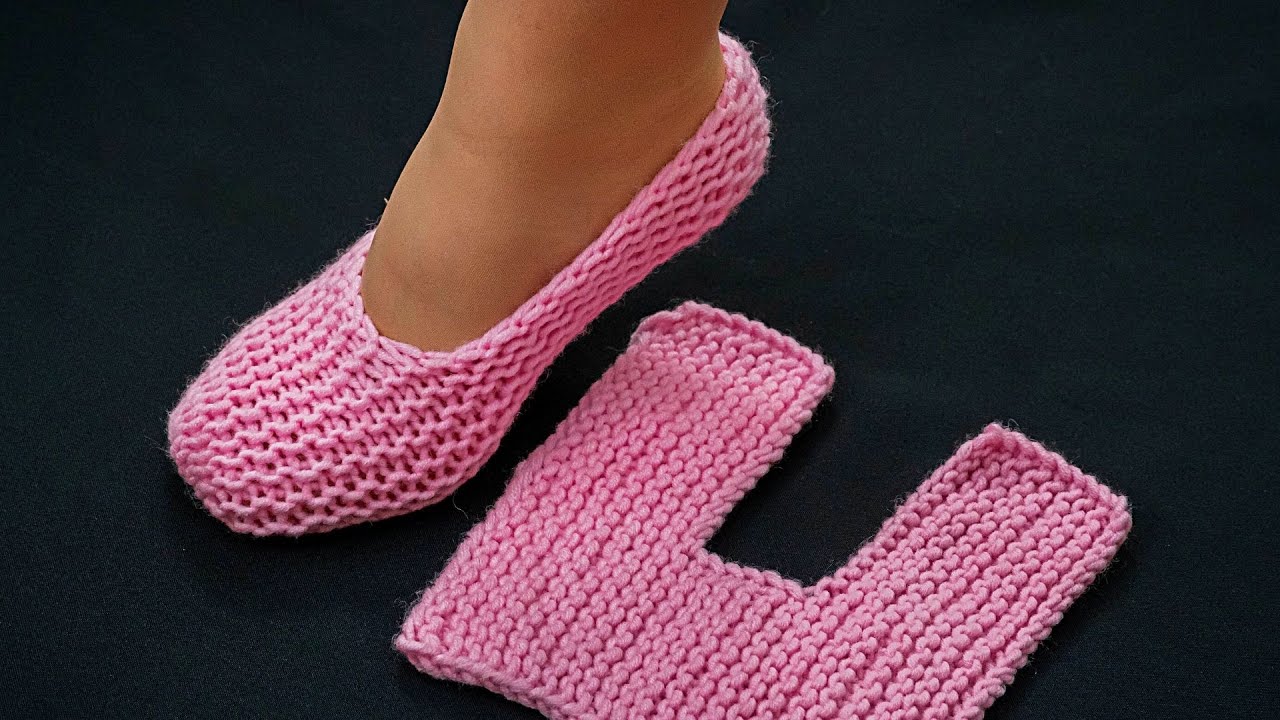
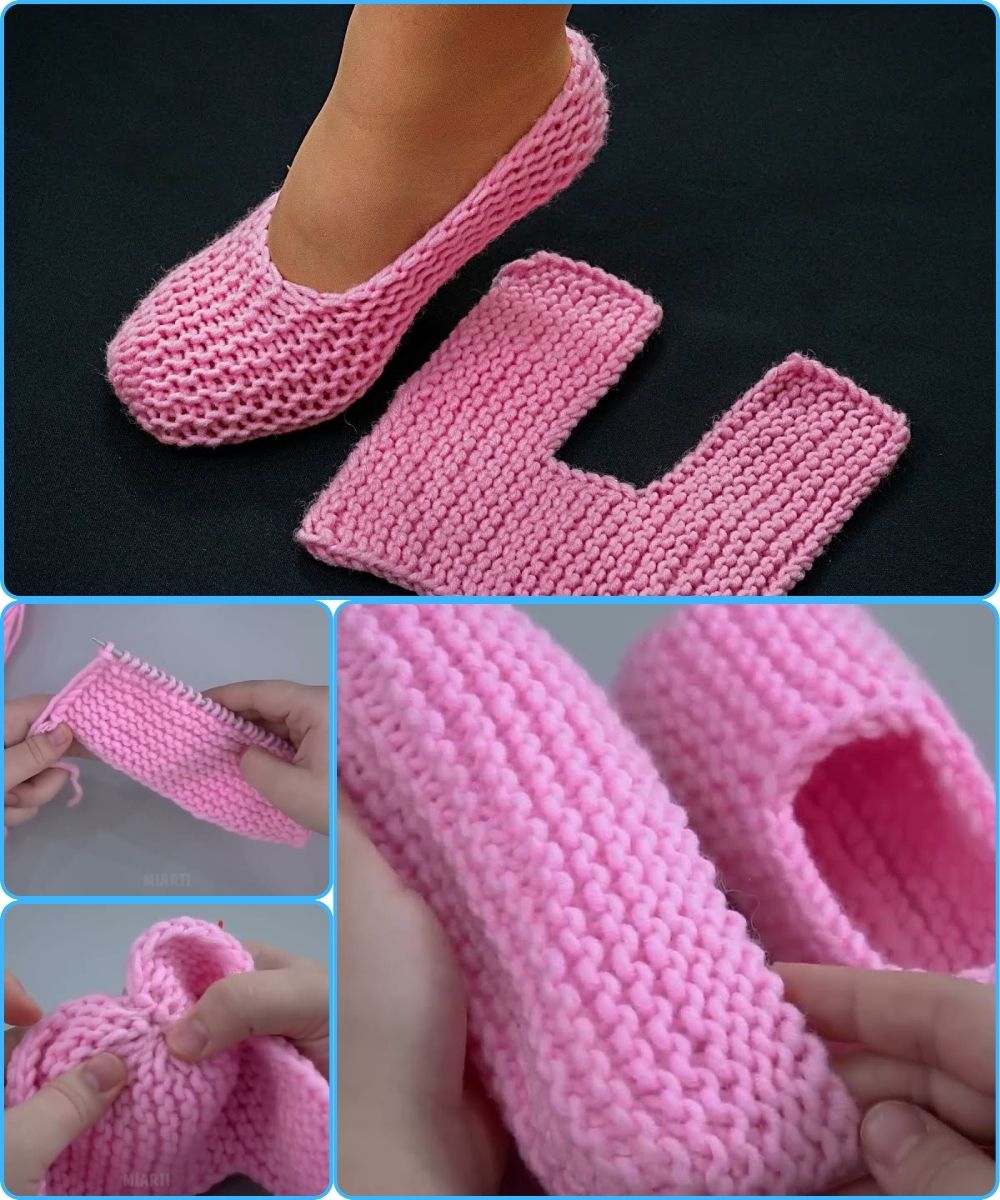
Step 1: Make a Swatch
-
Cast on 40–50 stitches, depending on foot width. For a small adult, 40 stitches is usually enough.
-
Knit in stockinette stitch (knit one row, purl one row) until the swatch is about twice the length of your foot. For an adult, aim for 9–10 inches (23–25 cm).
-
Bind off loosely.
Tip: You can also use garter stitch (knit all rows) for a more stretchy, cozy texture.
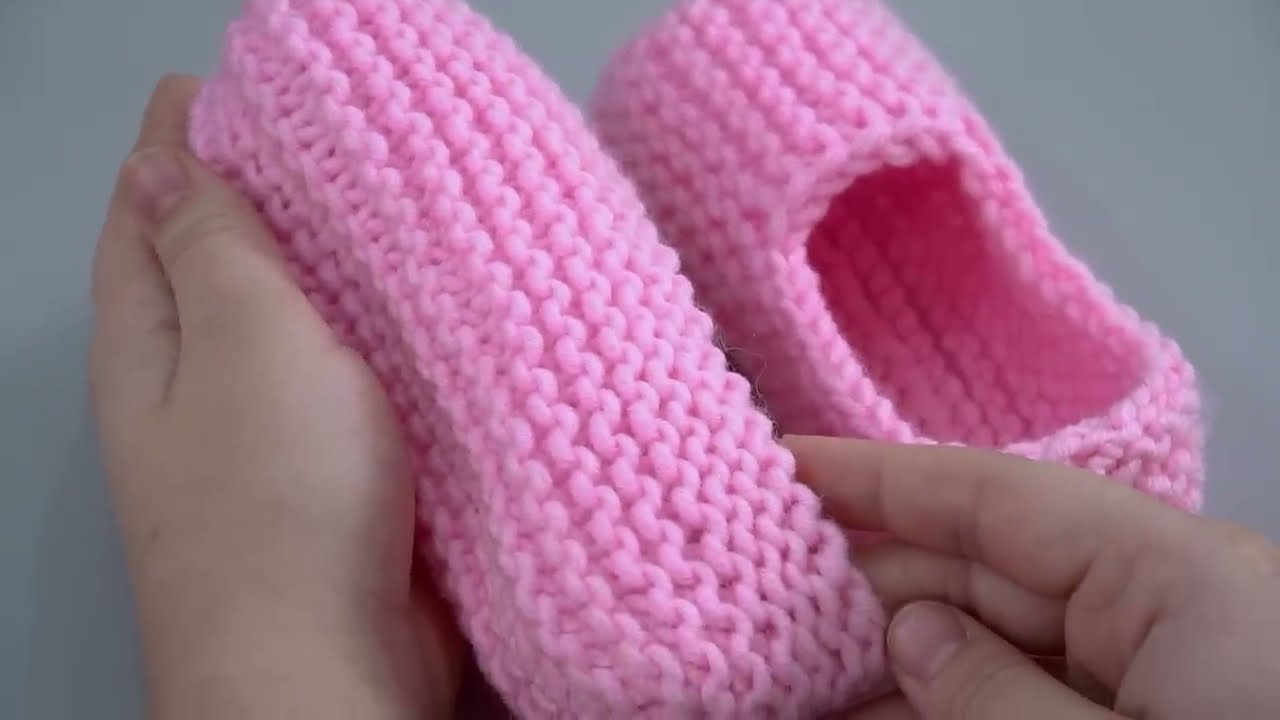
Step 2: Shape the Slippers
This slipper is made by folding the swatch and seaming the sides.
-
Lay the swatch flat with the right side facing down.
-
Fold the swatch so that the cast-on edge meets the bind-off edge, creating a rectangle twice the width of your foot.
-
Fold the rectangle in half widthwise to find the center of the top of the foot.
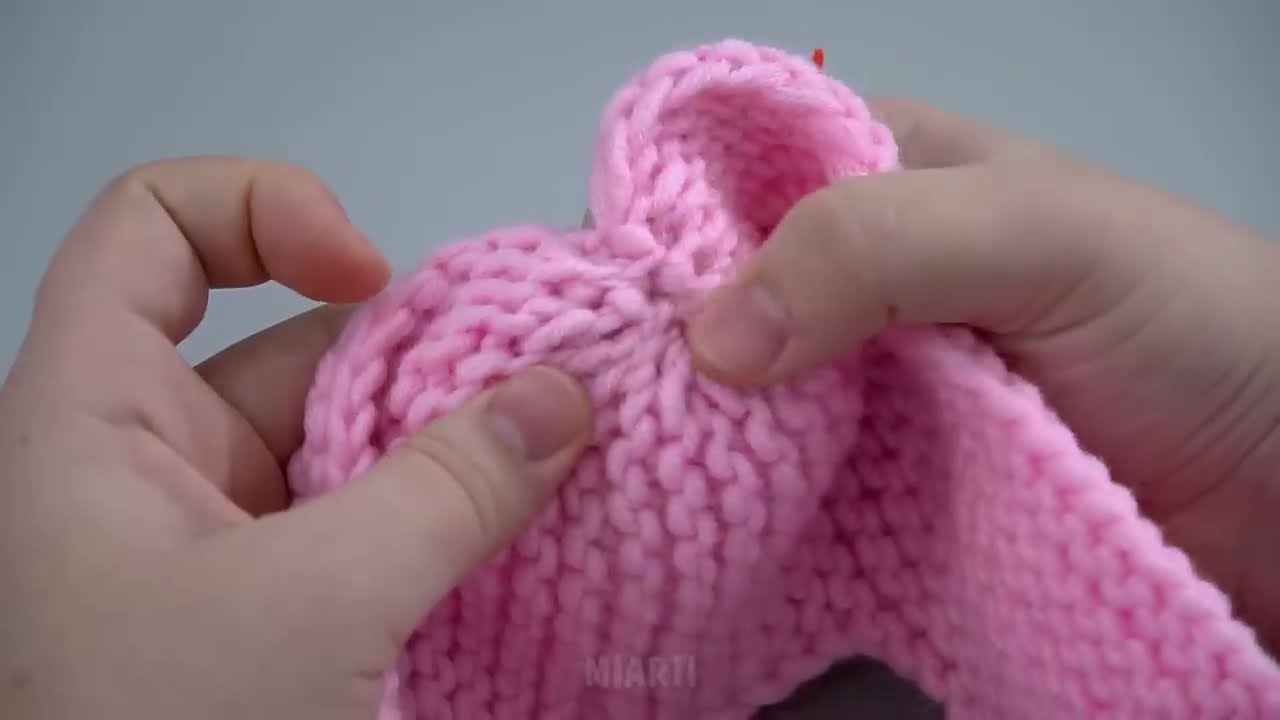
Step 3: Sew the Slipper
You’ll seam in two steps:
A. Side Seams (Heel and Sides)
-
With the swatch folded lengthwise, seam from the cast-on edge to the center of the fold on each side. This forms the heel.
-
You can use a whip stitch or mattress stitch for a neat finish.
B. Top Seam (Toe)
-
Fold the slipper so that the side seams are on the bottom.
-
Bring the toe edges together and seam across the top to shape the front of the slipper.
-
Adjust for fit before sewing fully: it should be snug but not tight.
Step 4: Finishing Touches
-
Weave in all ends neatly with a tapestry needle.
-
If desired, add non-slip dots to the bottom of the slipper with fabric paint.
-
Optionally, add a cuff by folding over the top edge or knitting a short ribbed band and sewing it on.

Tips for Beginners
-
Use wool or wool blends; they’re forgiving and stretch nicely.
-
Try on as you go to adjust length or width before seaming.
-
This technique works for kids and adults — just adjust stitch count and swatch length.
-
Experiment with color blocks or stripes on your swatch for a fun effect.
Optional Variation: Ribbed Cuff
-
Pick up stitches along the top edge of the slipper.
-
Knit in k1, p1 rib for 1–2 inches.
-
Bind off loosely.
-
This adds elasticity and keeps slippers snug on the ankle.
These slippers are super beginner-friendly because you only knit one simple swatch and then sew it into shape. No complex shaping or pattern repeats needed.
If you want, I can also make a simple chart with exact stitch counts and measurements for small, medium, and large sizes, so you can just follow it like a recipe. It’ll make the process even easier.
Watch tutorial: