 by
by Here’s a clear, detailed, beginner-friendly guide on How to Make Easy Crochet Granny Squares Slippers. This is written as an original, simple pattern you can follow step by step.
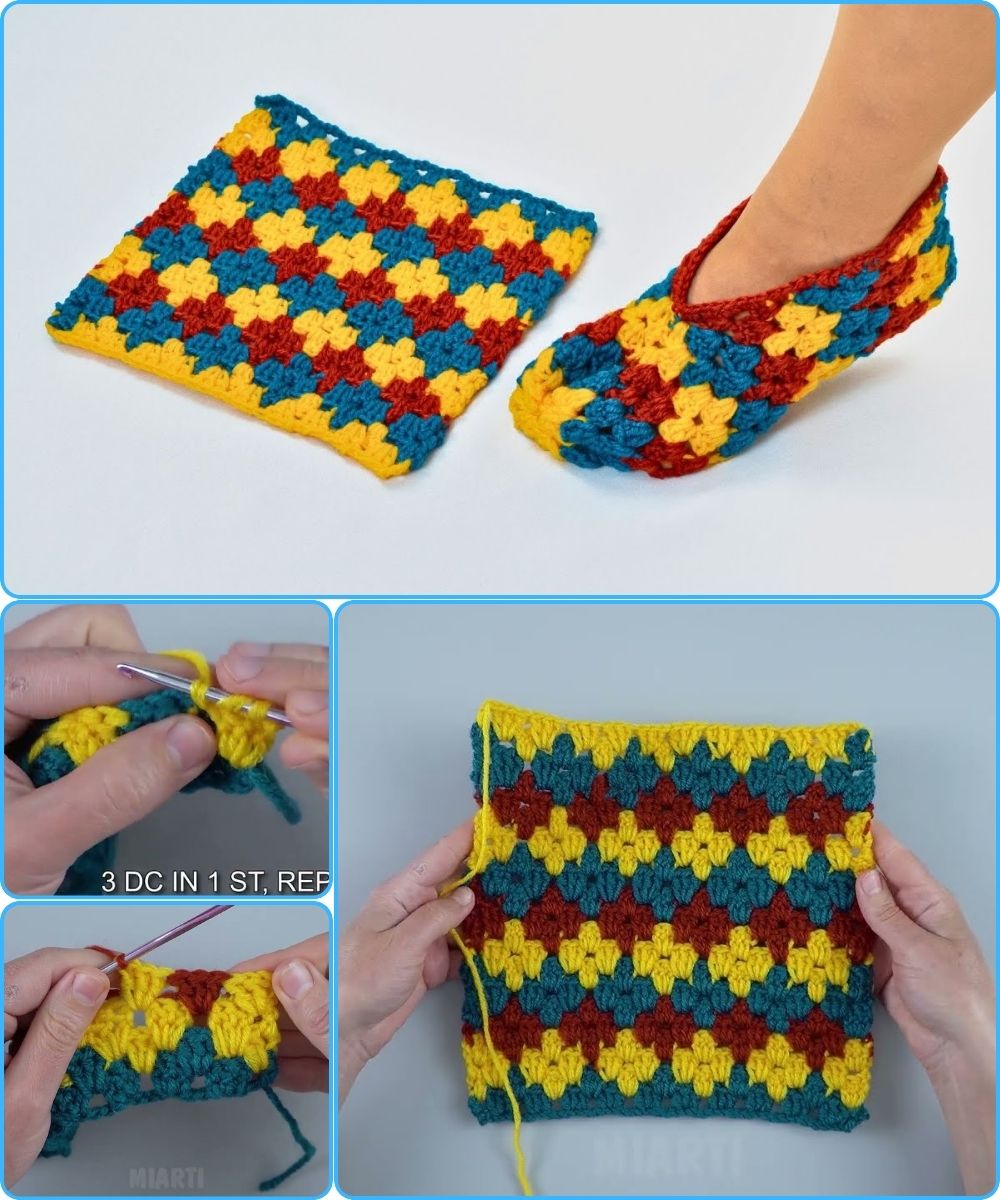
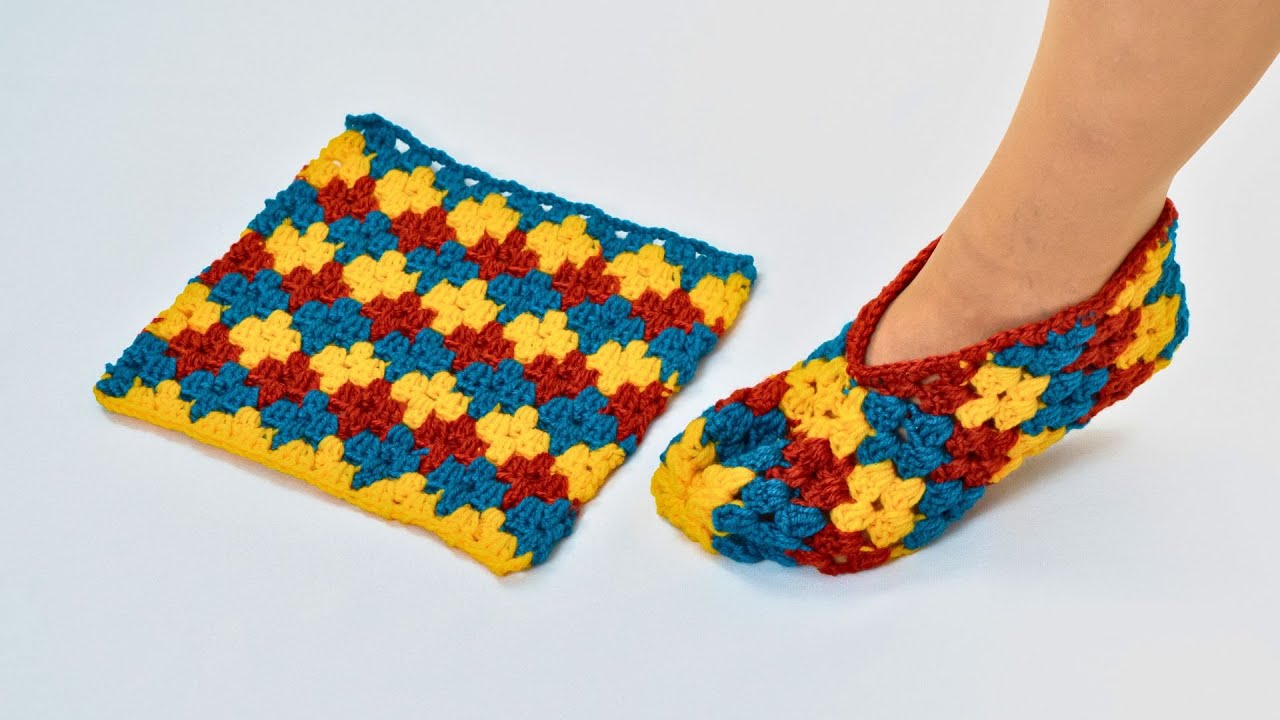
How to Make Easy Crochet Granny Squares Slippers
Crochet granny square slippers are cozy, colorful, and perfect for beginners. They are made by crocheting simple granny squares and then joining them together to form slipper shapes. You can customize the colors, size, and thickness to make them just the way you like.
Materials Needed
-
Medium-weight yarn (worsted weight #4)
-
About 150–200 grams total
-
You can use one color or multiple colors
-
-
Crochet hook (usually 5.0 mm / H-8)
-
Yarn needle (for sewing pieces together)
-
Scissors
-
Optional: non-slip fabric or puff paint for soles

Crochet Abbreviations (US Terms)
-
ch – chain
-
sl st – slip stitch
-
sc – single crochet
-
dc – double crochet
-
sp – space
-
rnd – round
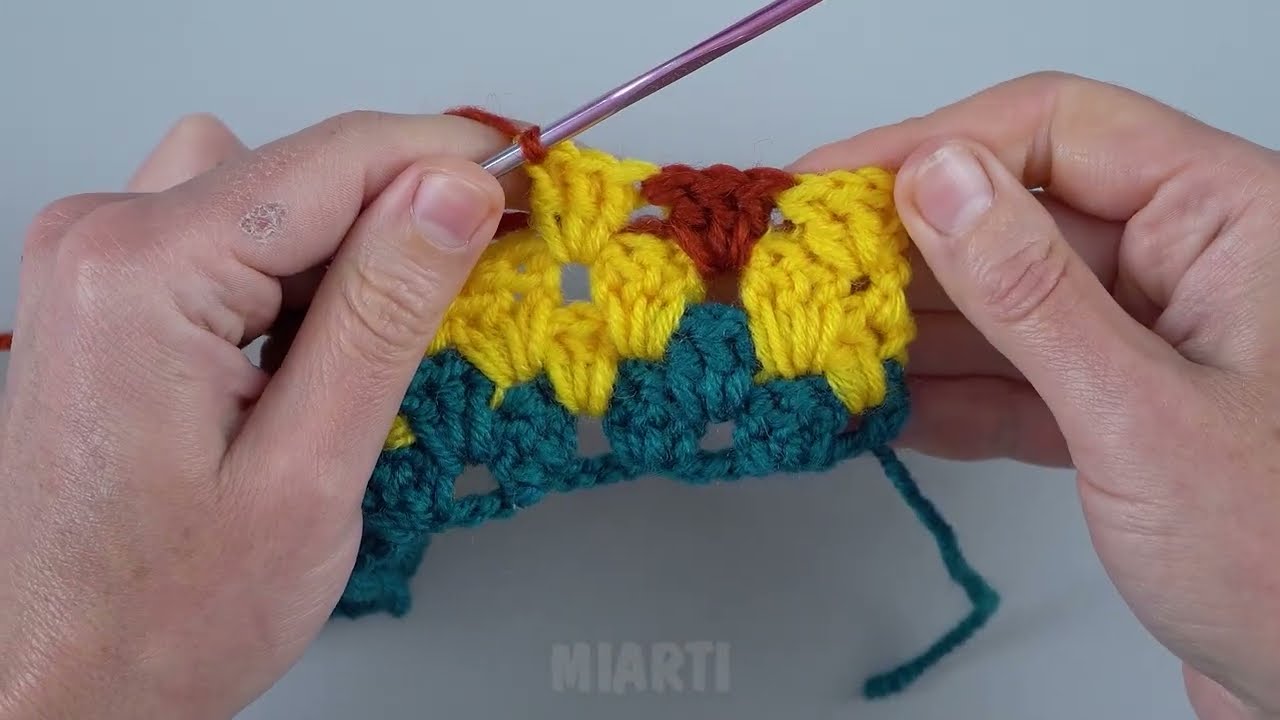
Step 1: Make the Granny Squares
Each slipper usually needs 3–4 granny squares, depending on foot size.
Basic Granny Square Pattern
-
Start
-
Make a magic ring or chain 4 and join with a sl st to form a ring.
-
-
Round 1
-
Ch 3 (counts as first dc)
-
2 dc into the ring
-
Ch 2
-
3 dc, ch 2 into the ring (repeat 3 times)
-
Join with sl st to the top of ch 3
-
You should have 4 corners
-
-
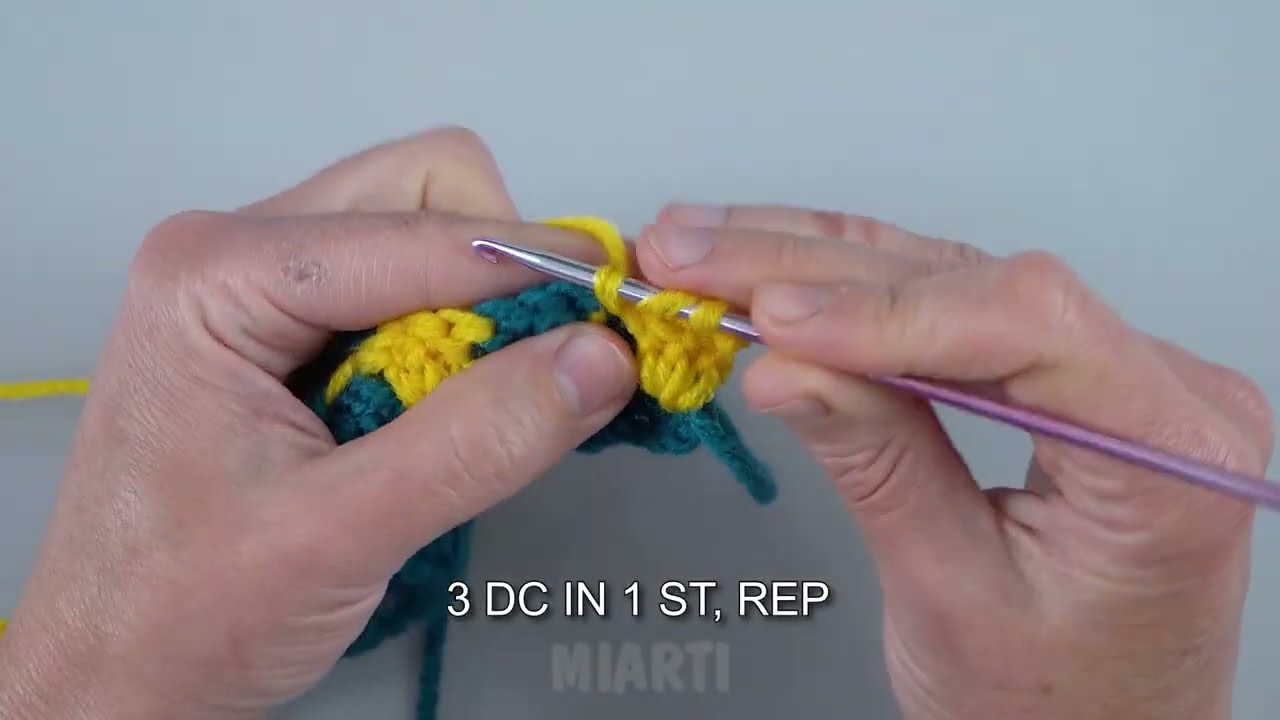
Round 2
-
Sl st into the next corner space
-
Ch 3, 2 dc, ch 2, 3 dc in the same corner
-
Ch 1
-
Repeat in each corner
-
Join with sl st
-
-
Round 3 (optional for bigger size)
-
Repeat the same pattern:
-
3 dc in side spaces
-
(3 dc, ch 2, 3 dc) in corners
-
-
Fasten off and weave in ends.
👉 Tip: For adult slippers, squares are usually 10–12 cm (4–5 inches) wide.
Step 2: Make All the Squares
-
Make 6–8 identical granny squares (3–4 per slipper)
-
Keep them the same size for a neat finish
Step 3: Assemble the Slippers
Basic Slipper Layout (Per Slipper)
-
1 square for the toe
-
1 square for the top of the foot
-
1 square for the heel
-
Optional 1 square for the sole (extra warmth)
Joining the Squares
-
Place squares right sides together
-
Use a yarn needle and whip stitch (or sl st with a hook)
-
Stitch along the edges to form a slipper shape
-
Leave the top open for your foot
Step 4: Shape the Slipper
-
Fold the back square upward to form the heel
-
Sew the sides securely
-
Try it on and adjust if needed
Step 5: Add a Border (Optional but Recommended)
To make slippers snug and neat:
-
Attach yarn to the opening
-
Sc evenly around the opening
-
Join and repeat 1–2 rounds
-
Fasten off
Step 6: Make Them Non-Slip (Optional)
-
Sew non-slip fabric to the sole
-
Or apply dots of fabric paint or hot glue to the bottom
Size Guide (Approximate)
-
Child: 8–9 cm squares
-
Teen/Small Adult: 10–11 cm squares
-
Adult: 11–12 cm squares
Final Tips
-
Use thicker yarn for warmer slippers
-
Tight stitches make sturdier soles
-
Wash gently and air dry
-
Great as gifts or beginner crochet projects 🎁
If you want, I can also:
-
Simplify this for absolute beginners
-
Turn it into a blog post
-
Create a step-by-step pattern with photos guidance
-
Adjust it for kids or specific shoe sizes
Watch video: