 by
by Here’s a clear, beginner-friendly, and detailed tutorial you can use as a blog post, school project, or crafting guide.

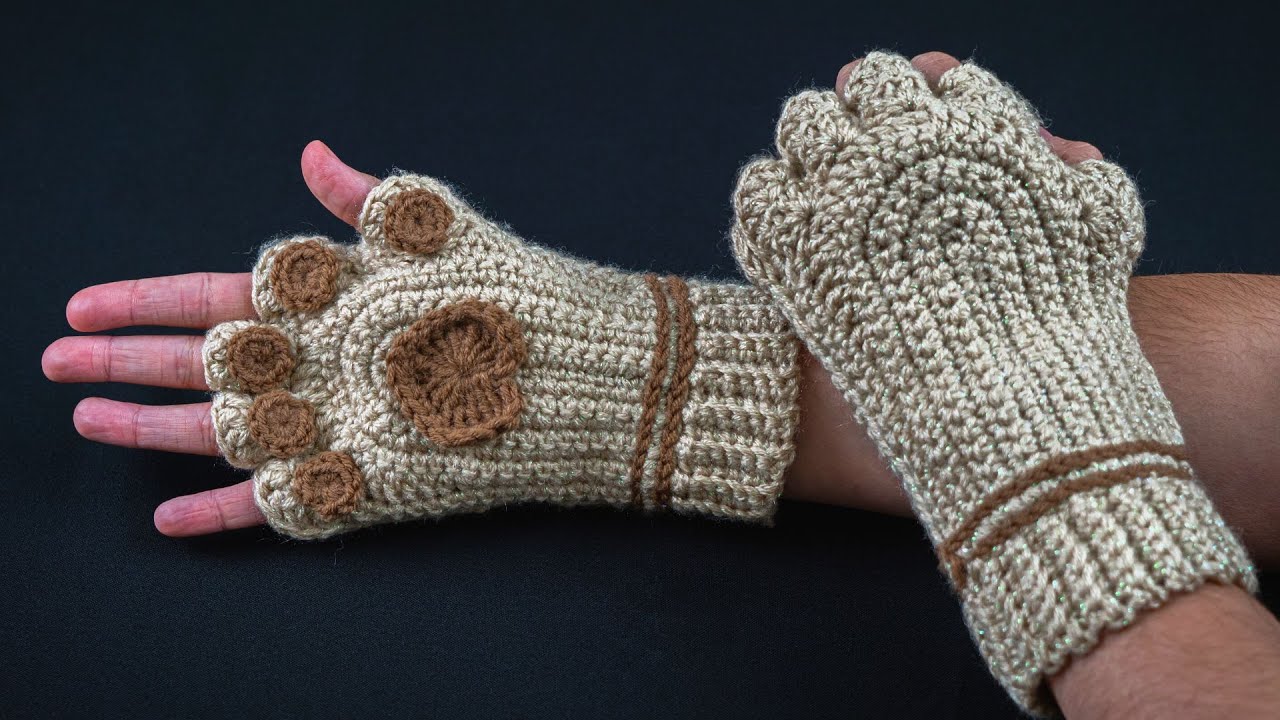
How to Make “Cat’s Paws” Fingerless Mittens
A Beginner-Friendly Crochet Tutorial
If you love cute accessories and easy crochet projects, you’ll wish you had started these Cat’s Paws fingerless mittens sooner! 🐾 These mittens are cozy, practical, and adorable, with soft “paw pad” details that make them extra special. Best of all, this tutorial is perfect for beginners—no complicated shaping or advanced stitches required.
Why You’ll Love These Mittens
-
Beginner-friendly pattern
-
No complicated thumb shaping
-
Works up quickly
-
Customizable colors
-
Adorable cat paw design
Fingerless mittens are great for keeping your hands warm while still allowing you to text, write, or crochet!
Materials You’ll Need
-
Yarn: Medium-weight (Category 4) yarn
-
Main color (for the mitten)
-
Contrasting color (for paw pads)
-
-
Crochet hook: 4.5–5.5 mm (use the size recommended on your yarn label)
-
Scissors
-
Yarn needle (for weaving in ends)
-
Stitch marker (optional but helpful)
Basic Crochet Stitches Used
This project uses only simple stitches:
-
Chain (ch)
-
Slip stitch (sl st)
-
Single crochet (sc)
-
Double crochet (dc)
If you know these basics—or are learning them—you’re ready!
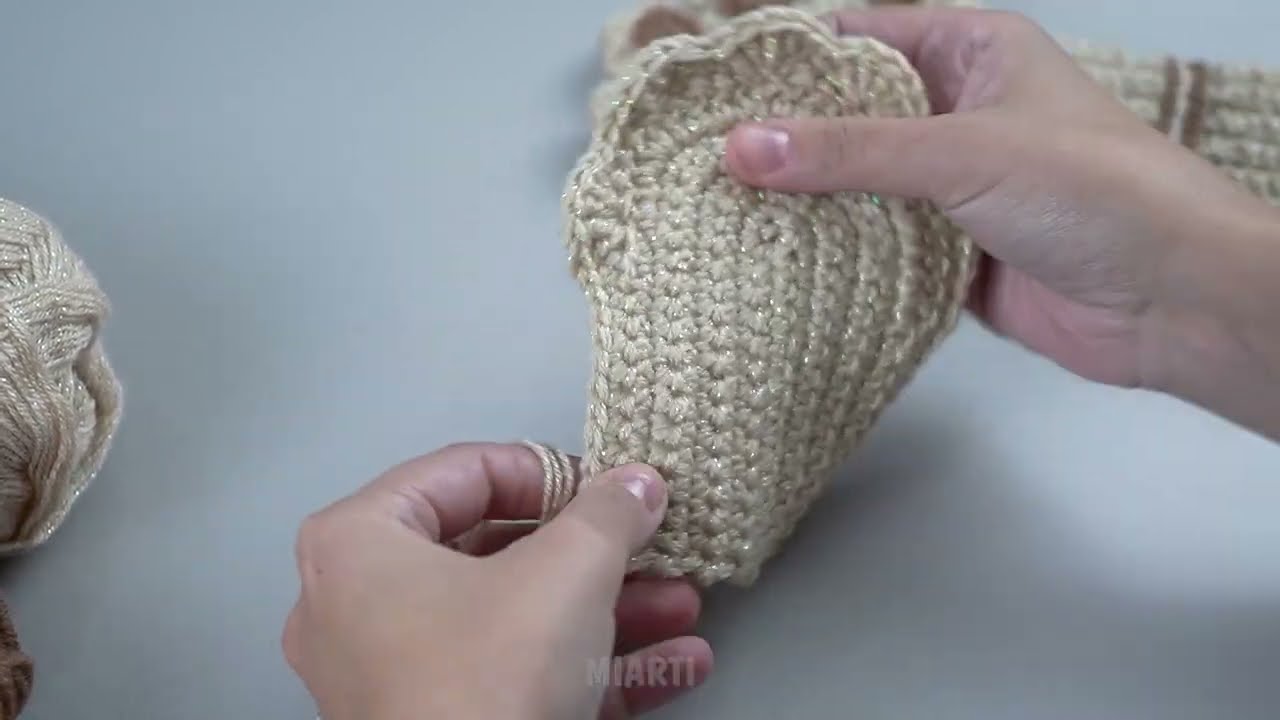
Step 1: Make the Wrist Cuff
-
Chain enough stitches to comfortably wrap around your wrist (usually 18–22 chains).
-
Join the chain into a loop with a slip stitch, making sure it’s not twisted.
-
Single crochet around the loop for several rows (about 6–8 rows).
-
This creates a stretchy cuff that keeps the mitten snug.
💡 Tip: Try it on as you go to make sure it fits comfortably.
Step 2: Crochet the Hand Section
-
Continue crocheting in rounds from the cuff.
-
Use single crochet or double crochet for a soft, flexible fabric.
-
Crochet until the mitten reaches just below your knuckles.
Step 3: Create the Thumb Opening
-
Crochet a few stitches.
-
Chain 3–5 stitches (depending on thumb size).
-
Skip the same number of stitches below and continue crocheting.
-
In the next round, crochet into the chain space to form the thumb hole.
No complicated shaping—just a simple opening!
Step 4: Finish the Mitten Top
-
Crochet 1–2 more rounds.
-
Fasten off and weave in your ends.
-
Repeat all steps to make the second mitten.
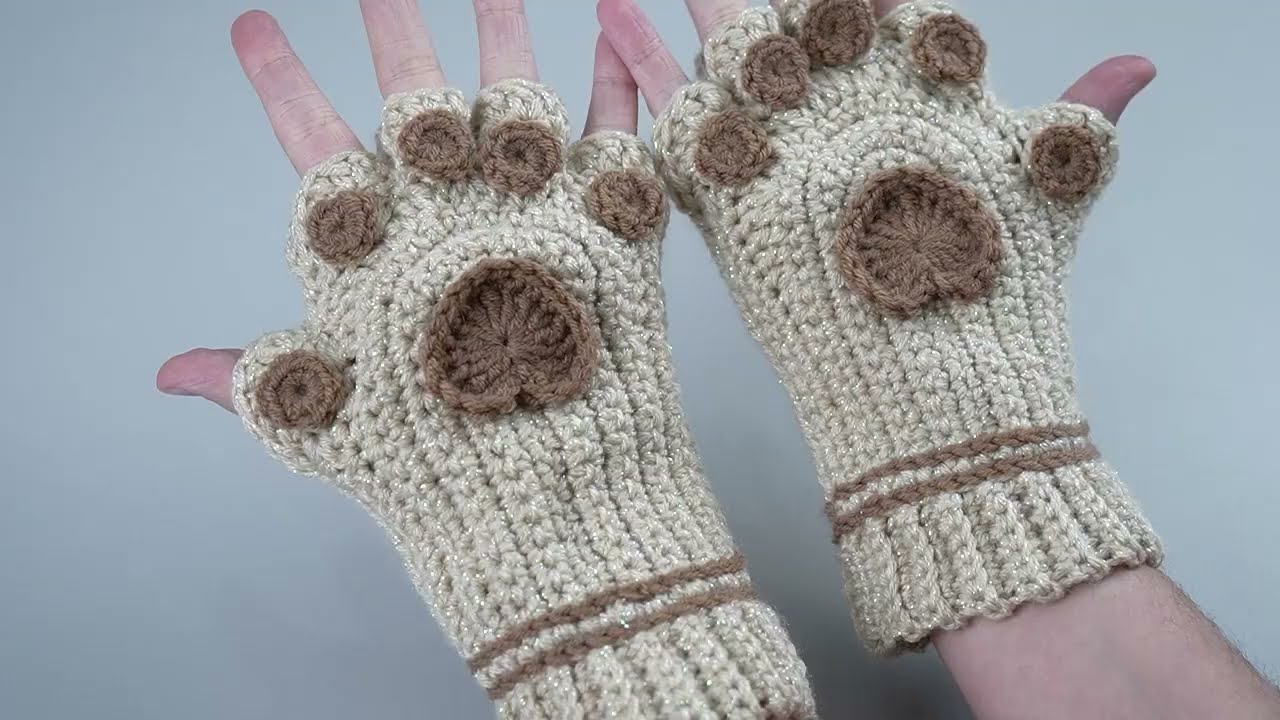
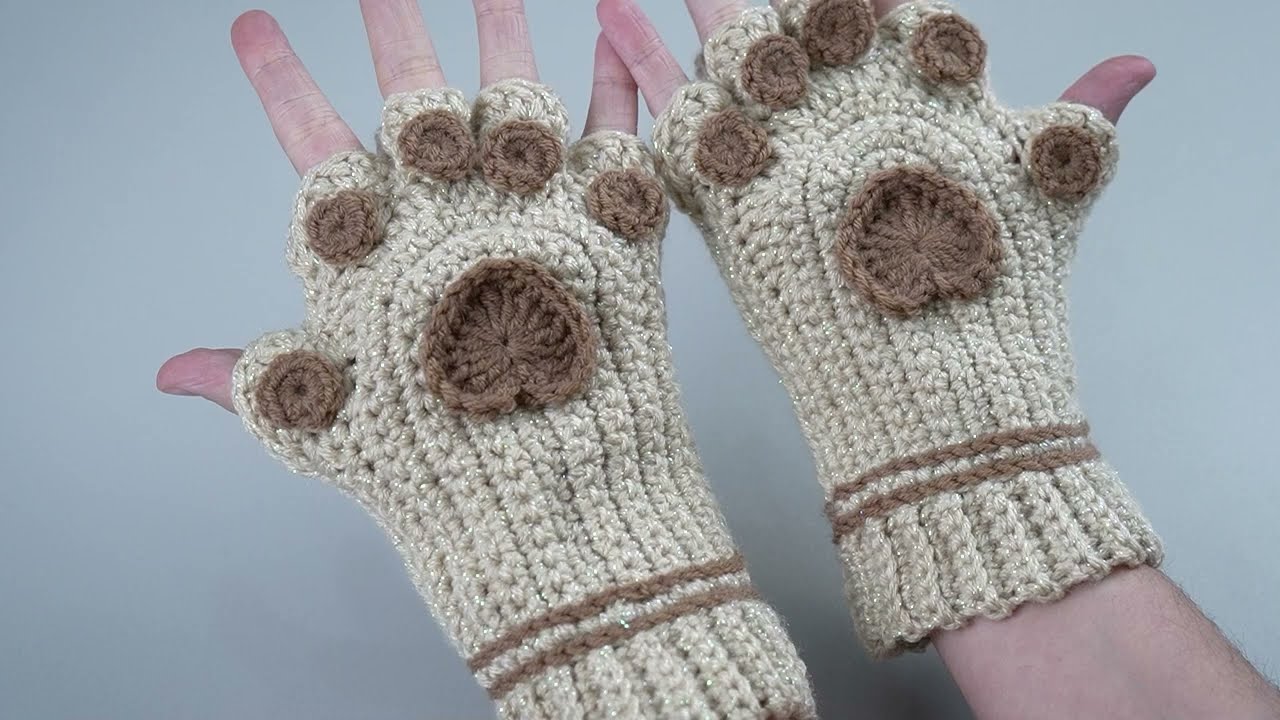
Step 5: Make the Cat Paw Pads
Now for the cutest part!
Paw Pad Pieces:
-
One large pad:
-
Make a small magic circle.
-
Crochet 6–8 double crochets into the circle.
-
-
Four small toe pads:
-
Crochet tiny circles using the same method.
-
Make these in a contrasting color (pink, beige, or light brown work great).
Step 6: Attach the Paw Pads
-
Arrange the pads on the palm side of the mitten.
-
Sew them on securely using a yarn needle.
-
Repeat for the second mitten.
🐾 Instant cat paws!
Customization Ideas
-
Use fluffy or velvet yarn for extra softness
-
Add embroidered claws or whiskers
-
Make them longer for extra warmth
-
Create matching cat-ear hats or scarves
Perfect for Beginners
These Cat’s Paws fingerless mittens are:
-
A great first wearable project
-
Ideal for gifts
-
Fun to customize
-
Easy to finish in one weekend
Once you make one pair, you’ll definitely want to crochet more!
If you’d like, I can also:
-
Simplify this into a short pattern
-
Turn it into a school project explanation
-
Add step-by-step photos descriptions
-
Adjust it for kids’ sizes
Watch video: