by
by Here’s a clear, detailed, beginner-friendly guide you can use as a tutorial or article on how to knit a simple beret in any size. This pattern is customizable and works for kids, teens, and adults 🧶
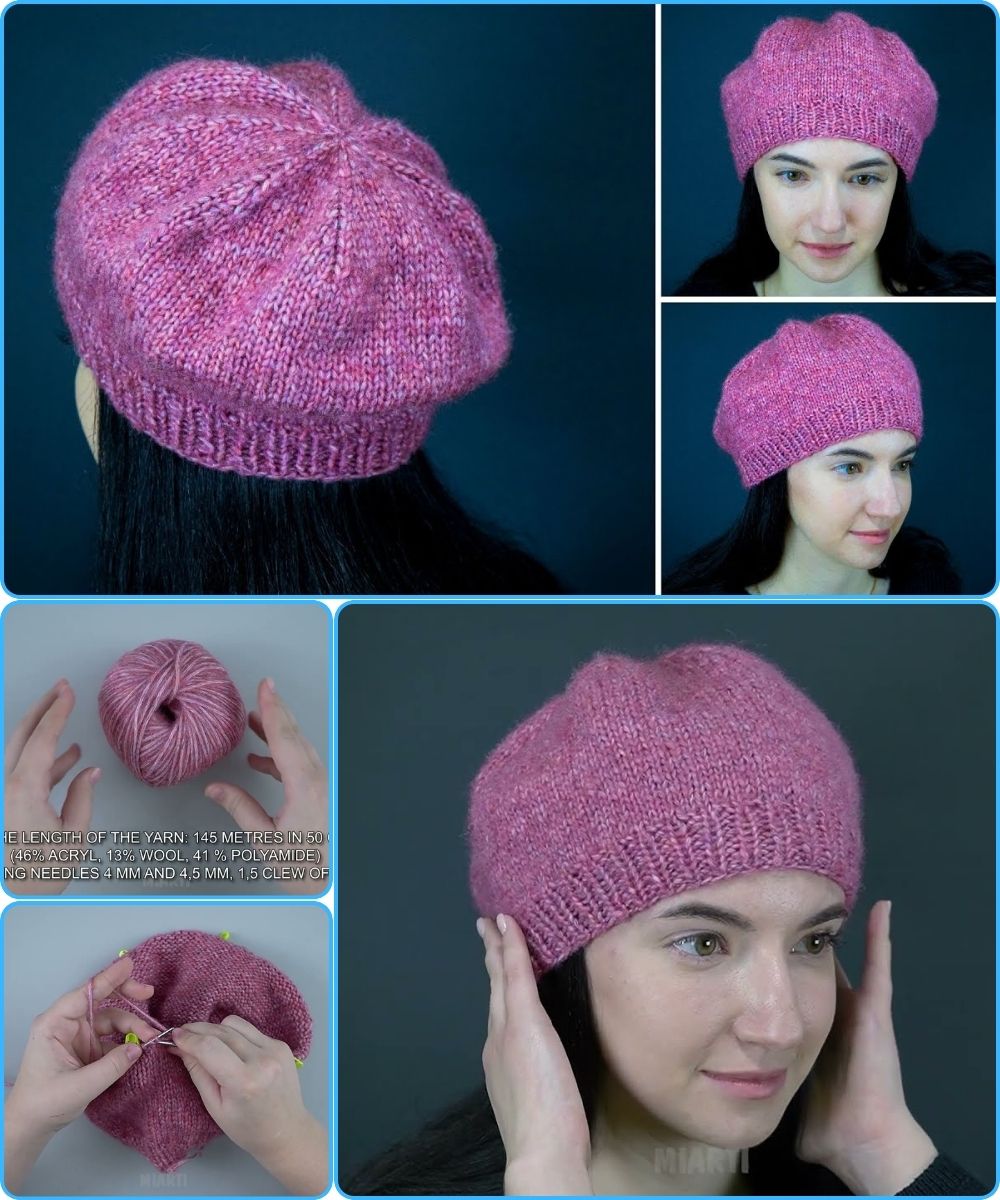
How to Make a Simple Knitted Beret (Any Size)
A beret is a soft, round hat that’s wider at the top and snug at the brim. The great thing about knitting a beret is that it’s mostly simple stitches, and once you understand the shape, you can easily adjust it for any head size.
Materials You’ll Need
-
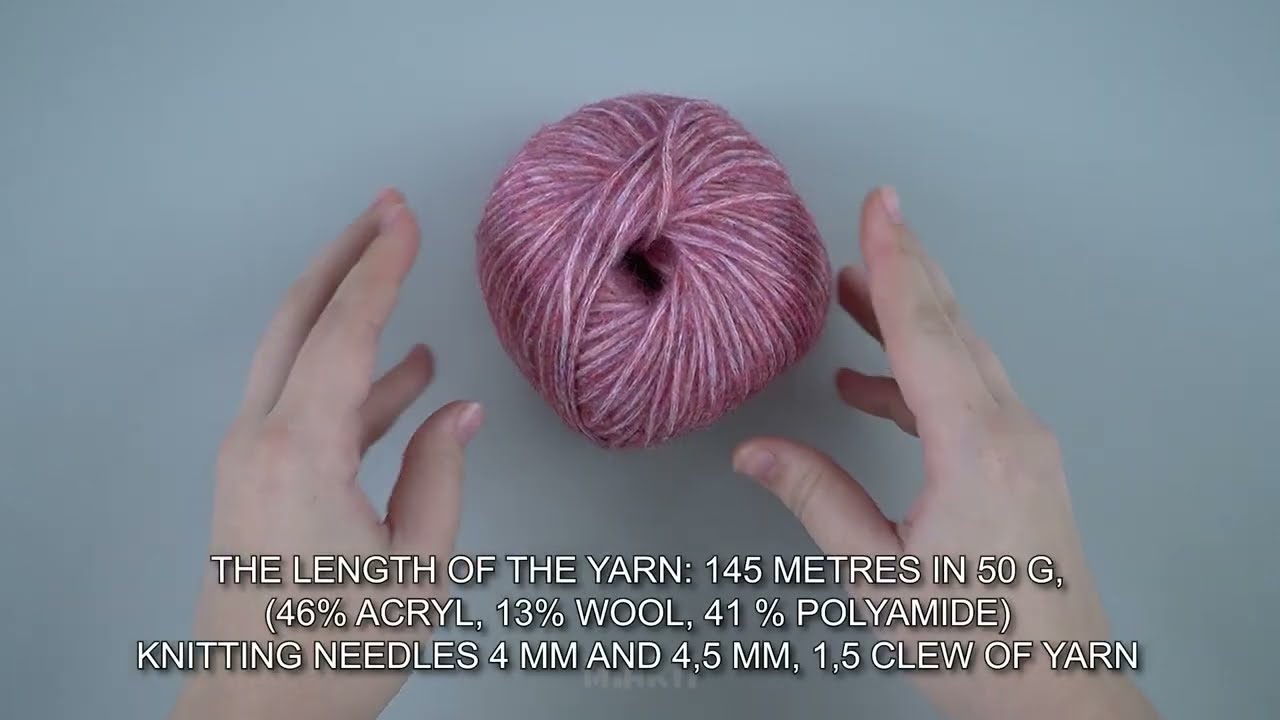
Yarn:
-
Medium weight (worsted) yarn works best for beginners
-
About 150–200 yards (more for larger berets)
-
-
Knitting needles:
-
Circular needles (16–24 in / 40–60 cm)
-
Size US 7–9 (4.5–5.5 mm), depending on yarn
-
-
Double-pointed needles (same size) for finishing the top
-
Stitch marker
-
Tapestry needle
-
Measuring tape
-
Scissors

Basic Knitting Skills Needed
-
Cast on
-
Knit stitch (K)
-
Purl stitch (P)
-
Knit 2 together (K2tog) – decrease
-
Yarn over (YO) – increase
Step 1: Measure for Any Size
Measure around the head where the hat will sit.
General guide:
-
Child: 18–20 in (45–50 cm)
-
Teen/Adult: 21–23 in (53–58 cm)
The brim should be slightly smaller than the head measurement so it fits snugly.
Step 2: Knit the Brim
-
Cast on stitches
-
Multiply head circumference by stitch gauge (usually ~4–5 stitches per inch).
-
Example:
-
22 in × 4.5 = ~100 stitches
-
-
-
Join in the round (be careful not to twist).
-
Place a stitch marker.
-
Knit 1×1 ribbing:
-
K1, P1 around
-
-
Continue ribbing for 1–2 inches (2.5–5 cm).
This ribbed brim helps the beret stay on your head.
Step 3: Increase for the Beret Shape
Now you’ll make the beret wider.
-
Switch to knit stitch only (stockinette in the round).
-
Increase evenly around the round:
-
Example:
-
K5, YO repeat around
-
-
-
On the next round, knit all stitches (knit the yarn overs through the back loop to avoid holes).
Repeat increase rounds every 2–3 rows until the beret reaches its widest point:
-
Usually 1.5–2 times the brim stitch count
Example:
-
Brim: 100 stitches
-
Widest point: 150–180 stitches
Step 4: Knit the Body
Once the beret is wide enough:
-
Knit every round (no increases)
-
Continue until the beret measures 6–8 inches (15–20 cm) from the brim
This section creates the soft, slouchy look of the beret.
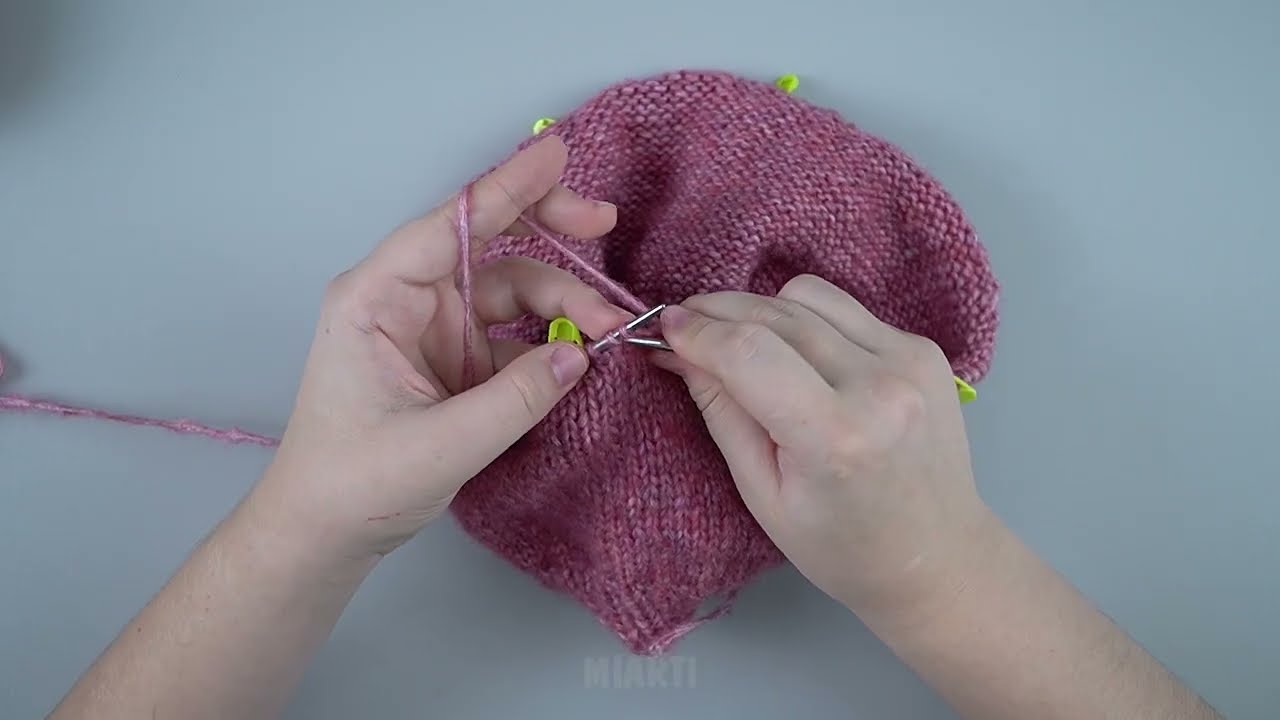
Step 5: Decrease the Top
Now you’ll shape the crown.
-
Divide stitches evenly using stitch markers (6–8 sections works well).
-
Begin decrease rounds:
-
K to 2 stitches before marker, K2tog
-
-
Knit one plain round between decrease rounds.
-
Continue decreasing until about 10–12 stitches remain.
Switch to double-pointed needles when needed.
Step 6: Finish the Beret
-
Cut yarn, leaving a 6–8 inch tail.
-
Thread tail through remaining stitches.
-
Pull tight to close the top.
-
Secure and weave in ends.
Optional: Add a small stem at the top by crocheting or knitting a short I-cord.
Tips for Success
-
Wool or wool blends hold the beret shape best
-
Block your beret by gently wetting it and shaping it flat
-
For a slouchier beret, increase more stitches
-
For a tighter fit, reduce brim stitches slightly
Final Thoughts
A knitted beret is a fun and rewarding project that’s easy to customize. Once you make one, you can experiment with colors, textures, or even patterns like cables or lace. With just basic knitting skills, you can create a stylish beret for any size and any season ✨
If you want, I can also:
-
Simplify this into a beginner pattern
-
Turn it into a school project write-up
-
Help you adjust it for chunky yarn or child sizes
Watch tutorial: