 by
by Below is a clear, friendly step-by-step tutorial on how to make simple crochet slippers, perfect for beginners and customizable to any size. I’ll include materials, sizing tips, step-by-step instructions, and finishing options.
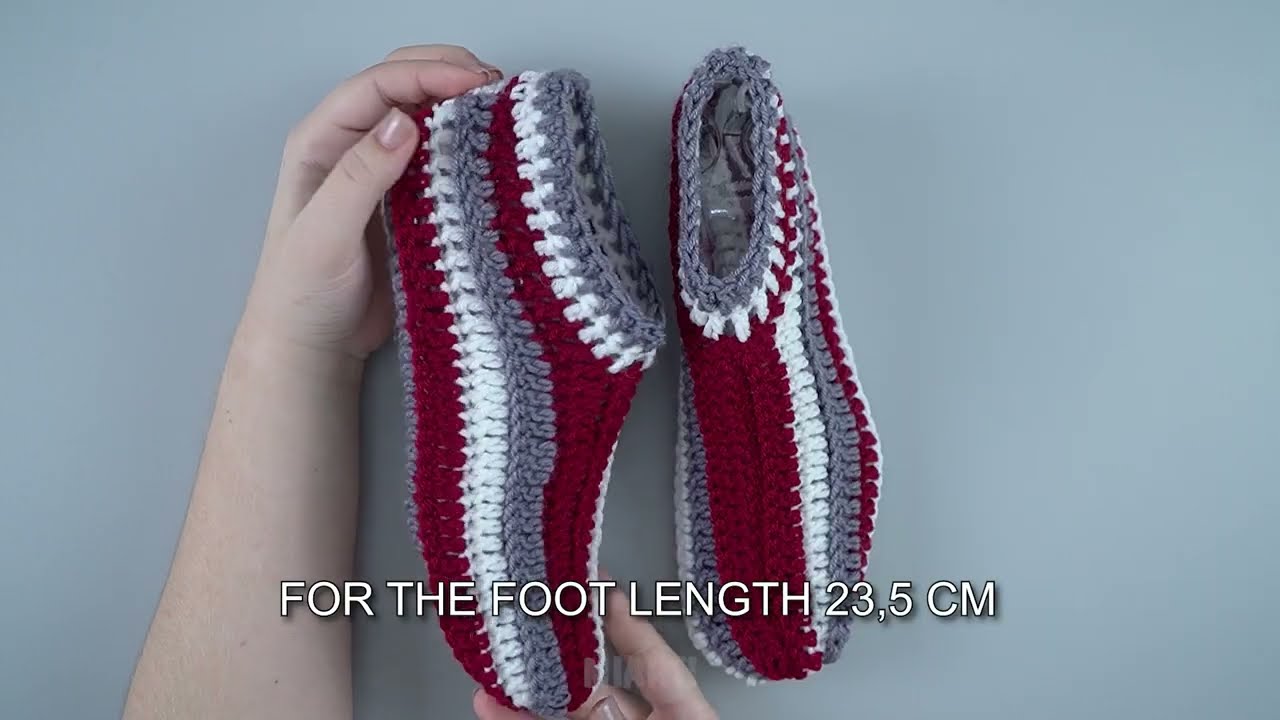
🧶 How to Make Simple Crochet Slippers (Beginner-Friendly Tutorial!)
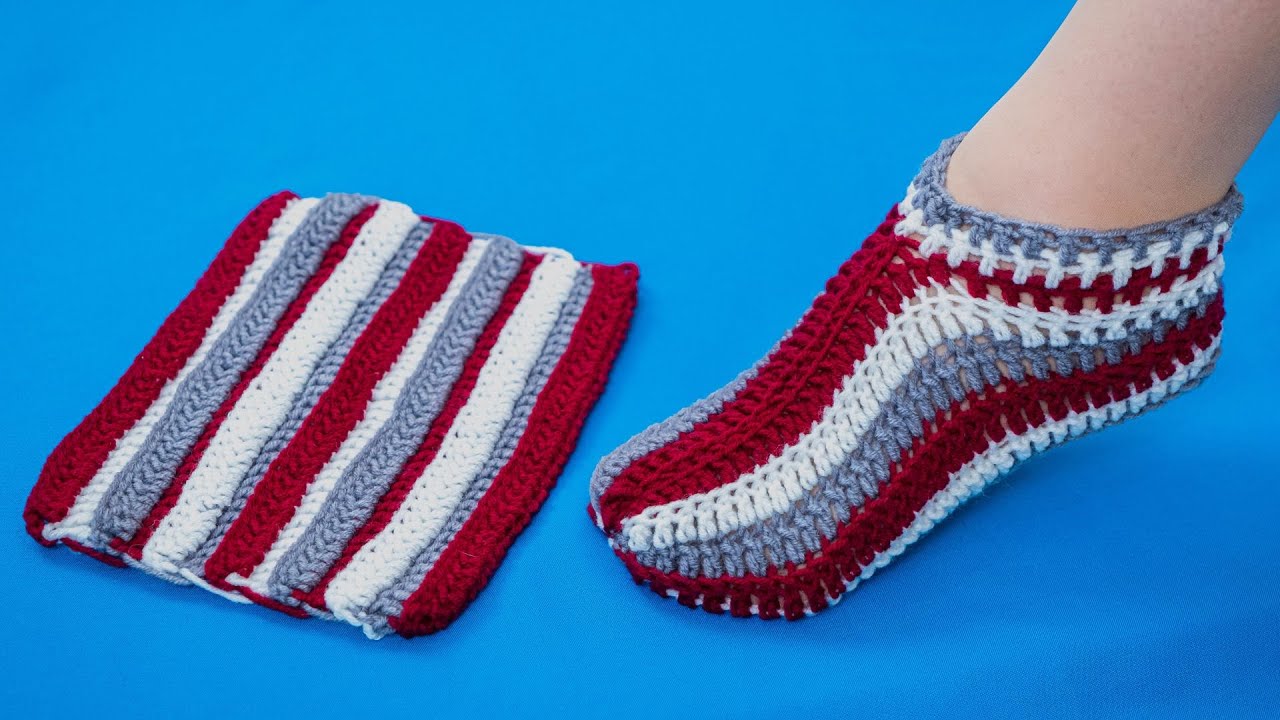
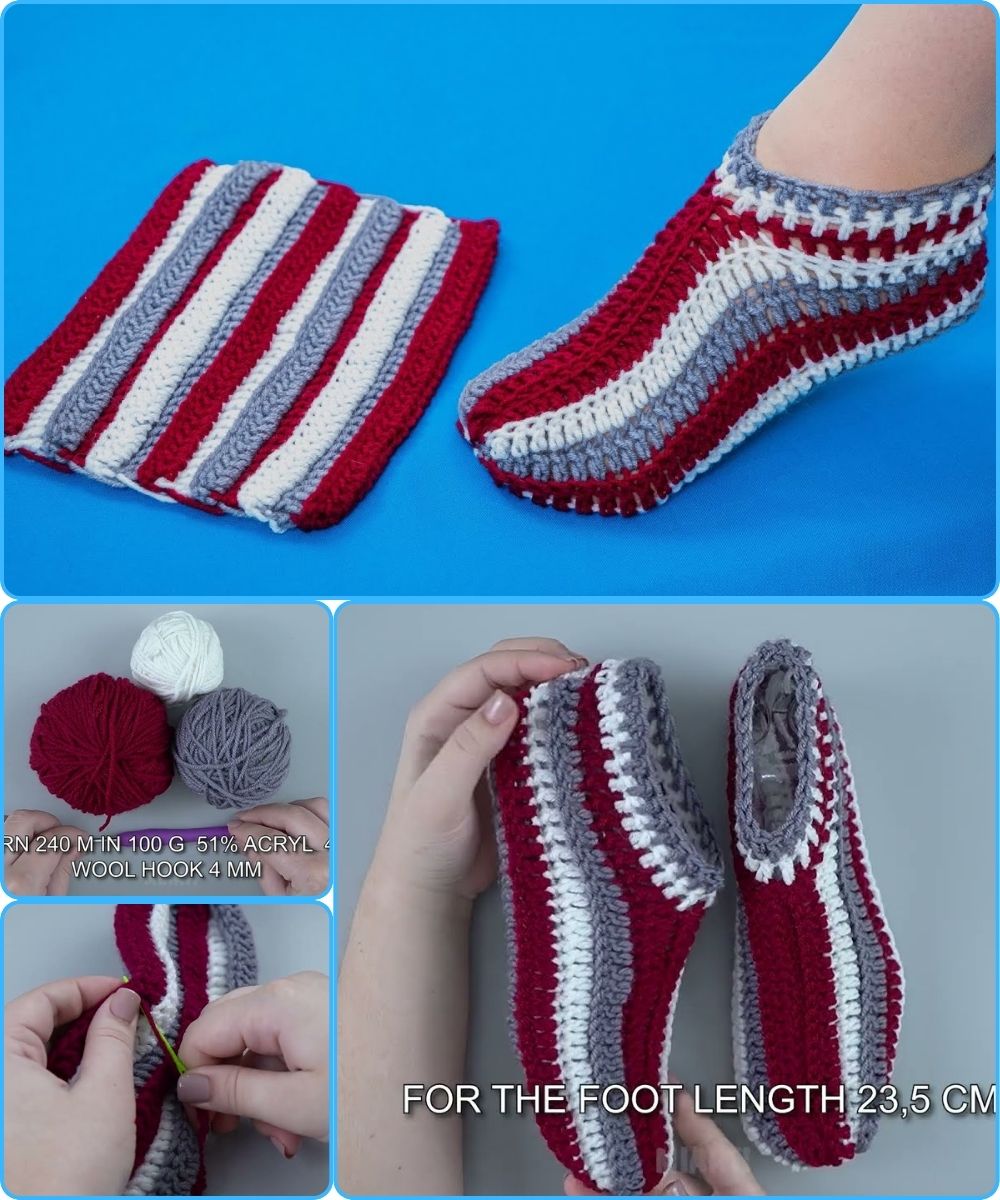
These slippers are worked from the toe to the heel in a simple rectangle that’s folded and seamed. No complex shaping—just basic stitches!
✅ Materials You’ll Need
-
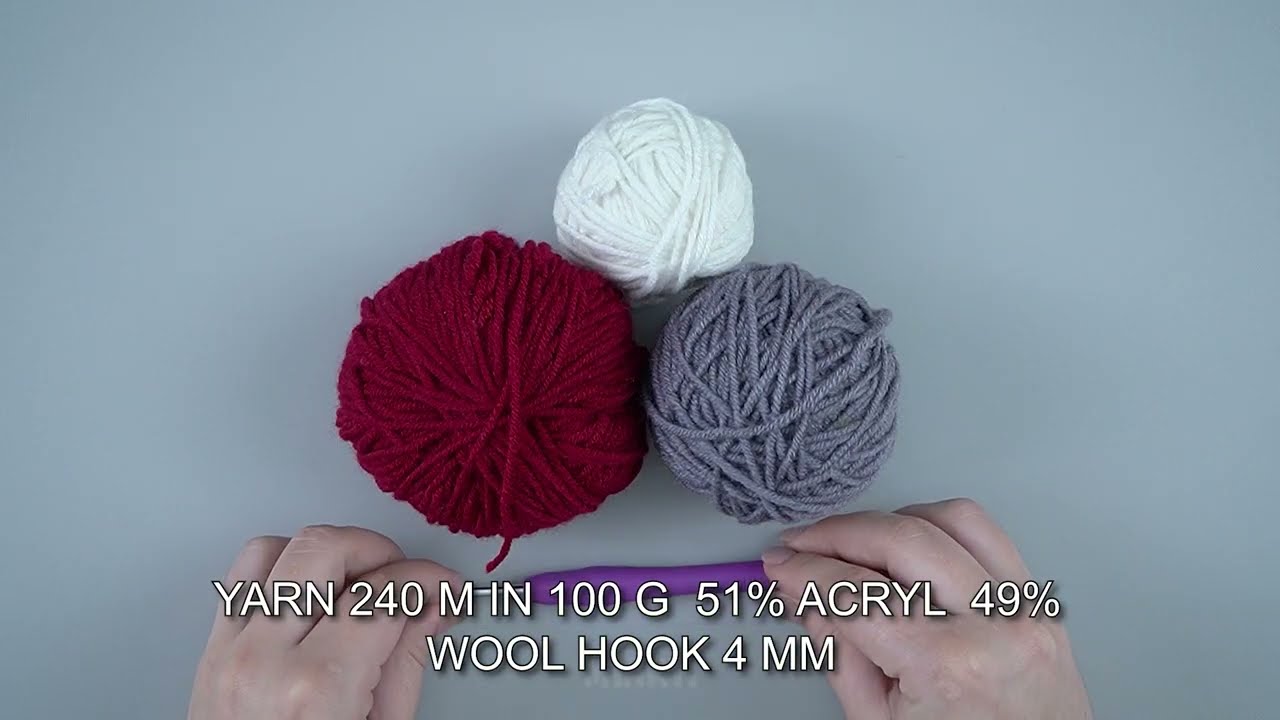
Yarn: Medium Weight (Category 4) acrylic or cotton blend
(Approx. 120–150 yards per pair for adult size) -
Hook: 5.0mm (H) hook (or size needed to meet gauge)
-
Tapestry needle (for sewing seams)
-
Scissors
-
Measuring tape
-
Stitch markers (optional)
🧵 Basic Stitches Used
-
CH – chain
-
SC – single crochet
-
HDC – half double crochet (optional substitute)
-
SL ST – slip stitch
This pattern uses mostly single crochet, but you can substitute half double crochet for a taller, stretchier slipper.
📏 Sizing Guide (Very Important!)
Each slipper is a rectangle.
Approximate rectangle measurements before folding:
| Foot Size | Rectangle Width | Rectangle Length |
|---|---|---|
| Women’s Small (US 5–6) | 7 in (18 cm) | 9 in (23 cm) |
| Women’s Medium (US 7–8) | 7.5 in (19 cm) | 9.5 in (24 cm) |
| Women’s Large (US 9–10) | 8 in (20.5 cm) | 10–10.5 in (25–27 cm) |
| Men’s Medium | 9 in (23 cm) | 11 in (28 cm) |
| Men’s Large | 10 in (25.5 cm) | 12 in (30 cm) |
Tip: Measure the user’s foot length and add ½ inch (1 cm) for comfort/stretch.
✨ STEP-BY-STEP CROCHET SLIPPER TUTORIAL
1️⃣ Make the Starting Chain
-
Chain enough stitches to reach your slipper width measurement.
(Example: Women’s Medium = chain until about 7.5 in wide.)
Do NOT worry about stitch count—measurements matter more than number of chains.
2️⃣ Row 1
-
SC in 2nd chain from hook
-
SC across the row
-
CH 1, turn
3️⃣ Continue Crochet Rows
Repeat the following until your rectangle reaches the foot length measurement:
-
SC across
-
CH 1, turn
Your rectangle should be even and stretchy.
Optional Variation:
For a softer, stretchier slipper, use HDC instead of SC.
4️⃣ Shape the Toe (Gathering Method)
Once your rectangle reaches the correct length:
-
Fold the rectangle in half widthwise.
-
Along one short end (the “toe” side), use your yarn needle to weave a running stitch.
-
Pull the yarn tight to gather the toe closed, like a drawstring.
-
Secure with several knots or stitches.
-
Sew a few stitches to reinforce the closed toe.
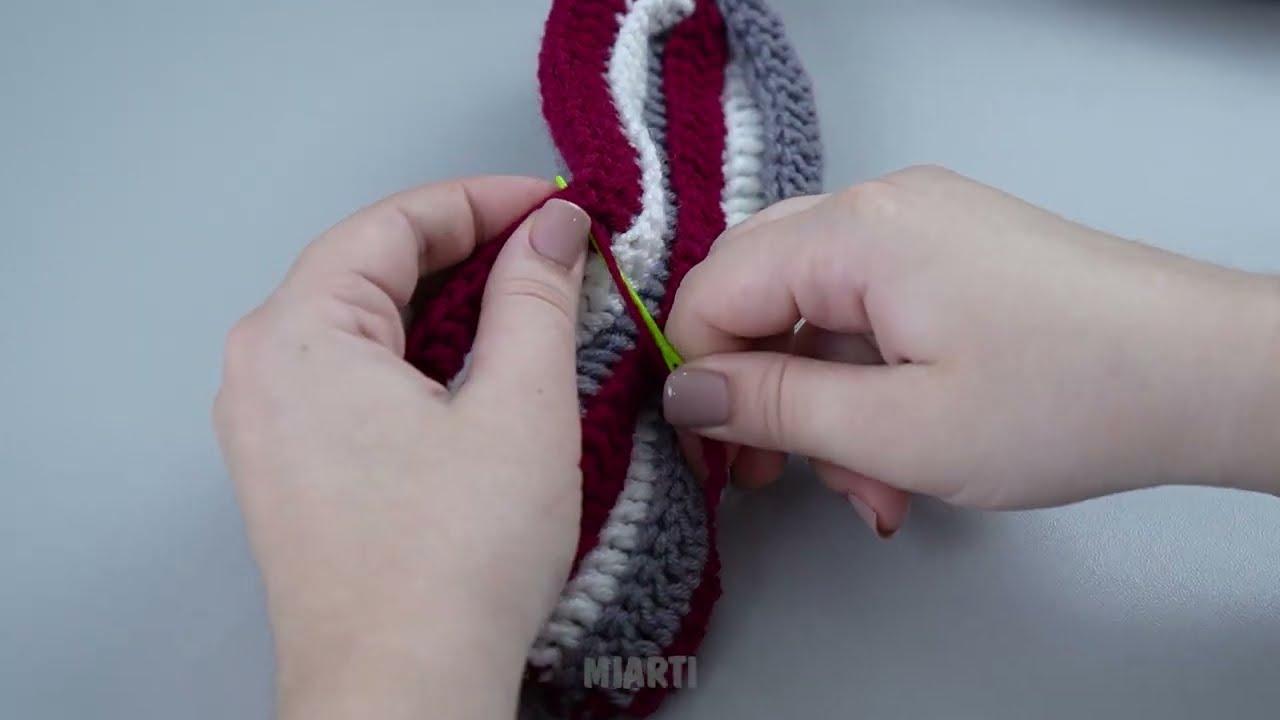
5️⃣ Sew the Top of the Foot
With the slipper still folded:
-
From the toe, sew up the top of the slipper about halfway to the heel.
-
Leave an opening wide enough for the foot to slip in.
(About 3–4 inches for women’s sizes.)
Use whipstitch, mattress stitch, or slip stitch—your preference.
6️⃣ Sew the Heel
-
Fold the heel edge so edges meet.
-
Sew straight across the back to close the heel.
-
Weave in all ends.
🎉 Your Slipper Shape Should Look Like This
-
Rounded gathered toe
-
Seam up top of foot
-
Seam across the heel
-
Opening around the ankle
If it looks like a cozy little sock—you’re good!
✨ 7️⃣ Add Optional Ribbed Cuff (Makes Them Prettier!)
Join yarn around the ankle opening:
Round 1:
-
SC evenly around the opening, SL ST to join.
Round 2–5:
-
CH 1, work SC in back loops only (BLO) around, SL ST to join.
This creates a stretchy ribbed cuff.
Adjust number of rounds for desired height.
💡 Helpful Tips
-
If your slippers feel loose, switch to a smaller hook.
-
If too tight, switch to a larger hook.
-
Use thicker yarn for extra warmth.
-
Add non-slip dots (puffy paint or silicone glue) to the sole.
🧼 Care Instructions
Machine washable if using acrylic yarn—wash on cold, dry flat.
Cotton or wool may shrink unless treated.
🧶 Want a Written Pattern Format? (Copy/Paste Friendly)**
Simple Crochet Slippers Pattern (Adult Medium):
-
Hook: 5.0 mm
-
Chain to 7.5 in width
-
Rows: SC across until length = 9.5 in
-
Sew toe (gather), sew top halfway, sew heel
-
Add ribbed cuff (optional)
If you want, I can also create:
✨ A printable PDF
✨ A children’s-size version
✨ A pattern with photos
✨ A video-style step-by-step script
Just tell me!
Watch video: