 by
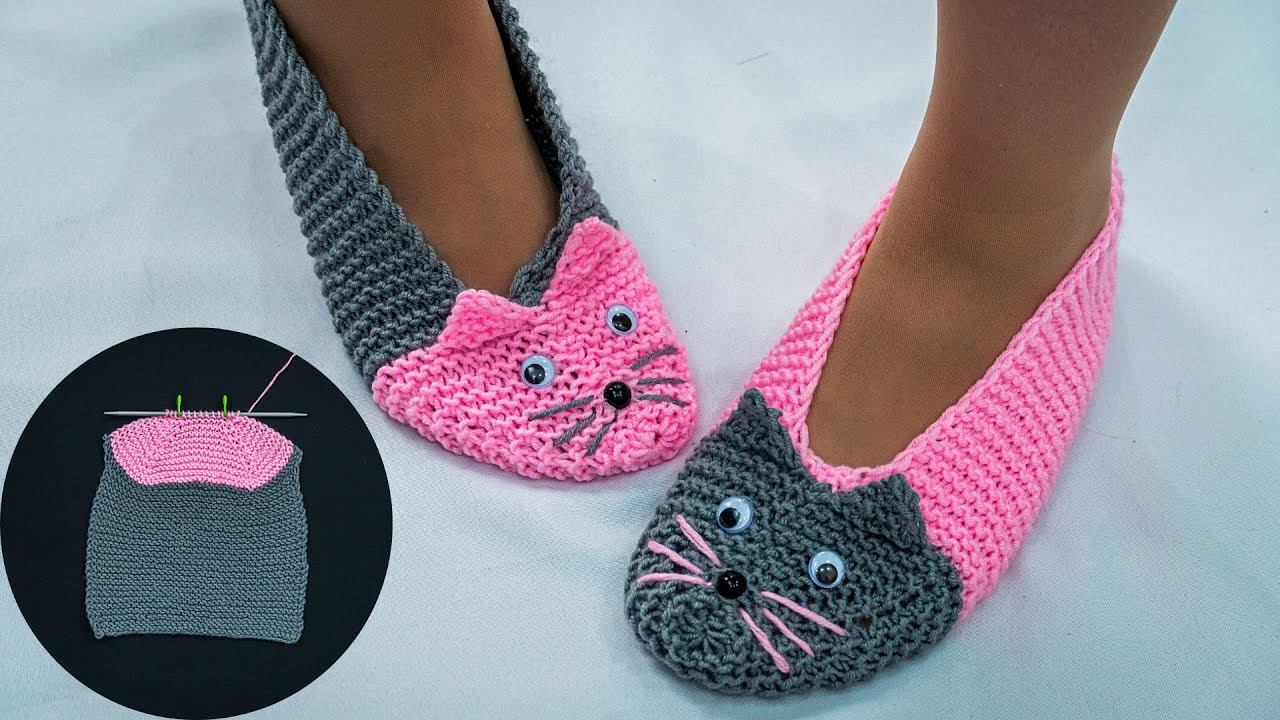
by Below is a clear, beginner-friendly, step-by-step guide for how to make knitted slippers using knitting needles. This method is simple, works with straight needles, and requires only basic stitches—perfect for someone who is just starting out.
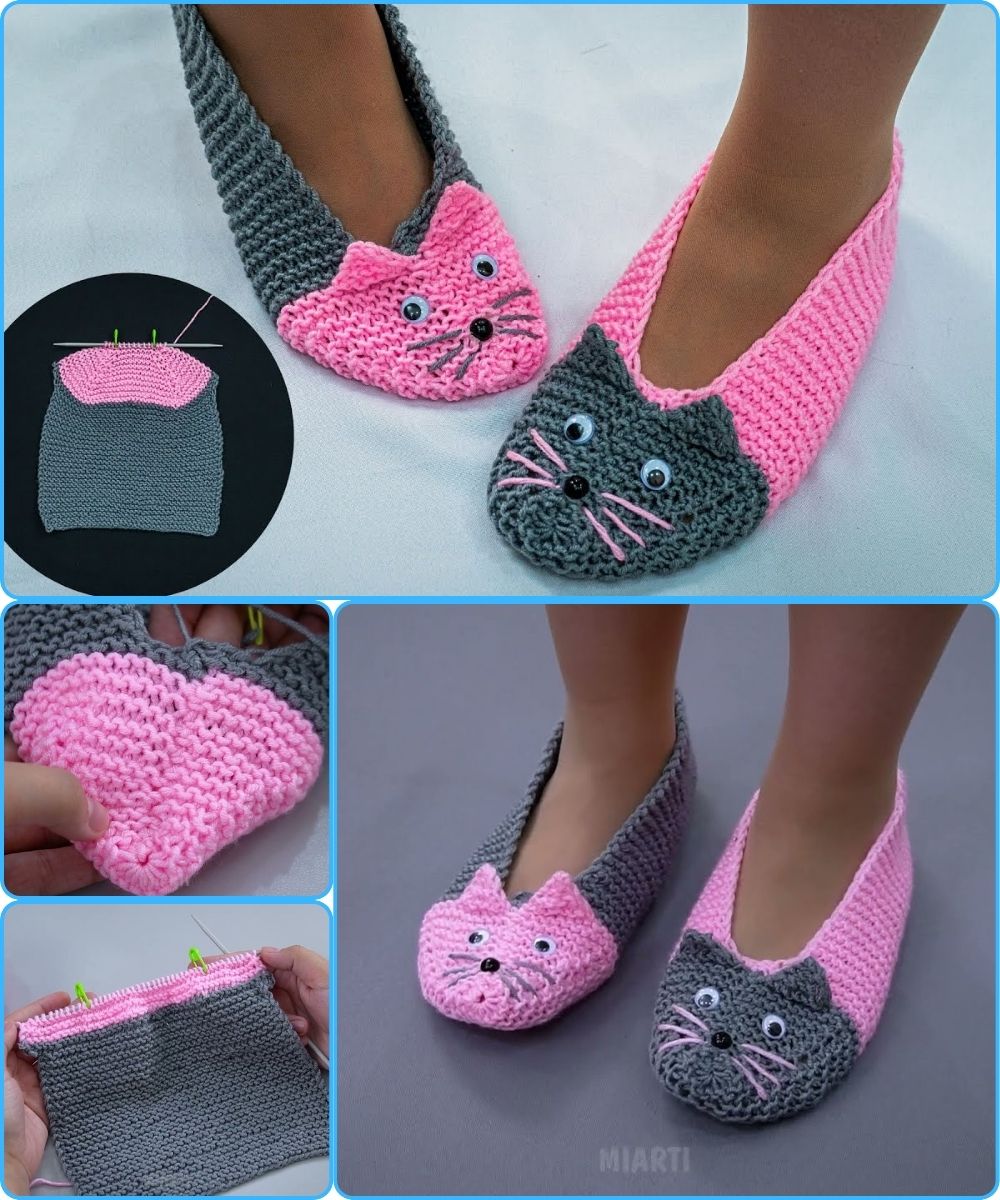
🧶 How to Make Slippers with Knitting Needles (Beginner-Friendly!)
These slippers are knitted as a flat rectangle and then folded and sewn to form a cozy, foot-hugging shape. No complex shaping, no advanced techniques. If you can cast on, knit, and sew a seam, you can do this!
⭐ What You Need
-
Yarn: Thick/bulky yarn (easier for beginners, makes slippers warm and fast to knit)
-
Needles: Straight needles, size 6–8 mm (US 10–11), or whatever suits your yarn
-
Tapestry/darning needle: For sewing the seams
-
Scissors
🧶 Skills You Need
Just the basics:
-
Casting on
-
Garter stitch (knit every row) — easiest for beginners
-
Casting off
-
Simple sewing
📏 Step 1: Measure and Cast On
You’re going to knit a rectangle that wraps around your foot.
For an adult medium:
-
Cast on 28–32 stitches using bulky yarn.
(For very small feet: 24 stitches; very large: 36 stitches.)
Width of the rectangle = around 6–7 inches (15–18 cm).

🪄 Step 2: Knit the Body of the Slipper
Knit every row (garter stitch) until your piece measures:
-
Foot length + ankle cuff height
Example:-
Foot length: 9 inches (23 cm)
-
Cuff height: 2 inches (5 cm)
-
Total = 11 inches (28 cm)
-
Visual guide:
If you want the slippers ankle-high, add an extra 1–2 inches.
🧵 Step 3: Cast Off
Cast off all stitches loosely so the opening around the ankle is comfortable.
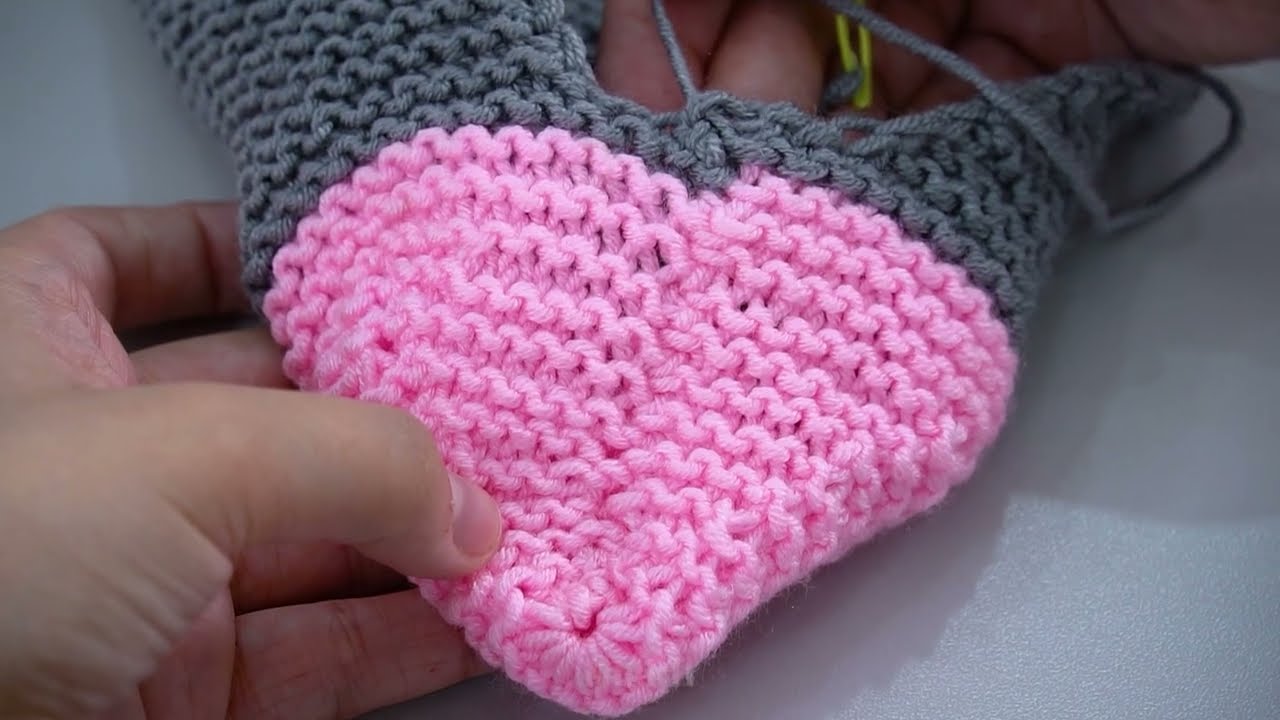
🧩 Step 4: Shape the Toe
Fold the rectangle in half lengthwise, like this:
Now sew the toe end closed:
-
From one corner, stitch across about ⅓ of the length of the slipper.
-
When you reach the toe, pull the yarn slightly to round the shape (not too tight).
-
Continue sewing along the top of the foot until you reach the ankle area.
This closes the toe and top of the foot.
🦶 Step 5: Sew the Heel
At the other end of the slipper:
-
Sew the heel seam straight across.
-
Do not sew the ankle opening—you want this open so you can slip your foot in.
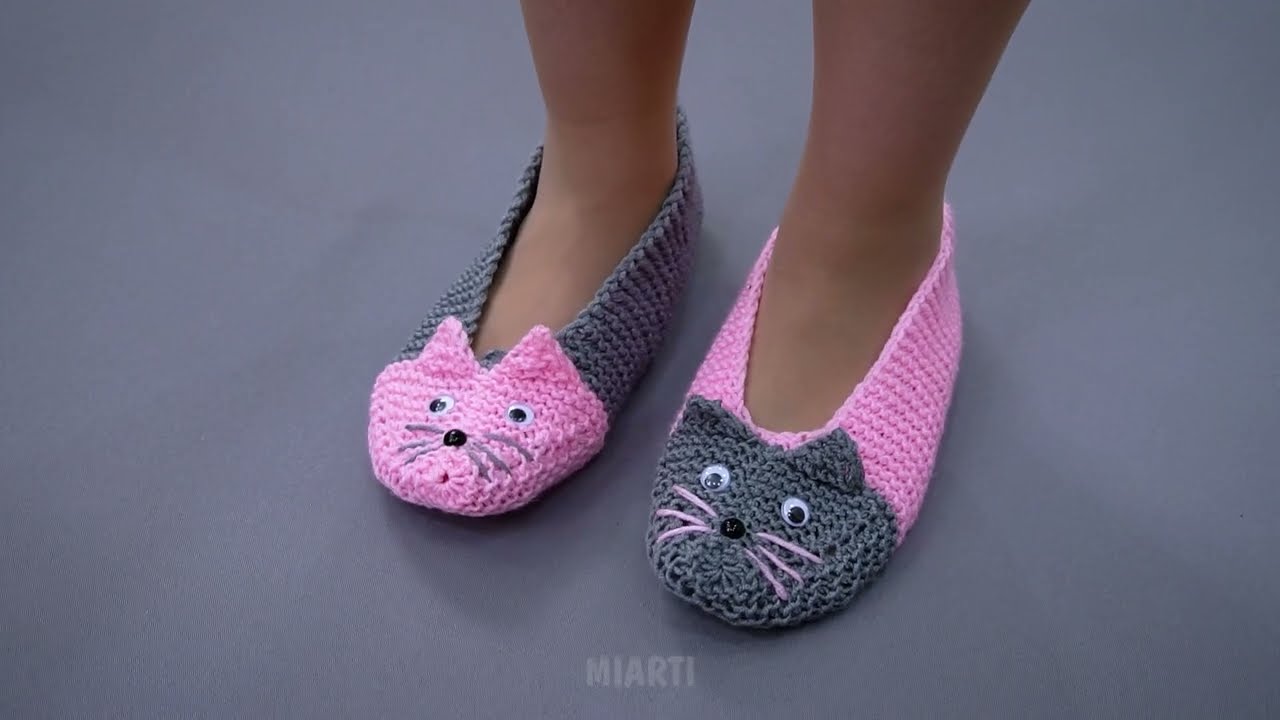
👟 Step 6: Turn Right Side Out
Flip the slipper right-side out.
You’ll see it already looks like a traditional, snug knitted slipper.
Make the second slipper the same way.
🌟 Optional Add-Ons (Beginner-Friendly)
-
Add a pom-pom on top
-
Crochet a simple decorative border
-
Sew on non-slip patches on the sole
-
Use striped or multicolor yarn for fun designs
📐 Simple Pattern Summary (Adult Medium)
Cast on 30 stitches.
Knit every row until the piece measures 11 inches (28 cm).
Cast off loosely.
Fold long edges together.
-
Sew 4 inches (10 cm) from one end for the toe.
-
Sew remaining 3–4 inches for top of foot.
-
Sew the opposite end 2 inches for the heel.
Turn inside out. Done!
🎉 That’s it!
You’ve made a pair of warm, comfy slippers using only straight needles and the knit stitch—one of the simplest slipper patterns ever. Perfect for gifting or cozy evenings.
If you want, I can also give you:
-
A ribbed version (still beginner friendly)
-
A child-size pattern
-
A video-style step-by-step
-
A printable pattern layout
Just tell me!
Watch video: