 by
by Sure! Here’s a detailed guide on how to sew a small travel bag (handbag) that’s easy, practical, strong, and perfect for trips or storage. This DIY project is suitable even for confident beginners.
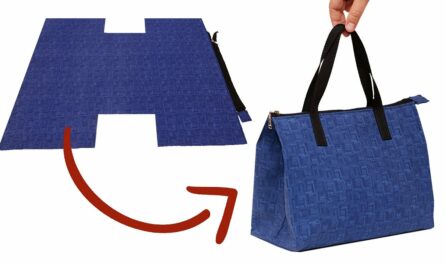
🧵 How to Make a Small Travel Bag (Handbag) – Strong, Easy & Practical
✂️ What You’ll Need:
Fabrics & Materials:
-
Main fabric (1/2 yard) – canvas, denim, or outdoor fabric for durability
-
Lining fabric (1/2 yard) – cotton or waterproof nylon
-
Interfacing (fusible, medium to heavy) – for added strength
-
Zipper – 12 to 14 inches (nylon or metal)
-
Straps – webbing or matching fabric (around 1 yard)
-
Optional: extra pockets, D-rings, Velcro, snaps, or plastic canvas base for structure
Tools:
-
Sewing machine
-
Iron and ironing board
-
Scissors or rotary cutter
-
Ruler or measuring tape
-
Pins or clips
-
Fabric marker or chalk
-
Seam ripper (just in case!)
-
Heavy-duty sewing needle (denim or leather needle if using thick fabric)
✏️ Design & Size (Customize as needed)
-
Finished Bag Size: ~10″ (W) x 7″ (H) x 3″ (D)
-
Cutting Measurements:
-
Main fabric (x2): 12″ x 9″
-
Lining fabric (x2): 12″ x 9″
-
Interfacing (x2): 12″ x 9″
-
Strap: Two pieces 16″ each (or longer/shorter as desired)
-
Pocket pieces (optional): 7″ x 5″ (x2)
-
🪡 Step-by-Step Instructions
🧶 1. Prepare the Fabric
-
Cut all pieces according to the measurements.
-
Fuse the interfacing to the wrong side of the main fabric using an iron.
🧵 2. Add Pockets (Optional)
-
Take the pocket pieces, fold top edge 1/2″, press and stitch.
-
Place them on the lining pieces where you want them.
-
Sew around the sides and bottom to attach, leaving the top open.
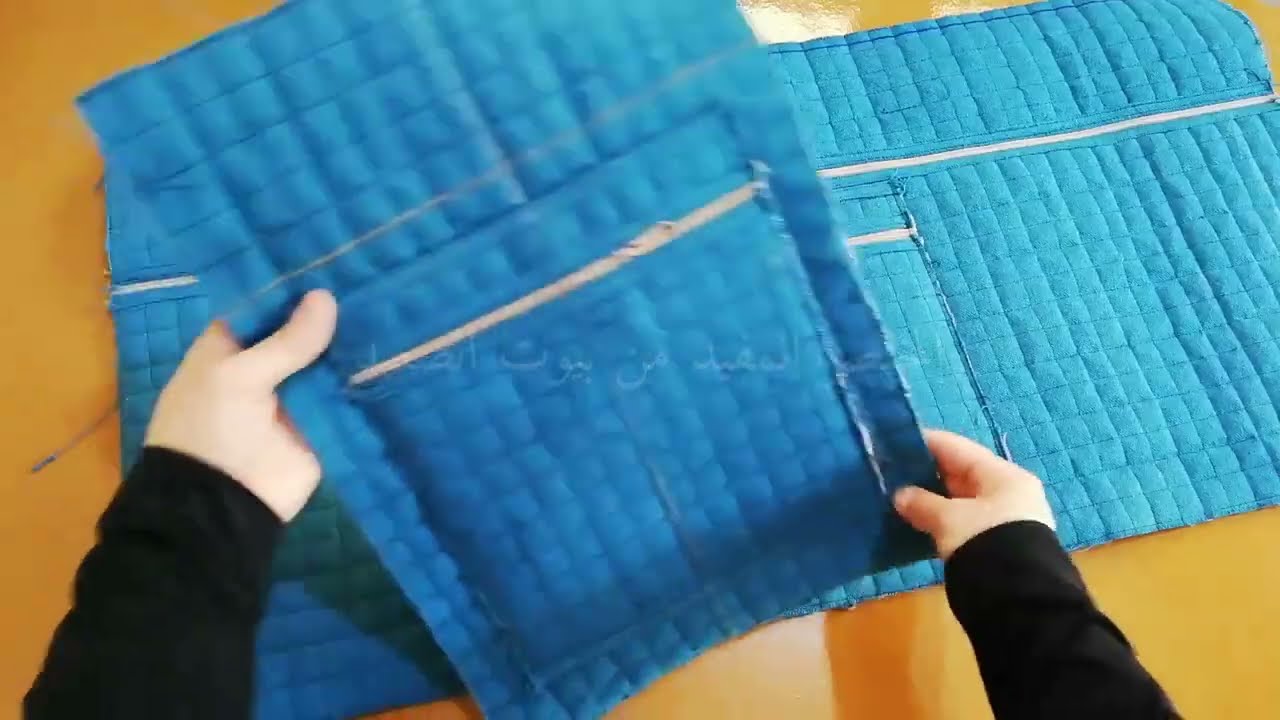
⚙️ 3. Sew the Zipper
-
Place one lining piece right side up, zipper face up on top, and main fabric piece right side down (like a sandwich with zipper in the middle).
-
Sew along the zipper using a zipper foot.
-
Repeat on the other side with the remaining main and lining pieces.
-
Open both and topstitch near the zipper to keep fabric from catching.

🎒 4. Construct the Bag Body
-
Open the zipper halfway (important!).
-
Match main fabric pieces right sides together, and lining pieces together.
-
Pin or clip all around.
-
Sew around the edge, leaving a 4-inch gap in the lining bottom for turning.
-
Box the corners (optional but recommended):
-
Flatten each corner, match the seams, and mark a 1.5” triangle.
-
Sew across the triangle, then cut off the excess to reduce bulk.
-
🎯 5. Turn & Finish
-
Turn the bag right side out through the gap in the lining.
-
Push out corners and shape it well.
-
Sew the lining gap closed by hand or machine.
-
Push the lining into the bag and press neatly.
👜 6. Attach the Straps
Option 1 – Fabric Handles:
-
Fold each 16″ fabric strip lengthwise, right sides together.
-
Sew down the long edge, turn inside out, press, and topstitch.
Option 2 – Webbing Handles: -
Just cut, seal the ends with a lighter (if synthetic), and sew.
Attach Handles:
-
Position handles 3″ from side seams on the front and back.
-
Pin in place, sew a box with an X in the middle for strength 💪🏼.
🧽 Extra Features (Optional):
-
Waterproof lining: Use ripstop nylon or oilcloth.
-
Multiple pockets: Add mesh, zippered, or elastic pockets inside or out.
-
Adjustable strap: Add a D-ring or slider buckle.
-
Structured base: Insert plastic canvas between fabric layers at the bottom.
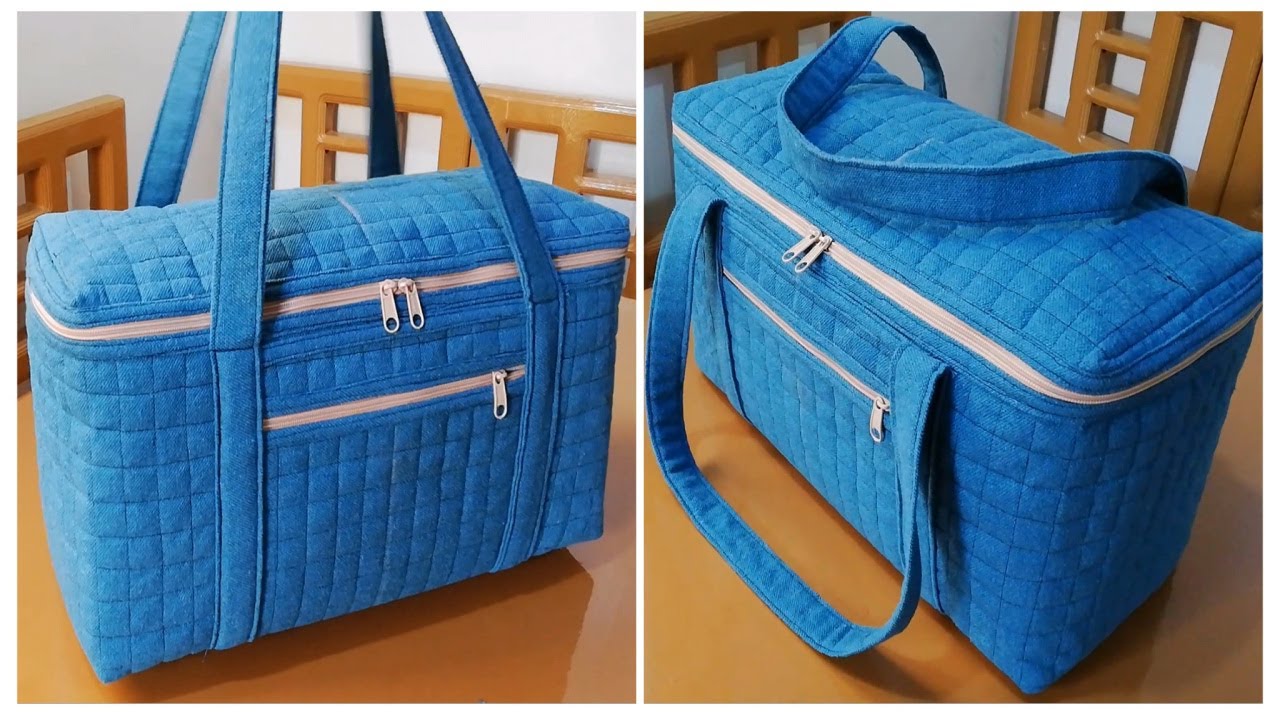
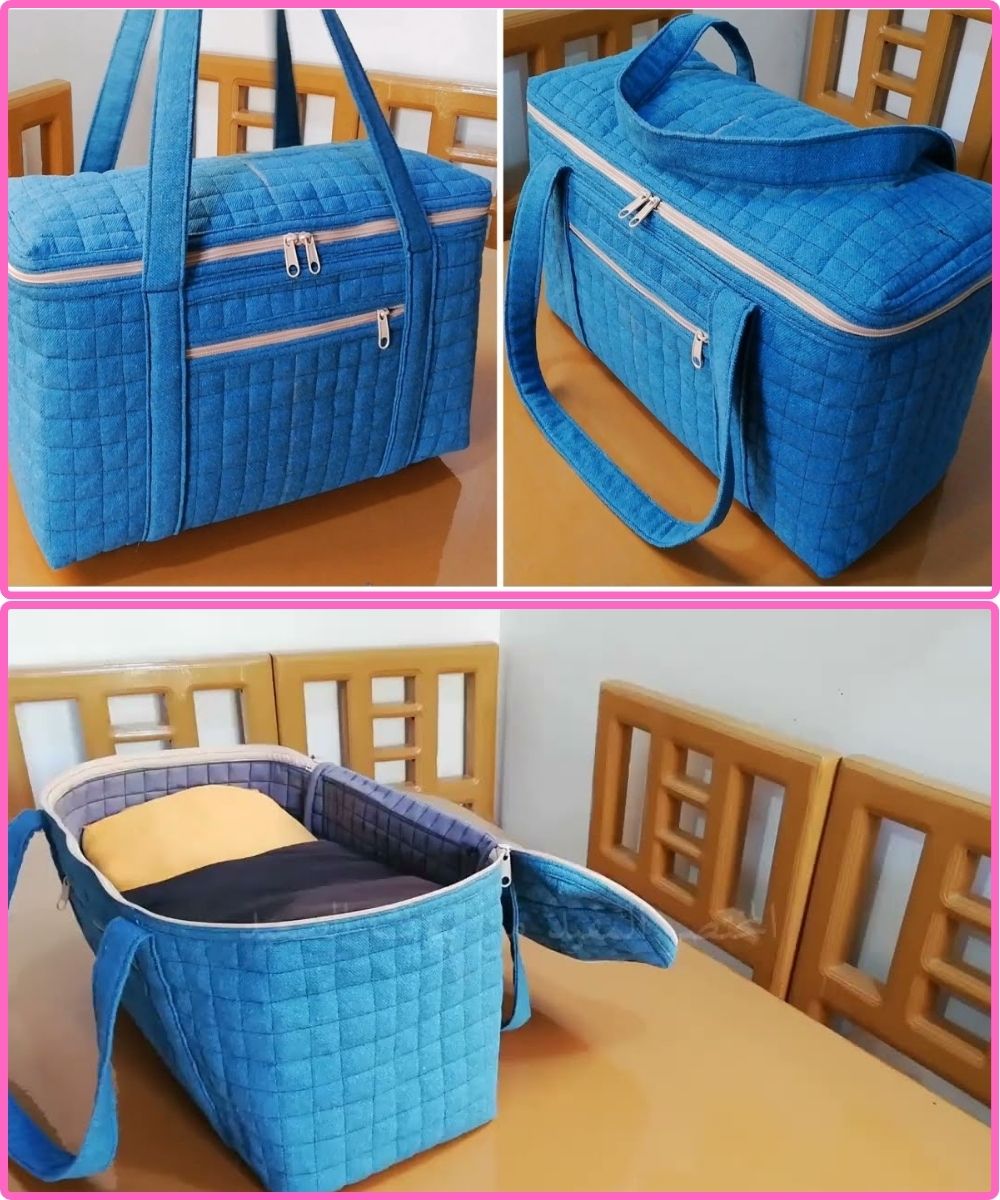
🧡 Why This Bag Works:
-
Strong: Reinforced fabric + interfacing + boxed corners = durable
-
Easy: Straightforward seams and simple zipper install
-
Practical: Can hold chargers, makeup, snacks, meds, or travel docs
-
Customizable: Add labels, embroidery, or color block it
Watch video: