 by
by Certainly! Here’s a detailed guide on how to make a zippered shoulder bag with an outside pocket. This sewing project is suitable for beginners to intermediate sewists and can be customized in size, color, and fabric type.
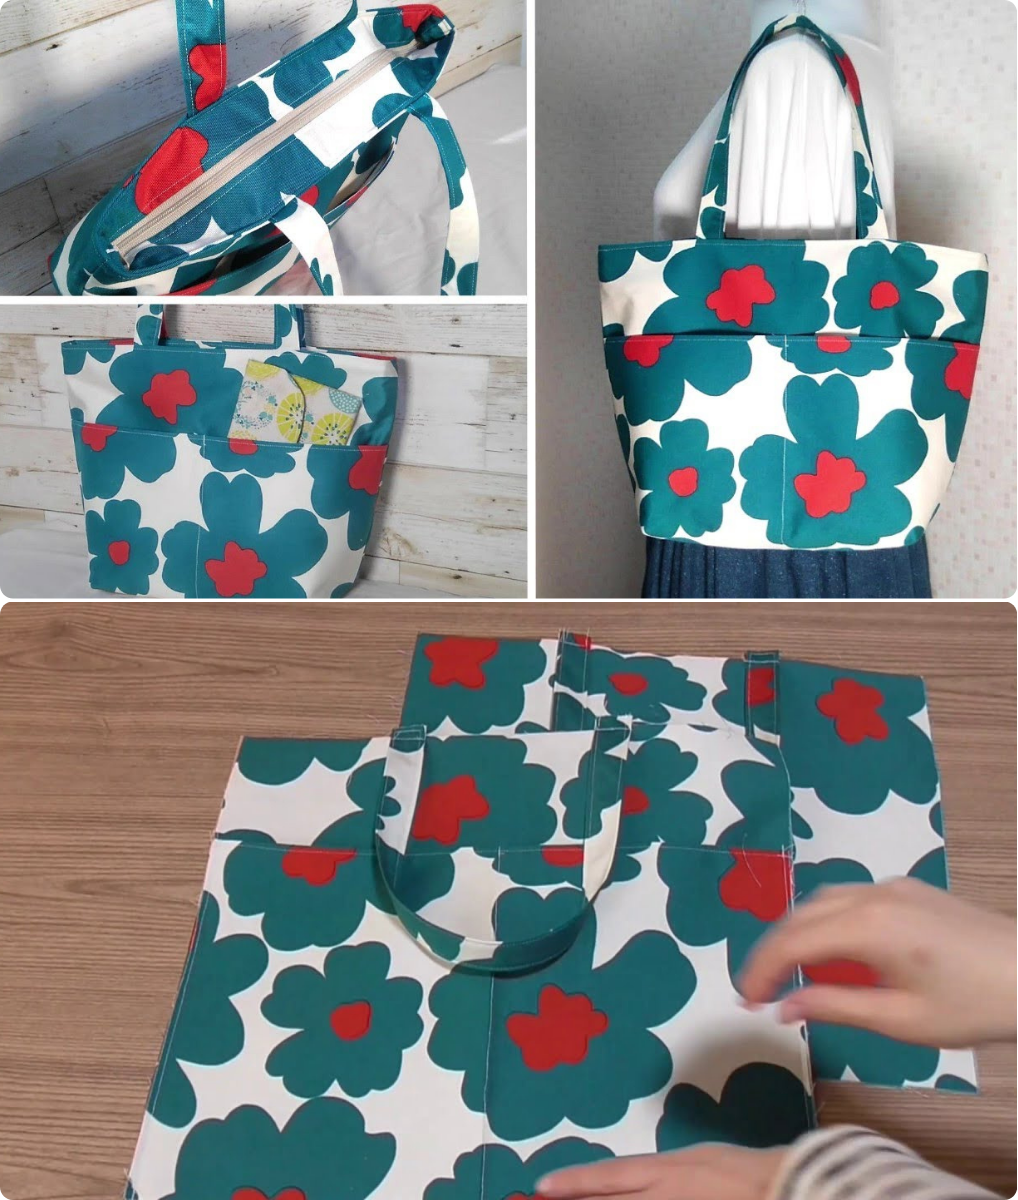
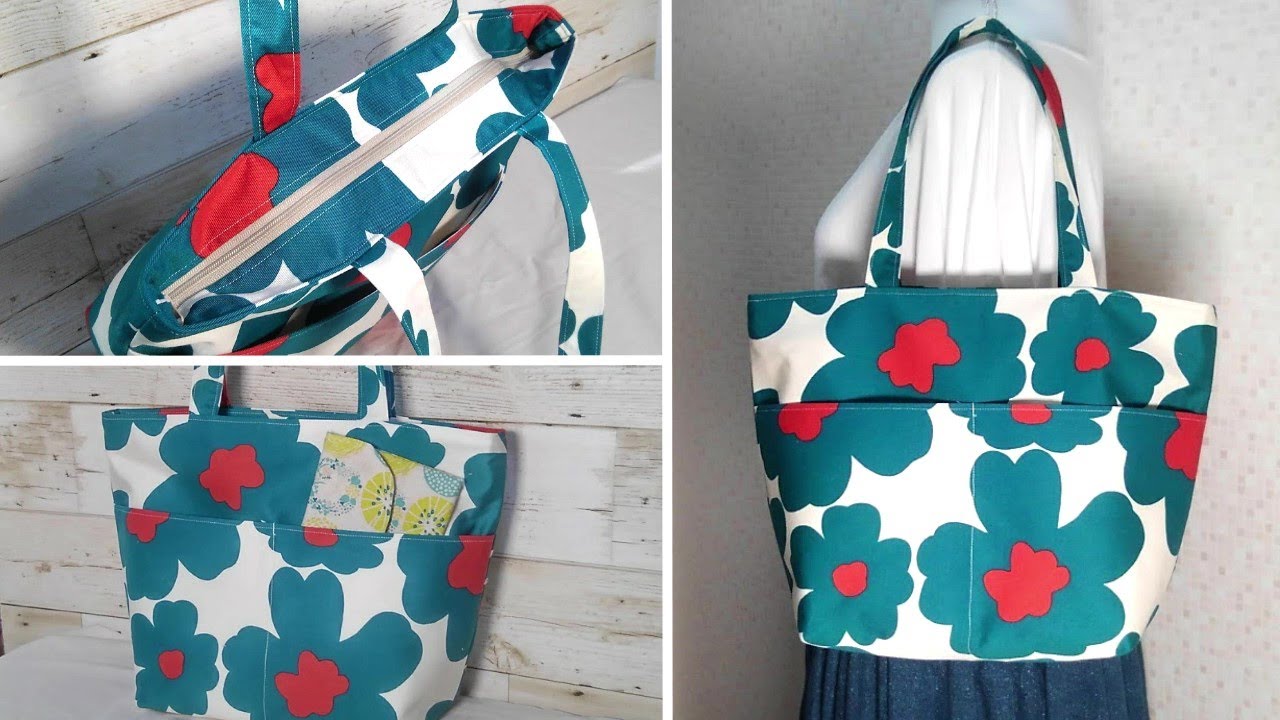
🧵 How to Make a Zippered Shoulder Bag with an Outside Pocket
✂️ Materials Needed:
-
Main fabric (e.g., canvas, cotton, or denim): ½ yard
-
Lining fabric: ½ yard
-
Fusible interfacing (medium to heavy weight): ½ yard
-
12”–14” zipper (for main opening)
-
7” zipper (for outside pocket)
-
1.5” or 2” wide webbing or fabric for the shoulder strap: 1.25 yards
-
Matching thread
-
Basic sewing tools: sewing machine, scissors, pins, iron, measuring tape, marking pen
📏 Finished Dimensions (Adjustable):
Approx. size: 10” wide x 9” tall x 2.5” deep
🪡 Step-by-Step Instructions:
1. Cut Your Fabric
From main fabric:
-
(2) 11” x 10” rectangles – bag front/back
-
(1) 3” x 28” strip – gusset (sides and bottom)
-
(1) 8” x 5” – outside pocket
From lining fabric:
-
(2) 11” x 10” – bag lining
-
(1) 3” x 28” – gusset lining
-
(1) 8” x 5” – lining for outside pocket
From interfacing:
-
Fuse to all main fabric pieces for structure
2. Make the Outside Zipper Pocket
-
Prepare pocket pieces (outer and lining, both 8” x 5”).
-
Center and sew the 7” zipper between the outer and lining fabrics (right sides together), using a zipper foot.
-
Flip right side out and topstitch along the zipper.
-
Sew the pocket onto one main body panel, centered horizontally and about 2” from the top.
3. Assemble the Bag Exterior
-
Sew the gusset strip to the sides and bottom of the front panel, right sides together.
-
Repeat with the back panel, creating the outer shell of the bag.
-
Install the main zipper:
-
Place the zipper face-down on the top edge of the outer bag (right side up), then lay the lining on top, right side down.
-
Sew with a zipper foot.
-
Repeat for the other side of the zipper with the remaining outer and lining pieces.
-
-
Topstitch both sides of the zipper.
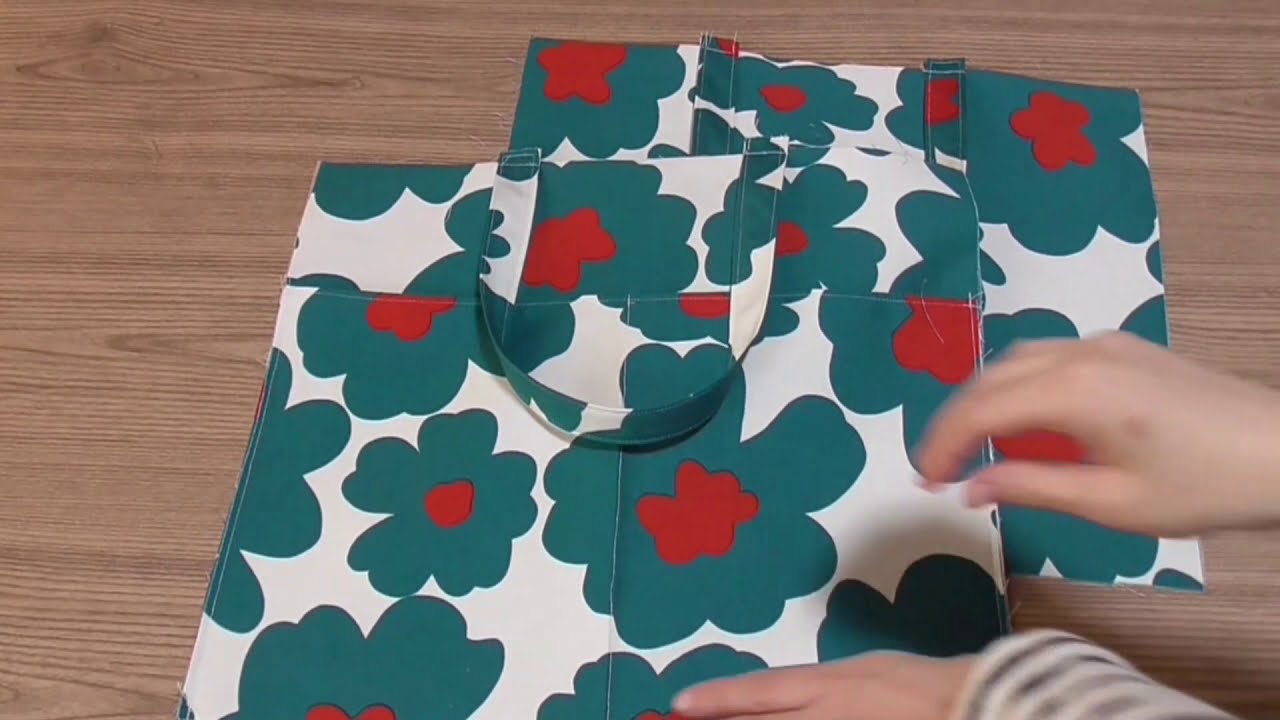
4. Make the Strap (Optional: Use Webbing)
If making from fabric:
-
Cut a strip 4” wide x 48” long.
-
Fold in half lengthwise, then fold each edge toward the center, press, and topstitch both edges.
-
Attach each end to the sides of the bag, either by sewing into the seam or using D-rings.
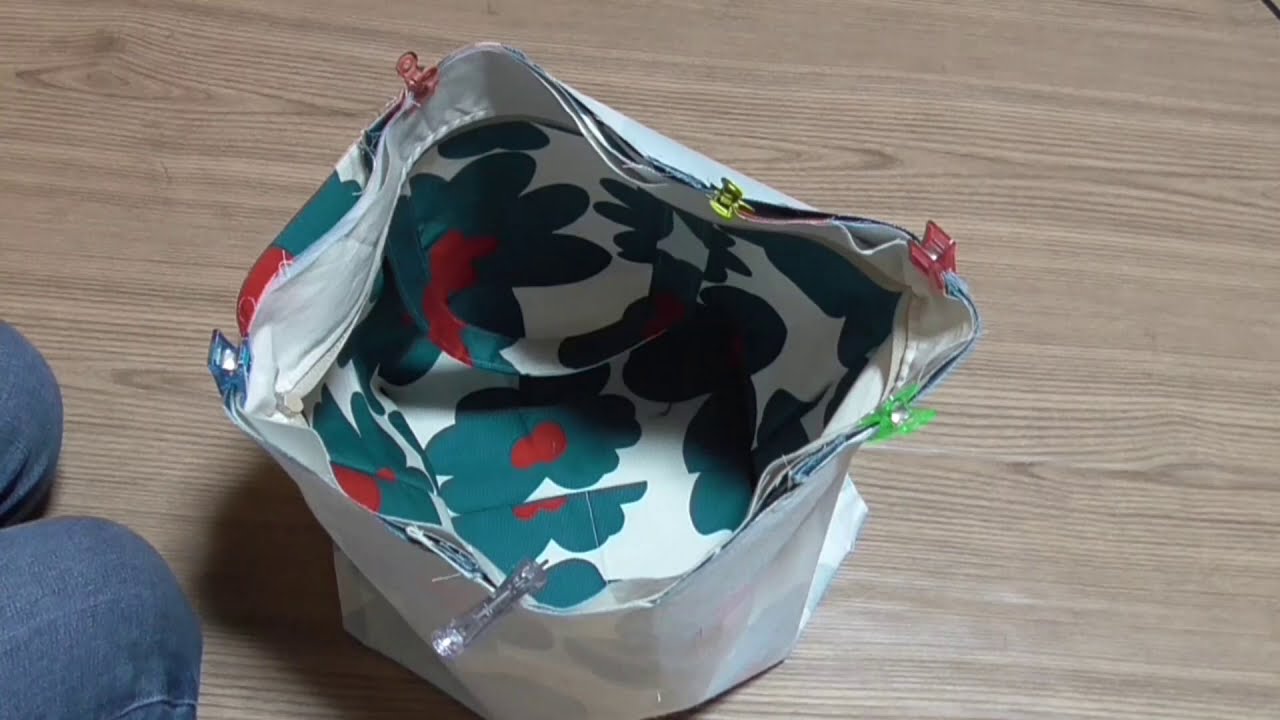
5. Assemble the Lining
-
Sew the gusset to the lining pieces just like the outer shell, leaving a 5” opening in the bottom seam for turning.
-
With the zipper open, place the outer bag and lining right sides together and sew all around the top opening.
6. Turn and Finish
-
Turn the bag right side out through the opening in the lining.
-
Stitch the lining opening closed (by hand or machine).
-
Push the lining into the outer shell and press the top edge.
✅ Final Touches:
-
Add rivets or snap closures if desired.
-
Consider edge painting or sealing for a more professional look.
-
Decorate the outside pocket with a label or embellishment.
👜 Tips:
-
Use a walking foot for thick fabrics or layers.
-
Press seams well for a neat finish.
-
Use coordinating zipper and thread colors for a polished look.
Would you like a printable version or illustrations for this tutorial?
Watch video: