 by
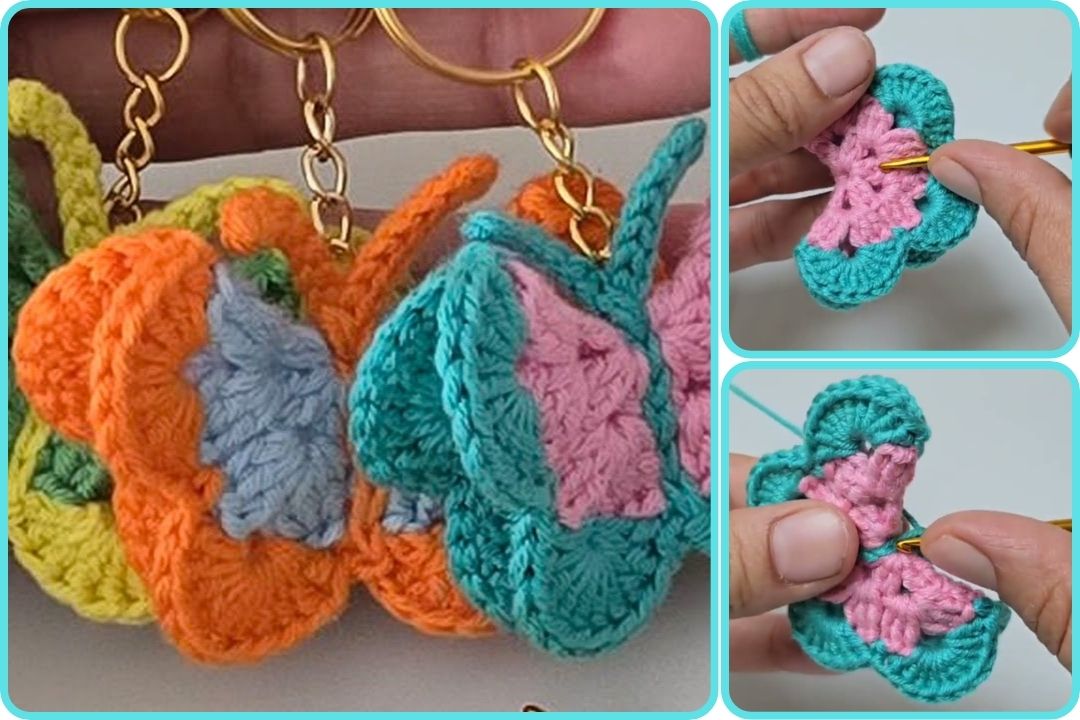
by Sure! Here’s a detailed step-by-step guide for “How to Crochet a Beautiful Butterfly Keychain 🦋 | Easy Crochet Tutorial” — perfect for a blog, video script, or written pattern. This tutorial is beginner-friendly and includes everything from materials to finishing touches.
🦋 How to Crochet a Beautiful Butterfly Keychain
Easy Crochet Tutorial – Step-by-Step Guide
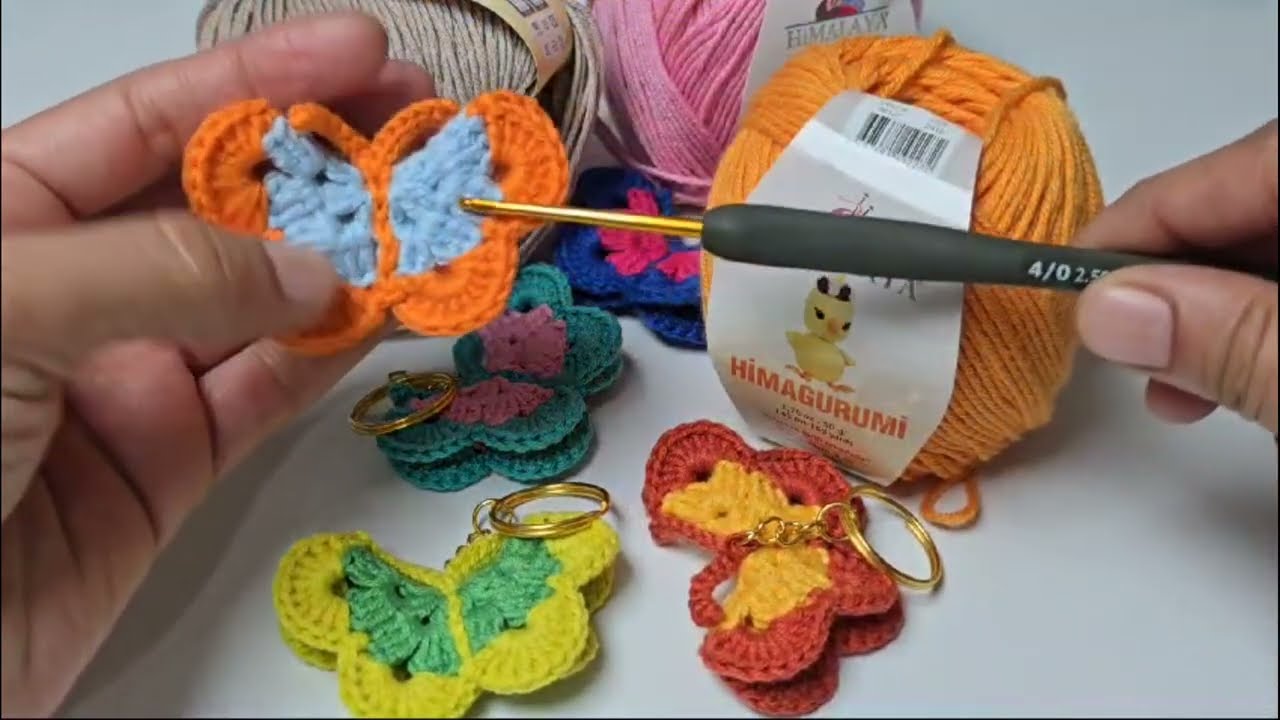
Butterfly keychains are not only adorable but also a quick and fun project! Whether you’re a crochet beginner or looking for a cute handmade gift idea, this tutorial will guide you through making your own crochet butterfly keychain. Let’s get started!
🧶 Materials You’ll Need:
-
Yarn: Use any 100% cotton or acrylic yarn (preferably lightweight/DK or worsted)
-
Choose 2-3 colors for contrast (e.g., pink + purple or blue + yellow)
-
-
Crochet hook: Size 3.5mm (E) or 4mm (G), depending on your yarn
-
Tapestry needle (for sewing in ends)
-
Scissors
-
Keychain ring or lobster clasp
-
Stitch marker (optional)
-
Stuffing (optional if you want it puffy)
📝 Abbreviations (US Terms):
-
ch – chain
-
sl st – slip stitch
-
sc – single crochet
-
dc – double crochet
-
tr – treble crochet
-
st(s) – stitch(es)
-
rnd – round
🪡 Instructions:
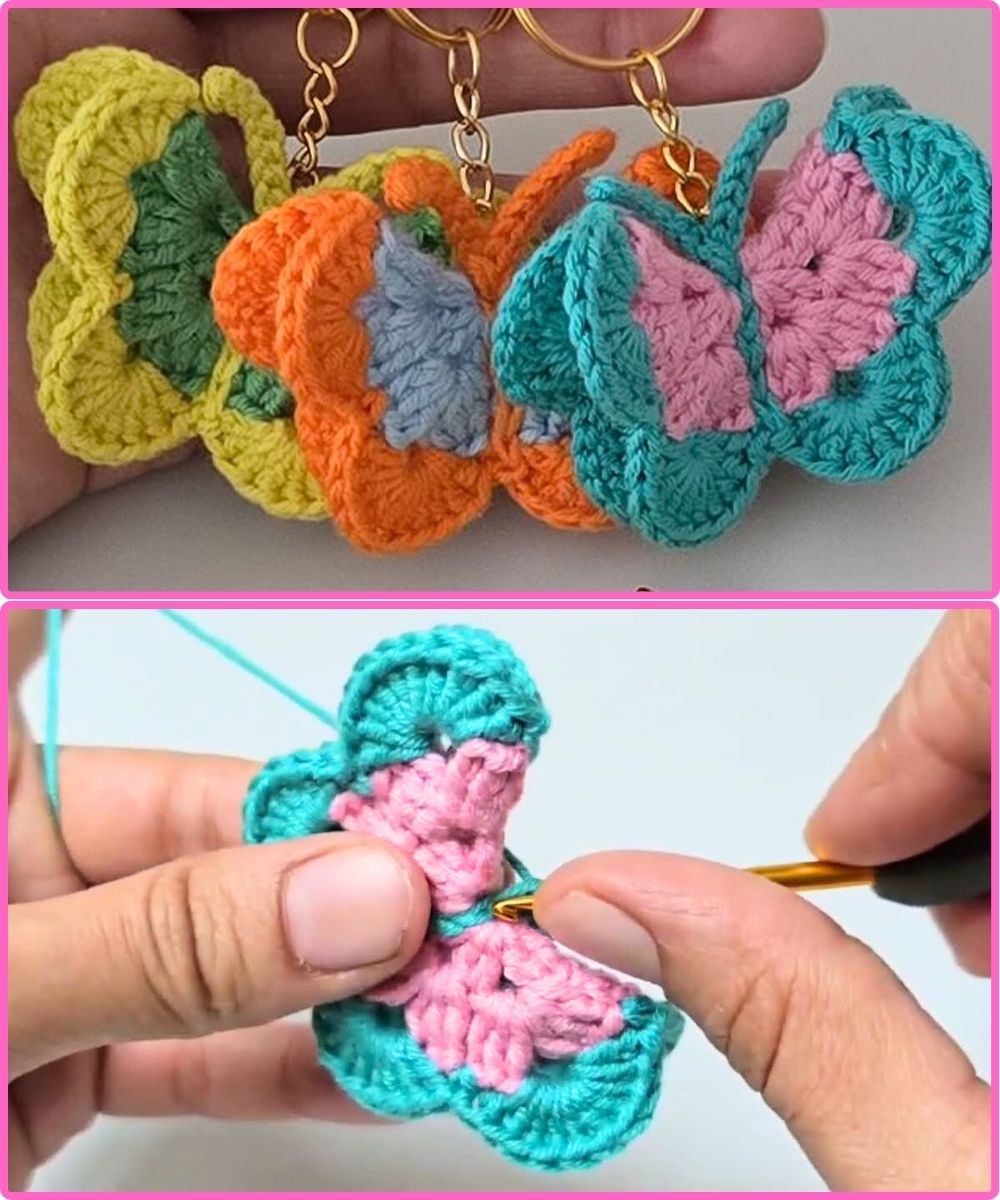
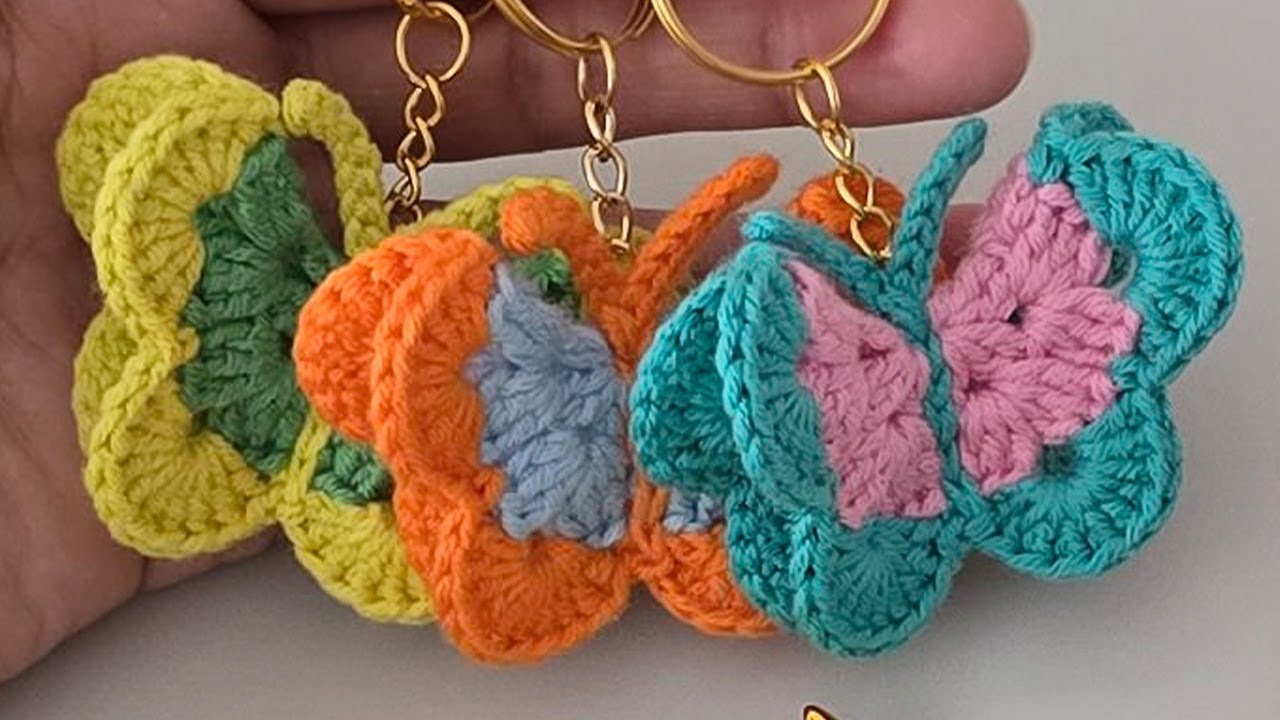
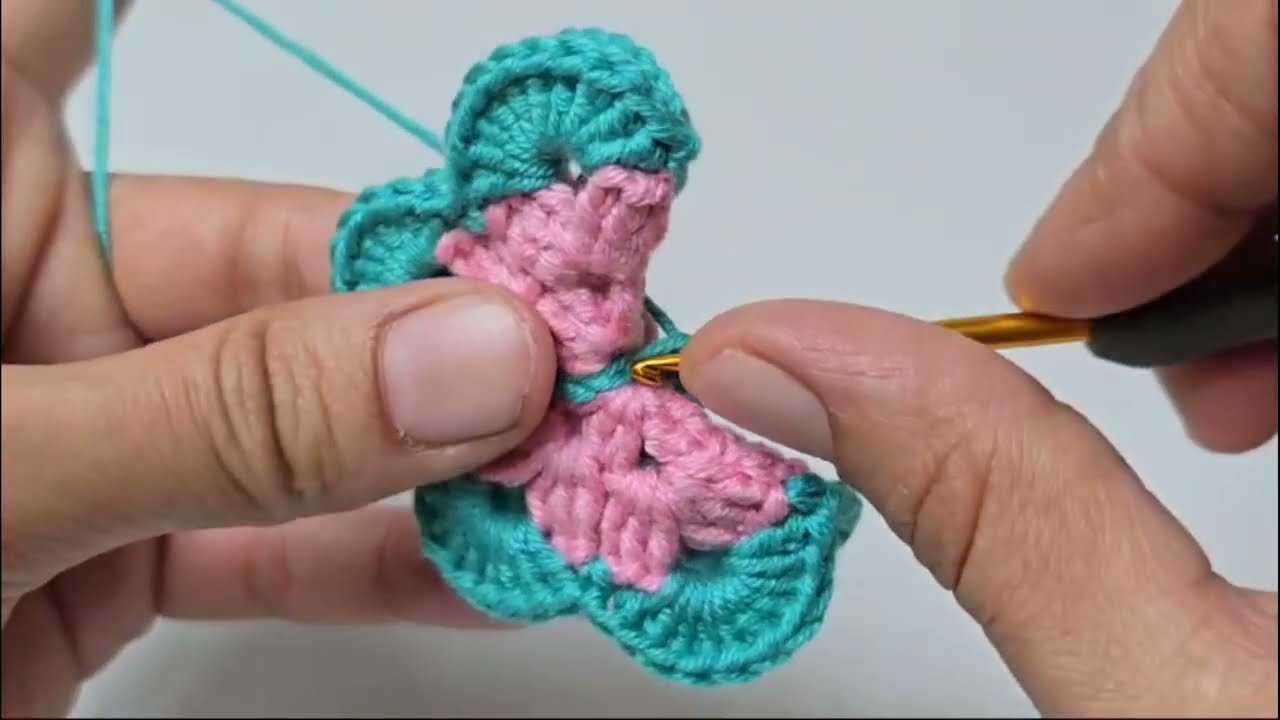
🌸 Step 1: Crochet Two Small Circles (Wings)
You’ll be making the wings from two round motifs.
With Color A (e.g., pink):
Rnd 1:
-
Magic ring, ch 3 (counts as dc), 11 dc into ring.
-
Join with sl st to top of ch 3. (12 dc total)
Rnd 2:
-
Ch 3, 1 dc in same st, 2 dc in each st around.
-
Join with sl st. (24 dc)
Change to Color B for decorative edging:
Rnd 3 (Optional):
-
Ch 1, sc in same st, ch 3, skip 1 st, repeat around.
-
Fasten off and weave in ends.
Repeat these steps to make two circles.
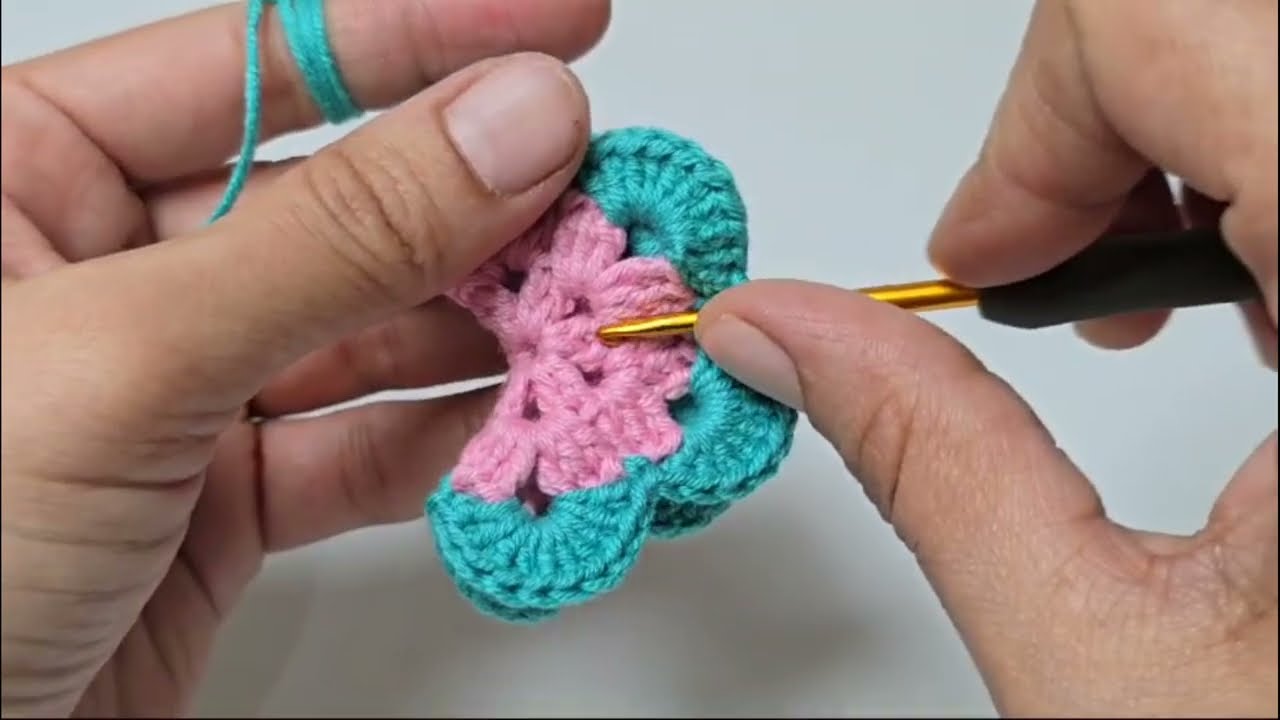
🧵 Step 2: Fold the Circles into Wings
-
Fold each circle in half (semi-circle).
-
Place the two folded halves together, facing outward, so they resemble butterfly wings.
🪶 Step 3: Make the Butterfly Body
With contrasting yarn (Color C, e.g., black or brown):
-
Ch 12 (or longer for bigger butterfly)
-
Fold the chain in half and tie it tightly around the center of the two wings.
-
Knot securely and leave two ends hanging — these will be the butterfly’s antennae.
🧷 Step 4: Attach the Keyring
-
Use one of the yarn tails or a jump ring to attach the butterfly to a metal keyring or lobster clasp.
-
Secure tightly by knotting or sewing the yarn in place.
✨ Optional Embellishments
-
Add a small bead or button to the center
-
Sew or glue on tiny sequins or glitter fabric paint
-
Use embroidery thread to create patterns on the wings
📌 Final Touches
-
Weave in any remaining yarn tails using a tapestry needle.
-
Trim excess yarn.
-
Shape the wings to make sure they look even and symmetrical.
-
Clip onto your keys, bag, backpack, or gift it to someone special!
🎥 Video Tutorial Suggestion (if making content)
Intro Shot: Show finished keychain close-up
Materials Layout: Display tools and yarn
Step-by-Step Filming: Zoom in on hands as each step is done
Voiceover: Explain each stitch slowly
Ending: Show finished butterfly being attached to keys or a bag
💡 Tips for Beginners
-
Use contrasting yarns to easily see your stitches.
-
If you’re new to magic rings, you can ch 4 and join instead.
-
Don’t over-tighten the body chain — the wings need room to spread.
Watch video: