 by
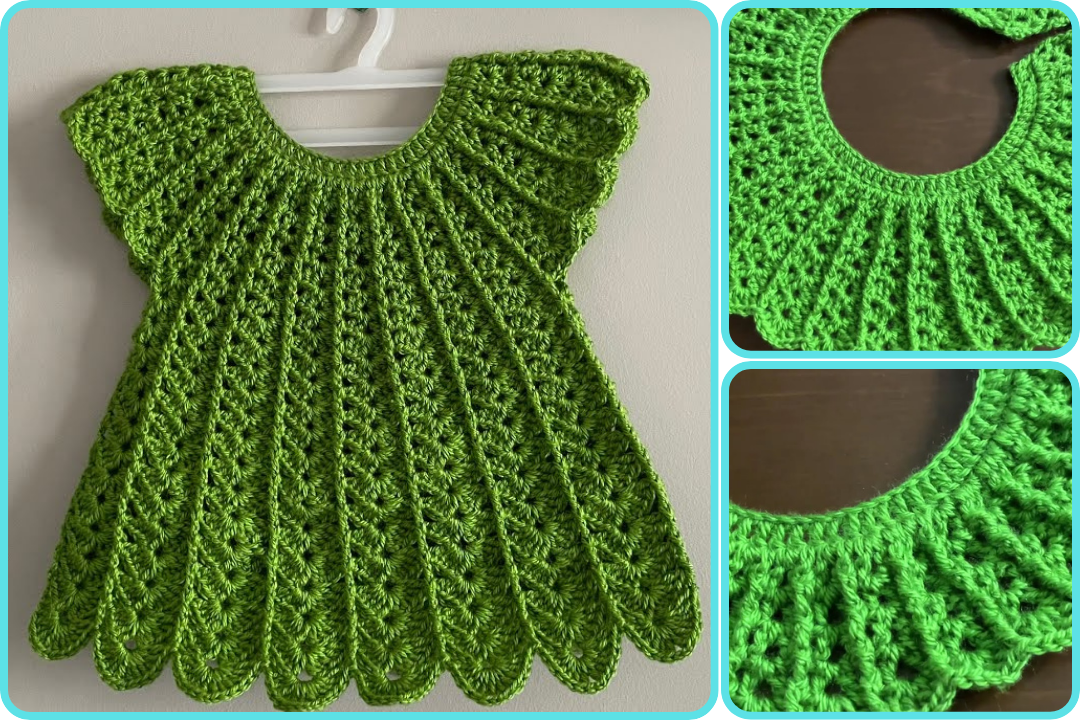
by Sure! Here’s a detailed guide on how to crochet a Princess Baby Dress – simple enough for beginners but elegant enough to look like a royal little outfit. This pattern is designed for a baby aged 0–6 months, but I’ll also include tips on how to adjust sizing.
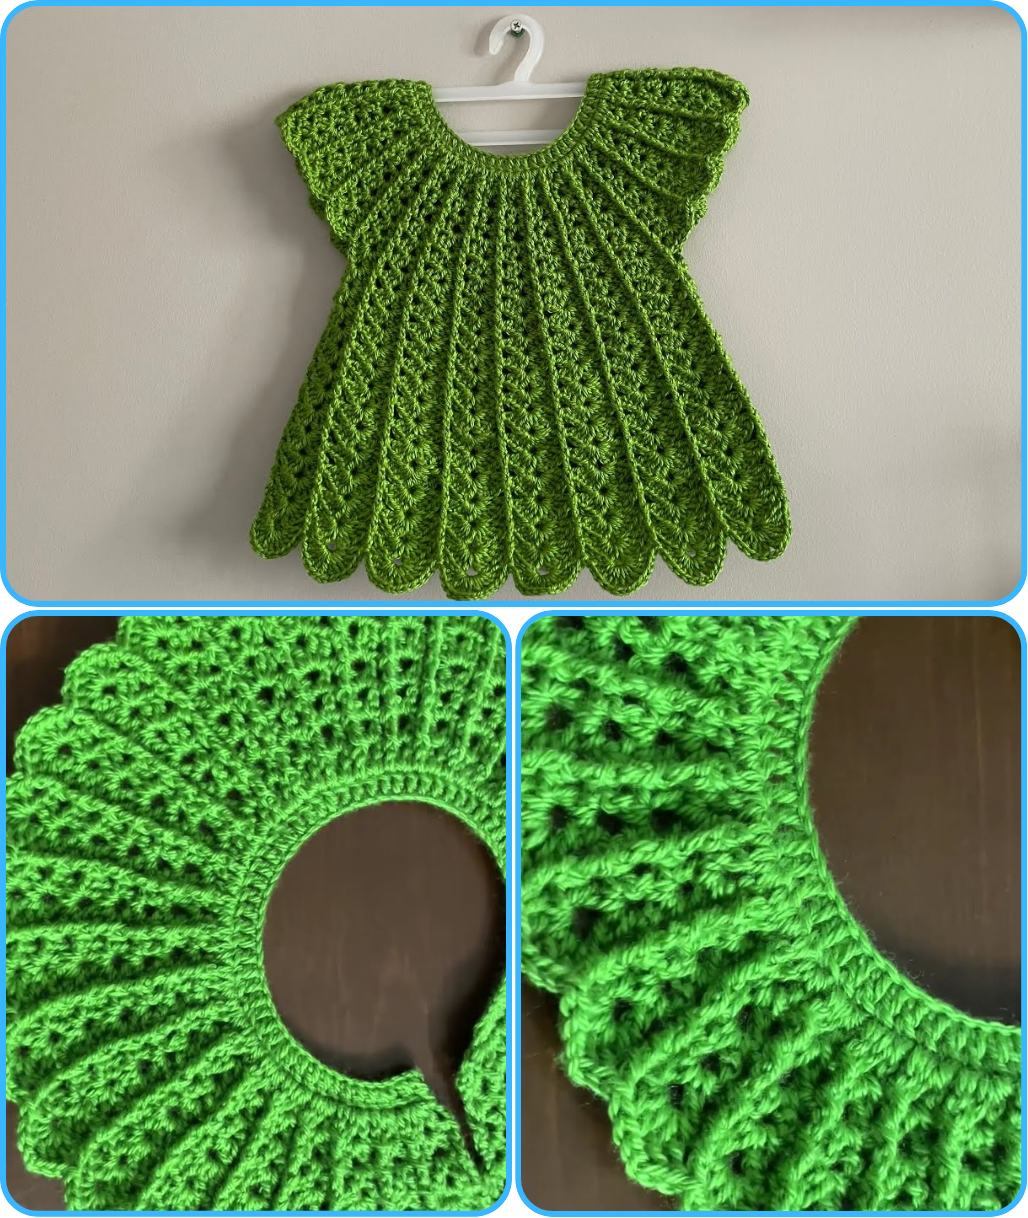
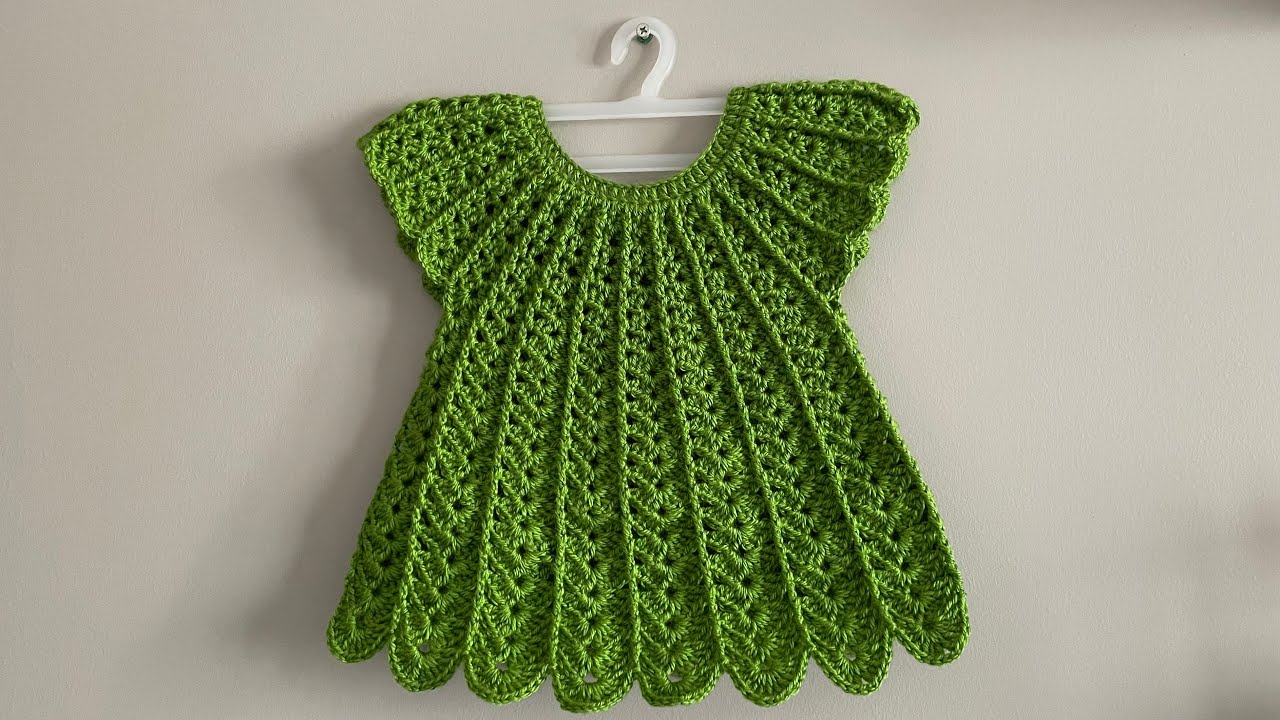
🧵 How to Crochet a Princess Baby Dress (Easy for Beginners)
🧶 Materials Needed:
-
Yarn: Soft baby yarn (DK weight or light worsted weight; 100% cotton or baby acrylic blend preferred) – ~300 yards
-
Hook: 4.0 mm (G/6) crochet hook
-
Stitch markers
-
Scissors
-
Yarn needle
-
Buttons (2–3 small ones) if making a back opening
-
Ribbon, bows, or appliqué flowers (optional for princess look)
📏 Sizing Guide
This basic pattern fits 0–6 months. To size up, increase starting chain and yoke rows. For example:
| Age | Chest Circumference | Starting Chain |
|---|---|---|
| 0–3 mo | ~16 in (40.5 cm) | ~48–52 ch |
| 3–6 mo | ~17–18 in (43–46 cm) | ~54–58 ch |
| 6–12 mo | ~19–20 in (48–51 cm) | ~60–64 ch |
🪡 Abbreviations (US Terms)
-
ch = chain
-
sl st = slip stitch
-
sc = single crochet
-
hdc = half double crochet
-
dc = double crochet
-
st = stitch
-
inc = increase (2 stitches in one stitch)
🧚 Pattern Overview
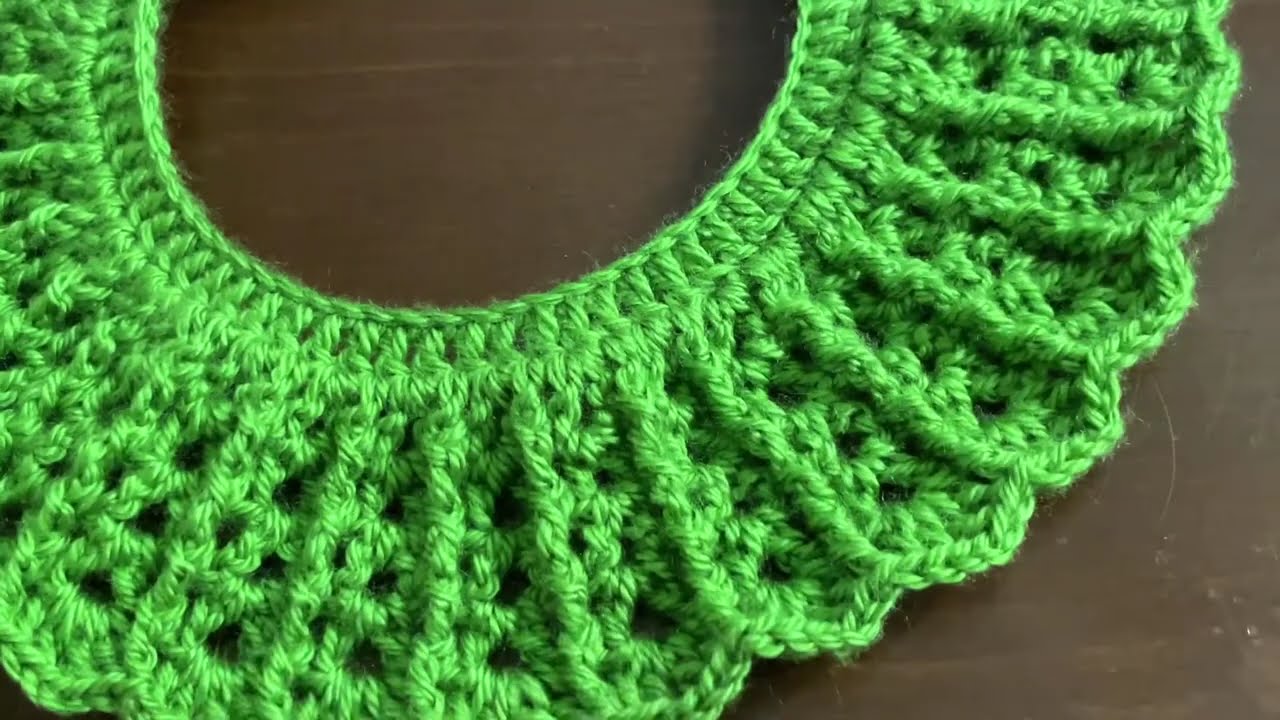
STEP 1: Create the Yoke (Top Part)
-
Foundation Chain: Ch 52 (for 0–3 months)
-
Row 1: Dc in 3rd ch from hook and across (50 dc). Ch 2, turn.
-
Row 2–5: Continue in dc, increasing at shoulder points. Use this division:
-
8 dc (front), ch 1 (armhole), 12 dc (sleeve), ch 1, 10 dc (back), ch 1, 12 dc (sleeve), ch 1, 8 dc (front)
-
Add 1 dc in each ch-1 space on the next row to shape the yoke.
-
Continue for 4–5 rows or until armholes reach ~4.5–5 inches wide.
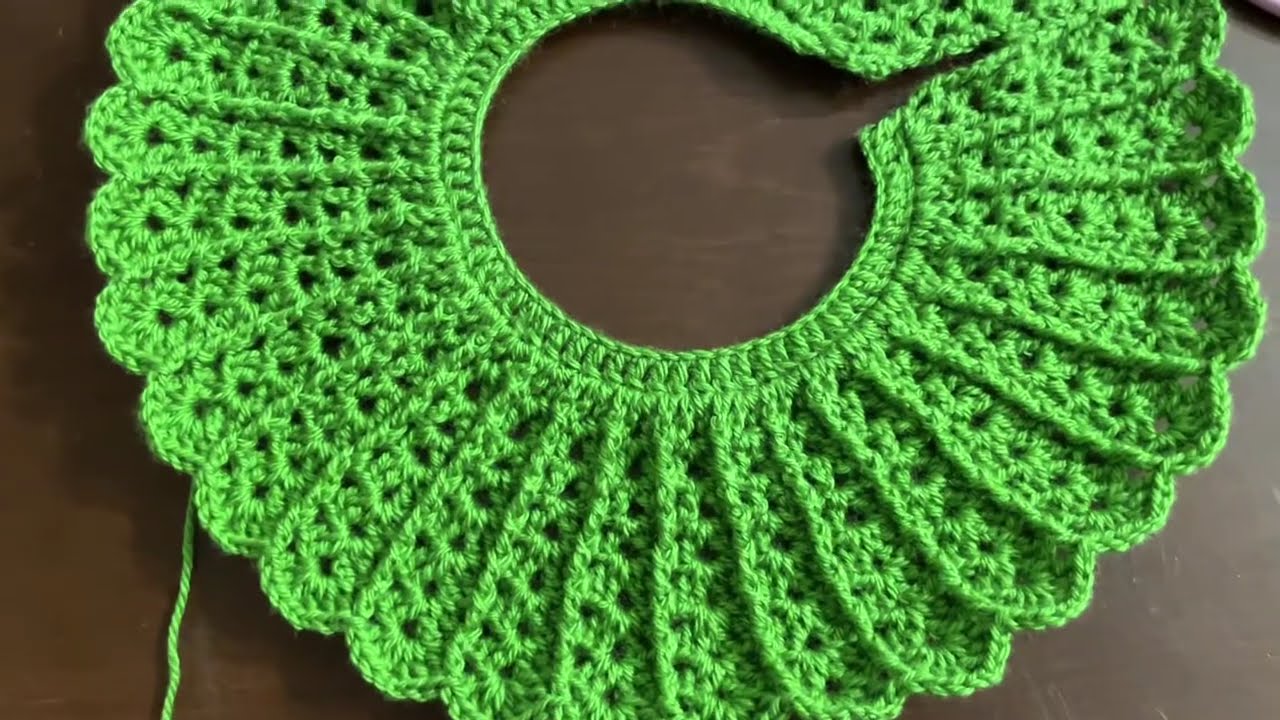
STEP 2: Join the Body
-
Joining Round:
-
Dc across front, skip sleeve stitches, dc across back, skip second sleeve, dc across second front.
-
Join with sl st to the top of ch 2.
-
-
Mark underarm stitches if needed.
-
From here, you’ll work in rounds.
STEP 3: Crochet the Skirt
-
Round 1: Ch 2 (counts as dc), dc in each st around, join with sl st.
-
Round 2 (increase): 1 dc in next 2 sts, 2 dc in next st – repeat around. This flares the skirt slightly.
-
Round 3–15 (or as long as desired): Dc in each st around.
-
For a princess look, alternate rows of shell stitch or V-stitch (see ideas below).
-
Optional: Add Princess Flair
-
💖 Shell Stitch Skirt: (2 dc, ch 1, 2 dc) in same st, skip 2–3 sts, repeat for delicate shell flare.
-
🎀 Ribbon Casing: Near waist, create a row of ch 1, skip 1 holes to weave in ribbon.
-
👑 Edging: Use picot or scallop edge on the bottom.
STEP 4: Add Sleeves (Optional)
-
If you want sleeves, reattach yarn at the underarm and work 2–3 rounds of dc or shells.
-
Cap sleeves are cute for summer.
STEP 5: Finishing Touches
-
Sew in all ends using a yarn needle.
-
Add buttons at the back opening (if you left one).
-
Attach ribbons, bows, lace, or a small tiara appliqué for a princess finish.
🧺 Washing & Care
Use machine washable yarn for easy care. Always hand wash delicate trims and lay flat to dry.
🎥 Want a Video?
I can link or recommend free YouTube tutorials if you’d like step-by-step visuals.
Watch video: