by
by Absolutely! I can guide you step by step on how to make simple granny square slippers. These slippers are cozy, customizable, and a perfect beginner-friendly crochet project. I’ll break it down in detail.

Materials You’ll Need:
-
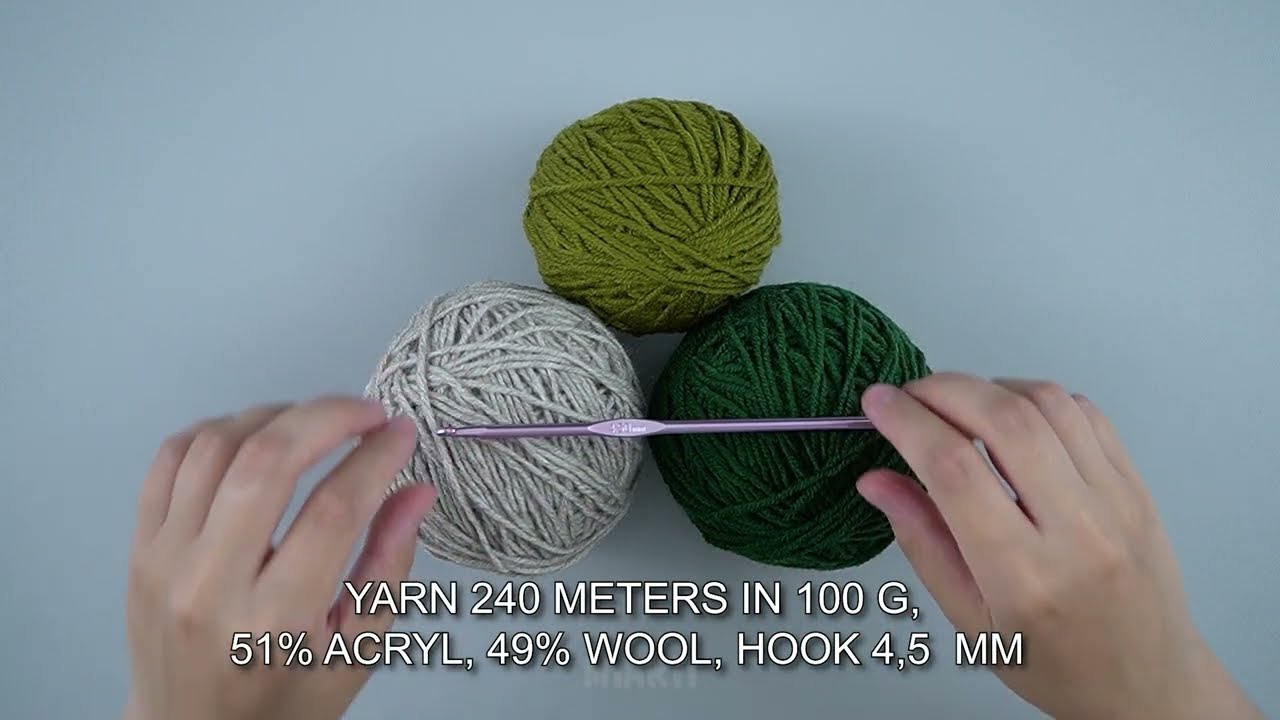
Yarn:
-
Medium-weight yarn (worsted weight, #4) works best.
-
You can choose a single color or multiple colors for a classic granny square look.
-
-
Crochet Hook:
-
Usually size H/8 (5mm) works well with medium-weight yarn.
-
-
Scissors
-
Tapestry Needle for weaving in ends
-
Optional: Non-slip fabric paint or grips for the sole
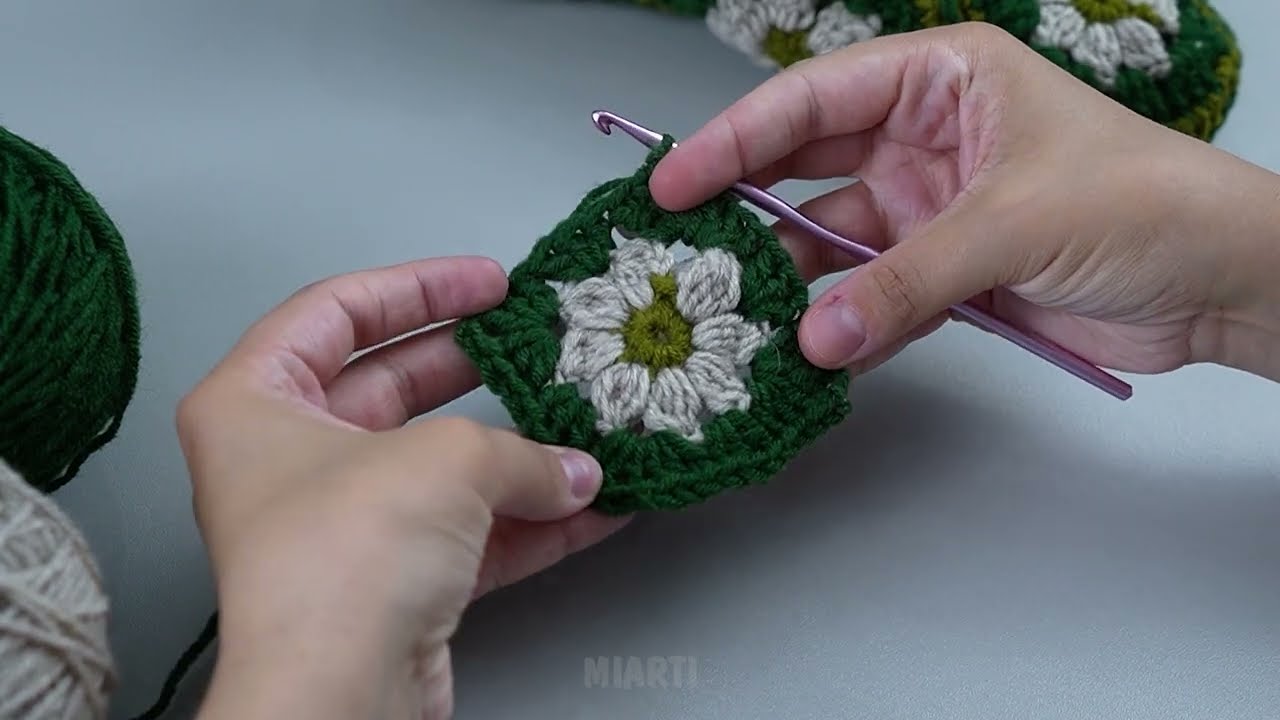
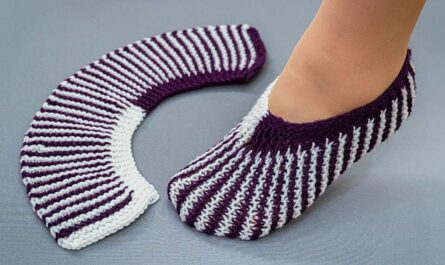
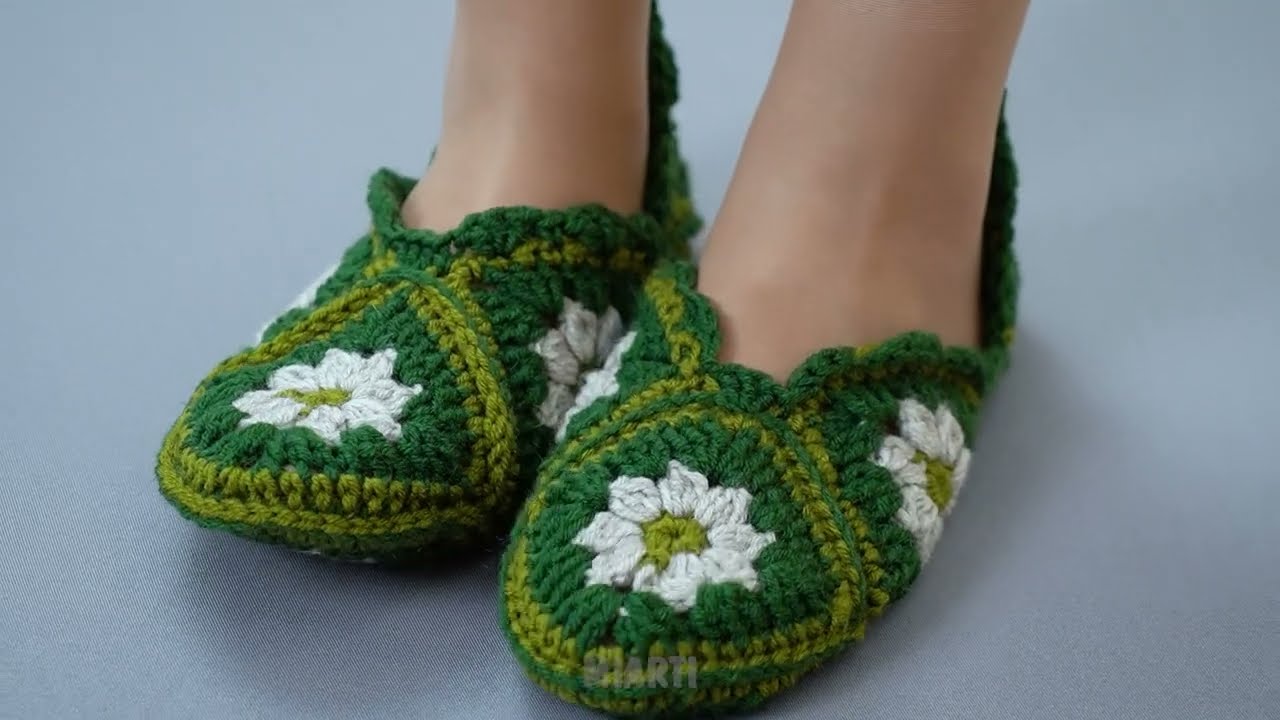
Step 1: Make a Granny Square
The basic granny square forms the main part of your slipper.
Instructions:
-
Start with a magic ring (or chain 4 and join to make a ring).
-
Round 1: Chain 3 (counts as first double crochet), then work 2 double crochets (dc) into the ring, chain 1, repeat 3 times (you’ll have 4 sets of 3 dc). Join with a slip stitch to the top of the starting chain 3.
-
Round 2: Slip stitch into the next chain-1 space, chain 3, work 2 dc, chain 1, 3 dc into the same corner space. Repeat for the other 3 corners. Join with a slip stitch.
-
Round 3: Repeat the same pattern, increasing the size until your square is big enough to cover the top of your foot (usually 5–6 inches for teens).
Step 2: Make the Sole
You can either crochet a simple sole or use a store-bought slipper sole. Here’s a quick crochet sole method:
-
Chain a length that matches your foot length (plus 1).
-
Work single crochet (sc) across the chain.
-
Chain 1, turn, and sc across each row until the sole reaches your desired width.
-
Round the edges with sc, 2 sc in corners for a slightly curved sole.
Step 3: Assemble the Slippers
-
Place the granny square over the top of your foot.
-
Using slip stitches or whip stitches, attach the sides of the granny square to the edges of the sole.
-
Make sure it’s snug but not tight.
Step 4: Make the Back (Optional)
-
For a closed-back slipper:
-
Chain across the back, then sc across until you reach the other side of the sole.
-
Attach it to the sides of the granny square.
-
Step 5: Finishing Touches
-
Weave in all loose yarn ends using a tapestry needle.
-
If desired, add non-slip grips to the bottom for safety.
Tips for Success
-
Use soft but durable yarn for comfort.
-
Make the granny square slightly bigger than your foot to allow stretching.
-
Experiment with colors for fun patterns—classic granny squares are colorful and cute!
If you want, I can also make a super easy step-by-step diagram showing exactly how the granny square slipper is constructed—almost like a visual tutorial—so it’s really beginner-friendly.
Watch video: