 by
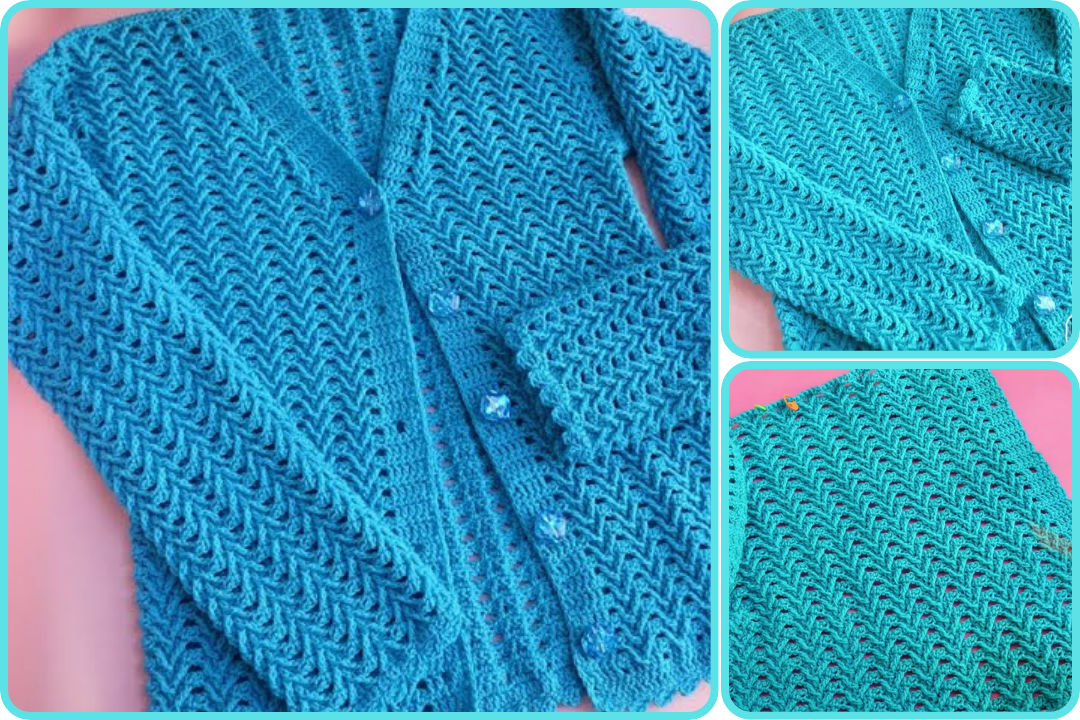
by Sure! Here’s a detailed step-by-step guide on how to make a crochet cardigan with sleeves, suitable for an adventurous beginner or intermediate crocheter. We’ll cover everything from choosing yarn to shaping the sleeves and assembling the cardigan.
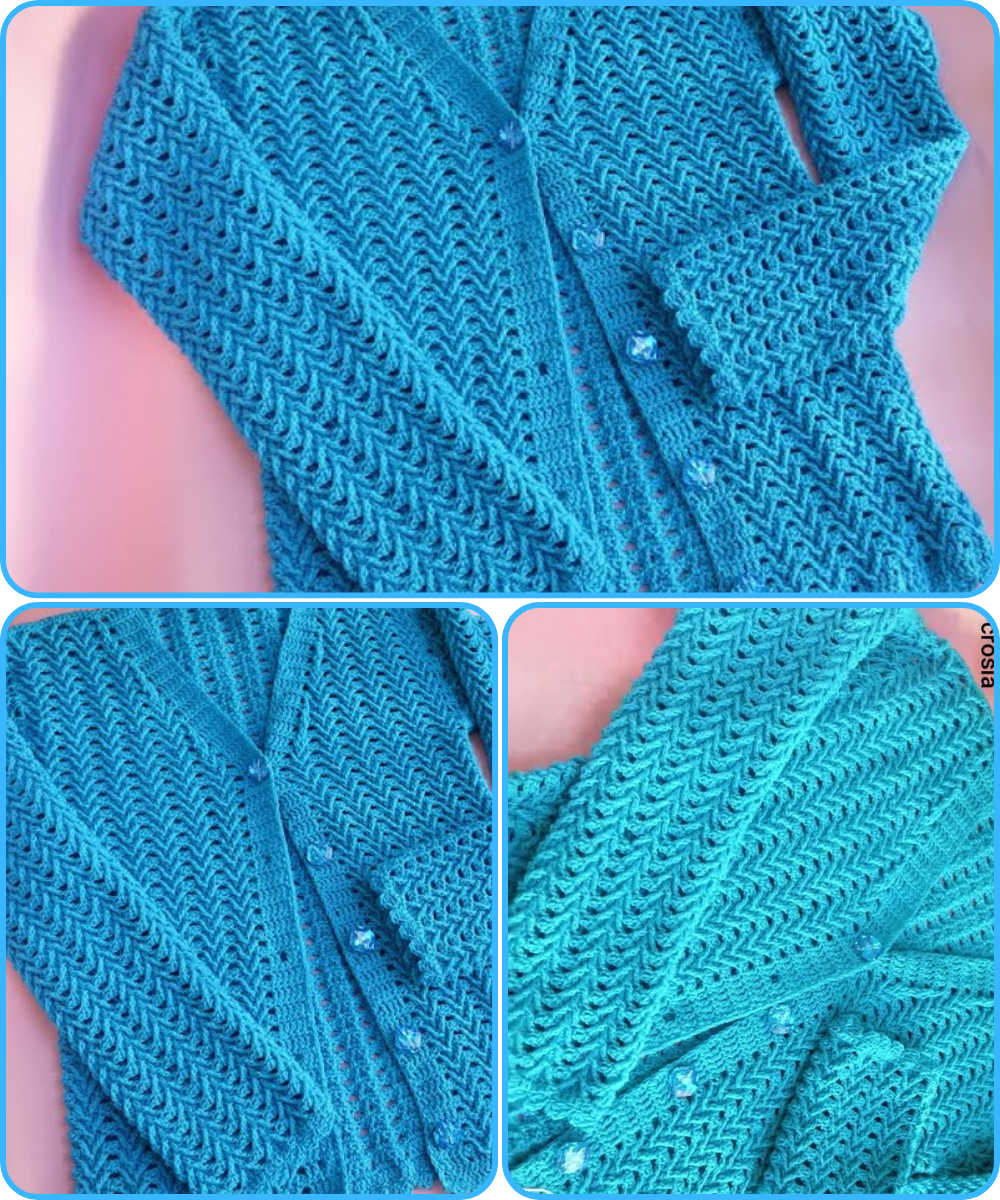
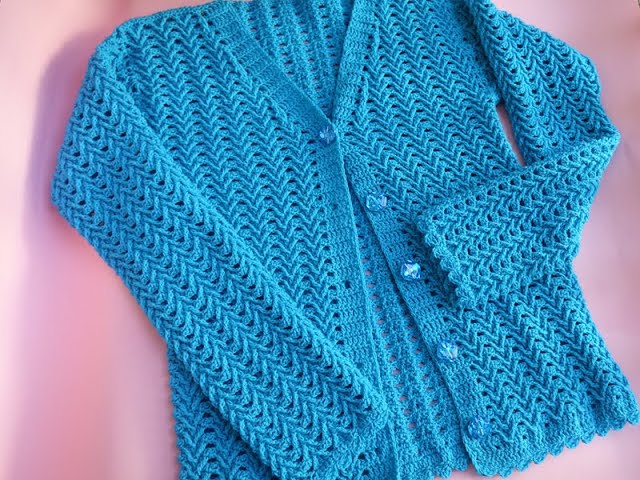
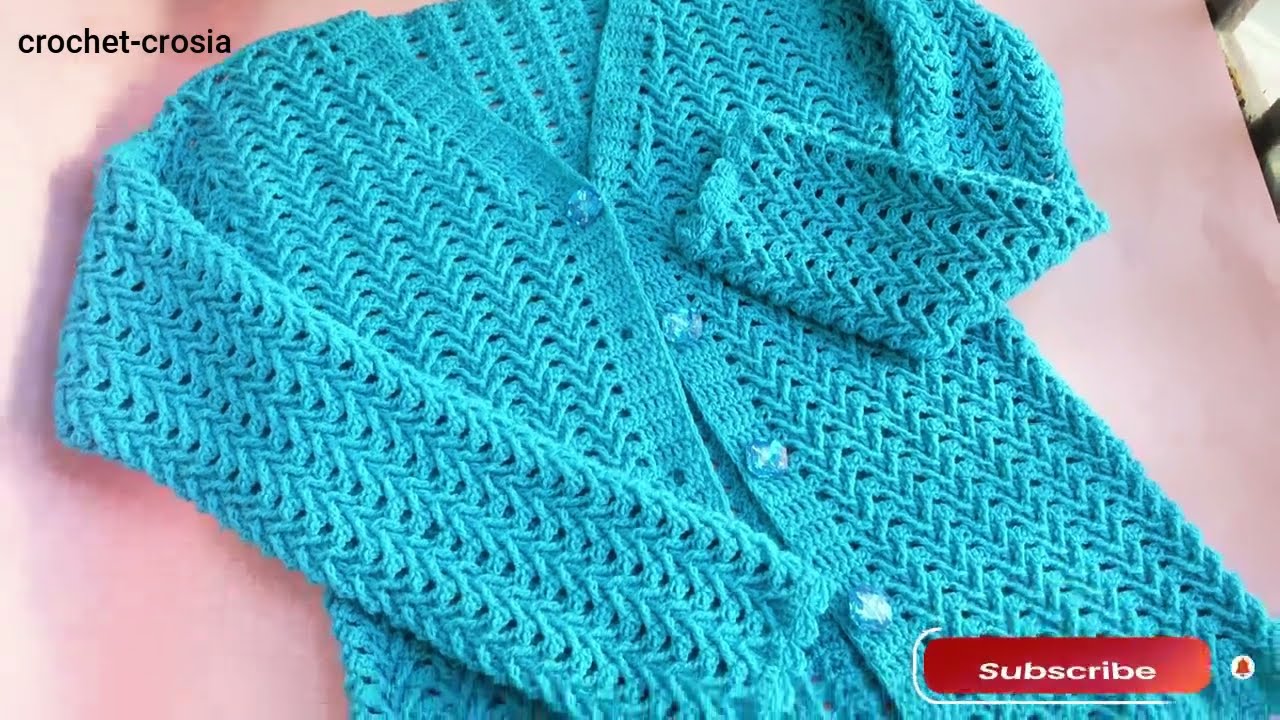
🧶 How to Make a Crochet Cardigan with Sleeves
📋 Materials Needed:
-
Yarn – Worsted weight (Category 4) is a good beginner choice.
-
Amount depends on size (approx. 1000–1500 yards for a medium size).
-
-
Hook – Use the size recommended on the yarn label (commonly 5.0 mm/H-8 for worsted).
-
Tapestry needle – For weaving in ends and seaming.
-
Stitch markers – To help with counting and shaping.
-
Measuring tape – To check gauge and measure panels.
🧵 Basic Structure of a Crochet Cardigan:
A simple cardigan usually consists of:
-
Back panel
-
Two front panels (left and right)
-
Two sleeves
-
Optional ribbing or edging
🧱 Step-by-Step Instructions
Step 1: Gauge Swatch
-
Crochet a small 4” x 4” square in the stitch pattern.
-
Wash/block it the way you will the final piece.
-
Count stitches per inch and rows per inch to match the pattern or adjust hook size.
Step 2: Crochet the Back Panel
-
Chain the width you want (usually from armpit to armpit).
-
Work in rows of your chosen stitch until it reaches the desired length (neck to hip).
-
Example stitch: Half Double Crochet (HDC) or Double Crochet (DC) are common.
-
Fasten off and weave in ends.
Step 3: Crochet the Front Panels
-
Make 2 panels, each half the width of the back panel.
-
They should be the same height as the back panel.
-
Leave space for neck shaping if desired (optional).
Step 4: Join Shoulders
-
Use mattress stitch or slip stitch to sew the front panels to the back panel at the shoulders.
-
Leave openings for the armholes.
Step 5: Add the Sleeves
There are two methods:
A) Worked in the round:
-
Attach yarn at the armhole.
-
Work in rounds to build the sleeve outward to the wrist.
-
Decrease stitches gradually if tapering is desired.
B) Worked flat:
-
Chain desired sleeve length and work rows for the width.
-
Shape the sleeve by decreasing stitches at the beginning and end of rows (optional).
-
Seam the sleeve and attach it to the armhole.
Step 6: Seam the Sides
-
Fold the cardigan and use mattress stitch or whip stitch to join the sides from bottom to armpit and underarms down to sleeve cuffs.
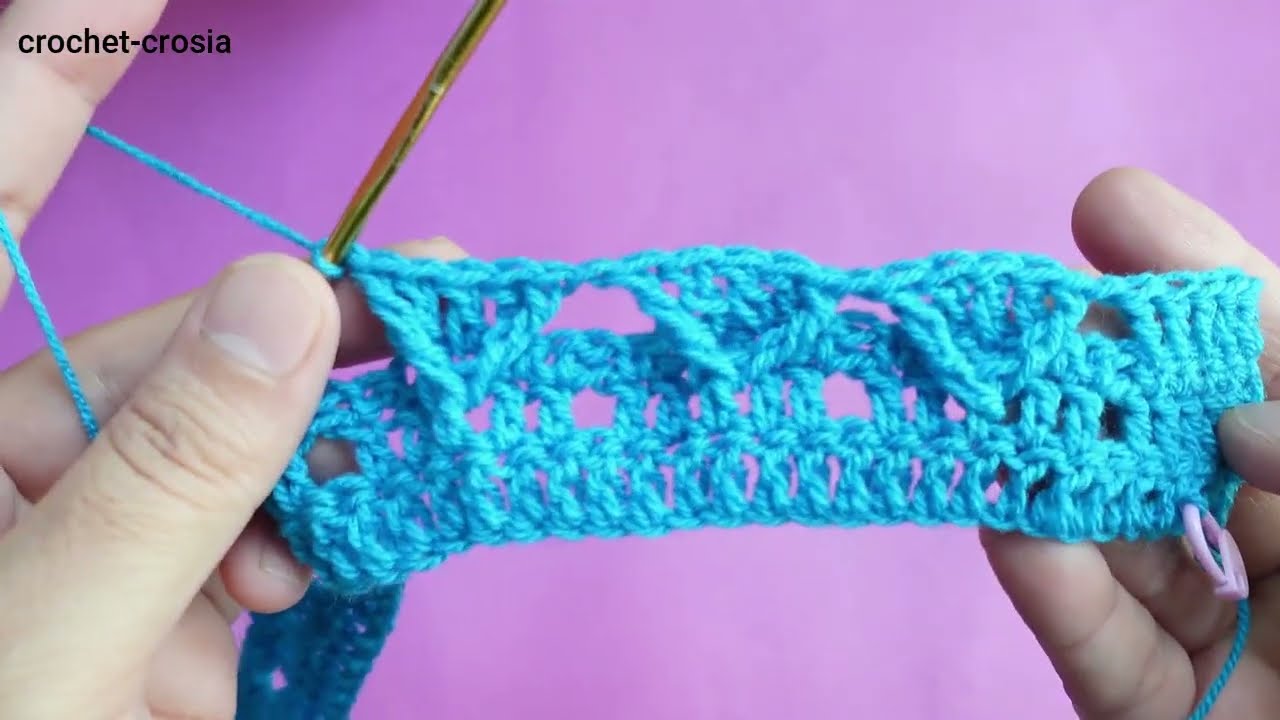
Step 7: Add Edging or Ribbing (Optional but Polished Look)
-
Bottom hem and cuffs: Use Front Post/Back Post DC for a stretchy ribbed effect.
-
Collar/Front opening: Add a few rows of HDC, SC, or DC along the front and neck opening.
-
Add buttons or ties if desired (remember to make buttonholes).
📏 Sizing Tips:
-
Measure your bust and desired cardigan length.
-
Add positive ease (extra inches) for a relaxed fit.
-
Try it on as you go if possible, especially with top-down or modular patterns.
✨ Stitch Suggestions:
-
Simple: Single crochet, half-double crochet.
-
Textured: Moss stitch, waffle stitch, granny stitch.
-
Fancy: Shells, lace, or cables (for advanced crocheters).
💡 Pro Tips:
-
Always block your pieces before assembly for evenness.
-
Use stitch markers to track increases, decreases, and seam placement.
-
Try color blocking or stripes for visual interest.
-
Use soft, wearable yarn like cotton blends or acrylic for comfort.
Watch video: