 by
by Absolutely! Here’s a detailed written tutorial titled:
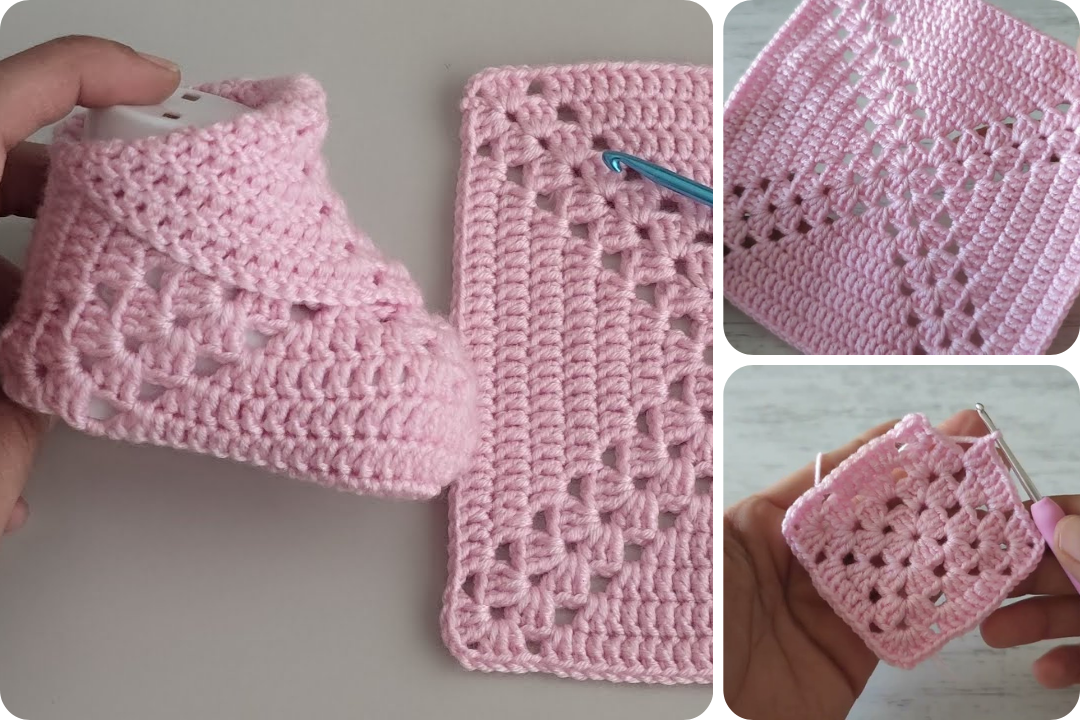
🧶 How to Crochet the Cutest Baby Shoes from the Square Stitch for Beginners
| Easy Crochet Booties – Step-by-Step Guide
These adorable crochet baby shoes are made from a simple square stitch base (often called a granny square), making them perfect for beginners. With just a little yarn and a few basic stitches, you’ll have a pair of cozy, handmade booties any baby will love!
🌟 What You’ll Learn:
-
How to crochet a square sole
-
How to shape baby shoes from a flat square
-
How to add a heel and optional cuff
-
Tips for finishing and customizing
🧵 Materials Needed:
-
Worsted weight yarn (size 4, soft acrylic or cotton preferred)
-
4.0 mm (G) crochet hook (adjust for yarn size and gauge)
-
Scissors
-
Yarn needle
-
Measuring tape
-
Stitch marker (optional)
-
Button or embellishment (optional)
📏 Size Guide:
| Age | Finished Sole Size |
|---|---|
| 0–3 months | ~3.5 in / 9 cm |
| 3–6 months | ~4 in / 10 cm |
| 6–9 months | ~4.5 in / 11.5 cm |
You can size up or down by changing your hook size or adding more square rounds.
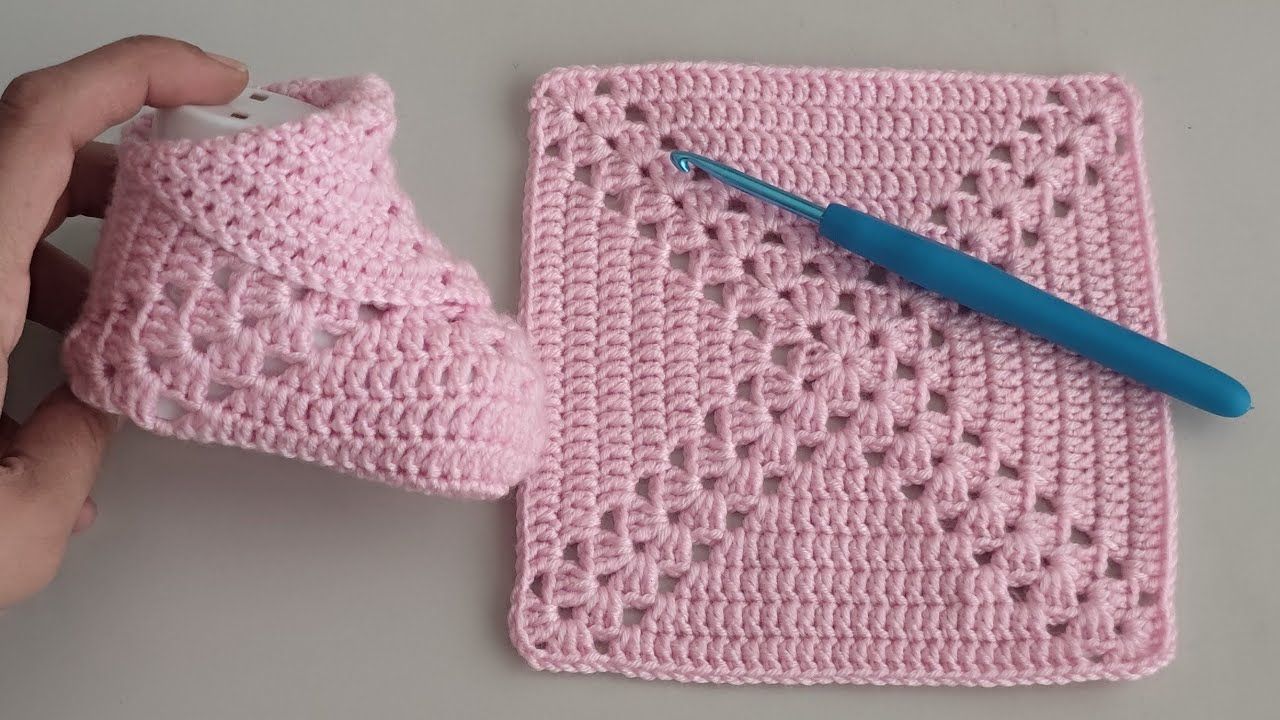
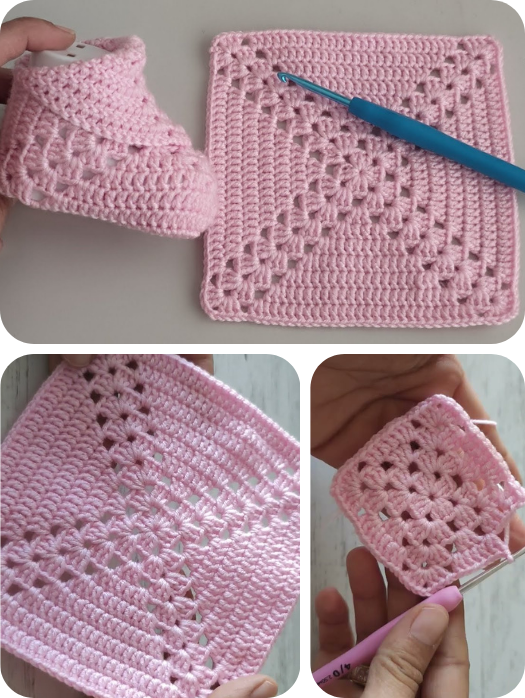
🪡 Step 1: Make the Granny Square Sole
Instructions:
-
Start with a magic ring or ch 4 and sl st to form a ring.
-
Round 1: Ch 3 (counts as 1 dc), 2 dc into ring, ch 2, (3 dc, ch 2) three more times. Sl st into top of starting ch-3. (You now have 4 sets of 3 dc and 4 corner spaces.)
-
Round 2: Sl st into corner space, ch 3 (counts as dc), 2 dc in same space, ch 2, 3 dc in same space. In next space between clusters: 3 dc. In next corner: 3 dc, ch 2, 3 dc — repeat around. Sl st to join.
-
Continue adding rounds in this pattern until your square is approximately the desired sole size (see size guide above).
👣 Step 2: Fold and Form the Toe
-
Fold the square diagonally to form a triangle (you now see the shoe’s sole).
-
Stitch the two side edges together (either with sl st or whip stitch), leaving the top corner open — this becomes the toe opening.
-
Turn inside out so the seam is hidden inside.
👟 Step 3: Shape the Heel
-
At the heel opening, reattach your yarn and sc evenly across the back.
-
Work 4–6 rows of single crochet (sc), turning at the end of each row, to build a small flap.
-
Fold the flap vertically, and sew or slip stitch the sides together to close the heel.
🧦 Step 4: Add a Cuff or Strap (Optional)
Option A: Cuff
-
Join yarn at the ankle opening.
-
Work 2–4 rounds of sc or hdc around the opening for a soft cuff.
-
Fasten off and weave in the ends.
Option B: Button Strap
-
Chain 10–12 and attach one side to the shoe.
-
Sew a button on the other side for fastening.
🎨 Step 5: Customize & Finish
-
Weave in all ends using your yarn needle.
-
Add decorations like tiny bows, buttons, or a pom-pom on the toe.
-
Block gently if needed for shape.
🧺 Care Instructions
-
Hand wash or machine wash on gentle cycle
-
Lay flat to dry
-
Avoid bleach or hot dryers
💡 Tips for Beginners
-
Start with a light-colored yarn so you can see stitches clearly.
-
Practice your granny square technique with scrap yarn first.
-
Count stitches carefully to keep your shape even.
-
Make a second shoe right after the first, so tension and size match.
Watch video: