 by
by Certainly! Here’s a detailed, beginner-friendly guide titled:
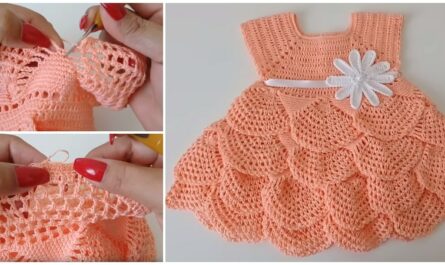
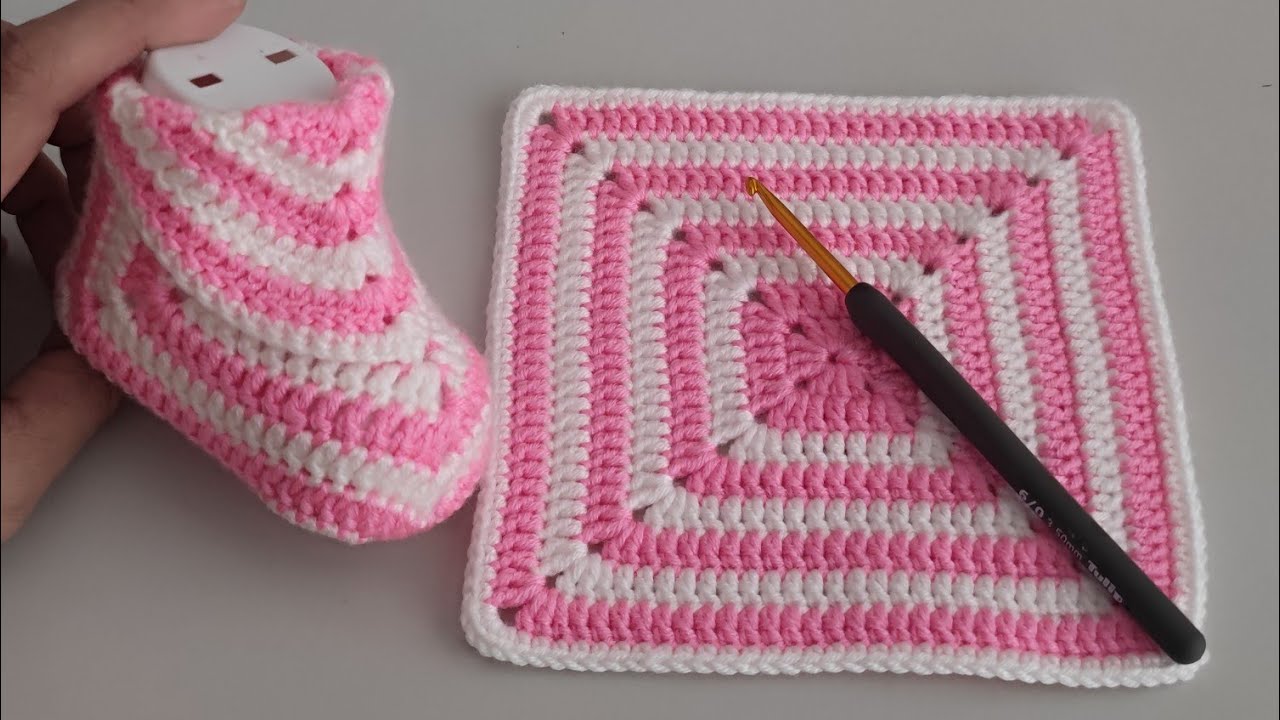
👟 Learn How to Make Adorable Baby Shoes with This Easy Granny Square Pattern!
If you’ve ever wanted to crochet cute baby shoes but didn’t know where to start, this is the perfect beginner project for you! These soft, adorable booties are made from a simple granny square, making it fun and easy to create cozy footwear for little feet.
🧶 Materials You’ll Need:
| Item | Notes |
|---|---|
| Yarn | Worsted weight (medium size 4), soft for babies |
| Crochet hook | 4.0 mm (G hook) or size needed for gauge |
| Yarn needle | For sewing pieces together |
| Scissors | For trimming yarn |
| Stitch markers | Optional, helps beginners track rounds |
| Button/Ribbon | Optional for straps or decorations |
🧵 Basic Stitches Used:
-
Chain (ch)
-
Slip Stitch (sl st)
-
Double Crochet (dc)
-
Single Crochet (sc)
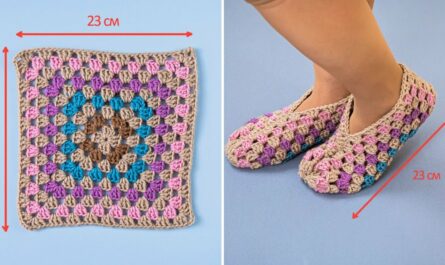
📏 Size Guide (Sole Length):
| Age | Square Size (Approx.) |
|---|---|
| 0–3 months | 3.5 in (9 cm) |
| 3–6 months | 4 in (10 cm) |
| 6–9 months | 4.5 in (11.5 cm) |
Adjust the number of rounds in your granny square to size up or down.
👣 Step-by-Step Instructions
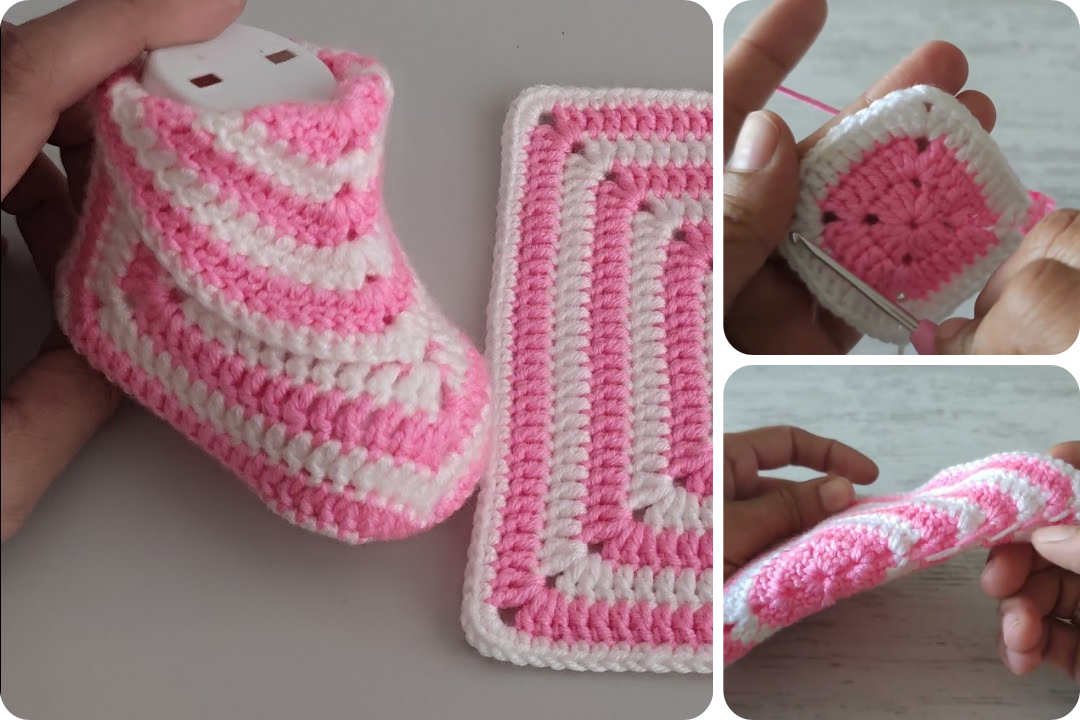
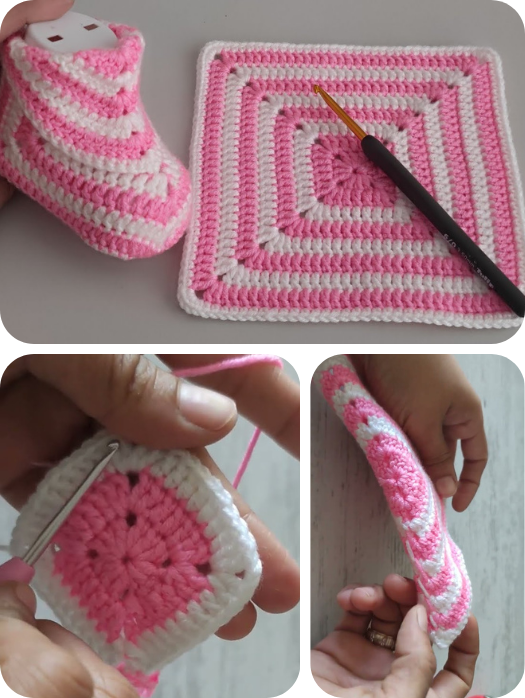
🧩 Step 1: Make the Granny Square
This forms the sole and top of the shoe.
Granny Square Pattern (Basic 2-Round):
-
Start: Ch 4, join to form a ring.
-
Round 1:
-
Ch 3 (counts as dc), 2 dc in ring, ch 2.
-
(3 dc, ch 2) repeat 3 more times in the ring.
-
Join with sl st to top of starting ch-3.
-
-
Round 2:
-
Sl st to next ch-2 corner space.
-
Ch 3, 2 dc in corner space, ch 2, 3 dc in same space.
-
(3 dc in next space between clusters, 3 dc, ch 2, 3 dc in next corner) repeat around.
-
Join with sl st.
-
🔁 Continue rounds until your square matches the needed size.
🩰 Step 2: Fold and Shape the Shoe
-
Fold the granny square in half diagonally, forming a triangle.
-
Join the two short sides together using sl st or whip stitch.
-
This forms the toe box.
-
-
Leave the wide end open — this becomes the ankle/heel opening.
👞 Step 3: Build the Heel
-
Attach yarn to one side of the heel opening.
-
Work sc across the opening (about 10–12 sc, depending on size).
-
Turn your work, and continue sc rows (4–6 rows total).
-
Fold the heel flap in half and sew or slip stitch the sides together to close the heel.
Now your shoe has a back and holds shape!
🧦 Step 4: Add a Cuff or Strap (Optional)
Option A: Crochet Cuff
-
Reattach yarn to the ankle opening.
-
Work 2–3 rounds of sc or hdc for a soft cuff.
-
Fasten off and weave in ends.
Option B: Strap with Button
-
Ch 10–12, attach one end to one side of the opening.
-
Sew a small button to the opposite side.
-
Use the chain as a button loop.
🌼 Finishing Touches
-
Weave in all ends neatly with a yarn needle.
-
Add embellishments: tiny flowers, bows, or pom-poms.
-
Make a matching pair by repeating the steps.
🧺 Care Instructions
-
Hand wash in cold water or machine wash on gentle
-
Lay flat to dry
-
Avoid bleach or hot dryers
💡 Beginner Tips:
-
Practice your granny square separately first.
-
Use lighter yarn colors — easier to see stitches.
-
Keep your tension even for consistency.
-
Count your stitches to keep your shape symmetrical.
-
Make the second shoe right after the first so they match.
🧾 Summary
| Step | Description |
|---|---|
| 1. Square | Crochet a granny square base |
| 2. Shape | Fold into a triangle, sew toe |
| 3. Heel | Build a heel flap and close it |
| 4. Finish | Add cuff or strap, weave ends |
Watch video: