 by
by Here’s a detailed, beginner-friendly guide for making crochet slippers on a rubber sole—simple, durable, and perfect for home use.
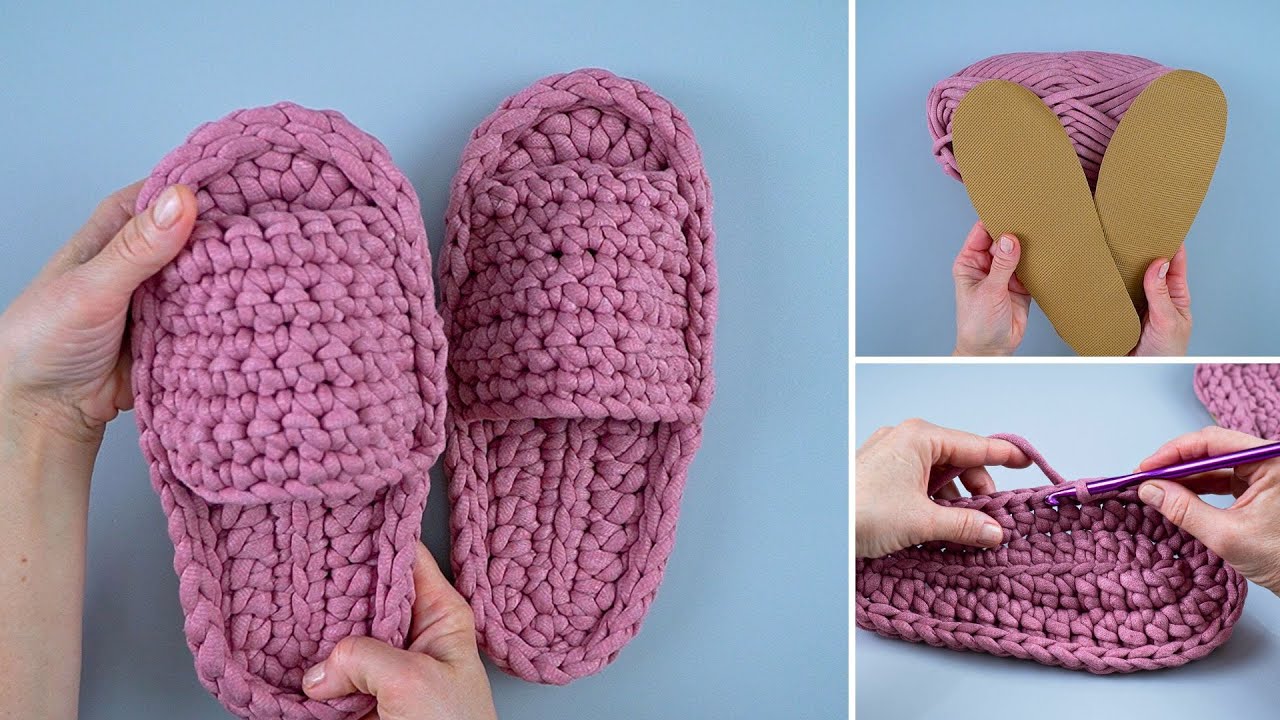
How to Make Crochet Slippers on a Rubber Sole – Simple and Easy
Crochet slippers are cozy, stylish, and practical, but adding a rubber sole makes them non-slip and long-lasting, ideal for wearing around the house. This method is beginner-friendly and doesn’t require complicated stitching or shaping.
By using a pre-made rubber sole, you can create a comfortable, custom pair of slippers quickly.
Why Crochet Slippers on a Rubber Sole Are Perfect 🧶
-
✔ Non-slip and durable
-
✔ Easy to make for beginners
-
✔ Works with leftover yarn
-
✔ Customizable with colors and patterns
-
✔ Comfortable and washable
Rubber soles give a professional look and make slippers safe for all floor types.
Materials You’ll Need
-
Pre-made rubber slipper soles (available online or at craft stores)
-
Yarn: Medium (worsted) or bulky yarn
-
Crochet hook: 5–6 mm (H/J hook)
-
Yarn needle (for weaving in ends)
-
Scissors
-
Optional: Decorative buttons or small embellishments
Crochet Skills Required
-
Chain (ch)
-
Single crochet (sc)
-
Half double crochet (hdc)
-
Slip stitch (sl st)
-
Working around a pre-made base
-
Fastening off and weaving ends
Beginner-friendly: No shaping, no sewing of multiple pieces.
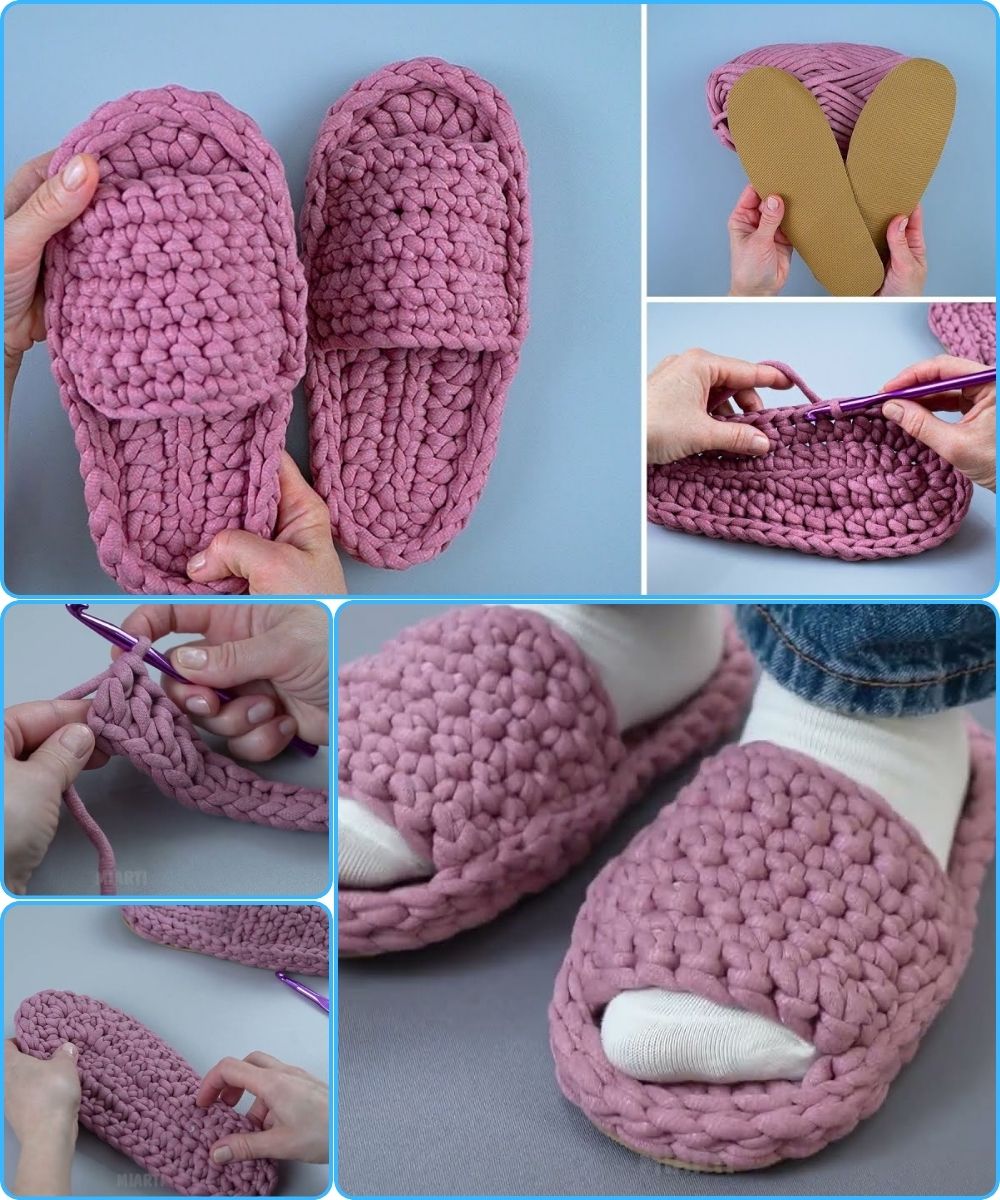
Step-by-Step Instructions
Step 1: Attach Yarn to the Rubber Sole
-
Start at the heel or toe of the rubber sole.
-
Insert the hook into the holes on the edge of the sole (most rubber soles have small holes for attaching yarn).
-
Make a single crochet stitch through the hole to secure the yarn.
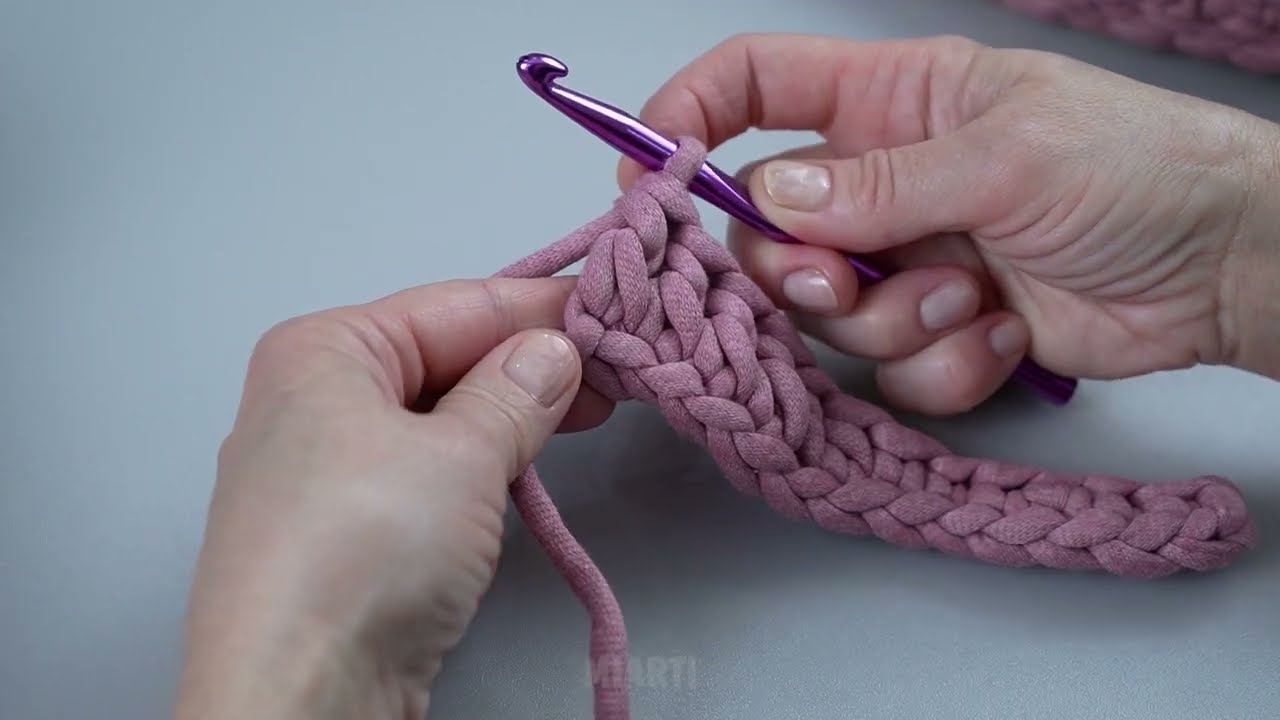
Step 2: Crochet Around the Sole
-
Work in single crochet (sc) or half double crochet (hdc) stitches around the entire edge of the sole.
-
Make 2 stitches in each corner (if the sole has corners) to keep it flat.
Tip: Ensure your stitches are evenly spaced for a neat edge.
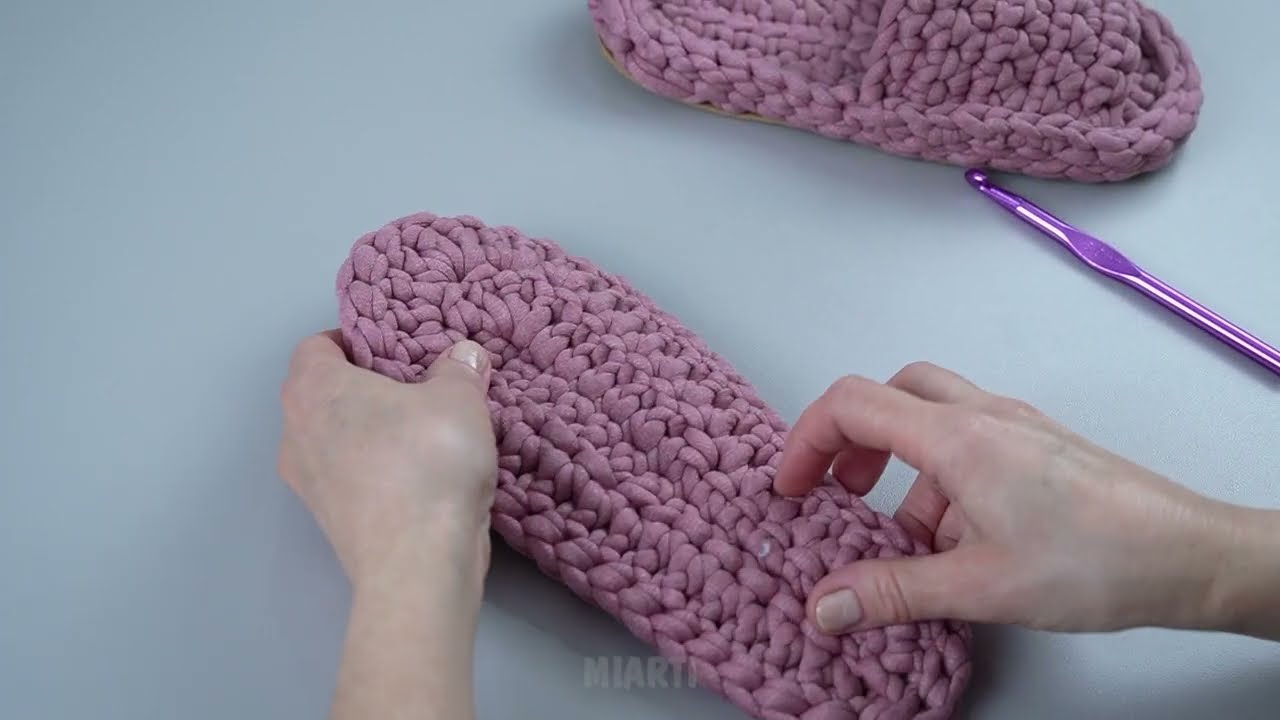
Step 3: Build the Sides
-
After completing the first round around the sole, continue crocheting upwards to form the slipper sides.
-
Work 1 stitch in each stitch from the previous round.
-
Continue until the sides reach just below the ankle or desired height.
Step 4: Shape the Top (Optional)
-
To create a snug fit over the foot, decrease a few stitches evenly across the top of the foot in the last few rounds.
-
This gives a gentle curve without complicated shaping.
Step 5: Finish the Slipper
-
Fasten off and weave in all ends with a yarn needle.
-
Optional: Fold the top edge for a neat cuff.
-
Add small decorations like pom-poms, buttons, or appliques.
Tips for Customization ✨
-
Use different yarn colors for stripes or patterns.
-
Use chunky yarn to make the slippers warmer and faster to crochet.
-
Add non-slip dots on the top for extra grip on smooth floors.
-
Make matching pairs for gifts using leftover yarn.
Sizing Tips
-
Longer foot: Use a larger sole or add extra rows around the sole.
-
Wider foot: Crochet additional stitches around the sole edge.
-
Kids or adults: Rubber soles come in multiple sizes, making it easy to adjust.
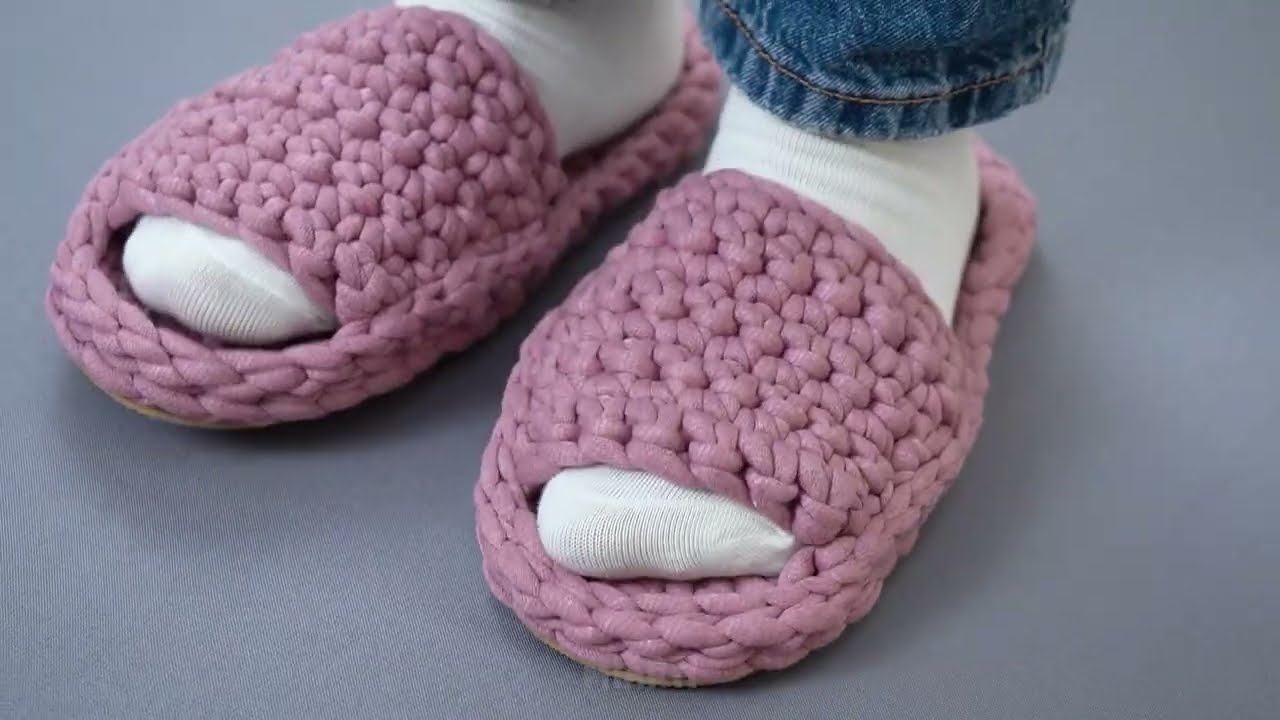
Final Thoughts
Making crochet slippers on a rubber sole is simple, practical, and beginner-friendly. You get the cozy comfort of yarn with the durability and safety of a non-slip sole. This project is perfect for home wear, using leftover yarn, or creating handmade gifts.
If you want, I can also create a full step-by-step beginner-friendly pattern with exact stitch counts, rounds, and decorative ideas, so you can make slippers on a rubber sole without guessing.
Watch video: