 by
by Absolutely! Let’s break this down in a detailed, beginner-friendly guide. I’ll explain it step by step so even if you’ve never made socks before, you can follow along easily.

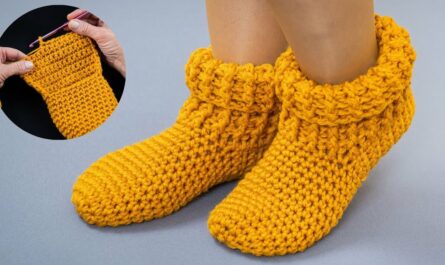
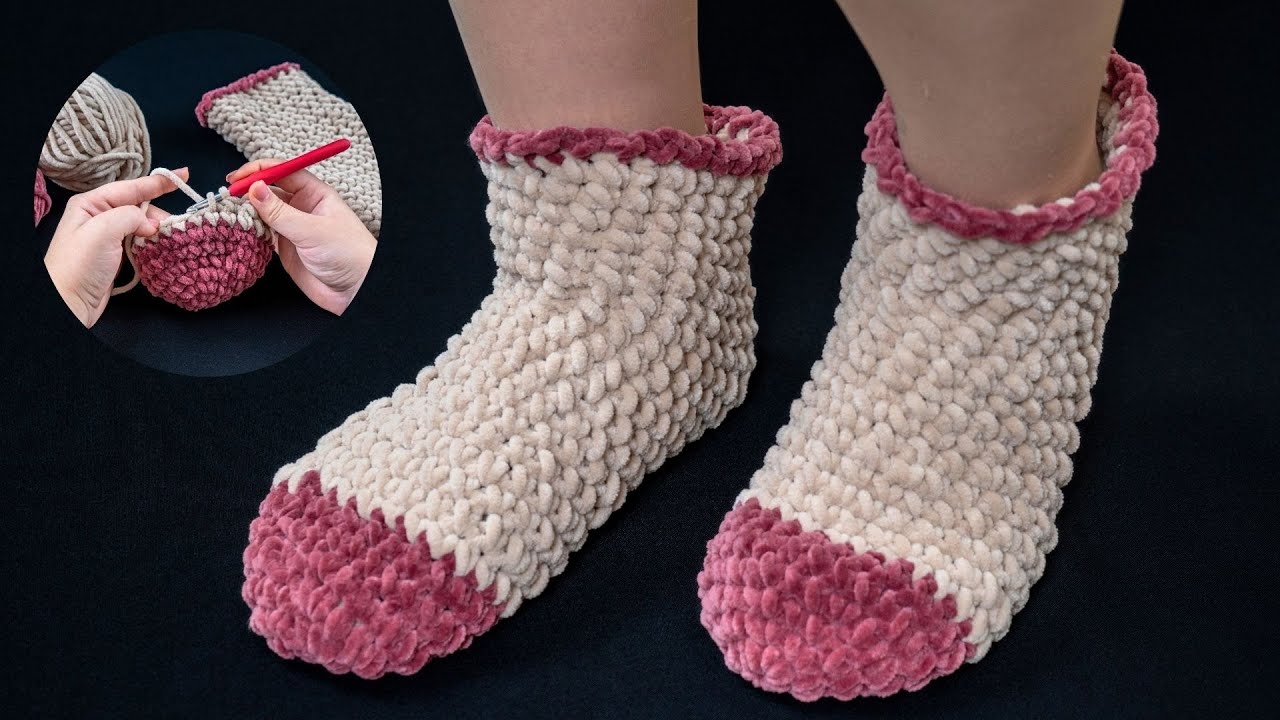
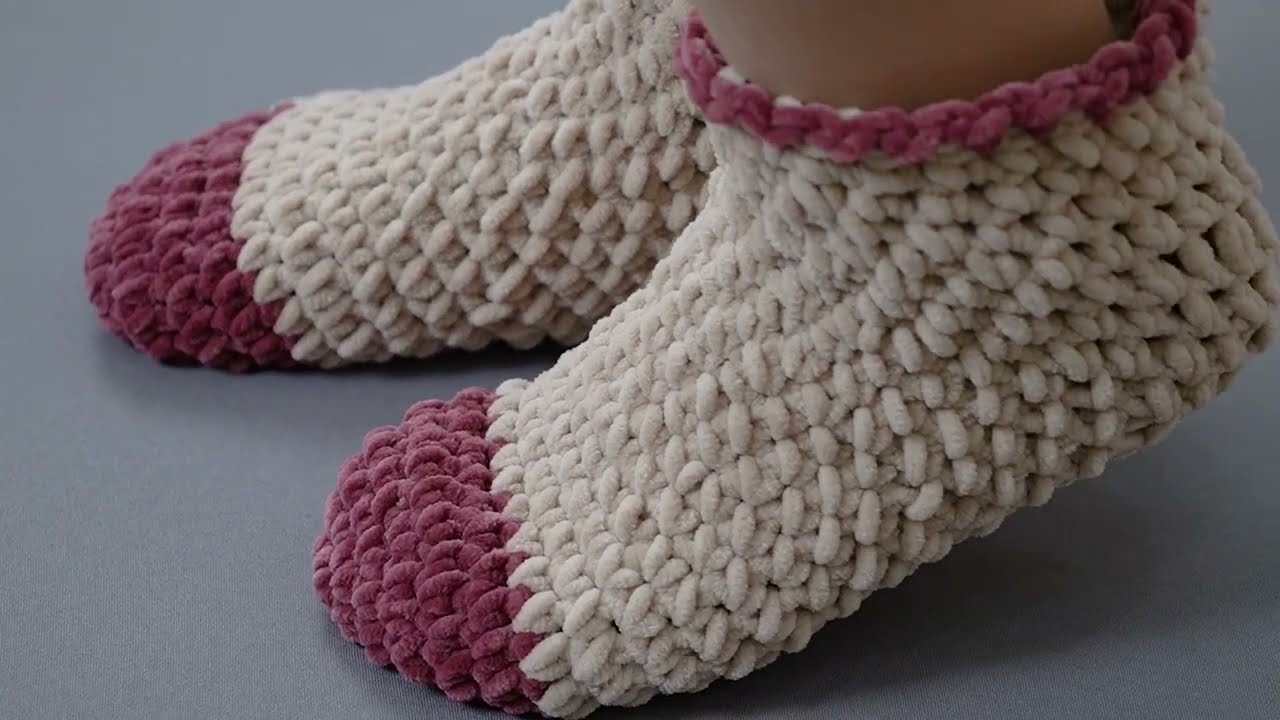
How to Make the Easiest Crochet Socks (Beginner-Friendly)
Crochet socks are a cozy, fun project, and they don’t have to be complicated. This guide will focus on simple, one-piece socks worked from the cuff down, using basic stitches.
Materials You’ll Need
-
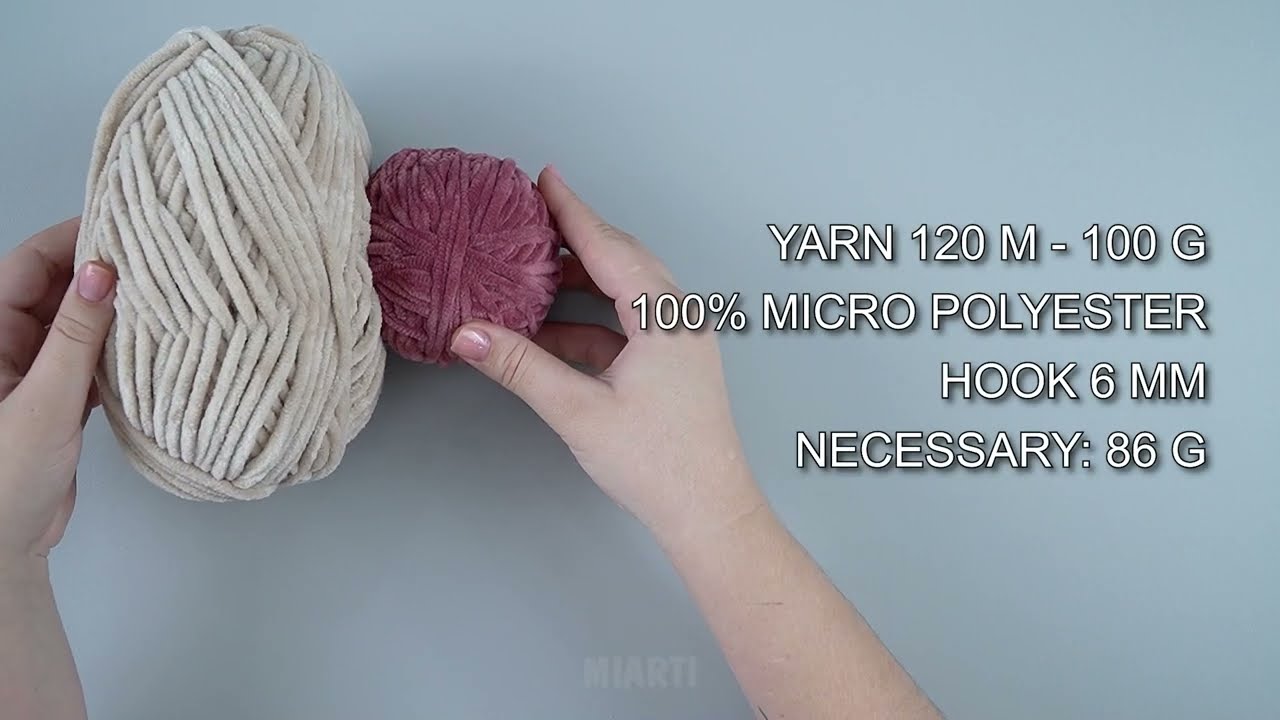
Yarn: Medium weight (worsted) yarn works best for beginners. Soft acrylic or wool blends are cozy.
-
Crochet hook: Check your yarn label, usually 4.0–5.0 mm (G/H) works well for worsted yarn.
-
Scissors
-
Tapestry needle for weaving in ends
-
Measuring tape or a ruler
Optional:
-
Stitch markers to mark your rounds or heel
-
Sock blocker (or just your feet!)
Basic Stitches You Should Know
-
Chain (ch)
-
Slip stitch (sl st)
-
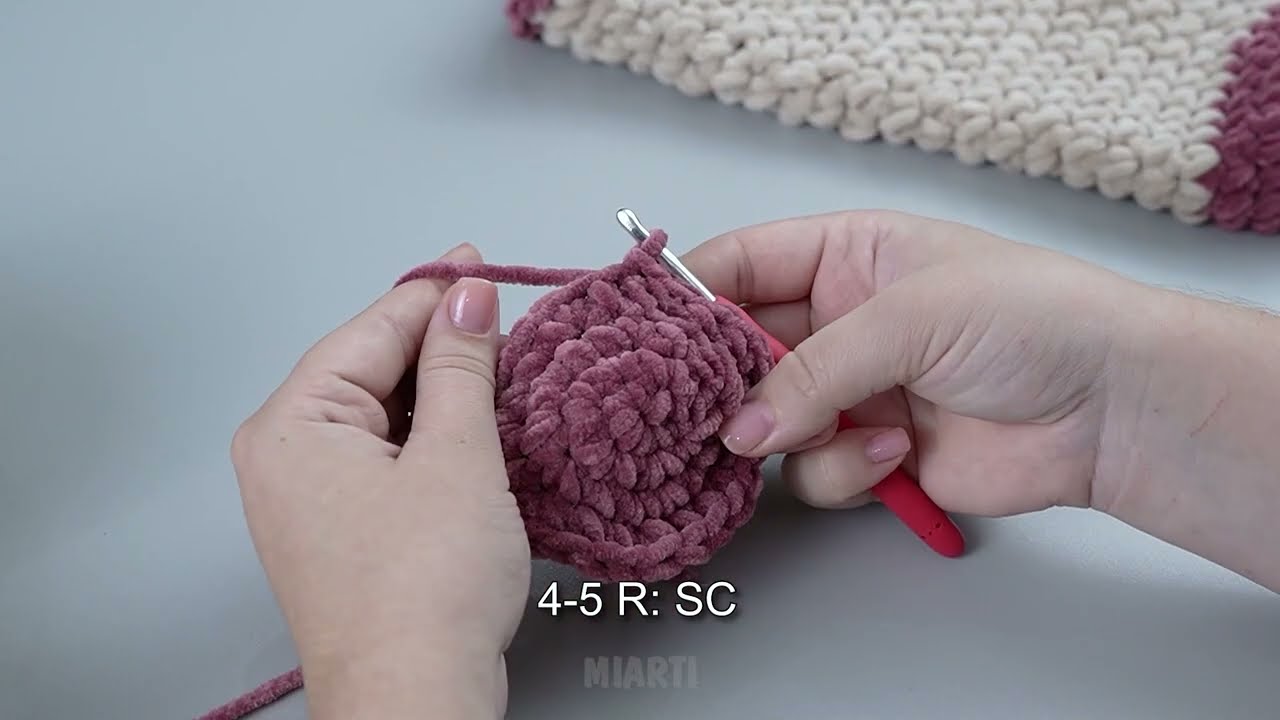
Single crochet (sc)
-
Half double crochet (hdc) – optional if you want a slightly taller stitch
Don’t worry! This pattern mostly uses single crochet (sc), making it perfect for beginners.
Step 1: Measure Your Foot
Before starting, measure:
-
Foot length – from heel to tip of toes
-
Foot circumference – around the widest part (usually the ball of the foot)
This helps you adjust the size of your sock.
Step 2: Start the Cuff
-
Chain a length that fits comfortably around your ankle.
Example: For a small adult foot, chain about 30–35. -
Join with a slip stitch to make a round. Be careful not to twist your chain.
-
Work single crochet in each chain around for 4–5 rounds for a short cuff, or more if you want a taller cuff.
Tip: You can also do ribbing by alternating front post and back post single crochets for a stretchy cuff.
Step 3: Work the Leg
-
Continue working single crochet in the round until your sock reaches the point just above the ankle bone.
-
This section is the leg part and can be as long as you like.
Step 4: Start the Heel
Here’s the beginner-friendly way (like a “short-row heel”):
-
Work single crochet on half of the stitches only.
-
Turn your work at the end of the row, and continue working back and forth on those stitches.
-
Keep decreasing 1 stitch at each end until you have a triangular cup shape that fits your heel.
-
Once the heel is shaped, pick up stitches along the sides to continue around the foot.
This method creates a simple cup heel without complicated shaping.
Step 5: Work the Foot
-
Continue single crochet in the round until you reach about 1 inch shorter than the total foot length.
-
Try the sock on to check the fit. Adjust as needed.
Step 6: Toe
-
Start decreasing gradually:
-
Round 1: sc 2, sc2tog repeat around
-
Round 2: sc 1, sc2tog repeat around
-
Round 3: sc2tog around until you have few stitches left
-
-
Fasten off and close the toe with a tapestry needle using a whip stitch or your preferred method.
Step 7: Finish
-
Weave in all ends neatly with a tapestry needle.
-
Optional: Wash and block your socks to shape them nicely.
Tips for Beginners
-
Use stitch markers to keep track of your rounds.
-
Try a slightly loose tension so the socks are stretchy and comfortable.
-
Practice on a smaller piece before making a full sock to get comfortable with rounds.
✅ Congratulations! You now have your first pair of handmade crochet socks.
If you want, I can also make a simple illustrated diagram showing each step — it’s like a visual cheat sheet for beginners, which makes this pattern even easier to follow.
Watch video: