 by
by Absolutely! Let’s make this step-by-step guide to knitting a hat super clear and beginner-friendly. I’ll break it down so even if you’re new to knitting, you can follow along. We’ll cover materials, techniques, and the whole process.
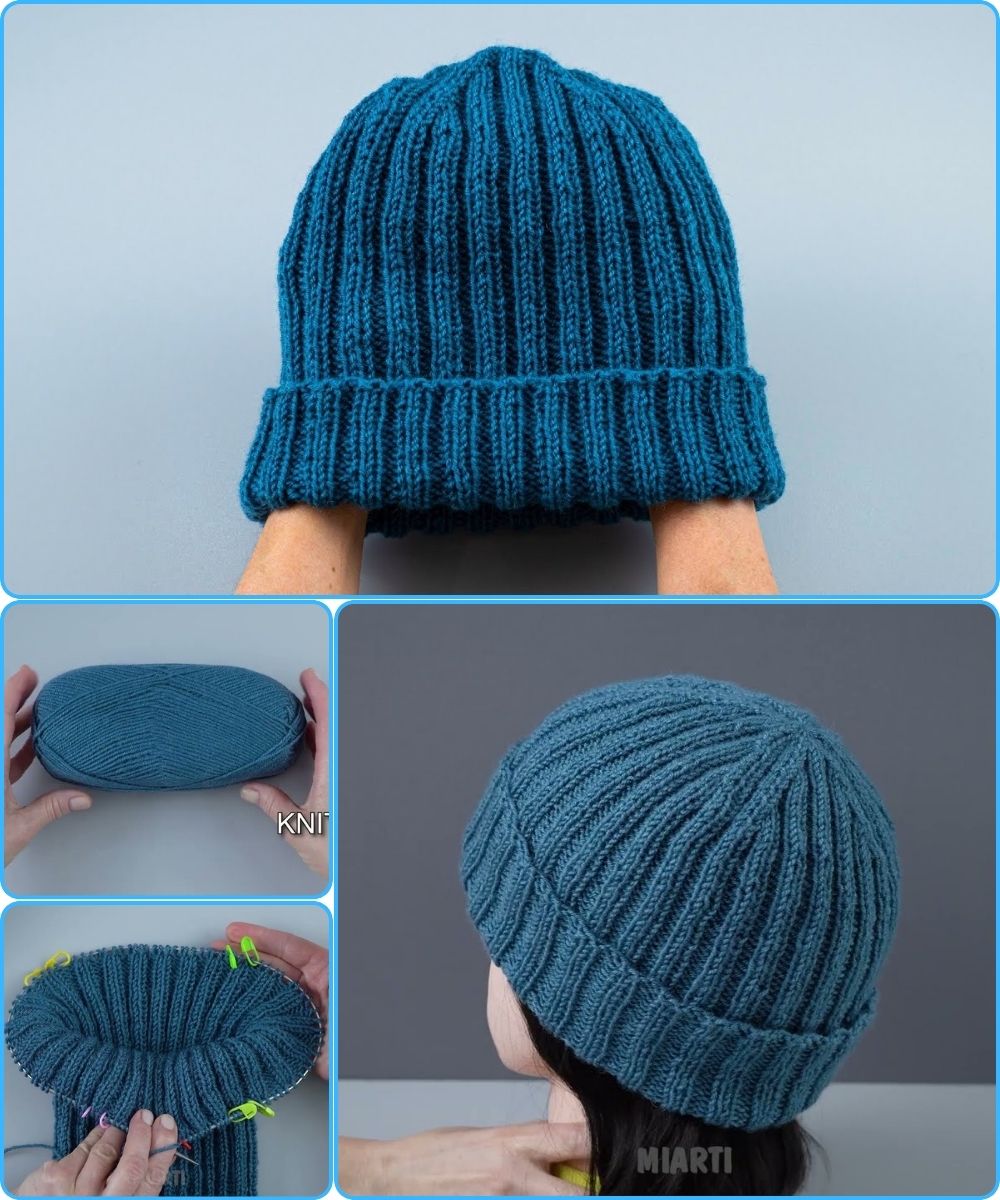
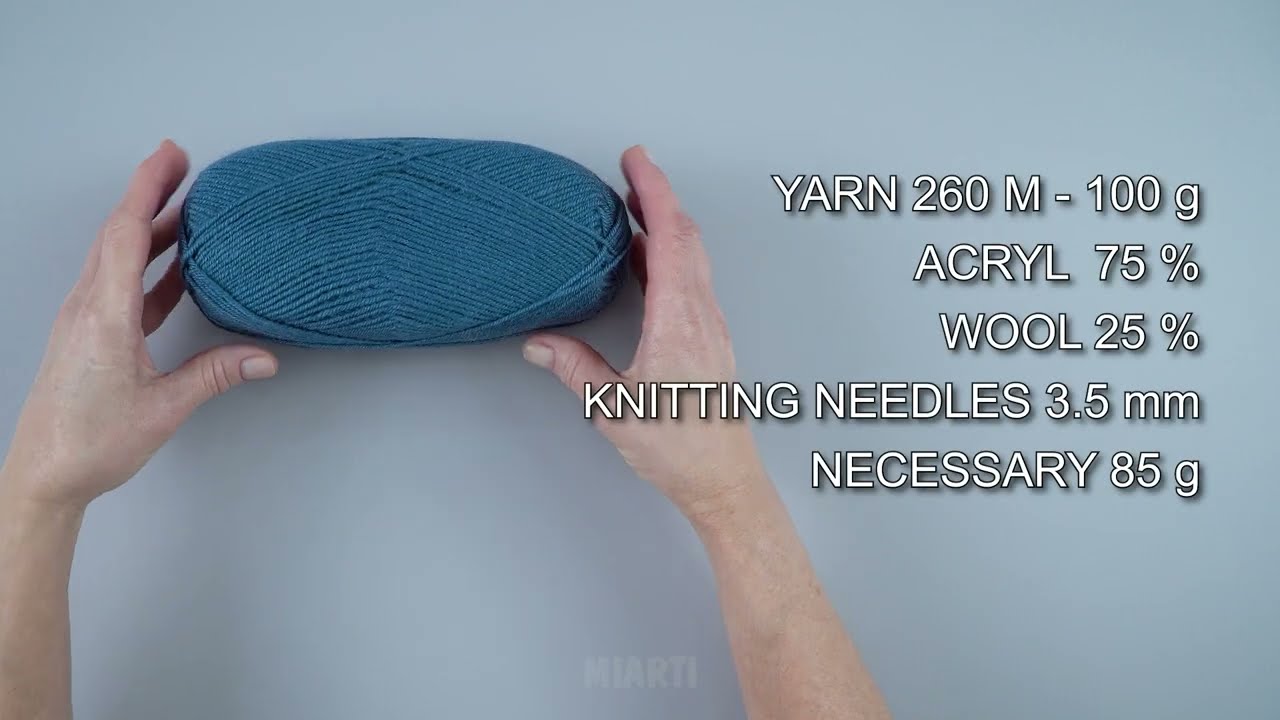
Materials You’ll Need
-
Yarn: Medium weight (worsted weight) yarn is easiest for beginners. Choose a color you like.
-
Knitting needles: Circular needles or double-pointed needles (DPNs) in a size appropriate for your yarn (check yarn label).
-
Stitch markers: To mark the beginning of rounds.
-
Tapestry needle: For weaving in ends.
-
Scissors
Step 1: Measure Your Head
-
Wrap a measuring tape around your head where the hat will sit.
-
Typical adult head: 21–23 inches, kid’s head: 18–20 inches.
-
This helps you know how many stitches to cast on.
Step 2: Cast On Stitches
-
Use the long-tail cast-on method for a stretchy edge.
-
Number of stitches: Usually 16–18 stitches per 4 inches of circumference (check yarn label and gauge).
-
Join in the round carefully—make sure stitches aren’t twisted.
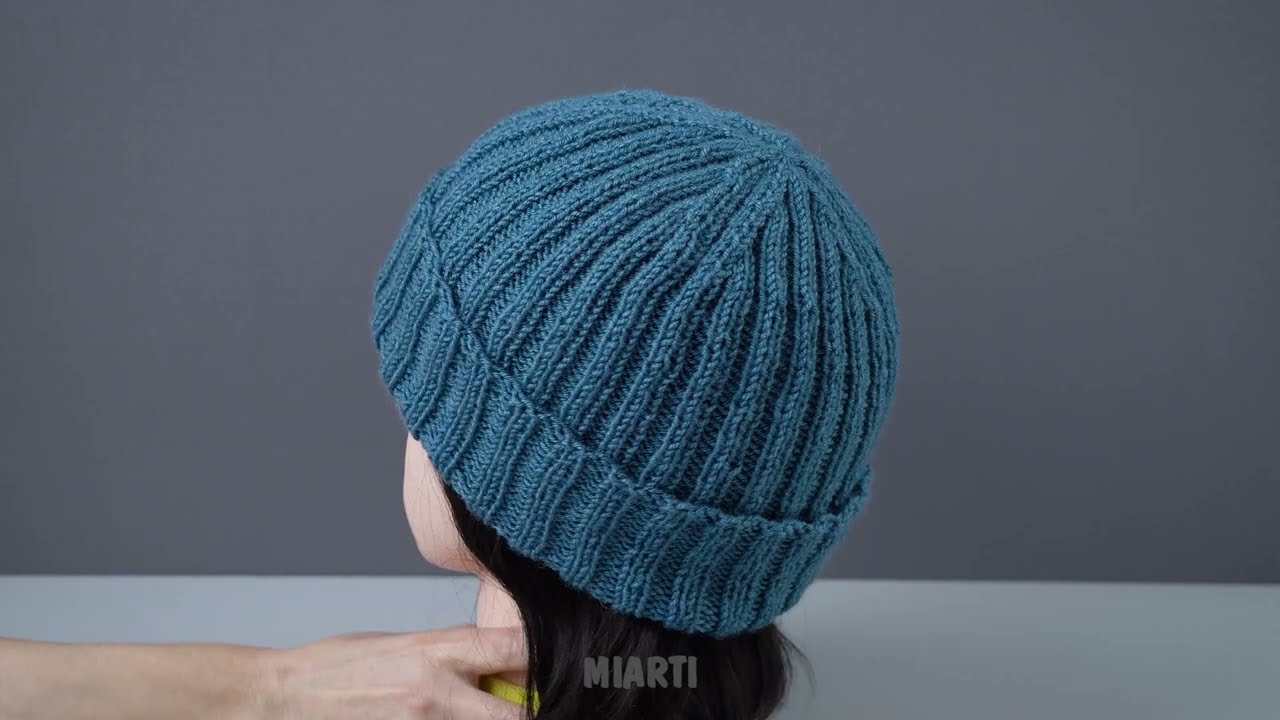
Step 3: Knit the Brim
-
Option 1: 1×1 ribbing (K1, P1)
-
Option 2: 2×2 ribbing (K2, P2)
-
Knit 1–2 inches for a standard cuff. This keeps the hat snug around the forehead.
Step 4: Knit the Body of the Hat
-
Switch to stockinette stitch (knit every round if working in the round).
-
Continue knitting until the hat measures about 6–7 inches from the cast-on edge for adults (slightly less for children).
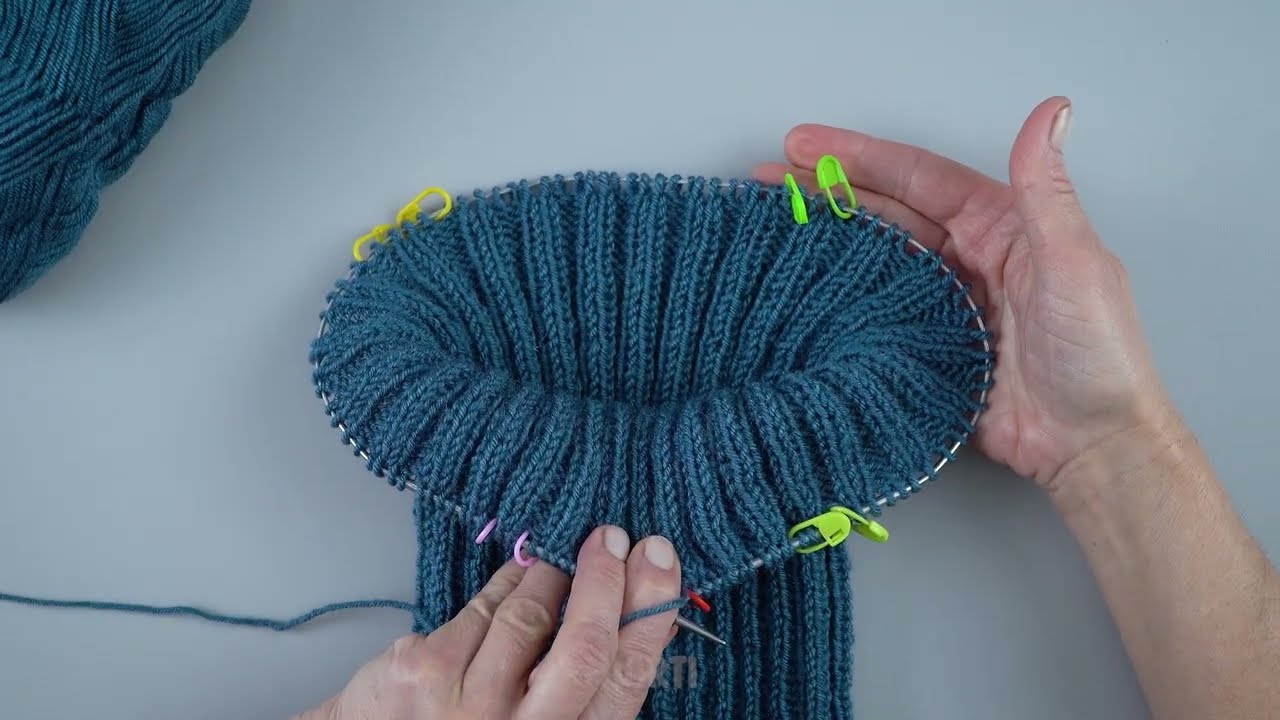
Step 5: Shape the Crown
-
Begin decreasing to shape the top of the hat:
-
Round 1: Knit 6, K2tog repeat to end of round
-
Round 2: Knit
-
Round 3: Knit 5, K2tog repeat to end
-
Round 4: Knit
-
Continue this pattern, reducing the knit stitches between K2tog by 1 each decrease round.
-
-
When you have about 8–10 stitches left, cut yarn leaving a 6-inch tail.
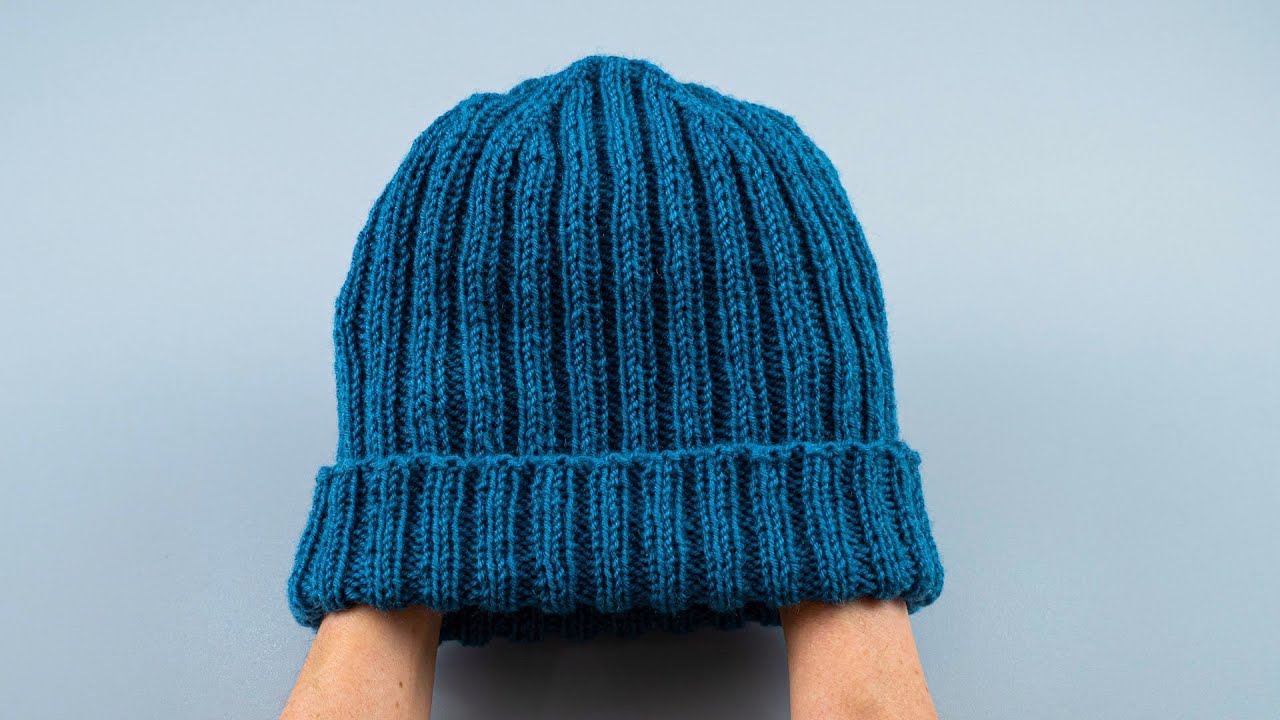
Step 6: Finish the Hat
-
Thread the tail through a tapestry needle.
-
Pull yarn through remaining stitches and tighten to close the top.
-
Weave in all loose ends inside the hat.
Optional: Add a Pom-Pom
-
Make a pom-pom from leftover yarn and attach it to the top of the hat for a fun look.
Tips for Beginners
-
Keep your tension even—too tight makes knitting difficult, too loose makes gaps.
-
Use stitch markers to keep track of rounds.
-
Practice K2tog (knit two together) on a scrap before decreasing on the hat.
If you want, I can also make a simple diagram showing every step visually, so you can see exactly how it should look as you go along. That makes knitting a hat way easier to follow.
Watch video: