 by
by Here’s a clear, beginner-friendly, step-by-step tutorial you can use as an article, blog post, or class handout.
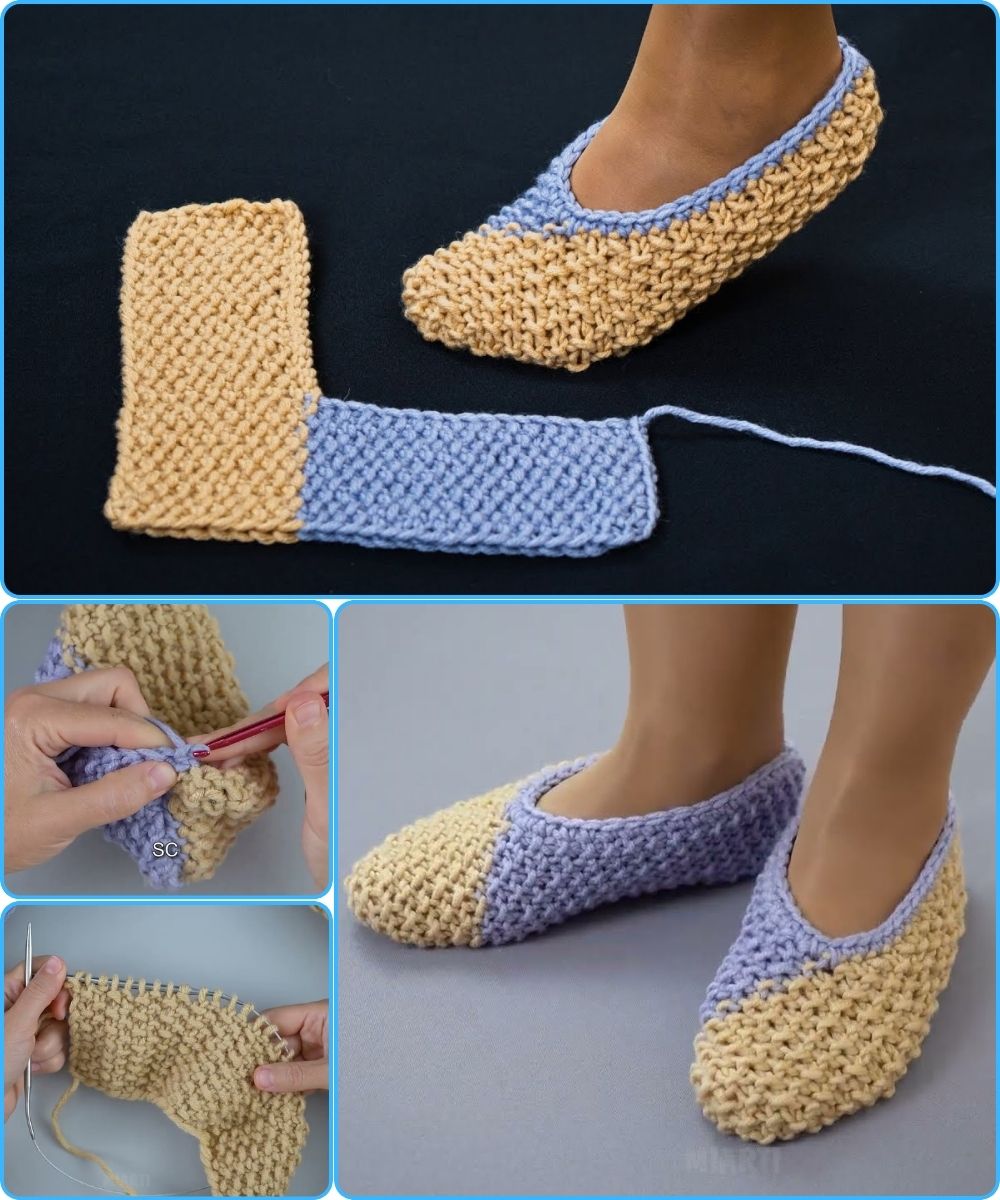
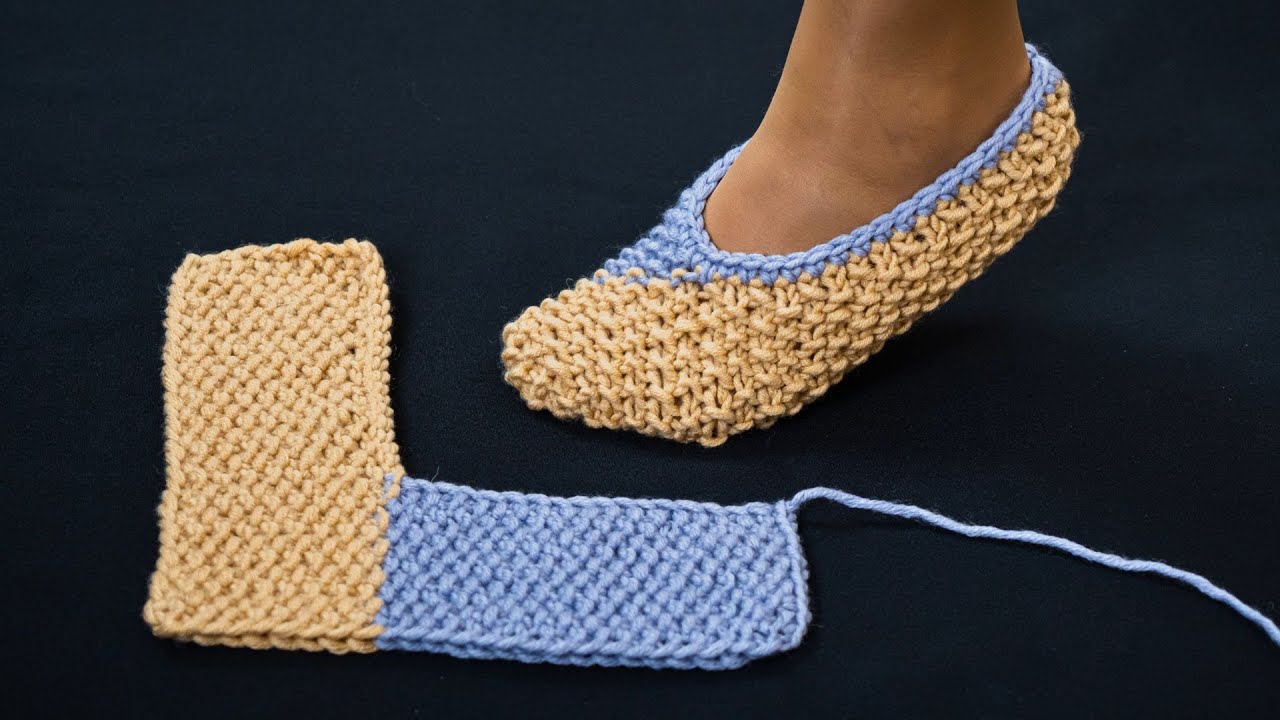
How to Make Easy Knitted Slippers – Tutorial for Beginners
Knitted slippers are a perfect project for beginners because they are warm, useful, and quick to make. This easy pattern uses simple stitches and basic shaping, so even if you are new to knitting, you can successfully complete a cozy pair of slippers.
Materials You Will Need
Before starting, gather the following supplies:
-
Yarn: Medium-weight (worsted) yarn – soft but durable
-
Knitting needles: Size 5 mm (US 8) straight needles
-
Scissors
-
Tapestry (yarn) needle for sewing seams
-
Measuring tape (optional)
Tip: Choose light-colored yarn if you are a beginner—it makes stitches easier to see.
Basic Knitting Skills Required
This project is beginner-friendly and uses only basic techniques:
-
Cast on
-
Knit stitch
-
Purl stitch
-
Bind off
-
Simple sewing
If you can knit and purl, you can make these slippers!
Step 1: Cast On
Cast on 30 stitches (this fits an average adult foot; you can adjust later).
This will form the width of your slipper.
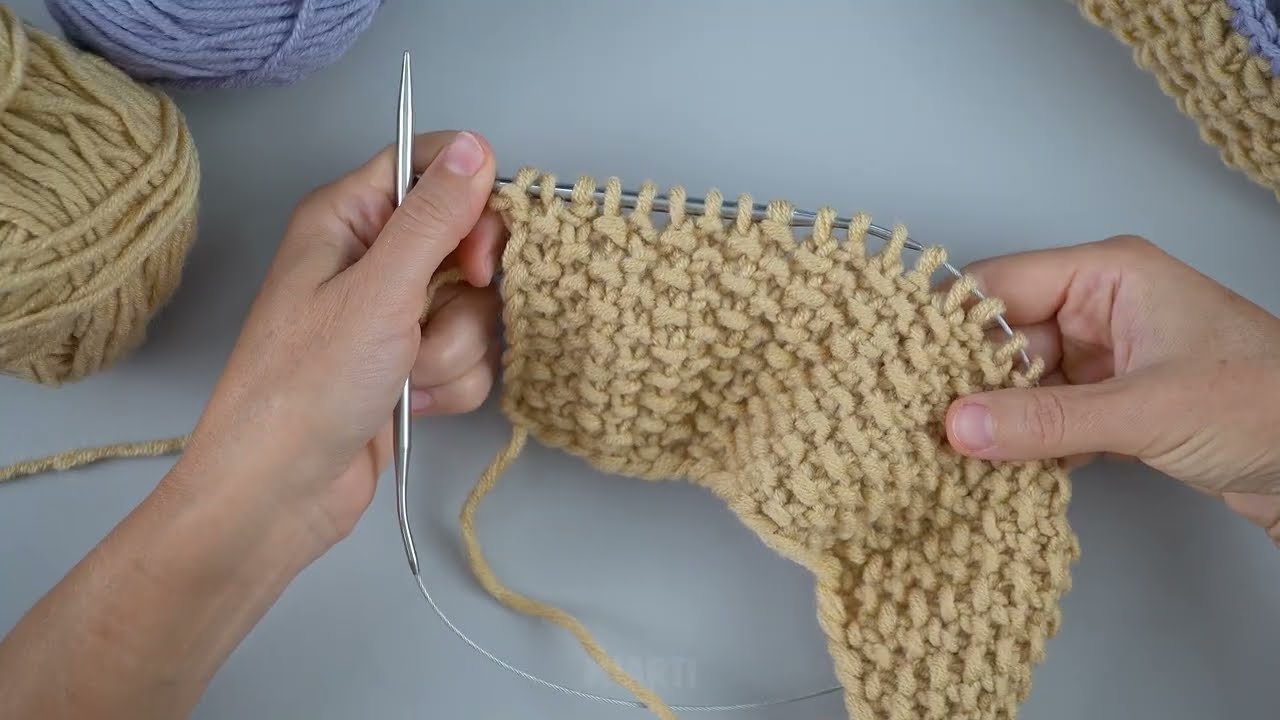
Step 2: Knit the Sole
-
Knit every row (this is called the garter stitch)
-
Continue knitting until the piece measures about 9 inches (23 cm) long
This rectangle will become the sole and sides of your slipper.
Step 3: Shape the Toe
Now we shape the front of the slipper:
-
Knit 10 stitches
-
Bind off 10 stitches (these create the opening)
-
Knit the remaining 10 stitches
Next row:
-
Knit the first 10 stitches
-
Cast on 10 new stitches
-
Knit the last 10 stitches
This creates space for your toes.
Step 4: Knit the Upper Part
-
Knit all stitches again in garter stitch
-
Continue knitting for about 3 inches (7–8 cm)
This forms the top of the slipper.
Step 5: Bind Off
Bind off all stitches loosely so the edge is comfortable and stretchy.
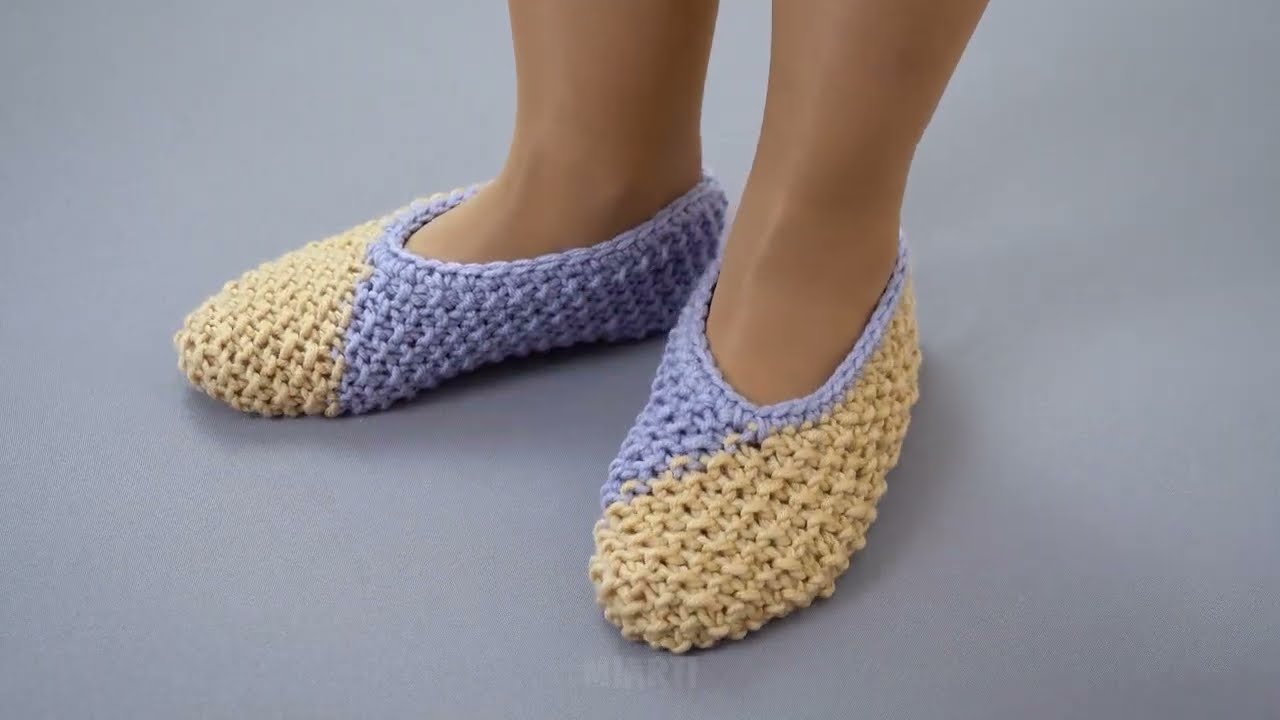
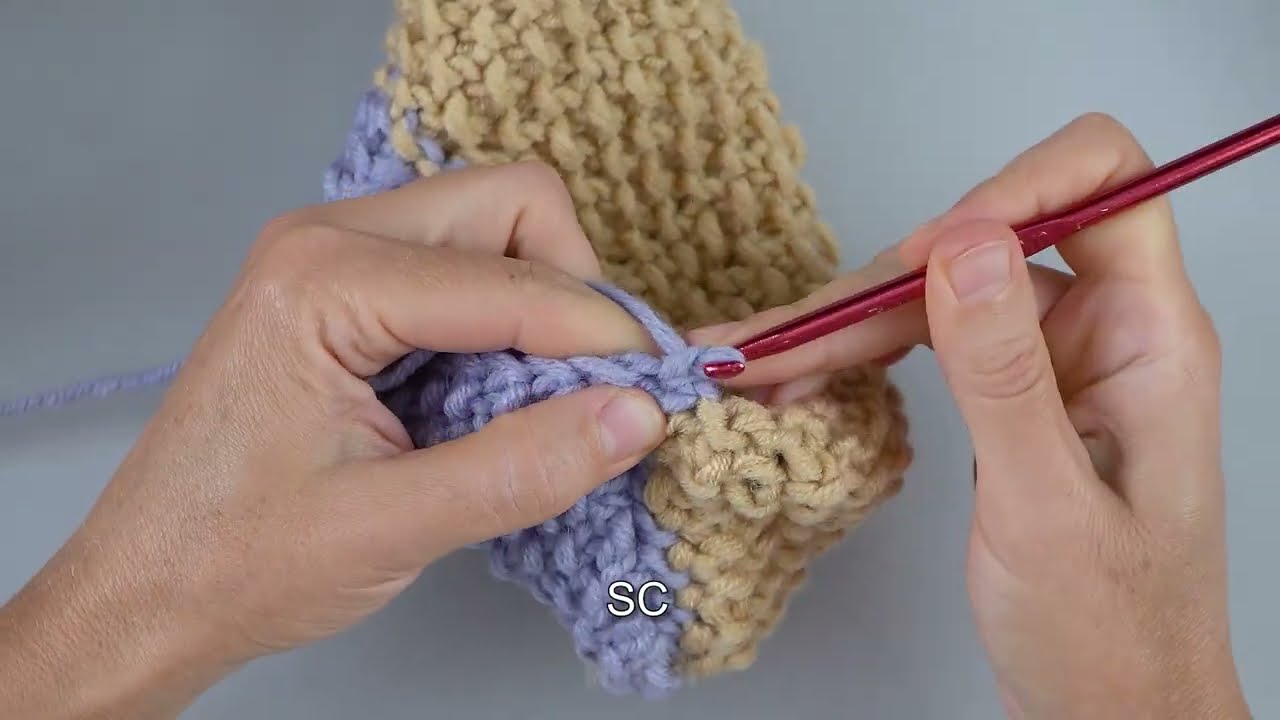
Step 6: Sew the Slipper Together
-
Fold the knitted piece in half (lengthwise)
-
Sew the back seam to form the heel
-
Sew the toe edges together neatly
-
Weave in all loose yarn ends
Turn the slipper right side out.
Step 7: Make the Second Slipper
Repeat all steps to make the matching slipper.
Optional Customizations
You can personalize your slippers by:
-
Adding a ribbed cuff at the top
-
Sewing on buttons or pom-poms
-
Using non-slip fabric or latex on the sole
-
Changing yarn colors for stripes or patterns
Final Tips for Beginners
-
Don’t worry if your stitches aren’t perfect—practice makes progress
-
Keep your tension relaxed for comfort
-
Try the slipper on as you go to check the fit
Congratulations! 🎉
You’ve made your own knitted slippers. This simple project helps build confidence and prepares you for more advanced knitting patterns in the future.
If you’d like, I can also:
-
Simplify this for kids
-
Adjust it for different sizes
-
Turn it into a printable PDF
-
Add pictures or diagrams descriptions
Watch video: