 by
by Below is a clear, beginner-friendly, detailed tutorial you can use for a blog post, class handout, or video script.
How to Make Easy Crochet Slippers from a Square
A Step-by-Step Beginner Tutorial
Crochet slippers made from a simple square are one of the easiest and most satisfying projects for beginners. With just one basic square, minimal shaping, and simple stitches, you can create cozy slippers that fit comfortably and look stylish. This tutorial walks you through everything—from materials to finishing—step by step.
Materials Needed
-
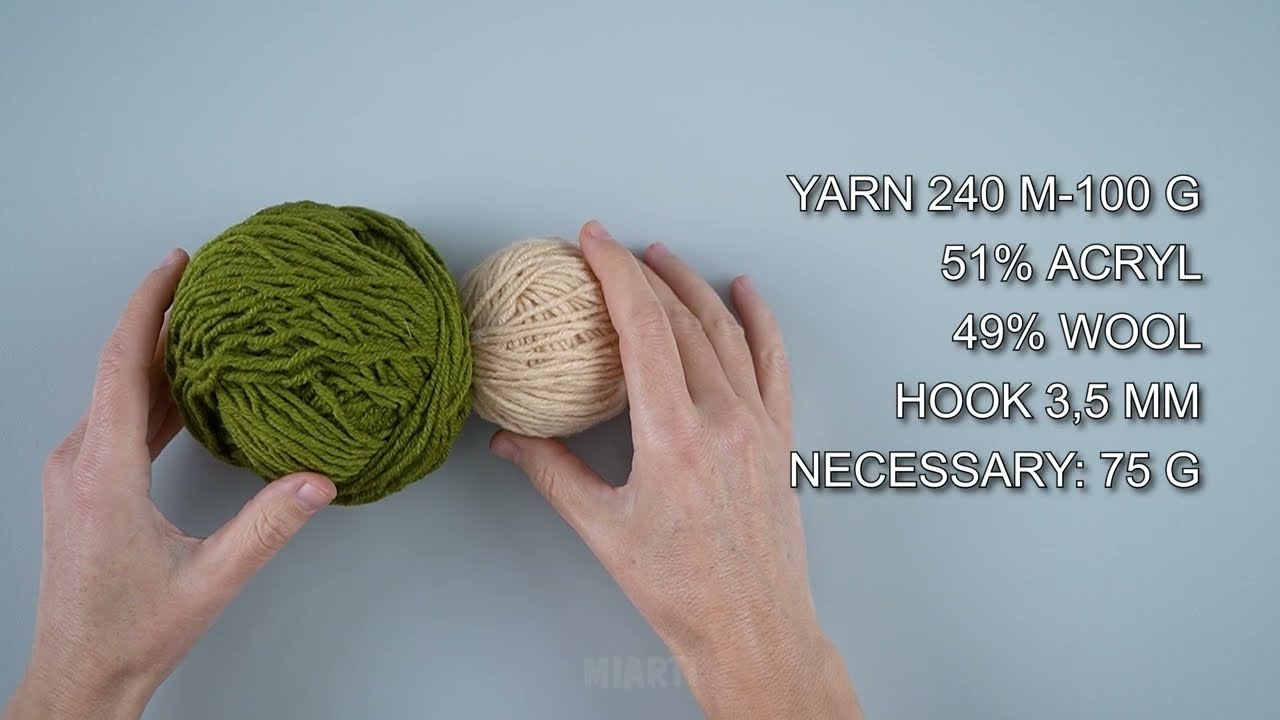
Yarn: Medium weight (worsted / size 4) yarn
Tip: Acrylic or wool blends work best for warmth and durability. -
Crochet hook: 5 mm (H/8) or size recommended on your yarn label
-
Scissors
-
Yarn needle (for sewing and weaving ends)
-
Measuring tape
-
Optional: Non-slip fabric paint or leather patches for soles
Stitches & Skills Required
This project is beginner-friendly. You should know:
-
Chain (ch)
-
Single crochet (sc) or Double crochet (dc)
-
Slip stitch (sl st)
-
Basic seaming
You can make the slippers using single crochet for a tighter fit or double crochet for a softer, faster project.
Step 1: Crochet the Square
Foundation
-
Chain 4, join with a slip stitch to form a ring.
-
Chain 2 (counts as first stitch).
Round 1
-
Work 12 double crochets into the ring.
-
Join with a slip stitch to the first stitch.
Round 2 and Beyond
-
Increase evenly in each round until the square measures:
-
8–9 inches (20–23 cm) for women
-
9–10 inches (23–25 cm) for men
-
To make it a square:
-
Place 2 double crochets, chain 2, 2 double crochets in each corner.
-
Work one double crochet in each stitch along the sides.
Make two identical squares—one for each slipper.
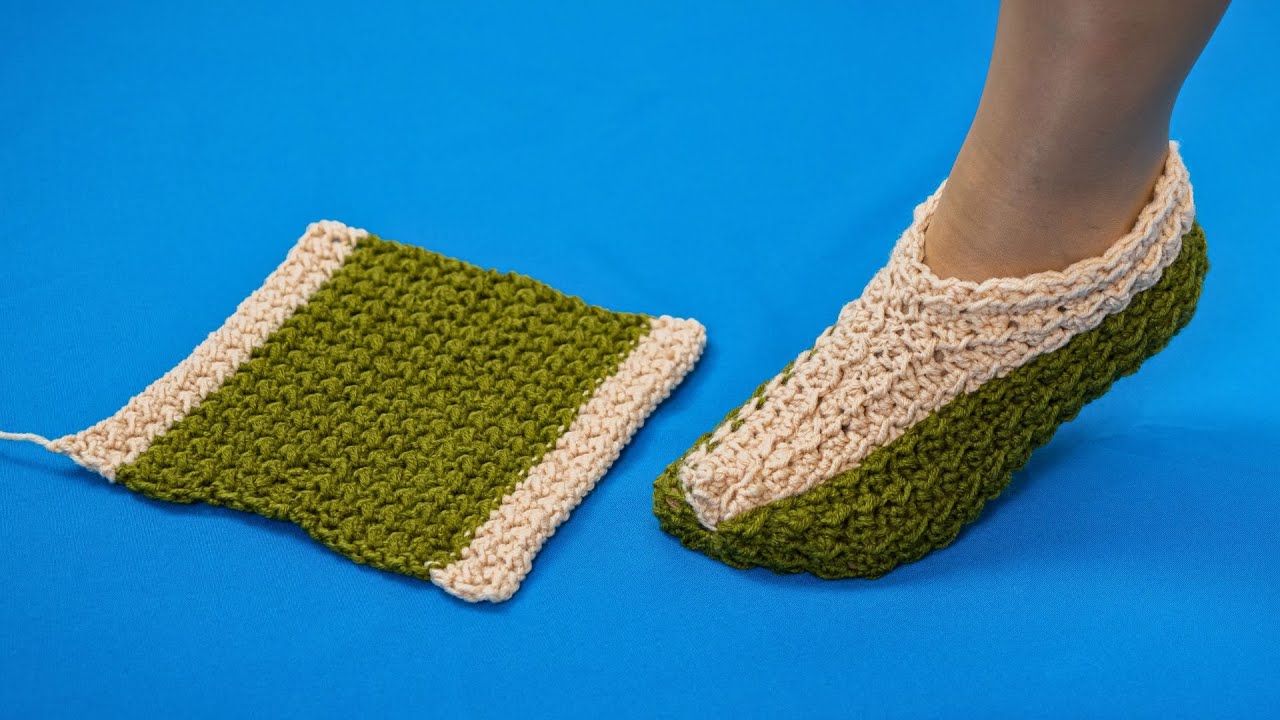
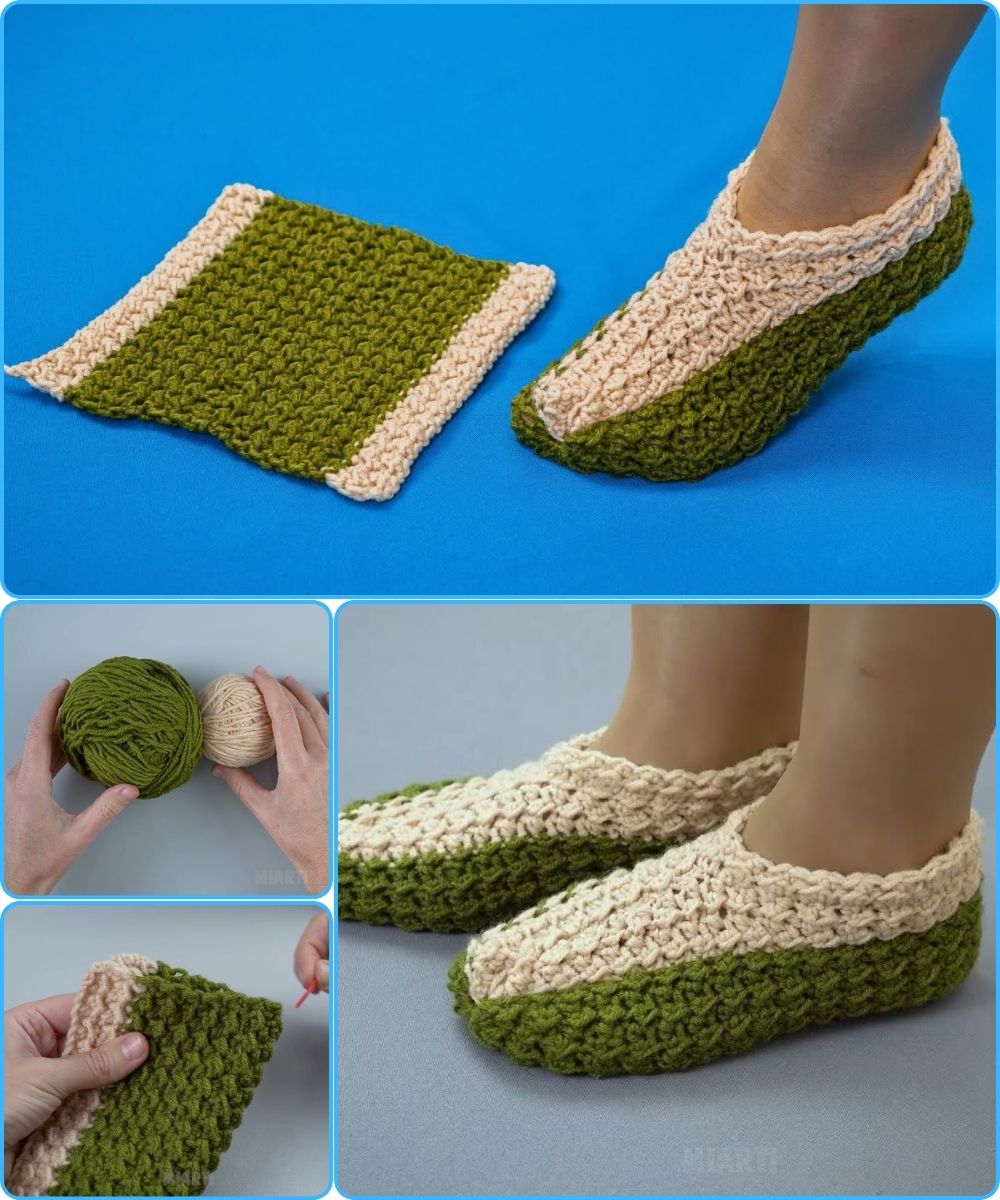
Step 2: Fold the Square into a Slipper Shape
Lay your square flat with one corner pointing toward you (diamond shape).
Folding:
-
Fold the bottom corner upward to meet the center.
-
Fold the left and right corners inward to form the sides.
-
The top corner becomes the heel.
You should now see a slipper shape forming naturally.
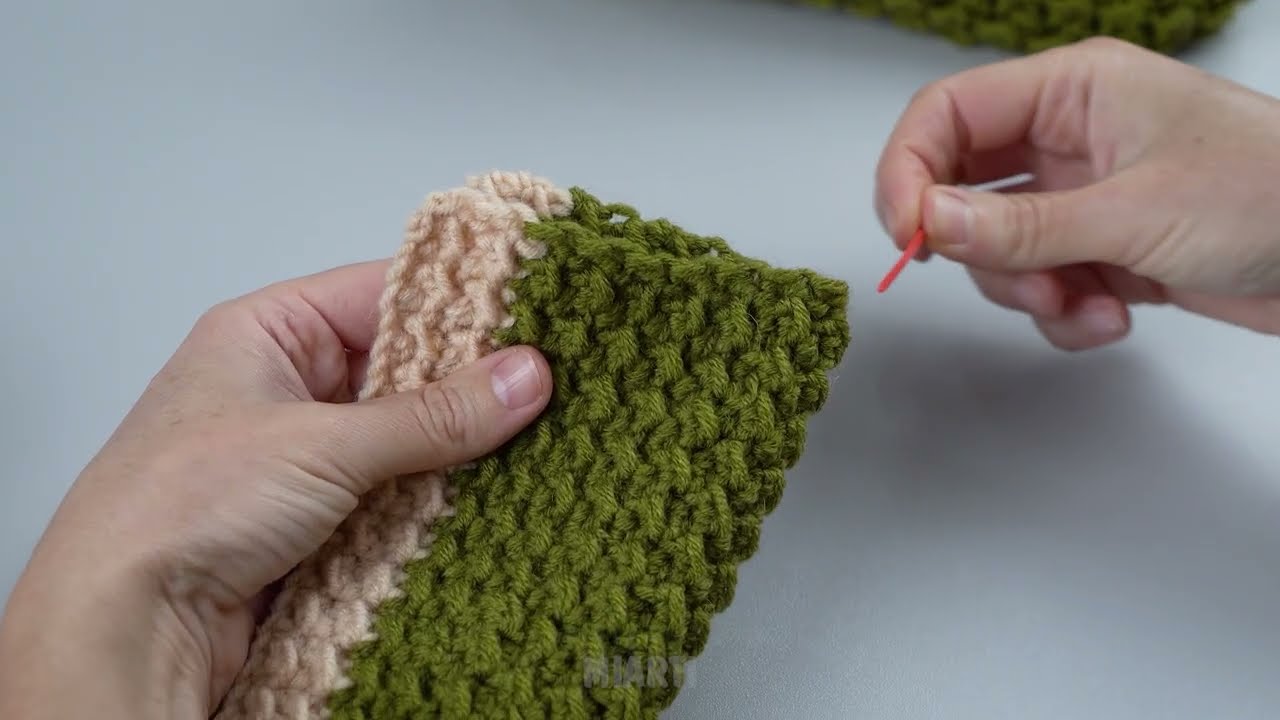
Step 3: Seam the Slipper
Using a yarn needle and matching yarn:
-
Sew along the back edge to close the heel.
-
Sew along the side edges to secure the slipper shape.
-
Leave the top open for your foot.
Try the slipper on before tying off to adjust fit if needed.
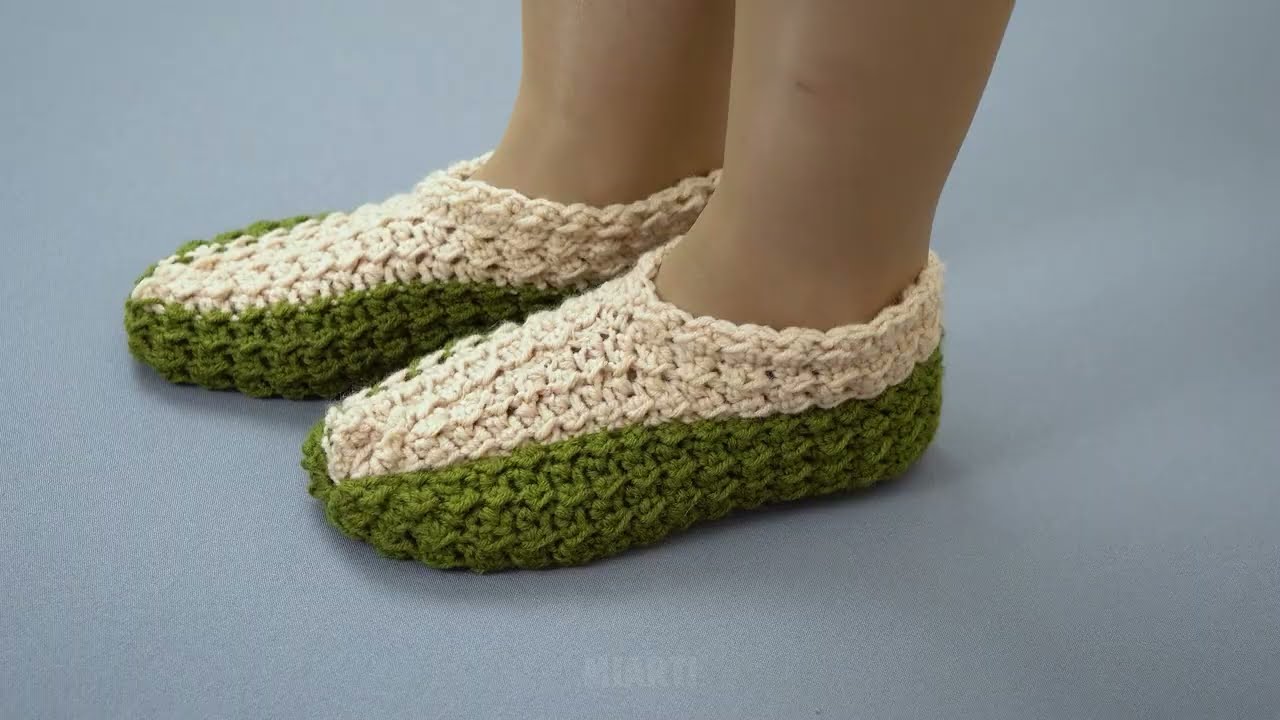
Step 4: Add a Border (Optional but Recommended)
To strengthen the opening and make the slipper more comfortable:
-
Attach yarn at the opening.
-
Single crochet evenly around the opening edge.
-
Join with a slip stitch.
-
Repeat for 1–2 rounds.
This helps the slipper keep its shape and improves durability.
Step 5: Make It Non-Slip (Optional)
To prevent slipping:
-
Apply non-slip fabric paint in dots on the sole.
-
Sew on leather or suede patches.
-
Crochet an extra sole layer and stitch it on.
Sizing Tips
| Foot Size | Square Size |
|---|---|
| Small (US 5–6) | 7.5–8 in |
| Medium (US 7–8) | 8–9 in |
| Large (US 9–10) | 9–10 in |
Adjust hook size or yarn weight for a better fit.
Customization Ideas
-
Add pom-poms, buttons, or bows
-
Change colors every round
-
Use textured stitches like bobbles or shells
-
Add ribbing around the ankle
Final Thoughts
Crochet slippers from a square are perfect for:
-
Beginners
-
Quick gifts
-
Scrap yarn projects
-
Teaching basic crochet shaping
With just one square and simple folding, you can create warm, cozy slippers in under an hour. Once you master this method, you’ll be able to experiment with textures, colors, and sizes effortlessly.
If you’d like, I can also:
-
Create a printable PDF pattern
-
Write a YouTube video script
-
Provide step-by-step images or diagrams
-
Adapt it for kids or men
Just tell me 😊
Watch video: