 by
by Here is a clear, detailed, and beginner-friendly guide you can use for a blog post, tutorial, or video description.
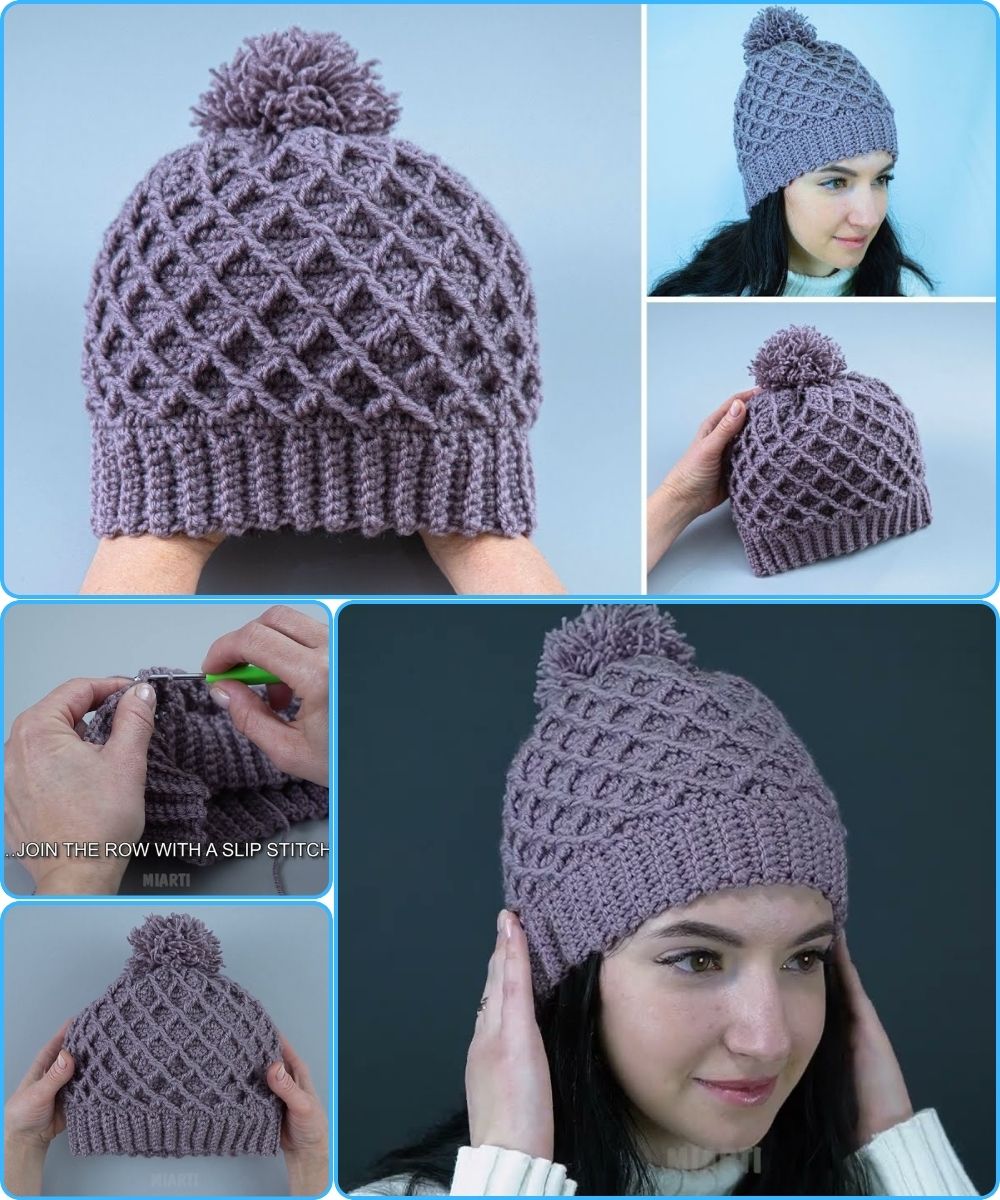
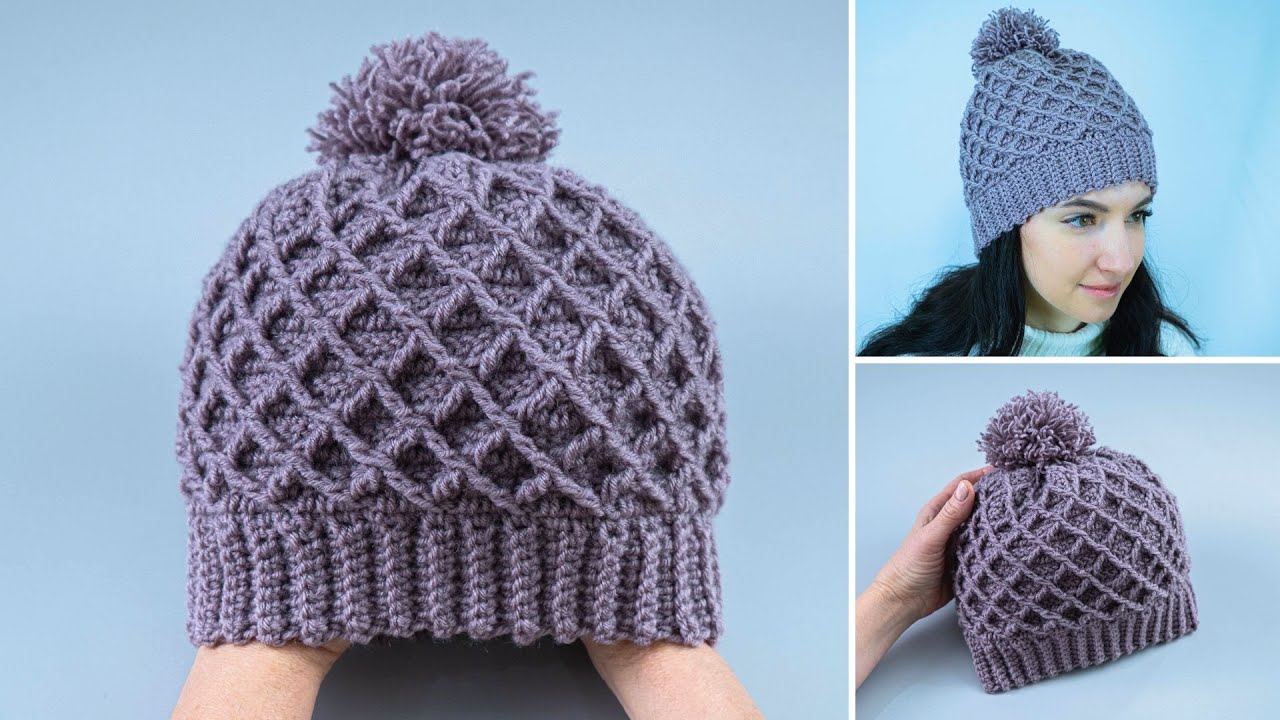
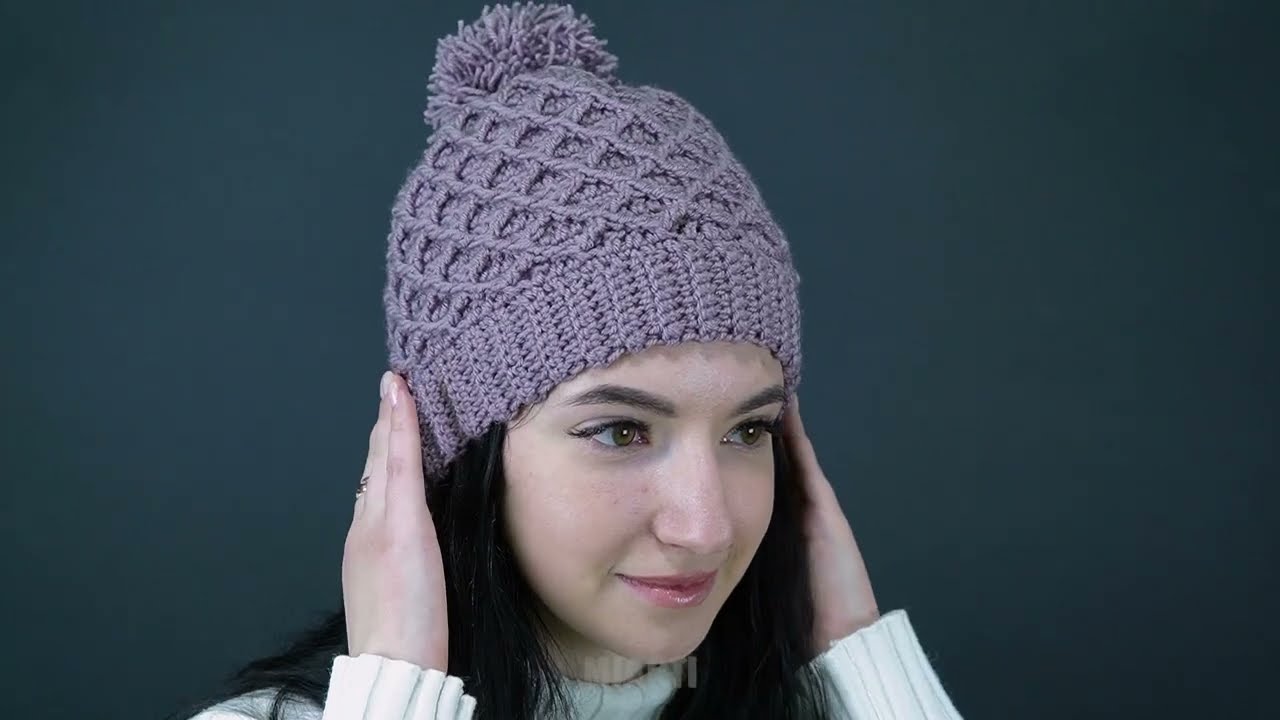
How to Make a Beautiful Crochet Hat with a Honeycomb Pattern
Very Simple and Easy – Perfect for Beginners
Crocheting a honeycomb-pattern hat is a wonderful project for both beginners and experienced crocheters. This design looks rich and textured, yet it uses simple stitches that are easy to memorize. With just basic crochet skills, you can create a beautiful, cozy hat that’s perfect for everyday wear or as a handmade gift.
Materials Needed
To get started, gather the following supplies:
-
Yarn: Medium weight (worsted weight) yarn
-
Choose soft acrylic or wool blend for warmth and comfort
-
-
Crochet Hook: Size 5.0 mm (H/8) or size recommended on your yarn label
-
Scissors
-
Yarn Needle (for weaving in ends)
-
Stitch Marker (optional, but helpful)
Basic Stitches Used
This honeycomb pattern uses very simple stitches:
-
Chain (ch)
-
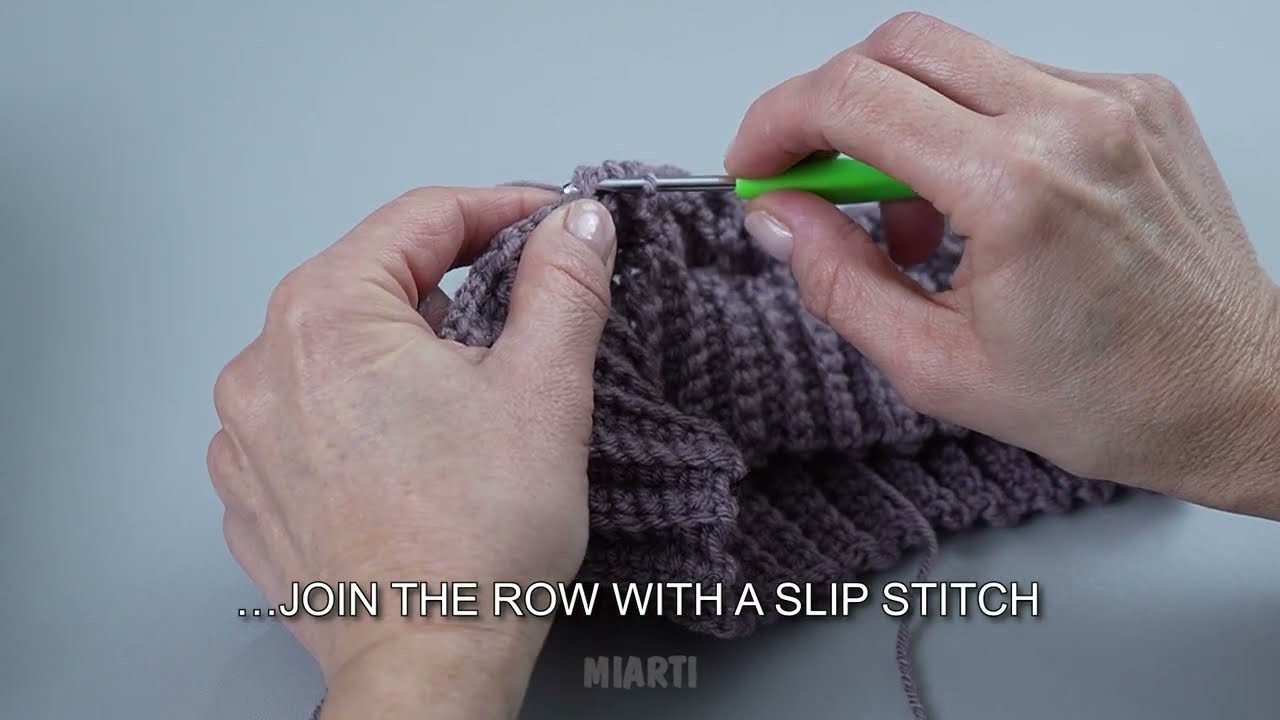
Slip Stitch (sl st)
-
Single Crochet (sc)
-
Double Crochet (dc)
-
Front Post Double Crochet (fpdc) – creates the honeycomb texture
If you know how to make double crochet stitches, you can easily learn this pattern.
Step 1: Crochet the Hat Brim
-
Start with a foundation chain that fits comfortably around your head (usually 50–60 chains for adults).
-
Join the chain with a slip stitch to form a circle.
-
Crochet single crochet stitches in each chain around.
-
Continue for 4–6 rounds to create a snug and stretchy brim.
👉 Tip: You can use ribbing or front/back post stitches if you want extra stretch.
Step 2: Begin the Honeycomb Pattern
This is where the hat becomes beautiful and textured.
-
Chain 2 (counts as the first stitch).
-
Work double crochet stitches around the hat.
-
On the next round, alternate between:
-
1 front post double crochet
-
1 regular double crochet
-
This alternating pattern creates the raised “honeycomb” look.
Step 3: Repeat the Pattern
-
Continue repeating the honeycomb rounds for 10–12 rounds, depending on how deep you want the hat.
-
The pattern is easy to remember and works up quickly.
-
The texture becomes more visible after a few rows.
👉 Tip: Try using a solid or lightly textured yarn to show the honeycomb design clearly.
Step 4: Shape the Top of the Hat
To close the hat:
-
Begin decreasing stitches evenly around the crown.
-
Reduce one stitch every few stitches each round.
-
Continue until the opening is small.
-
Cut yarn, pull through the remaining loops, and tighten securely.
Step 5: Finishing Touches
-
Use a yarn needle to weave in all loose ends.
-
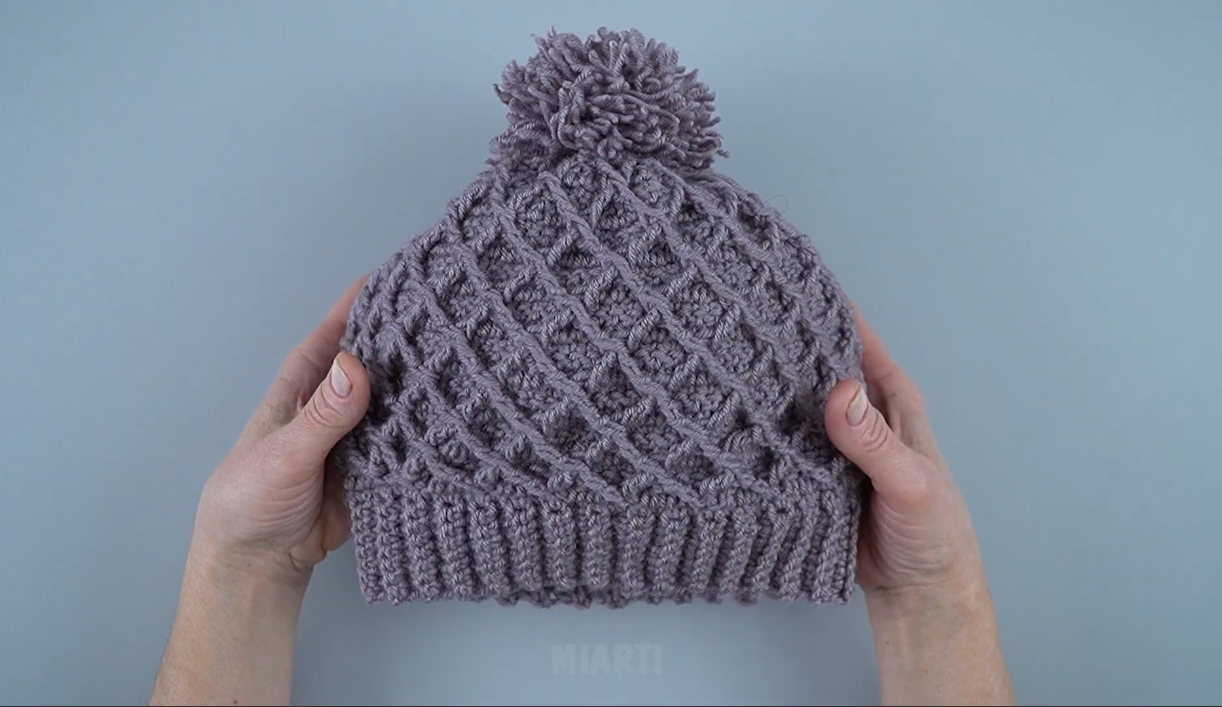
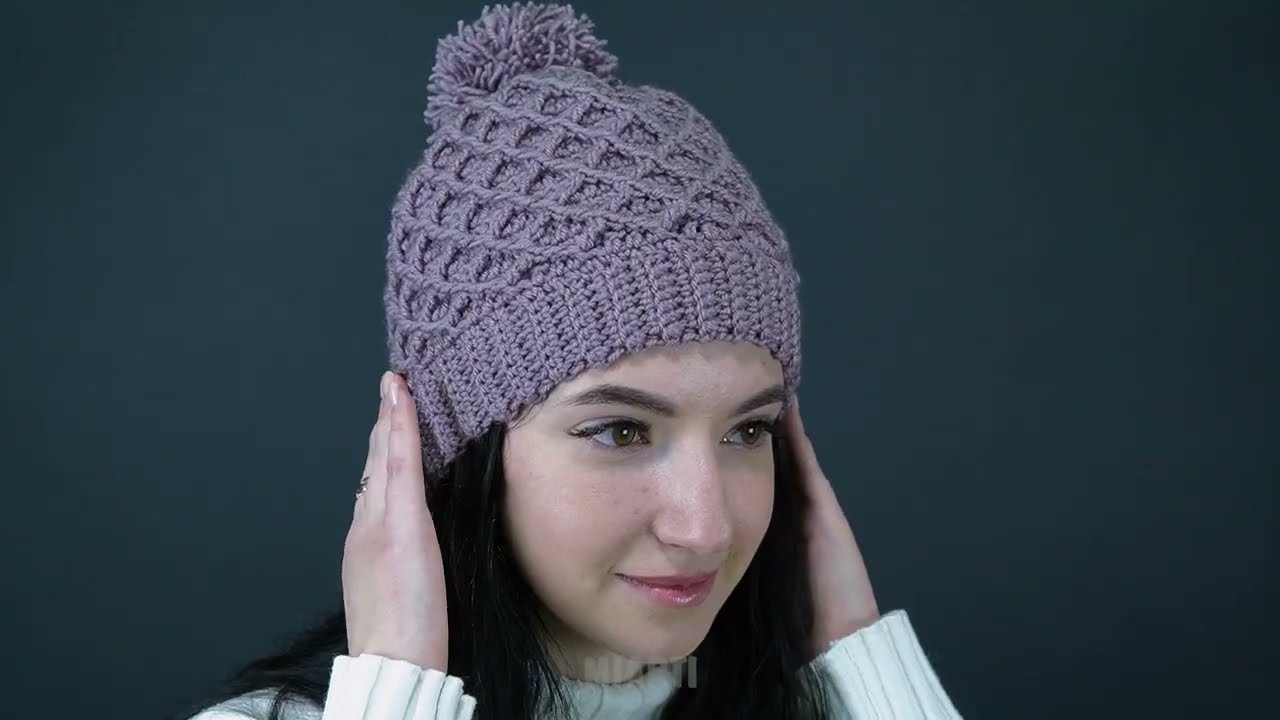
Add optional decorations like:
-
A pom-pom
-
A crochet flower
-
A leather or handmade tag
-
Final Thoughts
This honeycomb crochet hat is simple, stylish, and fun to make. The textured pattern gives a professional look while remaining easy enough for beginners. Whether you’re making it for yourself, as a gift, or to sell, this hat is sure to impress.
Happy Crocheting! 🧶✨
If you’d like, I can also:
-
Simplify this into a short YouTube description
-
Convert it into a step-by-step pattern
-
Adjust it for kids or baby sizes
Just tell me!
Watch video: