 by
by Here’s a clear, beginner-friendly, detailed guide you can use as a blog post, handout, or tutorial. I’ve written it in simple language with step-by-step instructions so even someone who has never made slippers before can follow along.

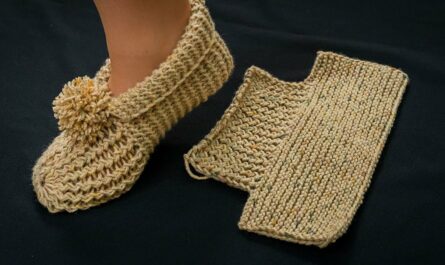
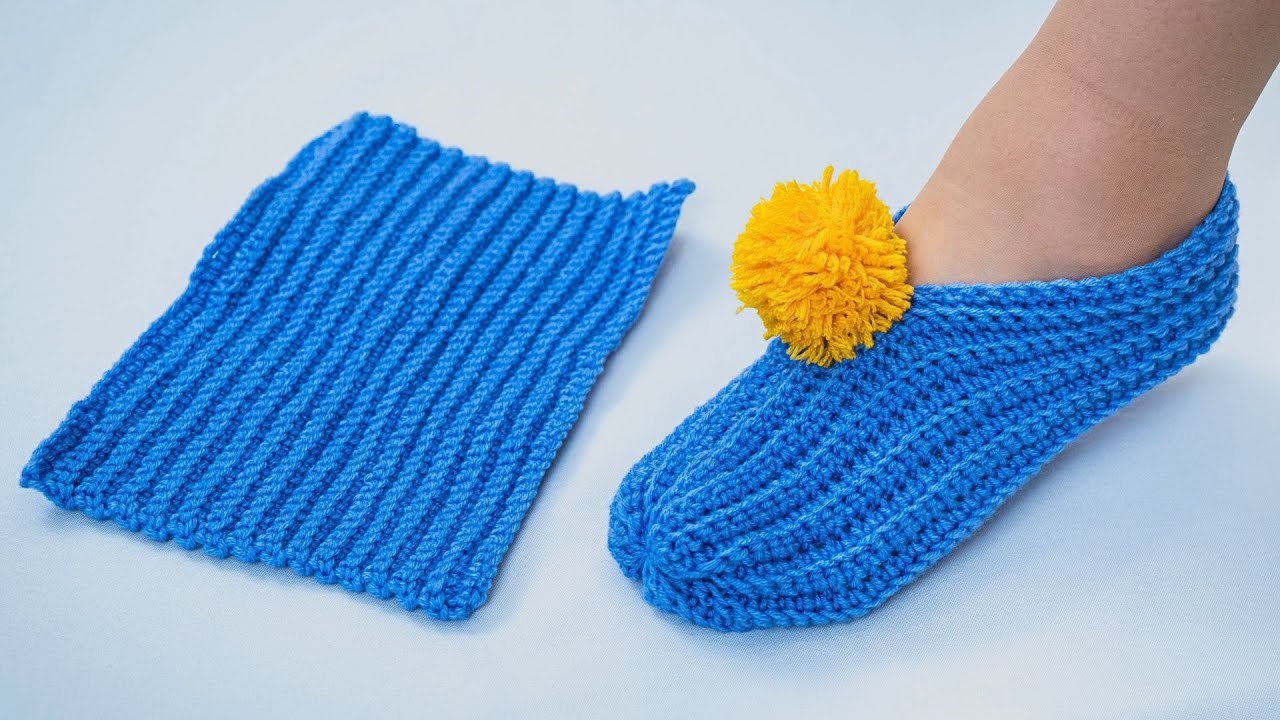
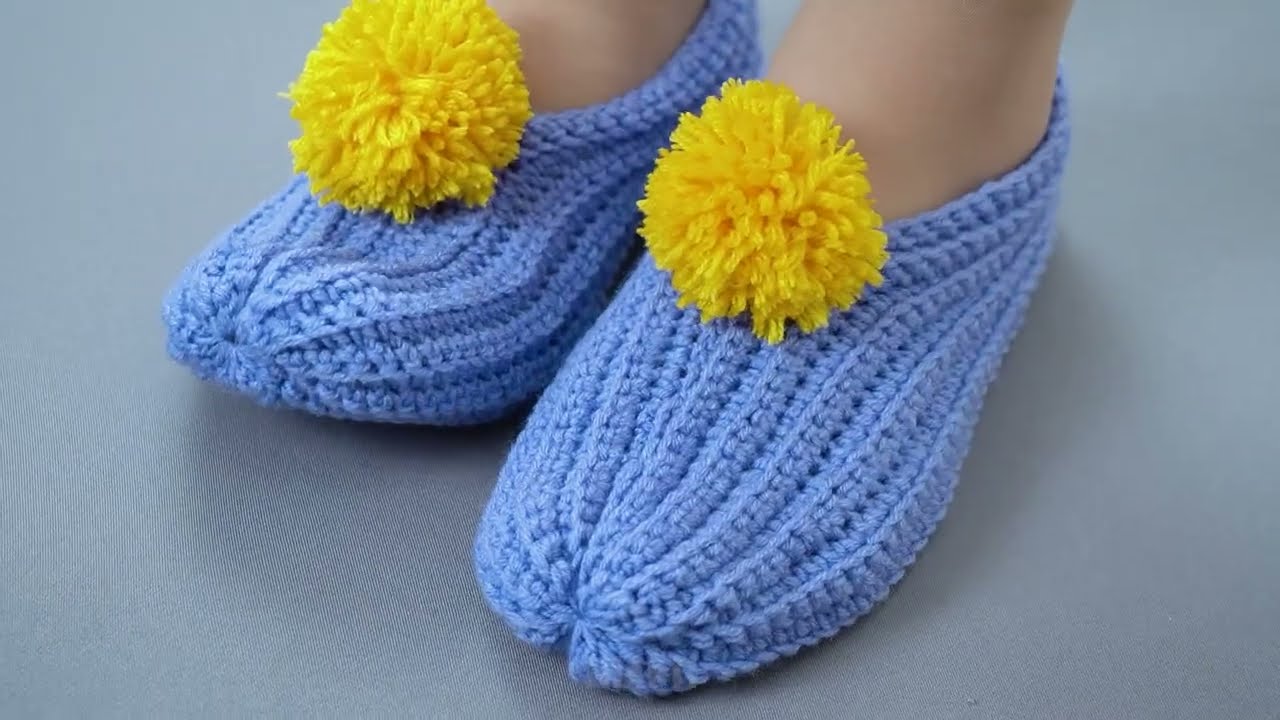
How to Make Simple Crochet Slippers with One Swatch
Even a beginner can handle it!
Crochet slippers don’t have to be complicated. In fact, you can make a cozy, comfortable pair using just one simple crochet swatch. This method is perfect for beginners because it uses basic stitches, simple shaping, and minimal counting.
If you can crochet a rectangle, you can make these slippers!
What You’ll Need
Before you start, gather these supplies:
-
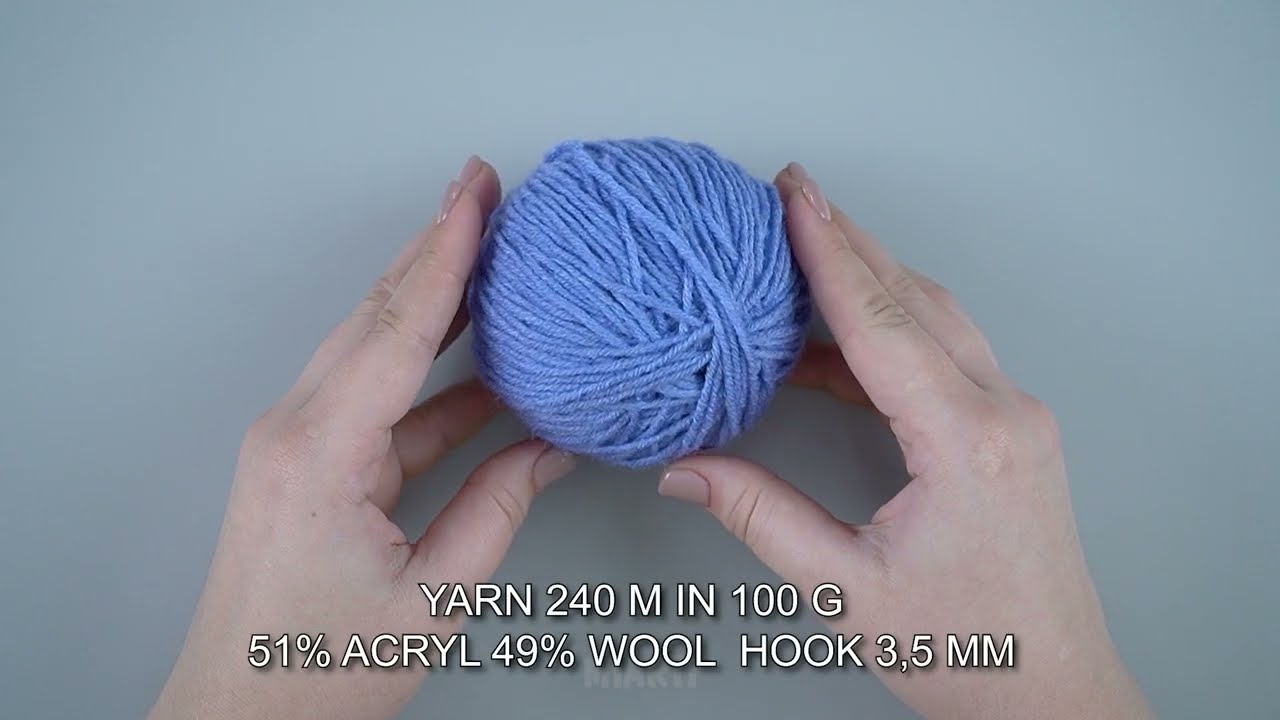
Yarn: Medium-weight yarn (worsted weight #4 works best)
-
Hook: Size H/8 (5.0 mm) crochet hook
-
Scissors
-
Yarn needle (for sewing seams)
-
Measuring tape or ruler
👉 Tip: Choose soft yarn for comfort. Acrylic or acrylic-blend yarn is great for beginners.
Skills You Should Know
This pattern uses only beginner stitches:
-
Chain (ch)
-
Single crochet (sc) or half double crochet (hdc)
-
Slip stitch (sl st)
That’s it!
Step 1: Make One Simple Rectangle (Swatch)
This rectangle will become your slipper.
Start the Swatch
-
Chain 26–30 stitches
(This will be the length of your foot. Adjust if needed.) -
Turn your work and crochet single crochet (sc) or half double crochet (hdc) in each stitch across.
-
Chain 1 (or 2 for hdc), turn.
-
Repeat this row until your rectangle measures:
-
About 9–10 inches long
-
About 4–5 inches wide
-
👉 This rectangle should fit from your heel to your toes when laid against your foot.
Fasten off, leaving a long tail for sewing.
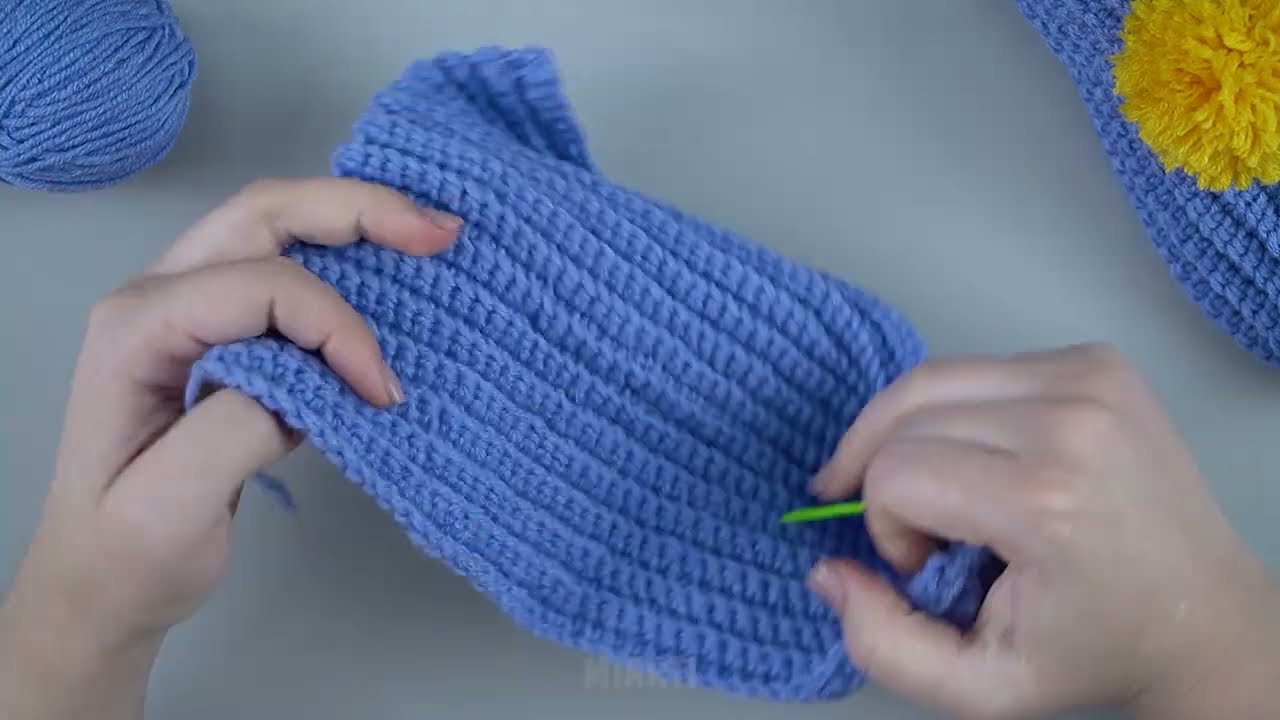
Step 2: Fold the Rectangle into a Slipper Shape
Now comes the fun part—turning the swatch into a slipper!
-
Lay the rectangle flat.
-
Fold it lengthwise, bringing the short ends together.
-
You’ll now see where the heel and toe will form.
Step 3: Sew the Heel
-
Using your yarn needle and long tail,
-
Sew one short end of the rectangle closed.
-
This creates the heel of the slipper.
Secure and knot, but don’t cut the yarn yet if you want to use it for shaping.
Step 4: Shape and Sew the Toe
-
At the opposite end, fold the corners inward slightly.
-
Sew across to close the toe area.
-
Pull gently to shape the front of the slipper.
👉 You can make the toe round or pointed depending on how tightly you pull the stitches.
Fasten off and weave in ends.
Step 5: Try It On and Adjust
Slip your foot into the slipper:
-
Too loose? Sew a little tighter at the toe.
-
Too tight? Use fewer stitches next time or a larger hook.
-
Want a cuff? Add a few rounds of crochet around the opening.
Repeat the entire process to make the second slipper.
Optional Finishing Touches
Make your slippers extra special:
-
Add a scalloped or ribbed edge
-
Crochet a strap or bow
-
Sew on buttons or pom-poms
-
Use non-slip fabric or dots on the sole
Why This Method Is Perfect for Beginners
✔ Only one simple swatch
✔ No complicated patterns
✔ Easy sizing adjustments
✔ Fast and satisfying results
These slippers are great for gifts, craft fairs, or cozy nights at home.
Final Thoughts
Crocheting slippers doesn’t have to be scary or confusing. With just one rectangle and a little folding, you can create something warm, useful, and handmade.
Once you’ve made one pair, you’ll want to make more—for family, friends, and yourself!
Happy crocheting! 🧶💛
If you’d like, I can also:
-
Add photos descriptions
-
Convert this into a PDF pattern
-
Adjust it for kids or men’s sizes
-
Write a YouTube video script
Just tell me!
Watch tutorial: