 by
by Below is a clear, friendly, step-by-step guide on how to make a beautiful snood/collar using a very easy stitch pattern, suitable for beginners. I’ll give you both a crochet and a knitting version—choose the one you prefer!
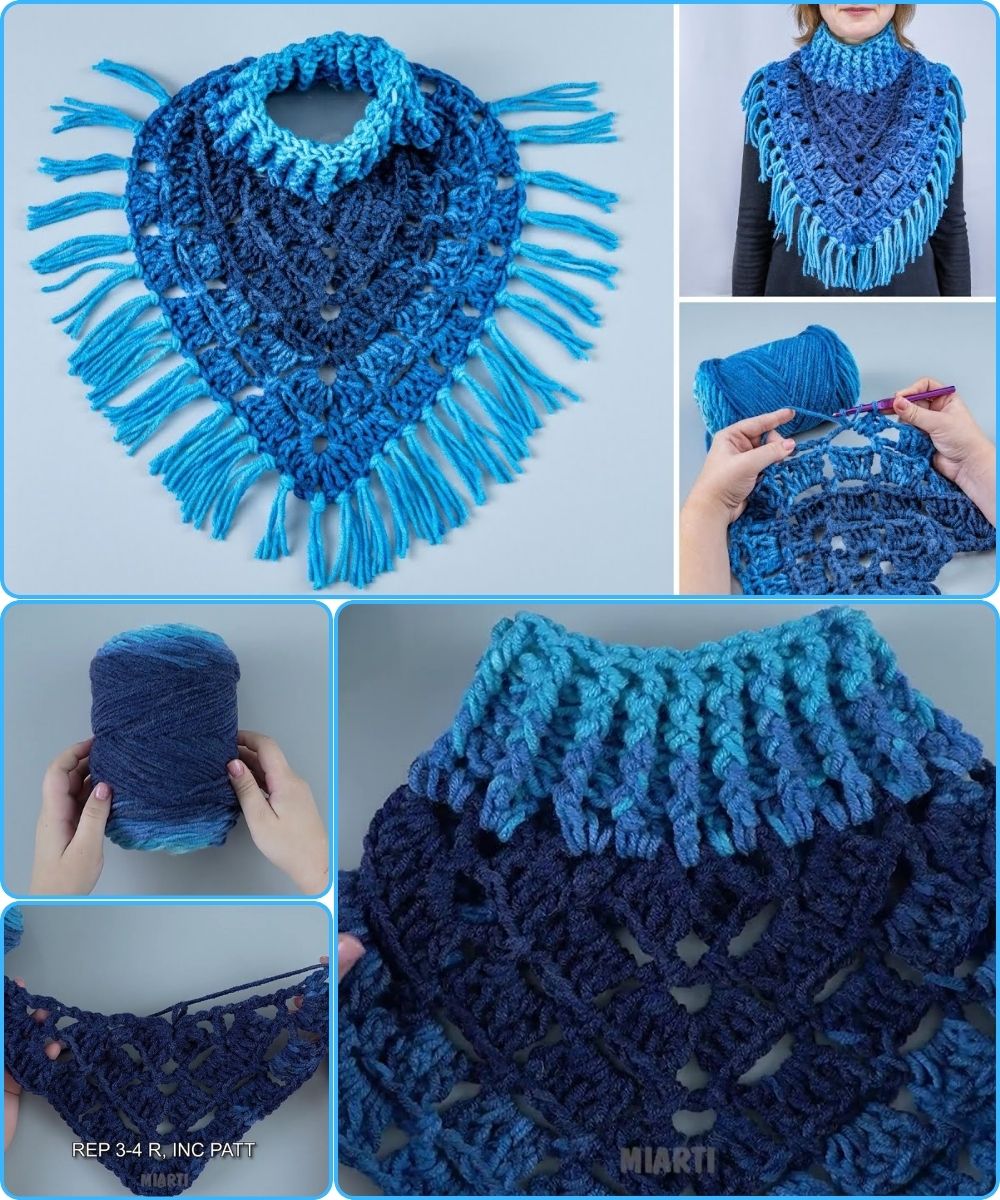
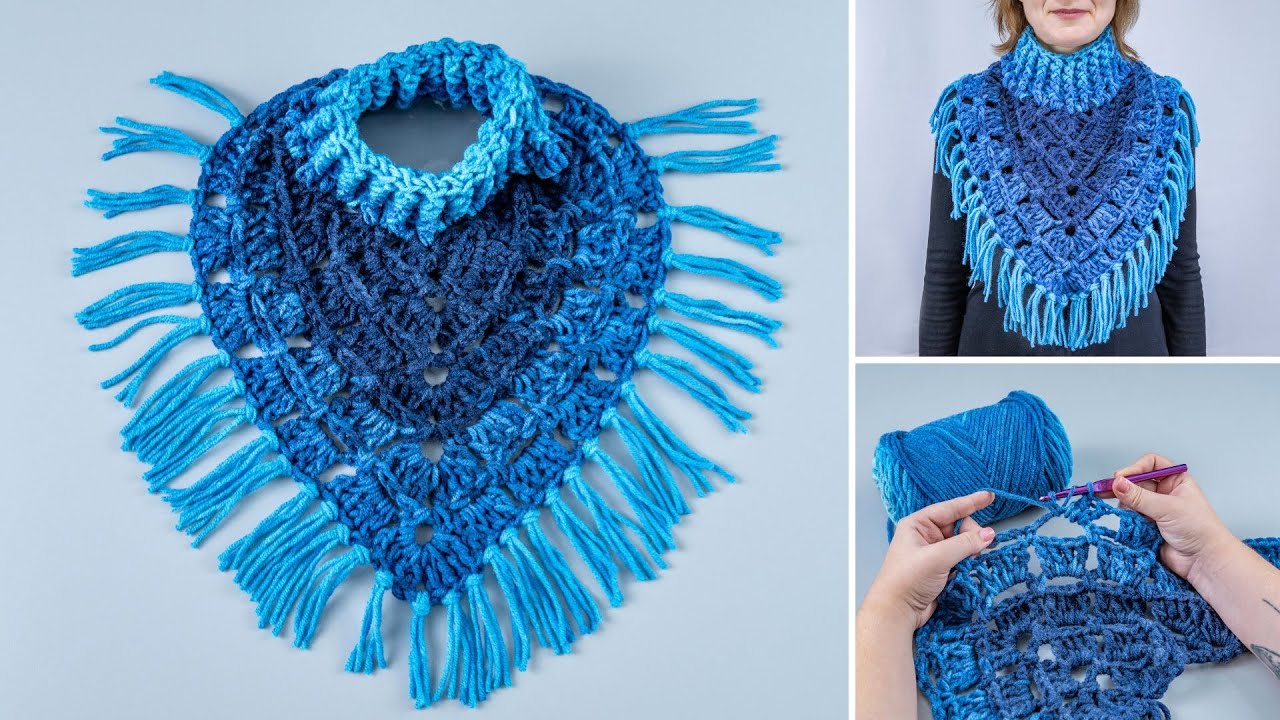
🧶 How to Make a Beautiful Snood/Collar
(With a Very Easy Stitch Pattern – Beginner Friendly)
A snood or collar is a cozy circular neckwarmer—easier than a scarf and faster to finish. These instructions use simple stitches but produce a stylish, textured result.
🌼 CROCHET VERSION (Super Easy!)
The “Mixed Rib” Stitch Snood
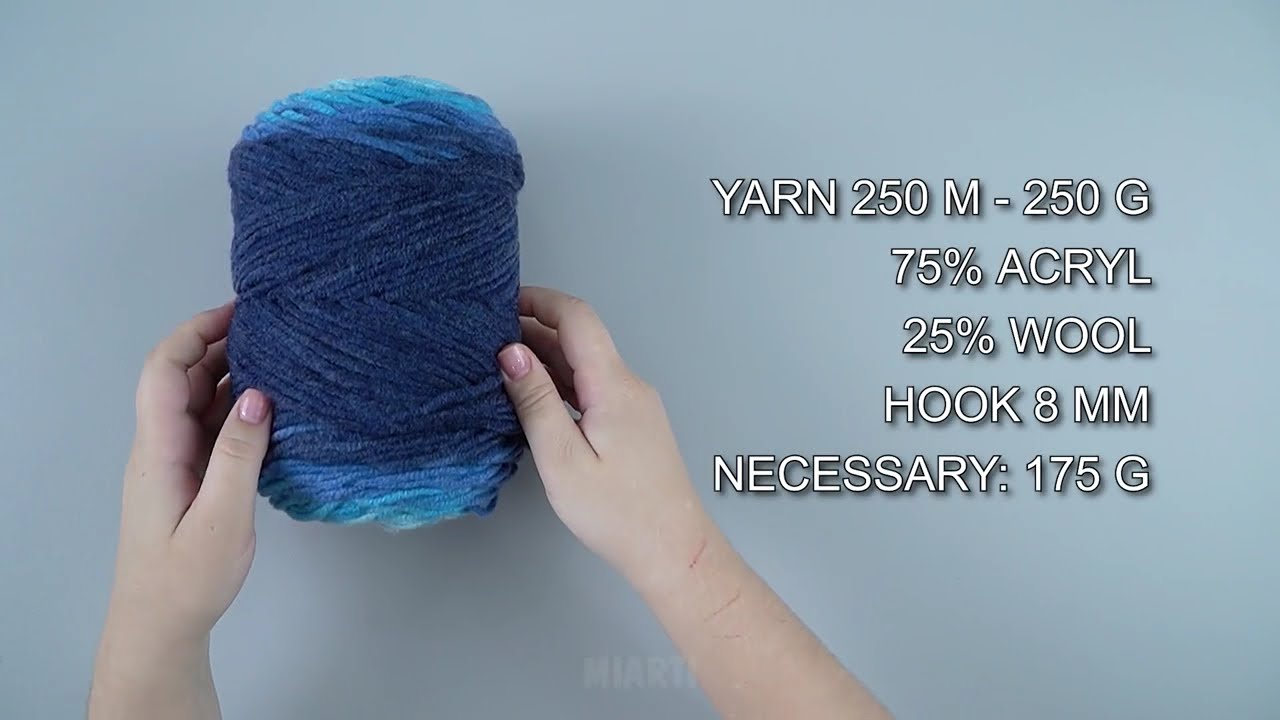
Materials
-
Bulky (weight 5) or super-bulky (weight 6) yarn – ~150 to 200g
-
8 mm crochet hook (or size recommended on yarn)
-
Scissors
-
Yarn needle
Finished Size (adjustable)
-
Height: 10–12 in (25–30 cm)
-
Circumference: 22–24 in (56–61 cm)
(Will stretch comfortably)
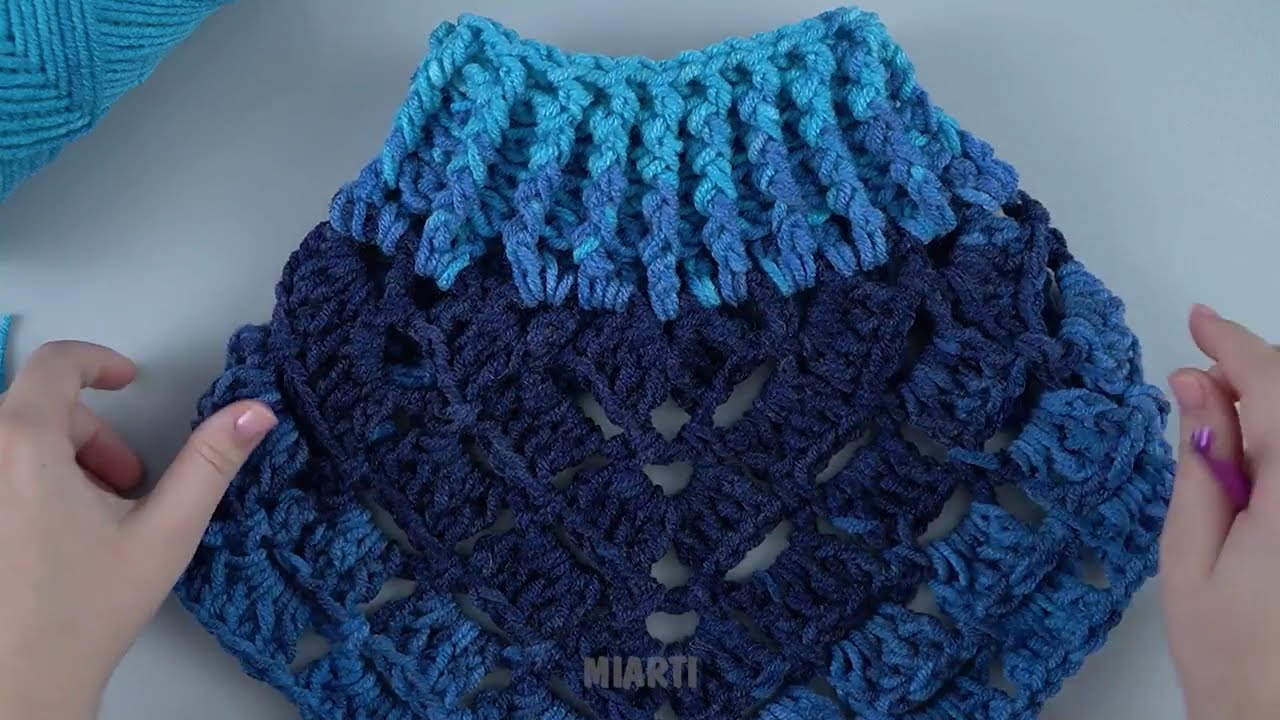
🧵 Stitch Pattern
You will use only:
-
Chain (ch)
-
Half Double Crochet (hdc)
-
Front Post Half Double Crochet (FPHDC)
-
Back Post Half Double Crochet (BPHDC)
This creates a soft rib that looks advanced but is incredibly simple.
⭐ Instructions
1️⃣ Foundation
Chain 60–64 (or any number that fits comfortably around your head).
Join with a slip stitch to form a loop without twisting.
2️⃣ Round 1
Ch 1.
Work 1 hdc in each chain around.
Join with slip stitch.
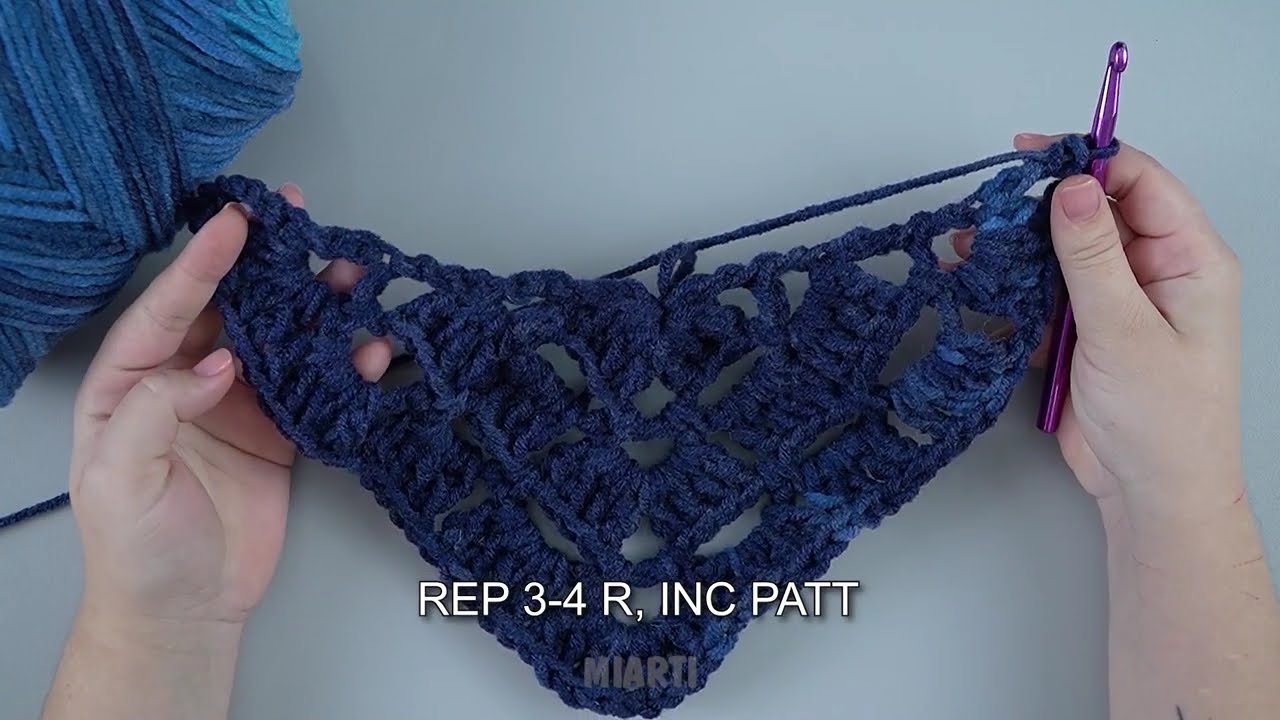
3️⃣ Round 2 and onward
Ch 1.
Repeat the rib pattern:
-
FPHDC in the first stitch
-
BPHDC in the next stitch
-
Continue FPHDC, BPHDC all the way around
Join with slip stitch.
4️⃣ Continue
Repeat Round 2 for 20–24 rounds, or until the snood is the height you like.
5️⃣ Finishing
-
Fasten off
-
Weave in ends
-
Optional: Add a decorative button, faux fur trim, or fold the top edge
🌟 Why This Stitch Pattern Works
-
The alternating front-post/back-post technique creates a chunky ribbed texture without complexity.
-
Gives the snood stretch and structure so it stands nicely as a collar.
-
Very forgiving for beginners!
🧶 KNITTING VERSION (Ultra Easy!)
The “Mistake Rib” Snood
Materials
-
Bulky yarn (150–200g)
-
8 mm circular knitting needles (40 cm length)
-
Stitch marker
-
Tapestry needle
🧵 Stitch Pattern
The mistake rib is created with just:
-
Knit (K)
-
Purl (P)
Pattern repeat: K2, P2
But because you cast on an odd number of stitches, the ribs shift and create a soft textured look.
⭐ Instructions
1️⃣ Cast On
Cast on 101 stitches (or any odd number close to the neck circumference you want).
Place marker and join in the round.
2️⃣ Work Mistake Rib Pattern
Round 1–?:
-
K2, P2 all the way around
(The last stitch will be a single P before starting over—this is what makes the “mistake rib” magic happen)
Continue until the snood is 10–14 inches tall.
3️⃣ Bind Off
Bind off loosely in pattern (knit the knits, purl the purls).
4️⃣ Finishing
-
Weave in ends
-
Block lightly if desired
-
Done!
💡 Customization Ideas
-
Use fuzzy yarn for a soft, cloud-like snood
-
Add alternating color stripes
-
Attach faux-fur edges
-
Make it extra tall for a face-covering winter cowl
-
Add buttons for a “collar” look
🎁 Beginner Tips
-
Keep tension light—ribbing looks best when not too tight
-
Try your snood on as you go
-
Choose a yarn you love touching (it will be against your neck!)
-
Bulky yarn is the fastest and warmest
If you want, I can also create:
✨ A printable version
✨ Video-style step-by-step instructions
✨ A diagram / chart
✨ A completely different stitch style
✨ A child-size or extra-large version
Would you like one of those?
Watch video: