 by
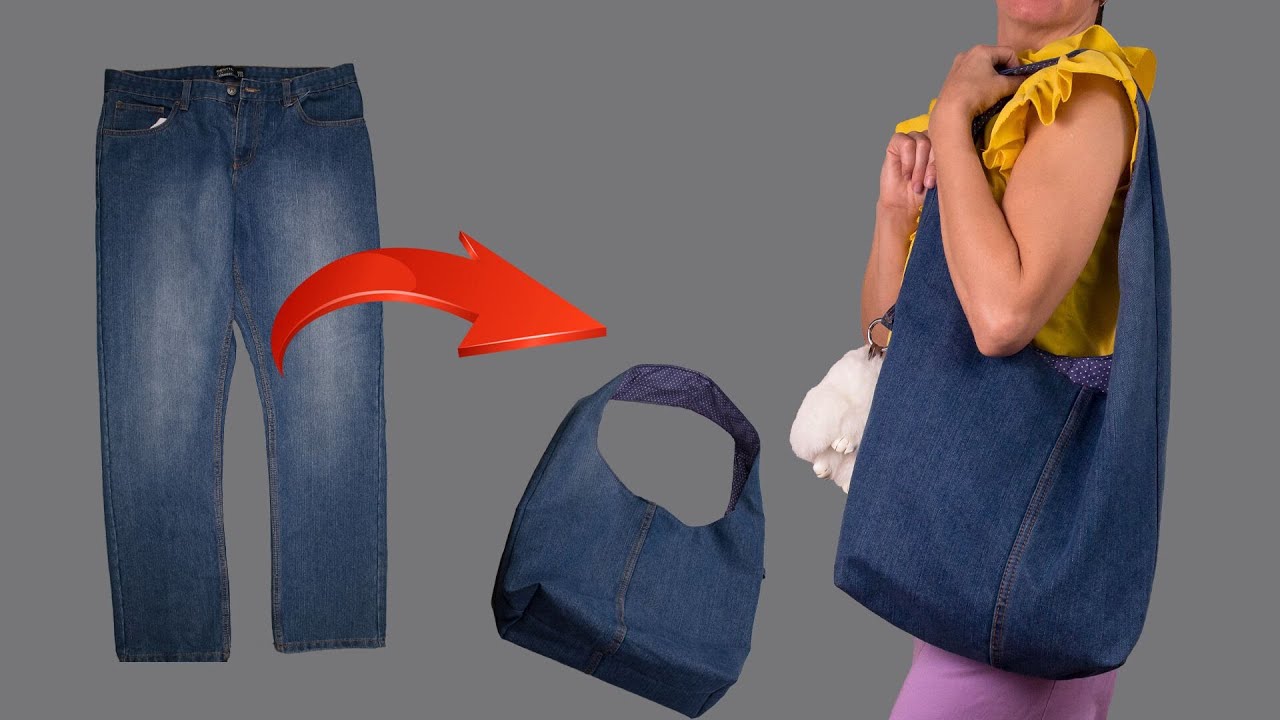
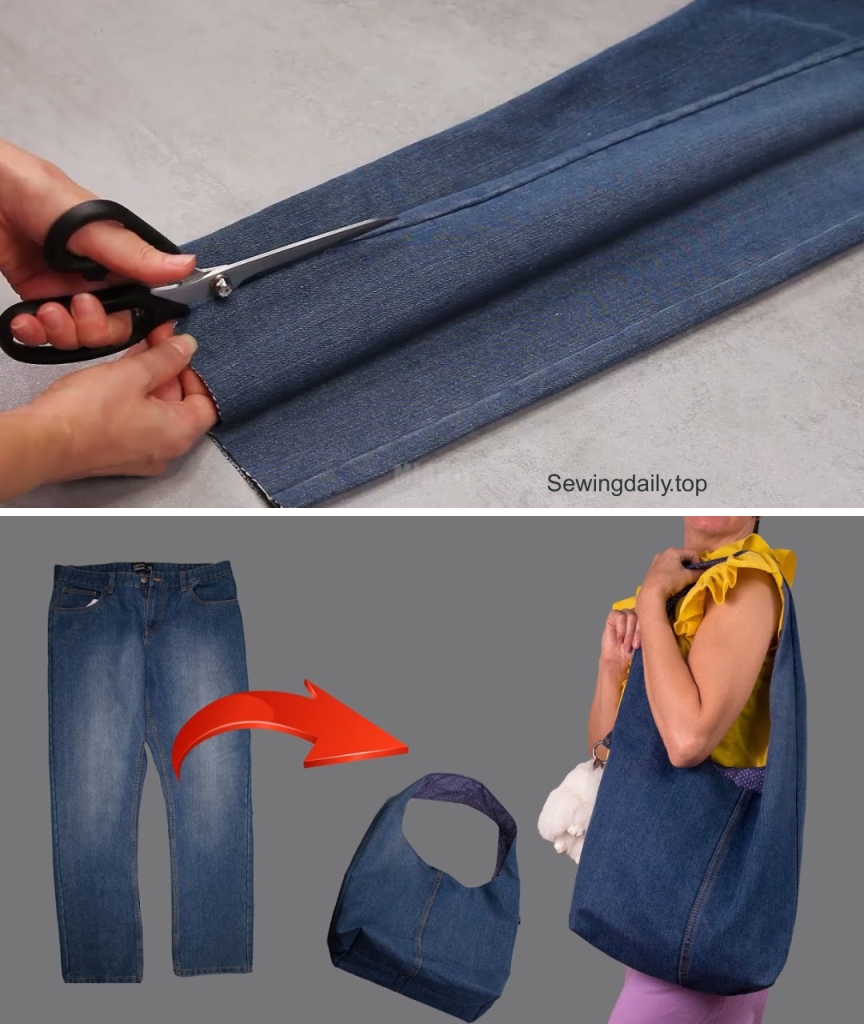
by Imagine taking the durable, faded fabric of old denim jeans and transforming it into a stylish, slouchy hobo bag with a gentle curved top and a comfortable, integrated shoulder strap. This detailed tutorial, inspired by the fantastic “How to sew a hobo bag out of old jeans easily!” video from Miarti – Reuse, will guide you through creating this charming, crescent-shaped accessory. The brilliance of this design is its ability to turn rigid denim into a soft, flowing shoulder bag that molds perfectly to the body.

Get ready to breathe new life into textile waste and create a personalized denim hobo bag that’s ideal for daily use, shopping, or as a relaxed weekend carryall!
Why This “Curved-Top Hobo” Bag Will Be Your New Favorite
This design is a brilliant fusion of sustainability and relaxed style, offering several compelling reasons to make it your next sewing project:
- Soft, Slouchy Shape: The curved top and side pieces create the classic “hobo” silhouette, which is both comfortable to wear and stylishly casual.
- Ultimate Upcycling: Repurpose sturdy denim, giving a retired pair of jeans a long second life as a unique, durable bag.
- Integrated Strap: The strap is seamlessly sewn into the side seams, ensuring maximum strength and stability.
- High Capacity: The wide base and slouchy top allow the bag to hold a surprising amount of gear.
- Easy Curves: The curved cuts are gentle, making them easy to manage even for beginners.
Materials You’ll Need:
Gathering your upcycled materials is the first step. The video uses dark blue denim and a contrasting lighter blue lining, showcasing how fabric choices impact the final style.
- One Pair of Old Denim Jeans: (For the main body and strap.)
- Exterior Fabric (Cut from Jeans):
- Main Body Panels: 2 pieces. (Cut two large rectangles, approximately 40 cm x 40 cm, then use a template/plate to round the top corners for the curved opening.)
- Bottom/Side Panel: 1 piece, 90 cm x 12 cm.
- Lining Fabric (Cotton/Poly):
- Main Body Lining: 2 pieces. (Matching the exterior curved-top shape.)
- Bottom/Side Lining: 1 piece, 90 cm x 12 cm.
- Thick Fusible Interfacing/Wadding:
- Main Body Wadding: 2 pieces, 40 cm x 40 cm (roughly). (Essential for structure, but keep it flexible.)
- Bottom/Side Wadding: 1 piece, 90 cm x 12 cm.
- Shoulder Strap: 1 piece, 120 cm long x 8 cm wide. (Can be pieced from denim scraps.)
- Optional Closure: 1 magnetic snap or 1 zipper, 35 cm long.
- Matching Thread: High-quality denim/polyester thread.
- Basic Sewing Tools: Sewing machine, heavy-duty needle (for denim), fabric scissors or rotary cutter, seam ripper, ruler, fabric marker, pins or clips, and an iron.
Step-by-Step Tutorial: Crafting Your “Curved-Top Hobo” Bag
This tutorial is broken down into four efficient phases: preparing the denim panels and strap, constructing the body and side loop, assembling the lining, and the final integration. All seam allowances are 1 cm unless otherwise stated.
Phase 1: Preparing the Curved Panels and Strap
The structure is established by stabilizing the fabric and shaping the top edge.
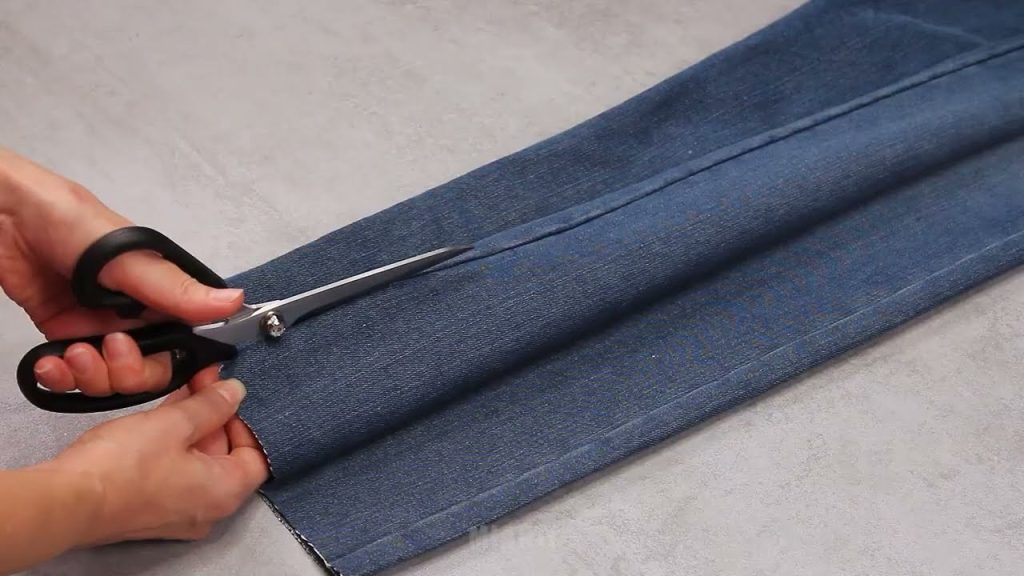
- Deconstruct & Cut Jeans: Cut two large rectangular sections from the jeans legs for the main body panels.
- Shape the Curve: Lay one 40 cm x 40 cm Exterior Denim piece flat. Use a large plate or a flexible ruler to mark a gentle, rounded curve on the two top corners. Cut the curve. Repeat for the second exterior panel and both lining panels.
- Fuse Interfacing: Iron the Thick Wadding onto the wrong side of ALL Exterior pieces (Main Body panels and Bottom/Side panel).
- Construct Strap: Take the 120 cm x 8 cm strap piece. Fold it in half lengthwise, right sides together, and stitch along the long edge. Turn the strap right side out and press flat. Topstitch along both long edges for a neat finish.
Phase 2: Assembling the Exterior Body and Strap Anchors
The 3D shape is formed by attaching the long bottom/side strip to the main panels.
- Sew Exterior Side/Base Loop: Take the long 90 cm x 12 cm Exterior Bottom/Side Panel. Fold it in half along the 90 cm length, right sides together, and stitch the two 12 cm ends to form a loop. Press the seam open.
- Attach Strap Anchors: Take the Strap and divide it into two 60 cm sections. Position the raw end of one 60 cm strap onto the top 12 cm raw edge of the Side/Base Loop, near the seam. Baste it in place. Repeat with the second 60 cm strap piece on the opposite side of the loop. These are your strap anchors.
- Sew Exterior Body to Loop:
- Pin the Exterior Side/Base Loop to the perimeter of one Curved Exterior Panel, right sides together. Start pinning at the bottom center and stitch all around the entire perimeter.
- Repeat the process to attach the second Curved Exterior Panel to the remaining perimeter of the Side/Base Loop. This creates the full 3D exterior shell with the long straps sticking out from the top sides.
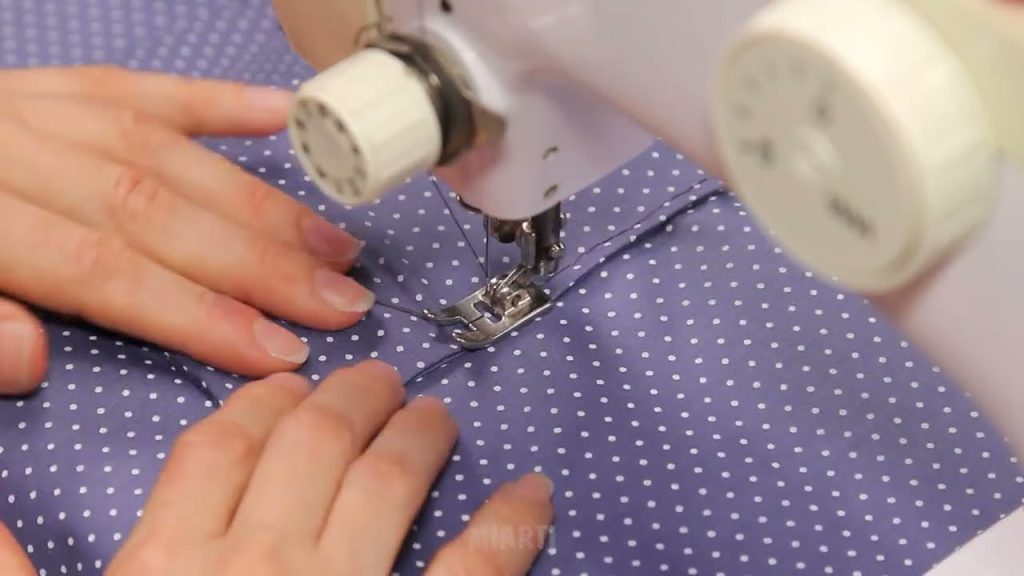
Phase 3: Constructing the Lining and Adding Closure
The lining is prepared, and the optional magnetic snap or zipper is installed.
- Sew Lining Body: Repeat the entire process from Phase 2 (steps 1, 2, & 3) using the Lining Fabric pieces. CRUCIAL STEP: When sewing the side/base perimeter, leave a 15 cm turning opening along the center of the bottom 90 cm seam of the side/base lining loop.
- Install Magnetic Snap (Optional): Install the female half of the magnetic snap onto the center-top curved edge of the front lining panel now. Install the male half onto the center-top curved edge of the back lining panel. (If using a zipper, wait until the next step.)
Phase 4: Final Assembly and Finishing
The exterior and lining are joined, and the top edge is sealed.
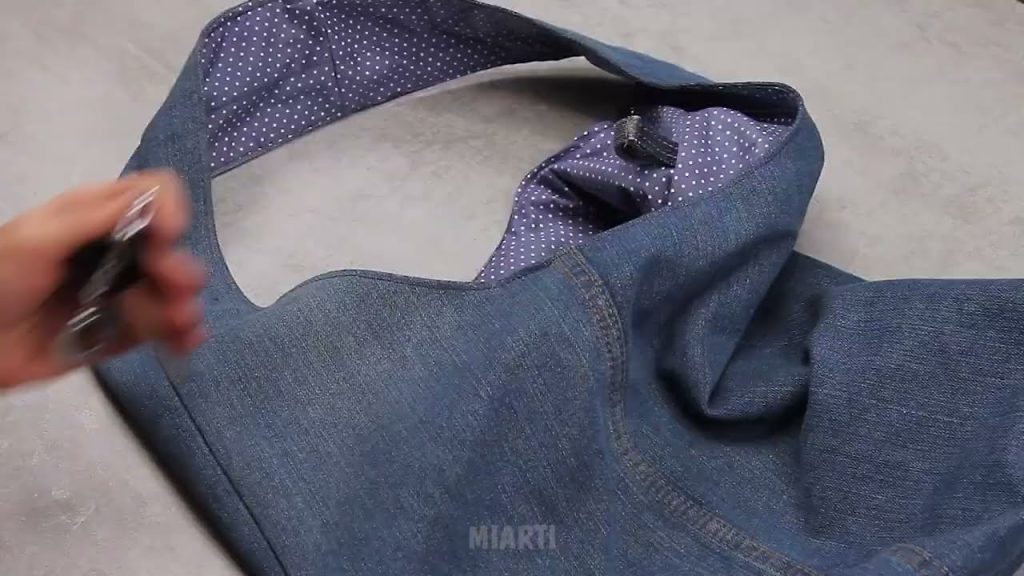
- Insert Exterior into Lining: Turn the Exterior Bag Body right side out. Keep the Lining Bag Body wrong side out. Slide the exterior bag into the lining bag, aligning the top curved raw edges perfectly. Pin all around the top.
- Stitch Top Perimeter: Stitch all around the top curved raw edge to join the exterior and lining.
- Turn and Close: Pull the entire backpack right side out through the 15 cm turning hole left in the lining bottom seam. Stitch the turning hole closed (by machine or hand).
- Topstitch: Push the lining neatly inside the exterior bag. Press the top curve flat and topstitch all around the top opening, 0.5 cm from the edge, to give a crisp, professional roll-top finish and reinforce the strap anchors.
Your unique “Curved-Top Hobo” Bag is complete! This durable, stylish, and comfortable upcycled accessory is ready to sling over your shoulder.
Video tutorial: