 by
by Sure! Here’s a detailed step-by-step guide on how to make the simplest DIY travel quilted bag easily, perfect for beginners or anyone looking for a fun, functional sewing project:
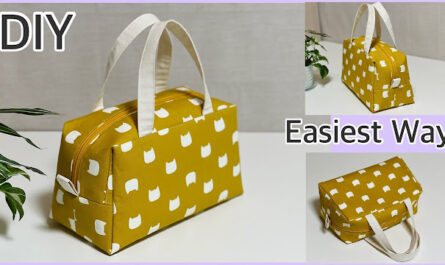
🧵 DIY Travel Quilted Bag – The Simplest Way!
A quilted travel bag is stylish, soft, and practical—ideal for carrying your essentials during trips. Let’s make a simple one with easy materials and minimal sewing skills required!
🧰 Materials You’ll Need:
| Item | Description / Notes |
|---|---|
| Quilted fabric | Pre-quilted cotton or quilt your own fabric |
| Lining fabric | Lightweight cotton or polyester |
| Zipper (12–14 inches) | For the bag opening |
| Webbing or fabric | For the straps (2 pieces, each 18–20 inches) |
| Thread | Matching or contrasting |
| Scissors or rotary cutter | For cutting fabric |
| Pins or clips | To hold pieces together |
| Sewing machine | Basic straight stitch is enough |
| Optional: Interfacing | For more structure, if needed |
✂️ Step-by-Step Instructions:
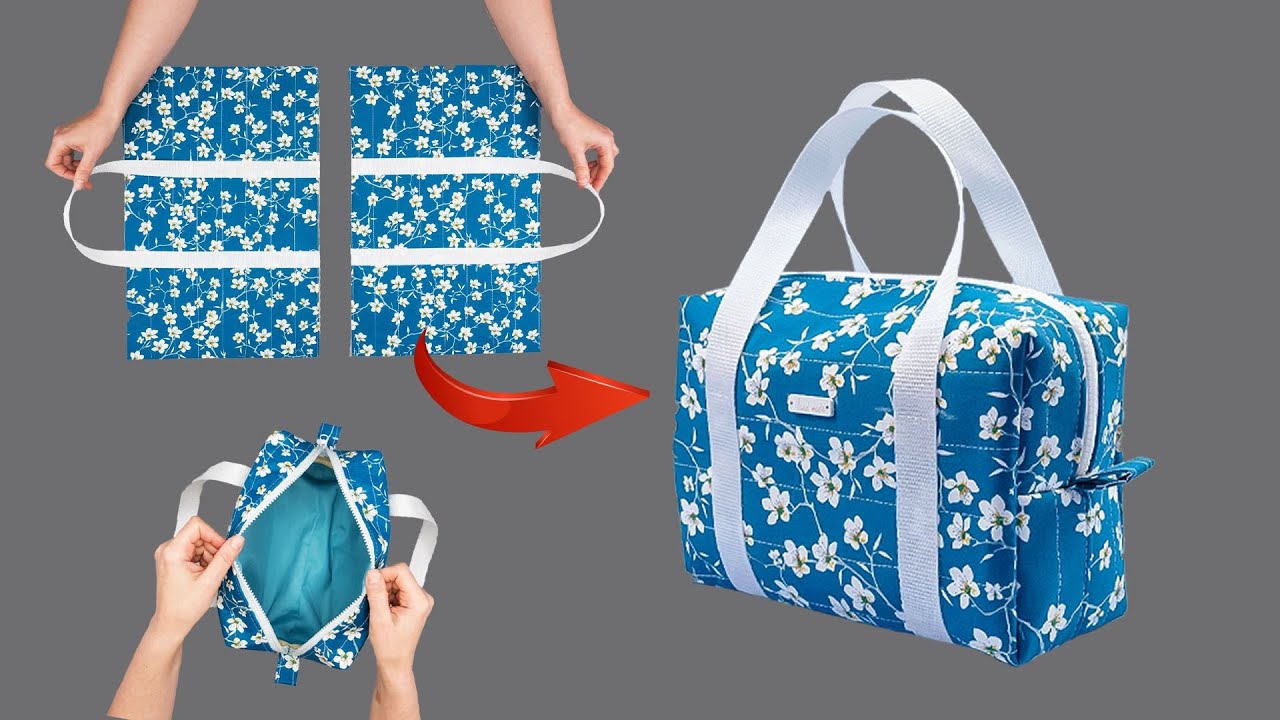
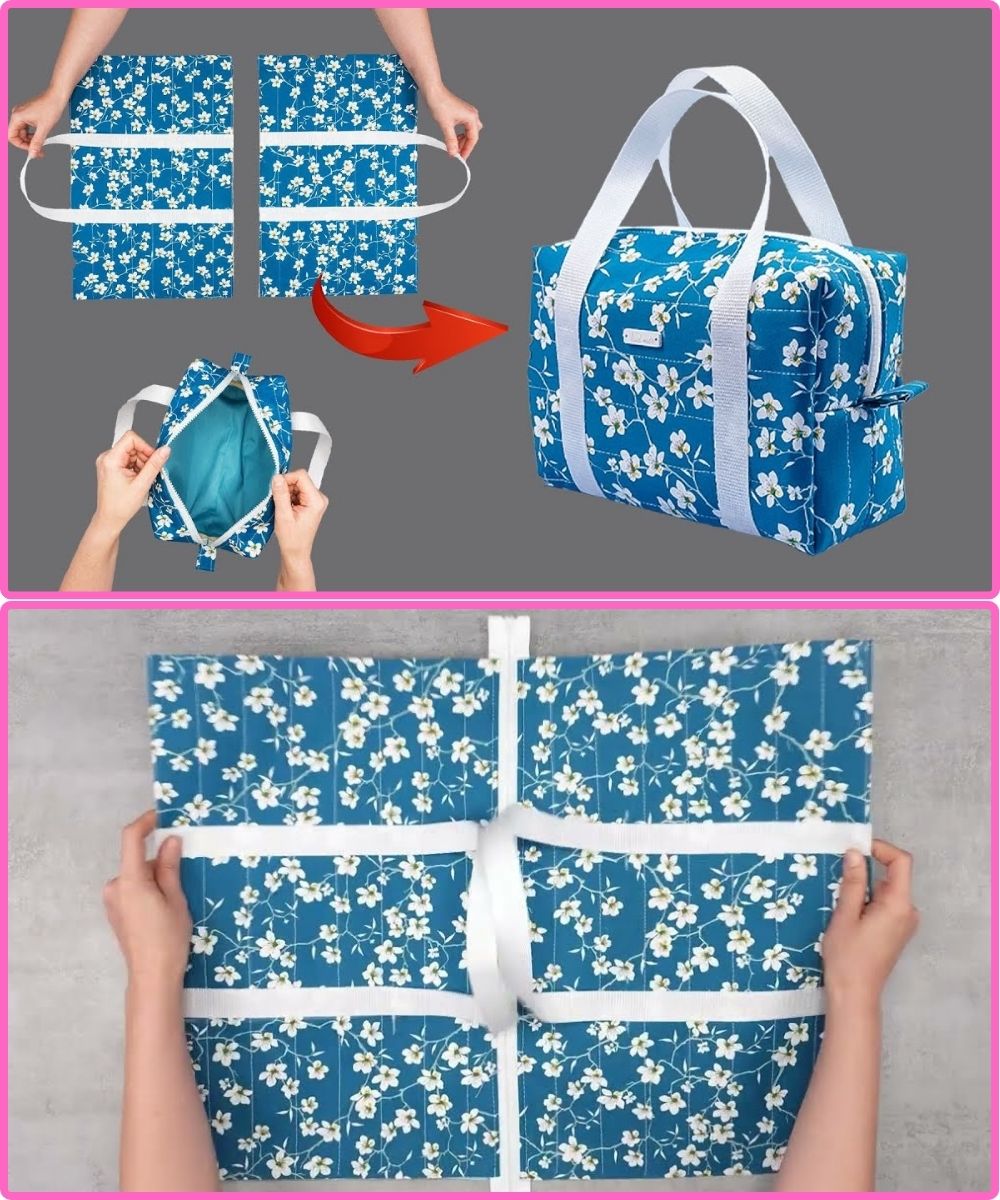
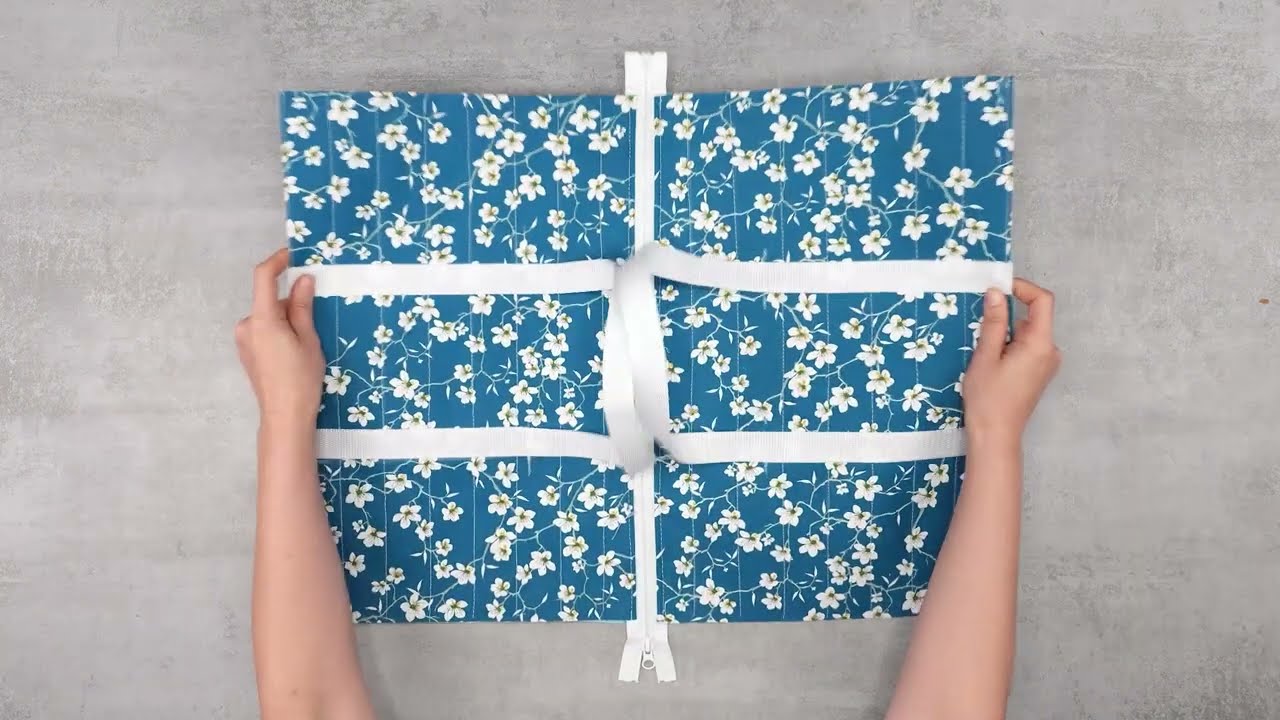
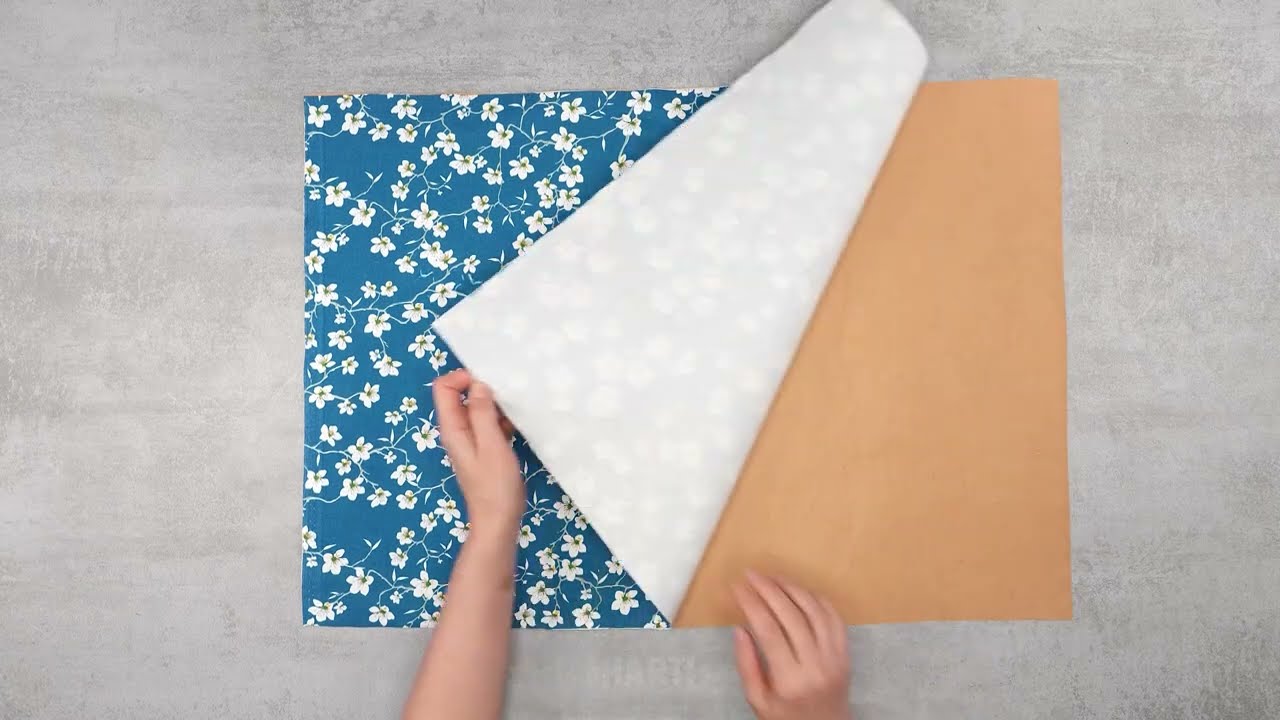
1. Cut the Fabric
You’ll need:
-
Quilted outer fabric: 2 rectangles, 14” x 11”
-
Lining fabric: 2 rectangles, 14” x 11”
-
Straps: 2 pieces of webbing or fabric, each 18–20”
-
Optional pocket (lining fabric): 1 rectangle, 6” x 8”
🔍 Tip: You can make your own quilted fabric by layering cotton + batting + backing and stitching lines diagonally.
2. (Optional) Add Interior Pocket
-
Fold the pocket fabric in half (right sides together).
-
Sew around the edges, leaving a small opening.
-
Turn it right side out and press.
-
Topstitch the pocket onto one of the lining pieces.
3. Attach the Zipper
-
Place the zipper face down along the top edge of one quilted piece, and align one lining piece face down on top.
-
Sew along the edge with a zipper foot.
-
Flip and press.
-
Repeat for the other side of the zipper with the remaining quilted and lining pieces.
4. Sew the Sides
-
Unzip the zipper halfway (important!).
-
Match up the quilted pieces right sides together and the lining pieces right sides together.
-
Pin around all the edges.
-
Sew around the entire edge with a 1/4”–1/2” seam, leaving a 3–4 inch gap in the lining bottom for turning.
5. Box the Corners (Optional for Depth)
-
Pinch each bottom corner of the quilted and lining sections into triangles.
-
Sew across the tip (about 1.5” from the point).
-
Cut off the triangle.
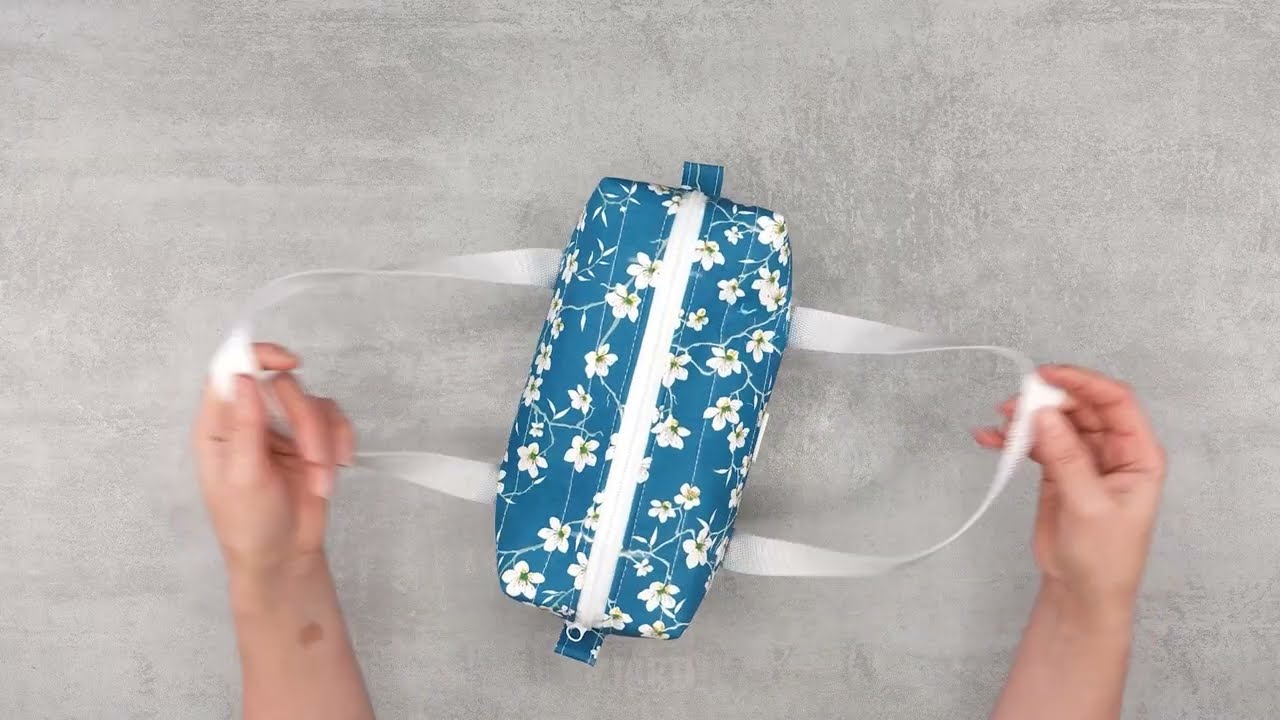
6. Turn and Finish
-
Turn the bag right side out through the lining gap.
-
Push out corners.
-
Stitch the gap in the lining closed (by hand or machine).
-
Push lining into the bag neatly.
7. Add the Straps
-
Pin each strap end to the outer quilted fabric, spaced evenly (about 3–4 inches from side seams).
-
Topstitch securely in place using a square + X pattern for strength.
✅ Done! You Made a Travel Quilted Bag 🎉
You now have a soft, stylish, and functional quilted bag perfect for toiletries, small accessories, or as a lightweight purse. You can customize the size, colors, add more pockets, or even applique your initials!
🧷 Extra Tips:
-
Want more structure? Add fusible interfacing or foam between layers.
-
Use bias tape to bind inside seams for a neater look.
-
Experiment with different shapes: square, boxy, or rounded corners.
Would you like a printable version or a diagram layout? I can also generate images or provide a simple sewing pattern if you want!
Watch video: