 by
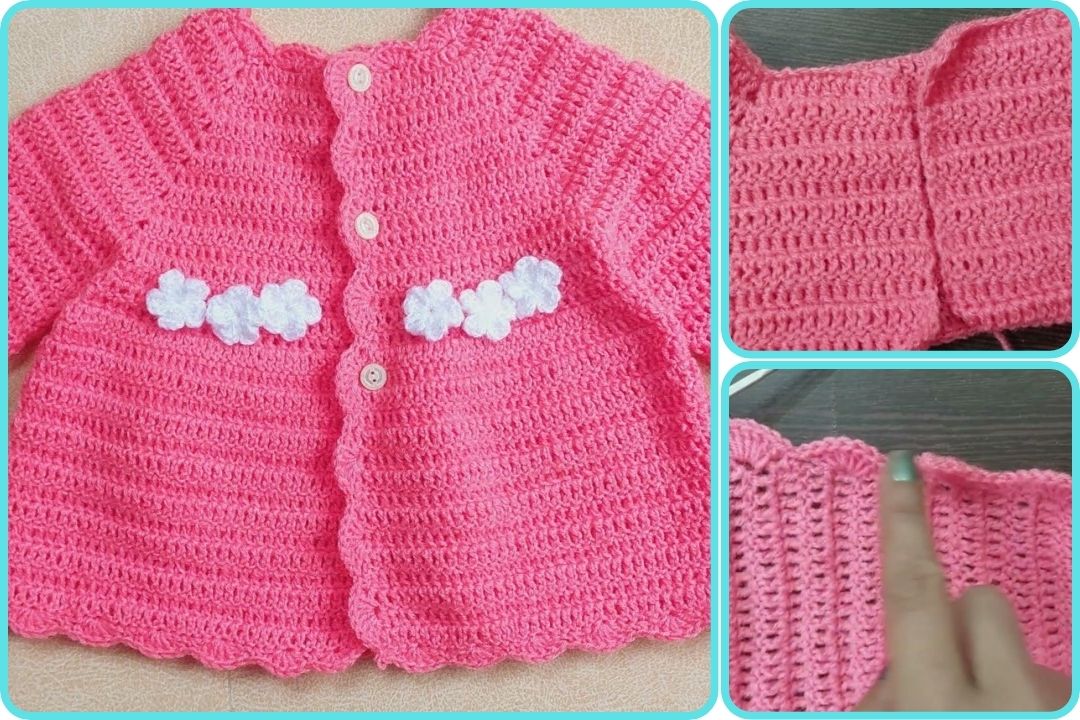
by Sure! Here’s a detailed guide on how to crochet a cardigan for a 12- to 18-month-old baby girl, suitable for intermediate beginners and up. It includes measurements, yarn recommendations, stitch patterns, and step-by-step construction instructions.
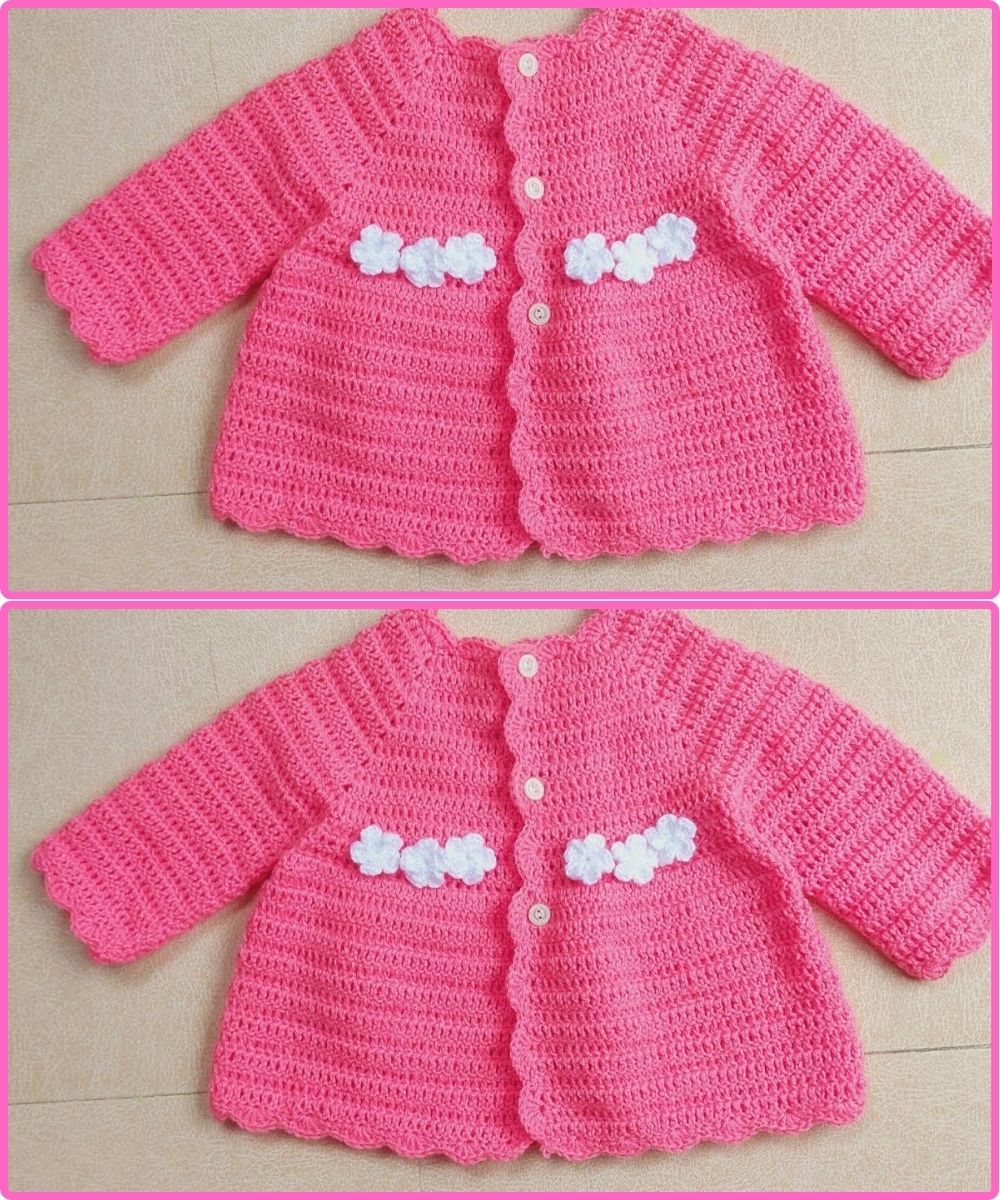
🧶 Crochet Baby Cardigan (12–18 Months)
📏 Finished Size (approximate):
-
Chest: 20–21 inches (51–53 cm)
-
Length: 10–11 inches (25–28 cm)
-
Sleeve length: 8–9 inches (20–23 cm)
🧵 Materials Needed:
-
Yarn: DK (Double Knitting) or Light Worsted Weight Yarn (Category 3)
(Approx. 300–400 yards)-
Recommended fiber: Cotton or cotton blend for softness
-
-
Hook size: 4.0 mm (G-6) crochet hook
-
Stitch markers
-
Tapestry needle
-
Scissors
-
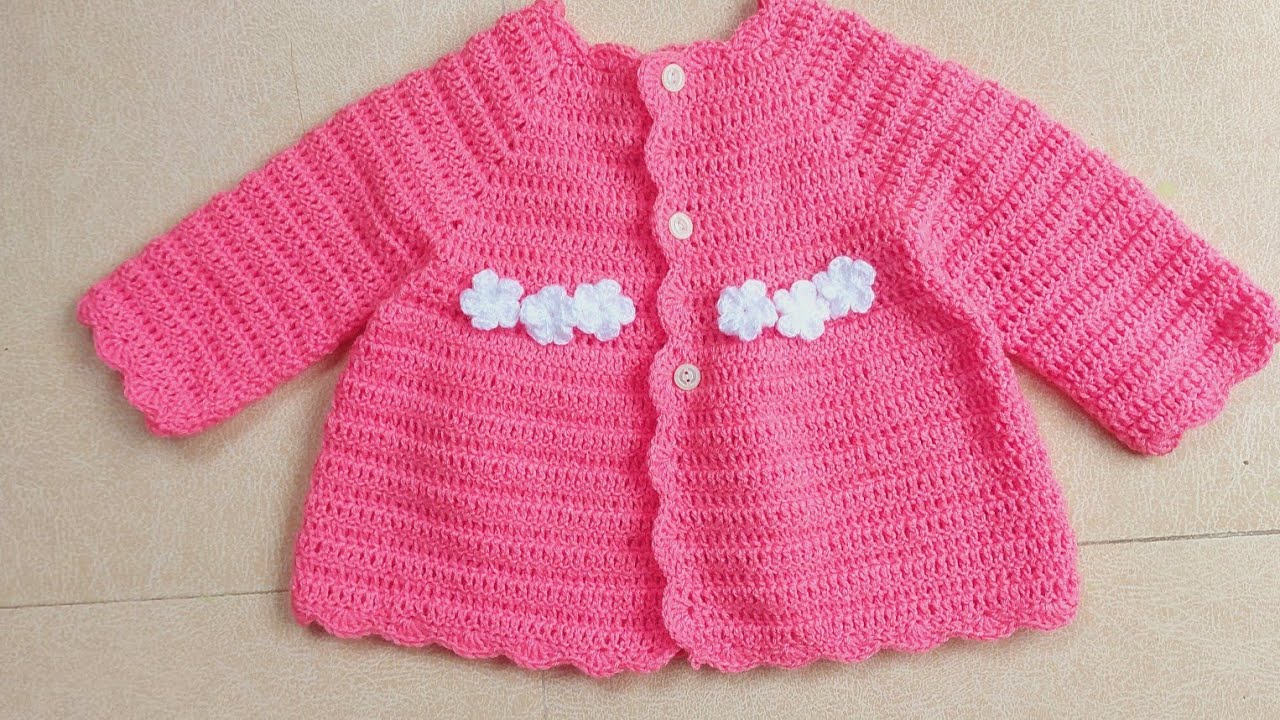
Buttons (optional): 3–5 small (½-inch) buttons
🧶 Gauge:
-
16 double crochet stitches x 10 rows = 4″ x 4″ (10 x 10 cm)
🪡 Stitches & Abbreviations (US Terms):
-
ch – chain
-
sl st – slip stitch
-
sc – single crochet
-
dc – double crochet
-
hdc – half double crochet
-
inc – increase (2 dc in same stitch)
-
dec – decrease (dc2tog)
🧩 Construction Style:
We will use a top-down yoke construction — no seaming needed.
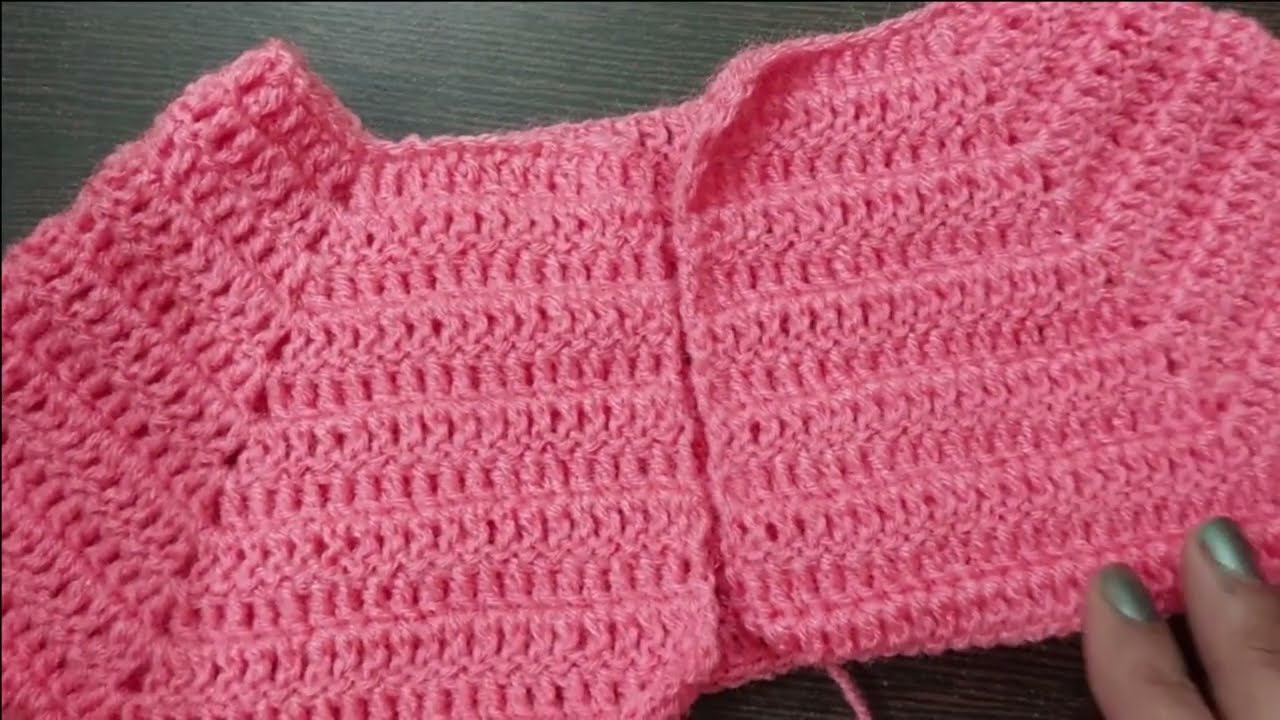
🧷 Instructions:
🧷 1. Yoke (Top Down):
Foundation Chain:
Ch 60 (adjustable, as multiples of 10 + 10)
Row 1:
-
Dc in 4th ch from hook and in each ch across. (You should have 57 dc)
-
Turn.
Row 2 (mark raglan points):
-
Ch 2 (counts as dc), dc in next 8 sts, place stitch marker (PM) in next st (raglan point)
-
Dc in next 9 sts, PM in next st
-
Dc in next 19 sts, PM in next st
-
Dc in next 9 sts, PM in next st
-
Dc in remaining sts. (You should have 4 stitch markers placed)
Row 3–9:
-
Ch 2, dc until 1 st before marker, dc-inc in that stitch and in stitch after marker.
-
Repeat for each raglan point (increasing 8 sts per row).
-
Continue until you have:
-
22 dc for each front
-
36 dc for back
-
14 dc each for sleeves (or similar proportions)
-
🧷 2. Split for Body and Sleeves:
Row 10:
-
Work dc up to first marker (front)
-
Skip stitches between 1st and 2nd markers (sleeve), ch 4 (armhole), continue dc from 2nd to 3rd marker (back)
-
Skip next sleeve, ch 4, and finish front.
You should now have one continuous row for body only.
🧷 3. Body:
Rows 11–20 (or desired length):
-
Ch 2, dc in each stitch (including chains from underarm).
-
Optional: For the last 2–3 rows, switch to hdc or sc for a neater edge.
Fasten off and weave in ends.
🧷 4. Sleeves:
Attach yarn to underarm area.
Round 1:
-
Dc evenly around the armhole (approx. 28–30 sts), join with sl st.
Rounds 2–12 (or desired length):
-
Dc in each stitch around, join each round with sl st.
-
Optional: Decrease one stitch every 3–4 rounds to taper the sleeve.
Last 2 rounds: switch to hdc or sc for neat cuff.
Repeat for second sleeve.
🧷 5. Button Band / Front Border:
Attach yarn at bottom front edge.
-
Work 2–3 rows of sc up one side, across the neckline, and down the other front edge.
-
On second or third row, space out buttonholes (ch 2, skip 2 sts) every 1.5–2 inches.
-
Fasten off and weave in ends.
🎀 Optional Finishes:
-
Add shell edging or picot to hem or sleeves
-
Add a flower applique or pocket
-
Use contrasting color for border
🧼 Care Instructions:
-
Wash gently in cold water
-
Lay flat to dry
-
Avoid heavy tumble drying
📝 Tips:
-
Try on the cardigan (if possible) before finishing sleeves or bottom
-
If using acrylic, block lightly with steam for better shape
-
Adjust hook size to match gauge
Watch video: