 by
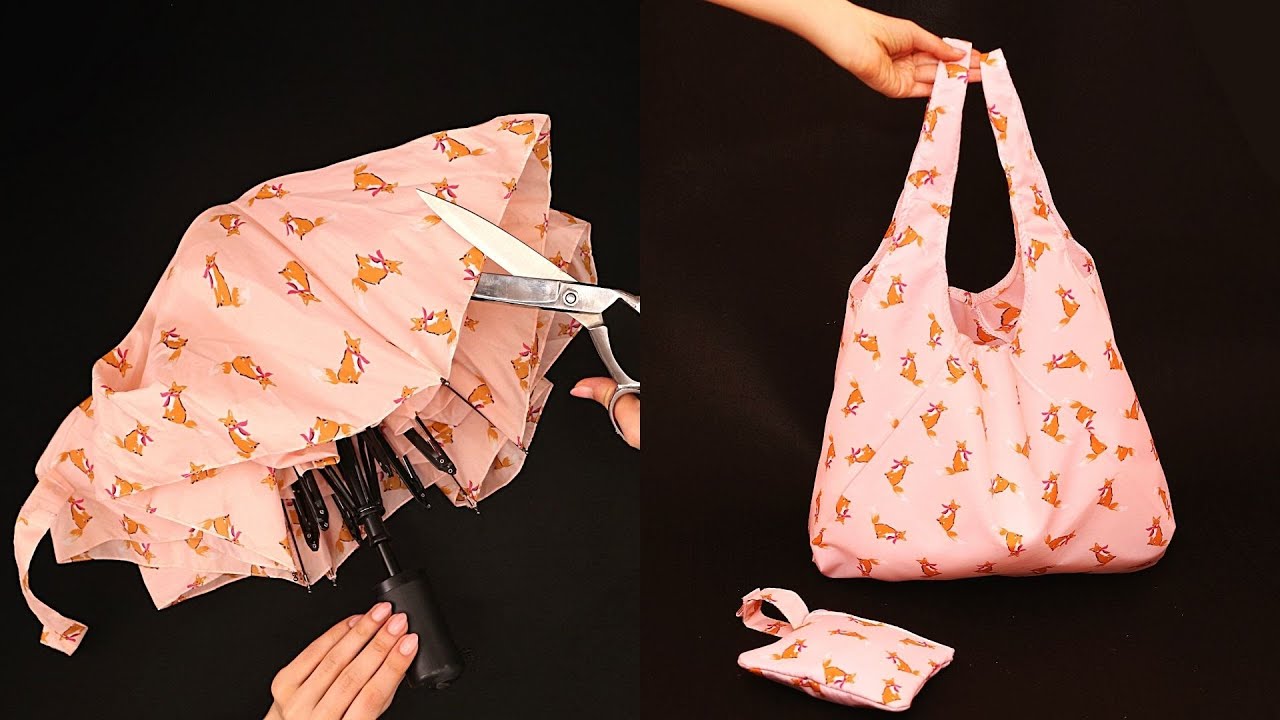
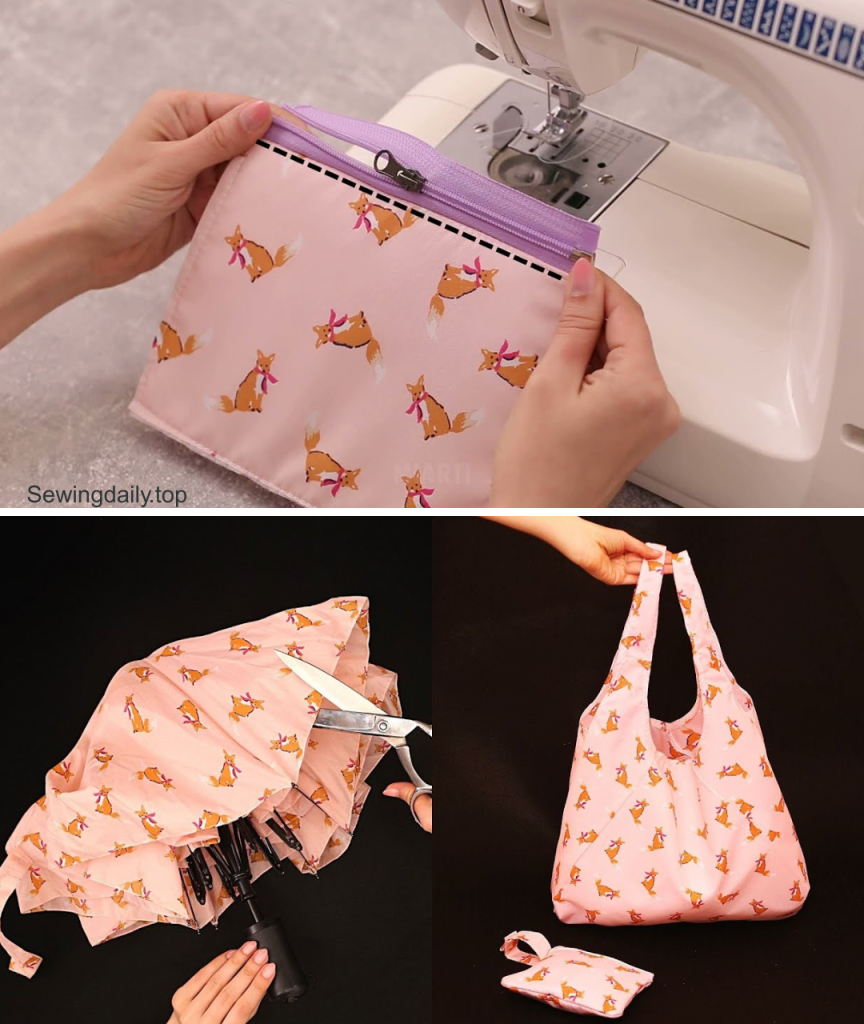
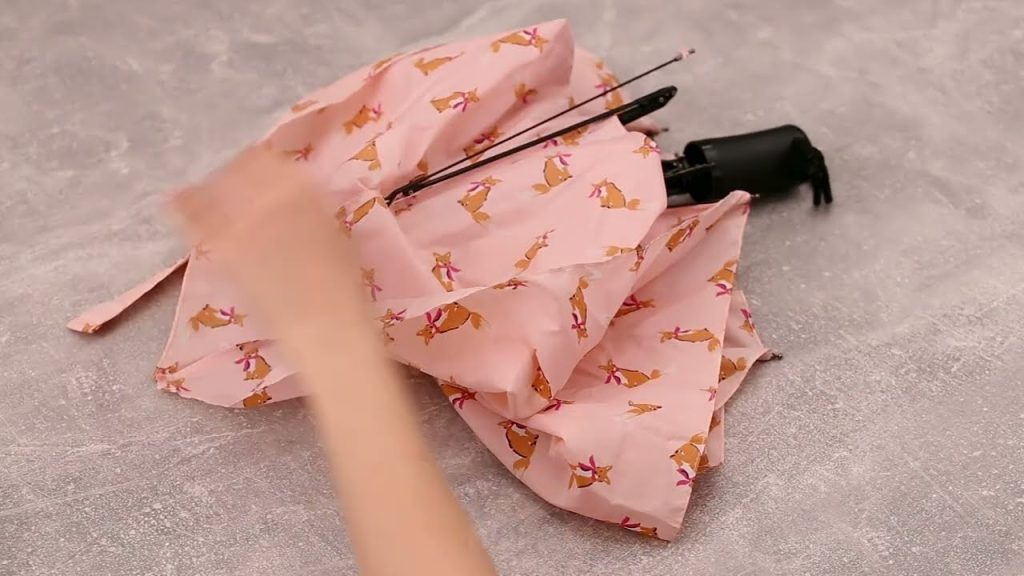
by Imagine taking the durable, water-resistant fabric from an old, broken umbrella and transforming it into a stylish, matching set of accessories: a structured zipper bag and a coordinating, compact wallet. This detailed tutorial, inspired by the innovative “How to sew a bag and a wallet from an old broken umbrella!” video from Miarti – Reuse, will guide you through this ultimate upcycling project. The brilliance of this design is that it reclaims a discarded item, giving it new life as highly functional, waterproof gear.
Get ready to turn a rainy day castoff into a chic, durable set perfect for travel, organization, or daily use!

Why This “Waterproof Upcycle” Set Will Be Your New Favorite
This project is a champion of sustainability and smart design, offering several compelling reasons to make it your next sewing challenge:
- Waterproof Durability: Umbrella fabric (usually nylon or polyester) is inherently water-resistant, making these accessories perfect for protecting contents from moisture.
- Ultimate Upcycling: Rescue a broken umbrella from the landfill and turn its high-quality fabric into something beautiful and useful.
- Matching Set: You create two coordinating pieces—a larger boxy bag and a smaller wallet—for a polished, unified look.
- Structured Shape: The addition of a sturdy lining ensures the bag holds its shape, despite the umbrella fabric’s light weight.
- Simple Construction: Both pieces rely on simple rectangular cuts and straight-line stitching, making the project accessible for intermediate sewers.
Materials You’ll Need:
The key to this project is harvesting the main fabric from the umbrella.
- One Broken Umbrella: (To harvest the main, waterproof fabric.)
- Bag Fabric: Approx. 2 pieces, 30 cm x 40 cm (for the exterior).
- Wallet Fabric: Approx. 2 pieces, 25 cm x 15 cm (for the exterior).
- Lining Fabric (Sturdy Cotton/Poly):
- Bag Lining: 2 pieces, 30 cm x 40 cm.
- Wallet Lining: 2 pieces, 25 cm x 15 cm.
- Fusible Interfacing (Medium Weight):
- Bag Interfacing: 2 pieces, 30 cm x 40 cm.
- Wallet Interfacing: 2 pieces, 25 cm x 15 cm. (Essential for giving the umbrella fabric body.)
- Zippers:
- Bag Zipper: 1 piece, 35 cm long.
- Wallet Zipper: 1 piece, 20 cm long.
- Webbing/Strap Fabric: 1 piece, 30 cm long x 3 cm wide (for bag handle).
- Matching Thread: High-quality polyester thread.
- Basic Sewing Tools: Sewing machine, fine needles (for slippery fabrics), fabric scissors or rotary cutter, clips (pins can leave holes in umbrella fabric!), iron, and ironing board.
Part 1: The “Waterproof Box-Top” Zipper Bag
This bag uses the classic boxed-corner technique for a stable, high-capacity shape.
Phase 1: Preparation and Handle
- Harvest Umbrella Fabric: Carefully cut the umbrella fabric away from the frame. Cut out two clean rectangular pieces (30 cm x 40 cm) for the bag exterior, avoiding seams where possible.
- Fuse Interfacing: Iron the Medium Weight Fusible Interfacing onto the wrong side of the two Umbrella Exterior pieces. Use a pressing cloth on a low setting to protect the nylon/poly fabric.
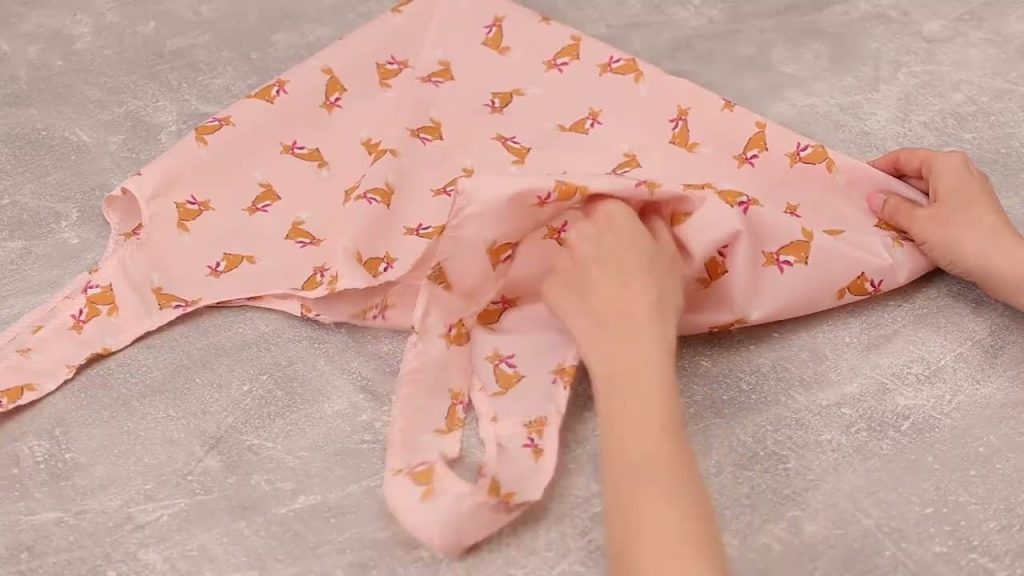
- Prepare Handle: Take the 30 cm x 3 cm Webbing/Strap Fabric. Fold the long edges inward and topstitch to create a finished handle. Fold in half to make a loop and set aside.
Phase 2: Zipper Installation and Body Construction
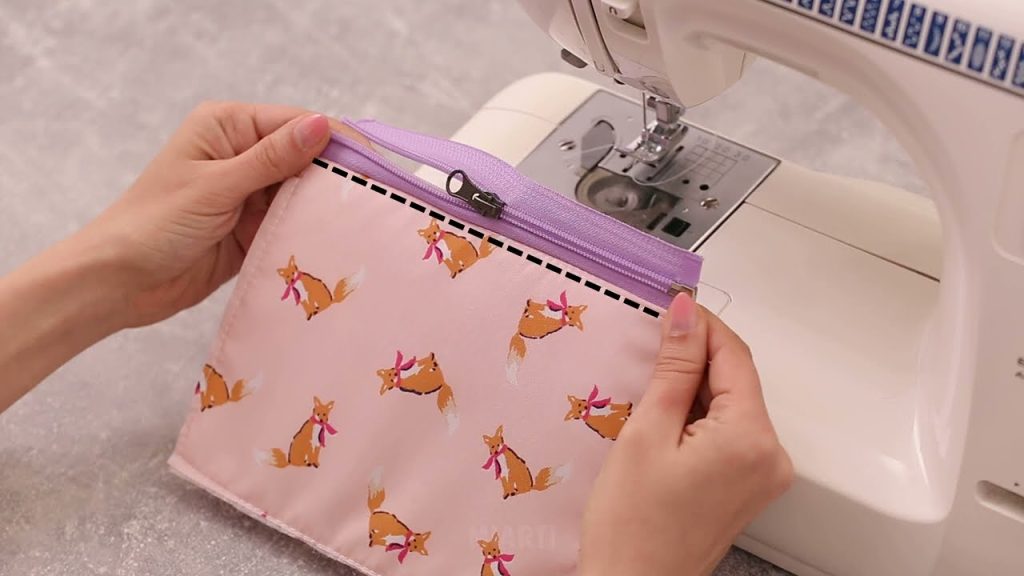
- Attach Zipper to Exterior: Lay one Exterior Panel (40 cm edge) right side up. Place the 35 cm Zipper right side down along the top 40 cm edge. Place the Handle Loop on the center of this edge, between the fabric and zipper, with the raw ends aligned. Baste the handle in place.
- Attach Lining: Place one Lining Panel on top (right side down, sandwiching the zipper and handle). Stitch all three layers along the 40 cm edge.
- Attach Second Side: Repeat the sandwich method with the remaining exterior and lining pieces on the other side of the zipper tape. Open the fabric, press, and topstitch along both sides of the zipper.
- Sew Perimeter: Open the zipper halfway. Place the Exterior Panels right sides together and the Lining Panels right sides together. Stitch the three open sides (two 40 cm edges and one 30 cm edge) for the exterior and lining separately. Crucially, leave a 15 cm turning opening on the bottom seam of the lining.
Phase 3: Boxing and Finishing
- Box the Corners: At all four corners (two exterior, two lining), measure and mark a 4 cm x 4 cm square from the corner. Cut out these squares. Pinch the cut edges together, matching the side seam to the bottom seam, and stitch the corners closed.
- Final Assembly: Turn the bag right side out through the hole in the lining. Stitch the lining hole closed. Push the lining inside the exterior bag and zip it up!
Part 2: The “Compact Cash” Wallet
This piece is built using the same efficient construction but on a smaller scale.
Phase 1: Preparation
- Cut & Fuse: Cut two 25 cm x 15 cm pieces from the umbrella fabric (Exterior) and two for the Lining. Iron the Wallet Interfacing onto the wrong side of the exterior pieces.
- Prepare Zipper Tab (Optional): Cut a small piece of umbrella fabric (6 cm x 4 cm) to fold and topstitch, creating a small tab to secure the zipper ends.
Phase 2: Zipper Installation and Assembly
- Attach Zipper: Use the same “sandwich” method from Part 1 to install the 20 cm Zipper between the two exterior panels and the two lining panels along the two 25 cm edges. Topstitch both sides of the zipper.
- Sew Perimeter: Open the zipper halfway. Place the exterior right sides together and the lining right sides together. Pin all three open sides (two sides, one bottom) and stitch. Leave a 10 cm turning opening on the bottom lining seam.
- Box the Corners: At all four corners, measure and mark a smaller 3 cm x 3 cm square from the corner. Cut and stitch the corners closed.
- Final Assembly: Turn the wallet right side out through the lining hole. Stitch the hole closed. Push the lining inside.

Your unique Waterproof Upcycle Set is complete! You’ve successfully rescued a broken umbrella and created durable, stylish, and sustainable accessories.
Video tutorial: