 by
by Here is a clear, beginner-friendly, and detailed guide on How to Make Crochet Granny Square Slippers Easily. You can use any basic granny-square pattern you like — the magic is in the assembly!
🧶 How to Crochet Granny Square Slippers (Easy Step-by-Step Guide)
Crochet granny square slippers are one of the easiest and most satisfying beginner projects. They work up quickly, require only a few squares, and can be customized to any size—from kids to adults.
⭐ Materials You’ll Need
-
Worsted-weight yarn (or any medium-weight yarn)
-
Crochet hook (size recommended on your yarn label, usually 4.5–5.5 mm)
-
Yarn needle for sewing
-
Scissors

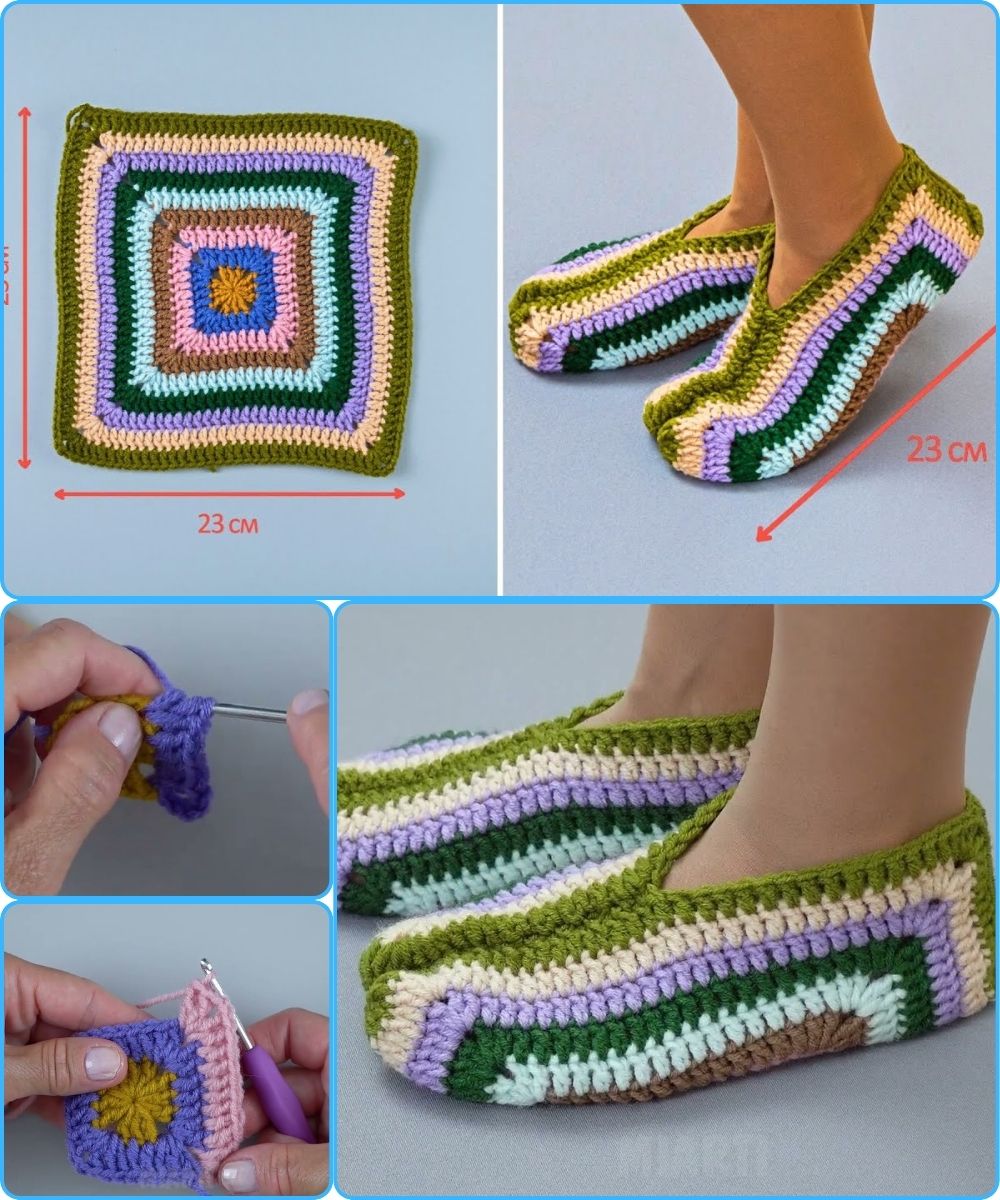
🟩 Step 1: Crochet the Granny Squares
You will need:
| Slipper Size | Number of 4″–5″ Squares |
|---|---|
| Child | 4 squares per slipper (8 total) |
| Adult | 6 squares per slipper (12 total) |
Standard Granny Square Pattern:
-
Round 1:
-
Make a magic ring.
-
Ch 3 (counts as dc), 2 dc, ch 2.
-
3 dc, ch 2 repeat 3 more times (for 4 corners).
-
Join to top of ch-3.
-
-
Round 2:
-
Sl st to corner space.
-
(3 dc, ch 2, 3 dc) into corner, ch 1 around.
-
Join.
-
-
Round 3 (and more rounds if needed):
-
Continue with (3 dc, ch 2, 3 dc) in corners
-
(3 dc in each ch-1 space) for sides.
-
Add rounds until your square is 4–5 inches.
-
Repeat until you have the total number of squares needed.
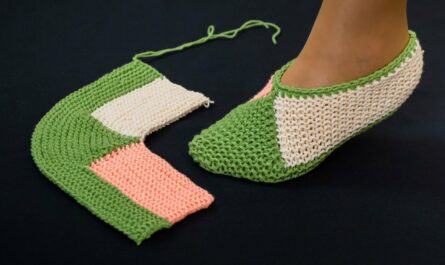
🧩 Step 2: Arrange the Squares
For each slipper you will assemble 6 squares (adult size):
Layout:
-
1 square = toe
-
2 squares = sides
-
1 square = heel
-
2 squares = top/bottom shaping (optional depending on size)
Basic Adult Layout (Most Common):
Squares 1–3 form the top front area
Square 4 wraps the heel
Squares 5 & 6 shape the bottom/instep
You can adjust using fewer squares for smaller feet.
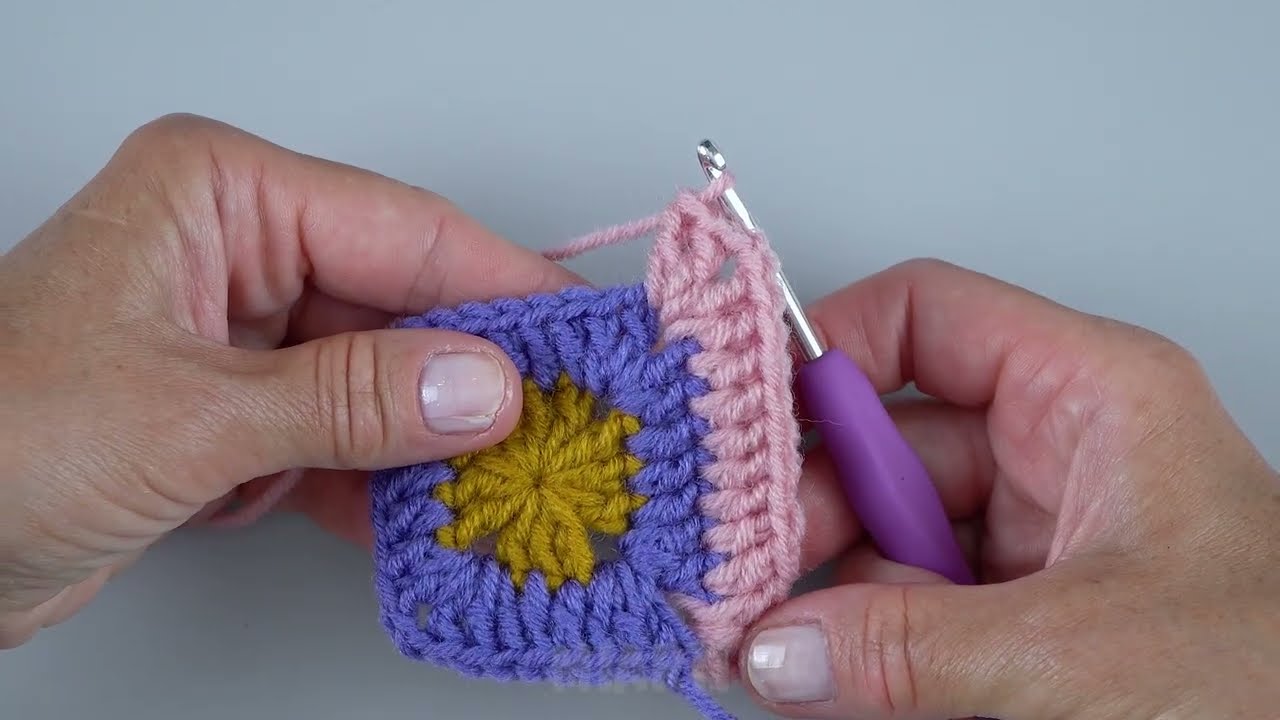
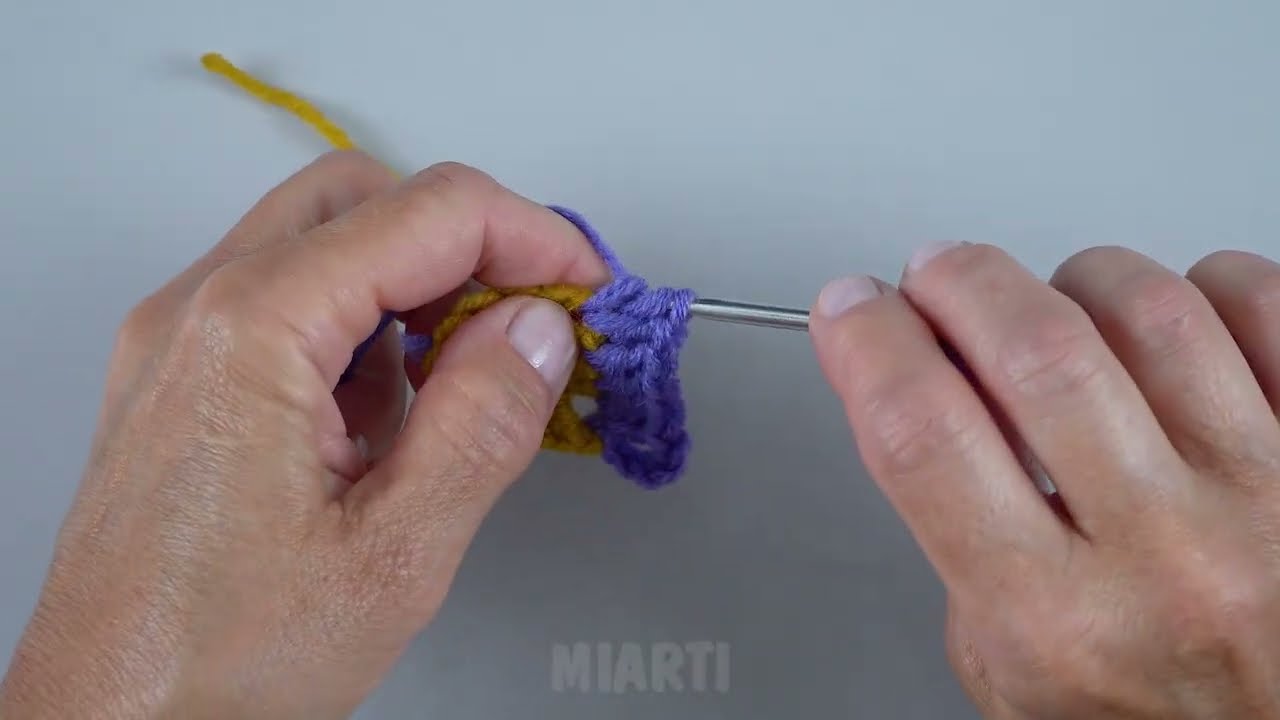
🪡 Step 3: Sew the Squares Together
Use a yarn needle and the whip stitch or slip-stitch join.
Join in this order:
-
Sew Square 1 to Square 2, and Square 2 to Square 3
-
Attach Square 4 to the back edges of the previous row
-
Add Square 5 and Square 6 on the bottom sides
-
Fold the shape to form a slipper and sew the side seams
Leave the ankle opening unsewn.
👟 Step 4: Shape the Slipper
Once sewn, it will naturally fold into a slipper shape:
-
The 3 squares across form the toe box
-
The bottom squares wrap your sole
-
The back square wraps your heel
Sew snugly for a cozy fit.
🎀 Step 5: Add Finishing Touches
Optional additions:
-
Add a round of single crochet around the ankle opening for a clean edge
-
Add decorative buttons or pom-poms
-
Add a simple felt sole or dots of fabric paint for grip
🧵 Size Adjustments
-
Add more rounds to each granny square for larger sizes
-
Use fewer rounds for smaller sizes
-
Add or remove bottom squares for width and length adjustments
🎉 Your Granny Square Slippers Are Ready!
They make perfect gifts and are a great stash-busting project. Let me know if you’d like:
-
A printable version
-
A diagram (visual layout)
-
A specific size pattern (women, men, kids)
-
A photo-based step-by-step guide
Watch video: