 by
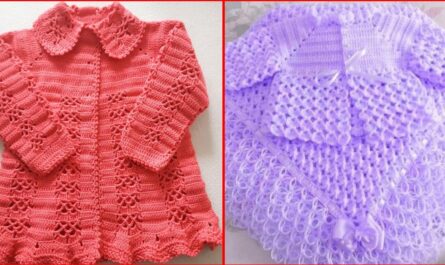
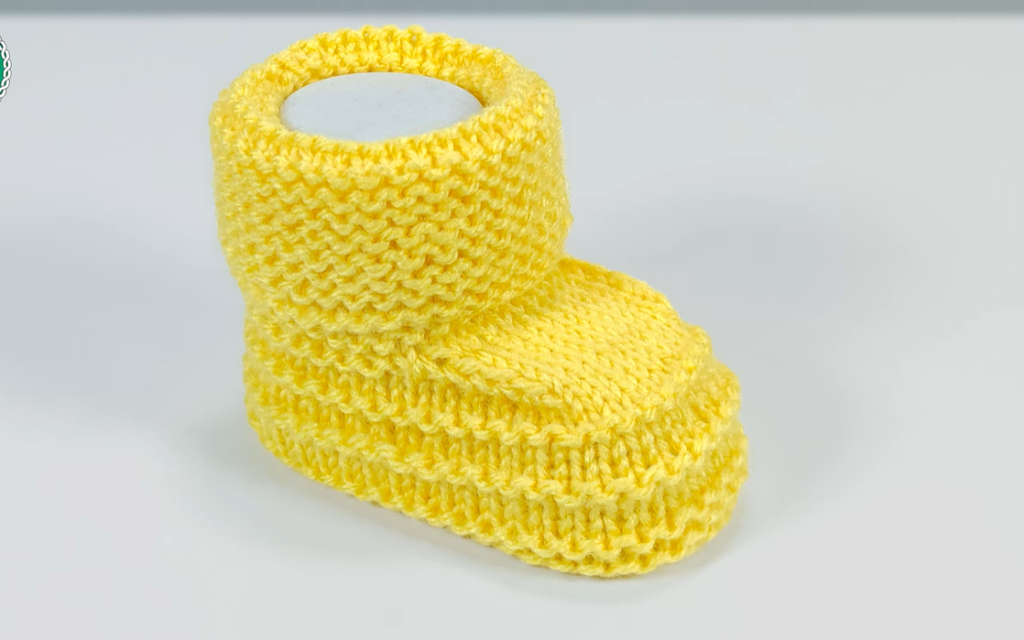
by Welcome, fellow knitters! There’s nothing quite as satisfying as crafting a little pair of booties for the newest arrival in your life. The bright yellow pair you see above is a classic, cozy, high-cuff design that stays put on tiny feet—a true essential! This pattern is designed to be simple yet rewarding, primarily using the garter stitch (knit every row) for a stretchy, textured, and reversible fabric, with a touch of stockinette for shaping the foot.
This detailed pattern is written for a newborn size (0–3 months) but includes notes on how to adjust for larger sizes. Grab your needles, some soft yarn, and let’s make some sunshine!
 Materials Needed
- Yarn: Approximately 50 yards (45 meters) of a soft DK weight (light worsted/8-ply) yarn.
- The yarn in the photo looks like a smooth acrylic or a cotton blend which is great for baby items due to washability.
- Needles: A pair of US size 5 (3.75 mm) straight knitting needles.
- Adjust needle size if necessary to meet the gauge.
- Notions:
- Tapestry needle for weaving in ends and seaming.
- Scissors.
- Optional: Two stitch markers.
 Gauge (Important!)
- Gauge: 22 stitches and 44 rows (22 garter ridges) equals 4 inches (10 cm) in garter stitch.
- Why this matters: Achieving the correct gauge ensures your finished booties are the right size for a tiny foot.
- If your swatch has fewer stitches per 4 inches, your knitting is too loose—try smaller needles.
- If your swatch has more stitches per 4 inches, your knitting is too tight—try larger needles.
 Key Techniques & Abbreviations
This pattern is primarily worked flat and then seamed.
- K = Knit
- P = Purl
- st(s) = Stitch(es)
- M1L = Make 1 Left (a left-leaning increase: lift the bar between the two needles from the front with the left needle, then knit into the back loop).
- M1R = Make 1 Right (a right-leaning increase: lift the bar between the two needles from the back with the left needle, then knit into the front loop).
- K2tog = Knit two stitches together (a decrease).
- Garter Stitch: Knit every row.
- Stockinette Stitch: Knit all odd rows, purl all even rows (when working flat).
- Seed Stitch (for cuff): Alternating K1, P1 every row, shifting where the knits and purls fall (e.g., Row 1: K1, P1, K1… Row 2: P1, K1, P1…).
 The Pattern: Sunshine Baby Booties
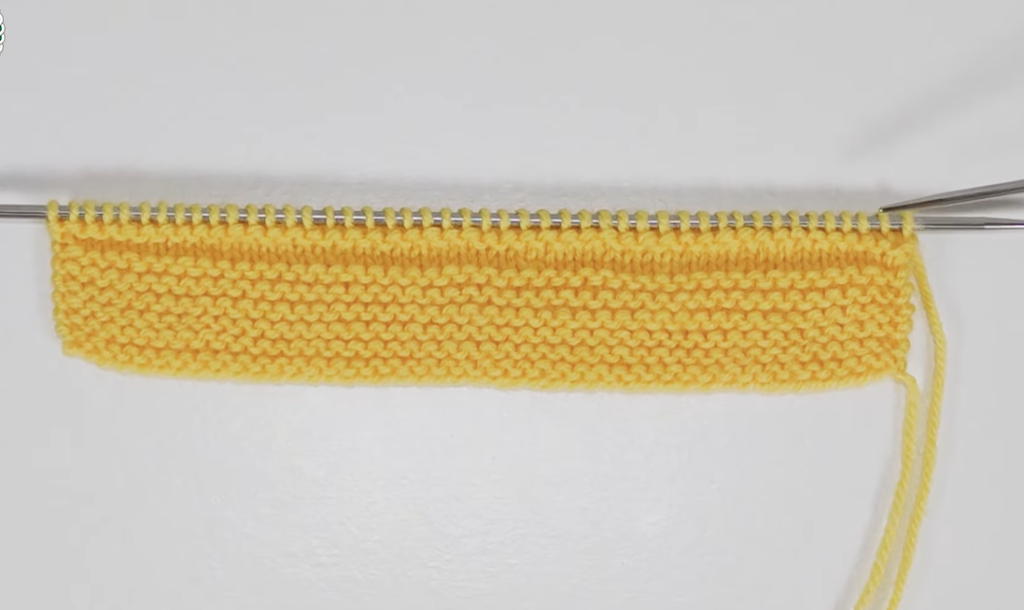
 Cuff and Leg (Worked Flat)
The cuff and leg are worked in a ribbed or seed stitch for elasticity, then switched to garter stitch.
| Step | Instructions | Stitch Count |
| Cast On | Cast on 32 stitches. | 32 sts |
| Rows 1–8 | Cuff: Work in Seed Stitch or 1×1 Rib (K1, P1 repeat) for 8 rows (approx. 1 inch). This creates a sturdy, flexible edge. | 32 sts |
| Rows 9–24 | Leg: Work in Garter Stitch (Knit every row) for 16 rows. This forms the main height of the bootie. | 32 sts |
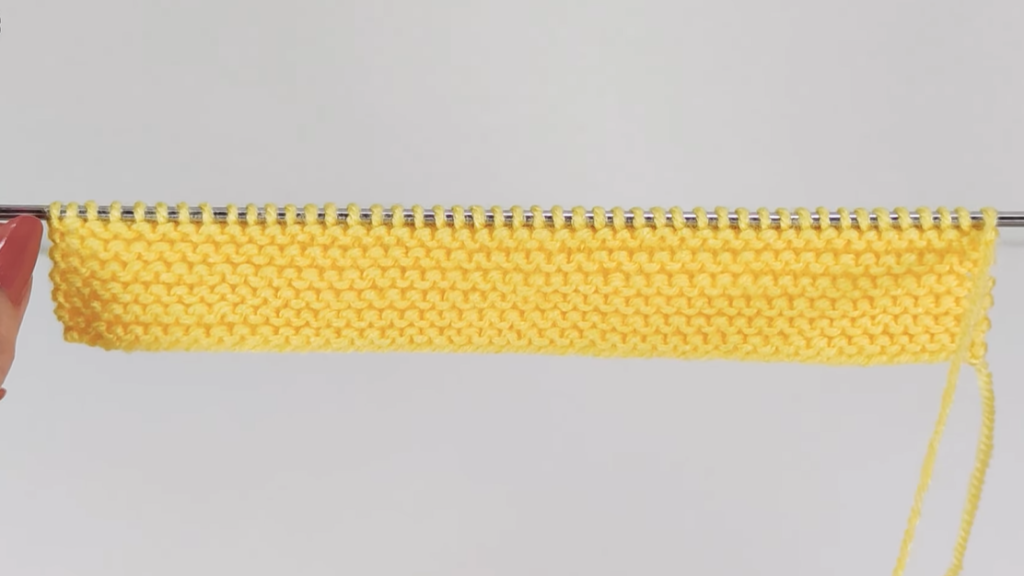
Note: For the high cuff pictured, the leg section is quite long. Feel free to add or subtract rows here to adjust the height.
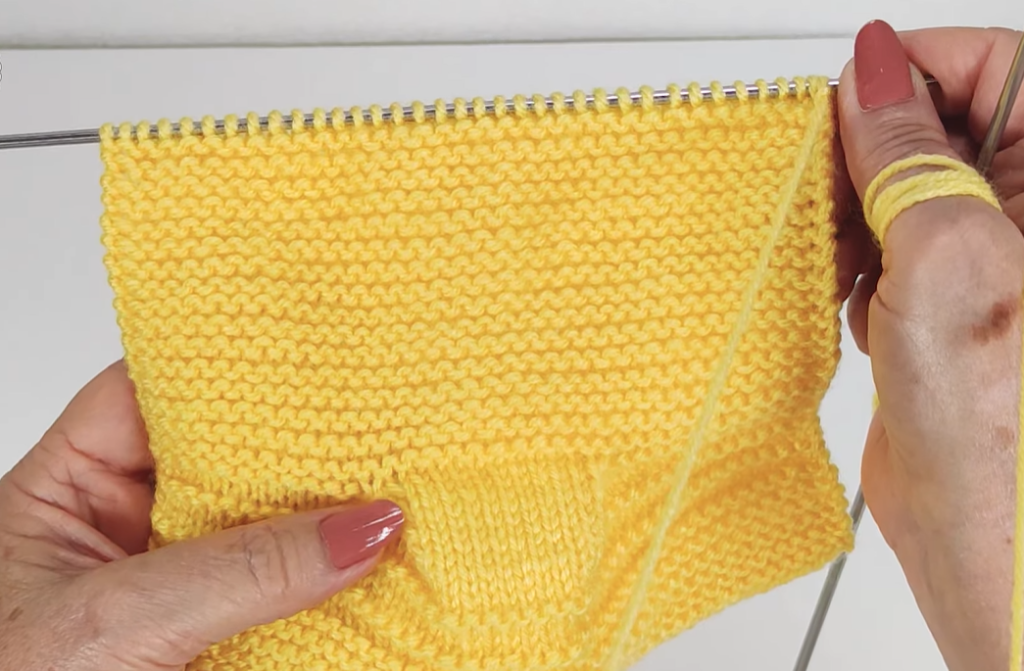
 Heel and Instep Shaping
Now we’ll shape the foot by dividing the stitches and working only the central 10 stitches for the instep (the top of the foot).
| Row | Instructions | Stitch Count |
| Row 25 (RS) | K 22 sts (side + instep). Turn the work. (The remaining 10 sts for the other side are held on the left needle). | 22 sts worked, 10 sts remaining |
| Row 26 (WS) | P 10 sts. Turn the work. | 10 sts worked, 12 sts held |
| Row 27 (RS) | K 10 sts. Turn the work. | 10 sts worked, 12 sts held |
The center 10 stitches are now the instep. We’ll work back and forth on these 10 stitches, picking up stitches along their sides to connect the foot.
 Instep (Top of the Foot)
The instep is worked in Stockinette stitch (knit the RS rows, purl the WS rows) to give it a smooth, distinct look from the garter stitch heel and sole.
| Row | Instructions | Stitch Count |
| Rows 28–43 | Instep: Continue working 16 rows in Stockinette Stitch on the central 10 stitches. (Knit RS rows, Purl WS rows). This forms the length over the baby’s toes/top of the foot. | 10 sts |
Export to Sheets
 Sole Shaping and Final Decreases
The final section creates the garter stitch sole, connecting the instep back to the stitches on the sides and decreasing down to shape the toe.
| Row | Instructions | Stitch Count |
| Row 44 (WS) | P 10 sts. Now, purl and pick up 8 stitches evenly along the side edge of the instep section you just worked (10 + 8 = 18 sts on the right needle). Then, purl across the 10 held stitches from the other side (18 + 10 = 28 sts). | 28 sts |
| Row 45 (RS) | K 18 sts. Now, knit and pick up 8 stitches evenly along the remaining side edge of the instep section (18 + 8 = 26 sts on the right needle). Then, knit across the remaining 10 held stitches (26 + 10 = 36 sts). | 36 sts |
| Rows 46–50 | Sole: Work 5 rows in Garter Stitch (Knit every row). This sets the base for the sole. | 36 sts |
| Row 51 (RS) | Decrease Row 1: K1, K2tog, K13, K2tog, K2, K2tog, K13, K2tog, K1. | 32 sts |
| Row 52 (WS) | Knit all stitches. | 32 sts |
| Row 53 (RS) | Decrease Row 2: K1, K2tog, K11, K2tog, K2, K2tog, K11, K2tog, K1. | 28 sts |
| Row 54 (WS) | Knit all stitches. | 28 sts |
| Row 55 (RS) | Decrease Row 3: K1, K2tog, K9, K2tog, K2, K2tog, K9, K2tog, K1. | 24 sts |
| Row 56 (WS) | Bind off all 24 stitches loosely. | Bind Off |
Export to Sheets
 Finishing (The Magic Touch)
- Seaming: Cut your yarn, leaving a long tail (about 18–24 inches). Thread the tail onto your tapestry needle.
- Fold the piece in half lengthwise, lining up the cast-on and bind-off edges.
- Use the mattress stitch (or a simple whipstitch) to seam the back of the leg and heel, running from the cuff edge down to the start of the sole.
- Continue the seam along the bottom edge (the sole) all the way to the toe, drawing the toe corner slightly tight for a nice curve.
- Weaving: Weave in all remaining yarn tails securely on the inside of the bootie.
- The Second Bootie: Repeat all steps for the second little bootie!