 by
by Below is a clear, detailed, beginner-friendly guide for making bright knitted slippers using a very simple pattern. This method is ideal even if you’ve only recently learned to knit—no shaping, no complex stitches, and no special tools required.
🧶 How to Make Bright Knitted Slippers (Beginner-Friendly + Simple Pattern!)
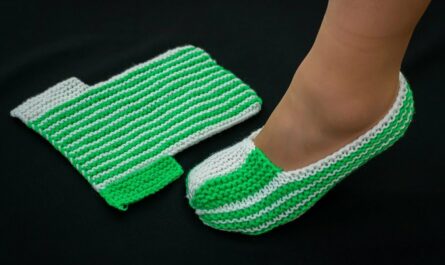
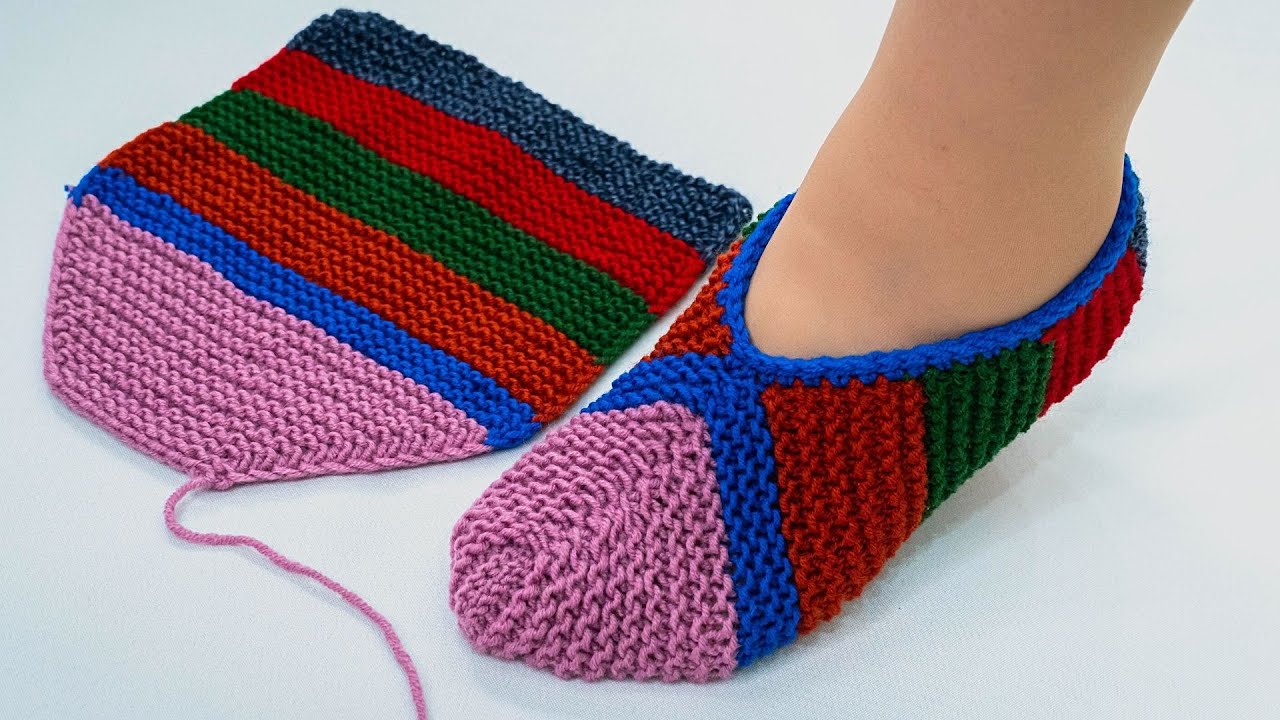
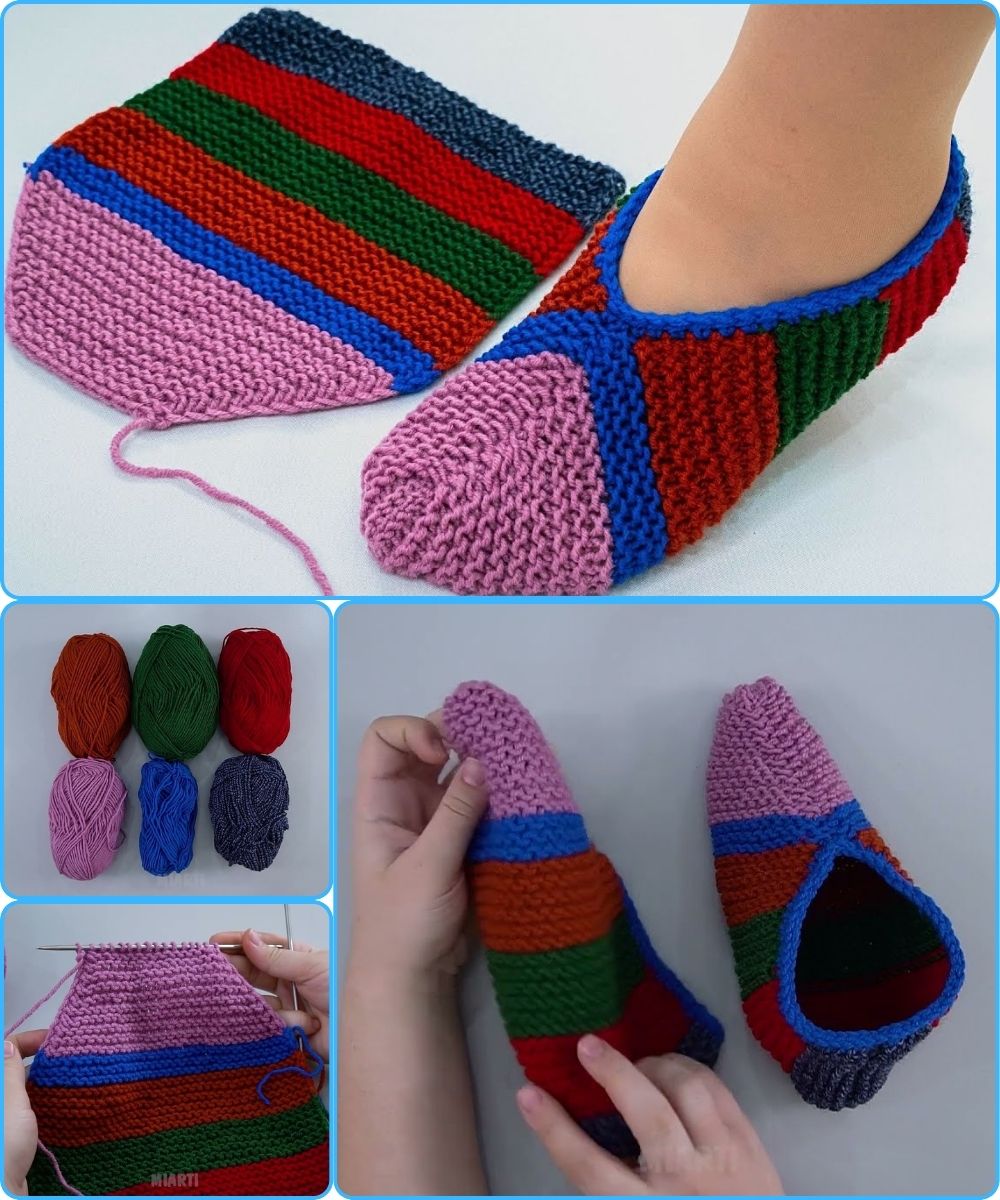
These slippers are made from one flat rectangle that you fold and seam—so if you can knit a rectangle, you can make slippers! They’re soft, stretchy, colorful, and quick to finish.
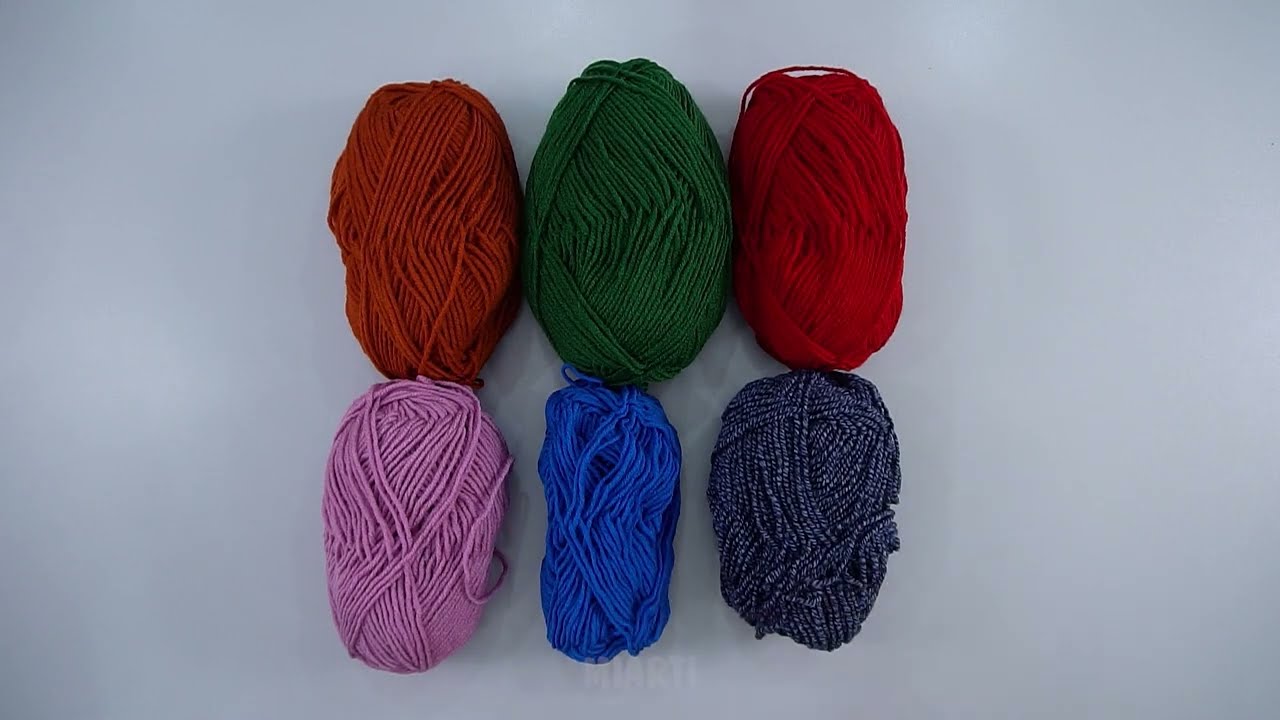
⭐ Materials You’ll Need
-
Yarn: Medium weight (Category 4), acrylic or wool blend
-
Needles: US size 8 (5 mm) straight or circular needles
-
Tapestry needle (for sewing the seams)
-
Scissors
-
Optional: pom-poms, buttons, ribbon, or contrasting yarn for edging
🎨 Choosing “Bright” Colors
To make them look lively and fun, choose:
-
Variegated yarn (multi-colored)
-
Or 2–3 bold contrasting colors (pink + orange, turquoise + yellow, lime + purple)
Striped slippers are especially easy: just switch colors every few rows.
🧵 Basic Stitch Knowledge Needed
You only need:
-
Cast on
-
Knit stitch (garter stitch)
Yep—that’s it! No purling required for the basic version.
📏 Sizing Guide
To size the slippers, you knit a rectangle based on foot length.
Approximate rectangle sizes:
| Size | Foot Length | Rectangle Size |
|---|---|---|
| Small (US Women 5–6) | ~9” (23 cm) | 7” wide × 10” long (18 × 25 cm) |
| Medium (US Women 7–9) | ~9.5–10” (24–26 cm) | 7” × 11” (18 × 28 cm) |
| Large (US Women 10–12) | ~10.5–11” (27–28 cm) | 8” × 12” (20 × 30 cm) |
| These slippers stretch, so sizing is forgiving. |
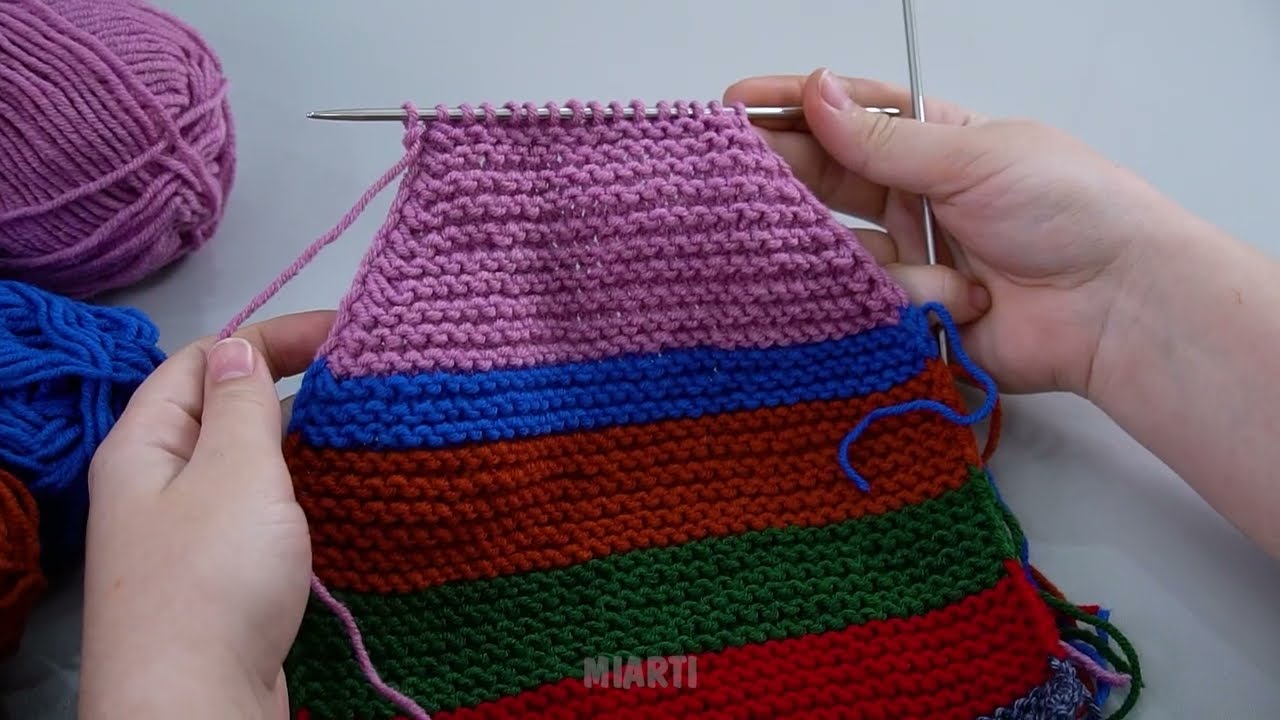
🧶 Super Simple Knitted Slipper Pattern
1. Cast On
Cast on enough stitches to make the width of your slipper (usually 28–32 stitches for medium size using worsted yarn and 5 mm needles).
2. Knit the Rectangle
Knit every row (garter stitch) until your work measures the length shown in the sizing chart above.
Want stripes? Change colors every:
-
2 rows for thin stripes
-
6 rows for thicker stripes
Want extra bright? Alternate neon colors!
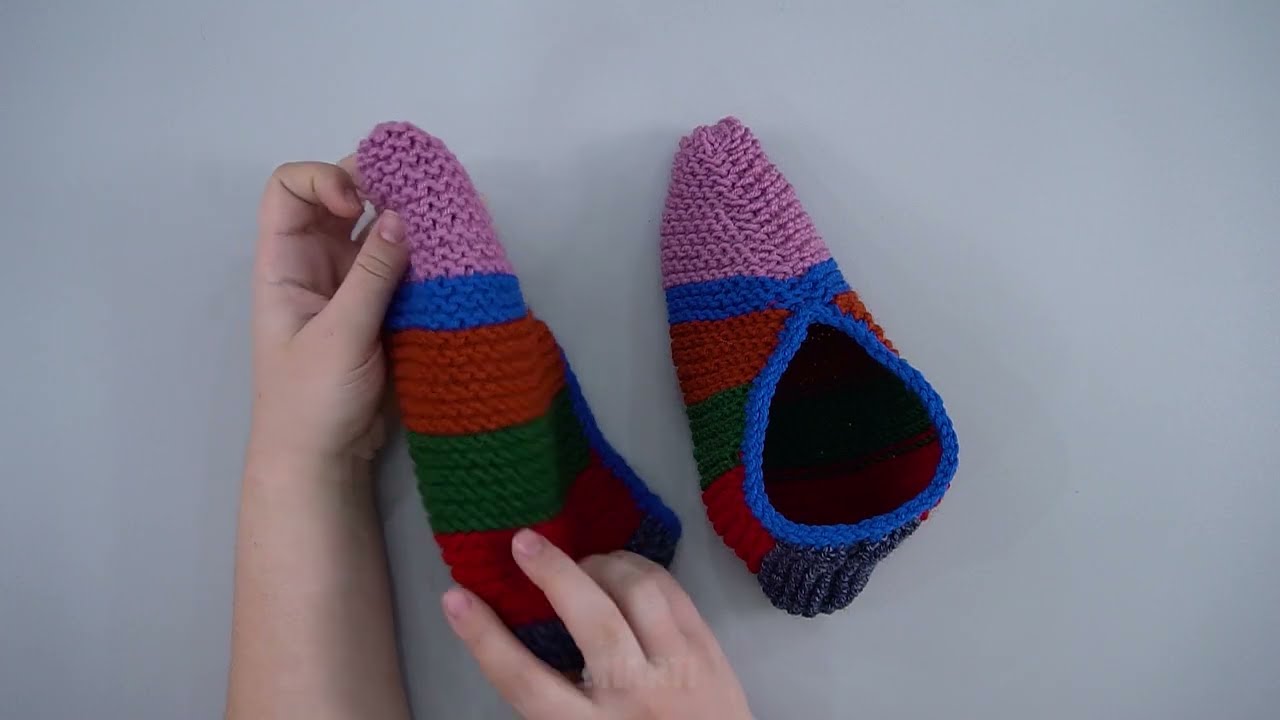
🪡 3. Assemble the Slipper (Magic Folding Method!)
You have a simple rectangle. Now:
Step A — Create the Toe
-
Fold the rectangle in half widthwise.
-
Seam about ⅓ of the length on one of the short edges.
This sealed end becomes the toe.
Step B — Create the Heel
-
On the opposite short edge, seam ½–⅔ of that side, leaving a small opening for your heel.
Adjust opening size by slipping your foot into it while sewing.
Step C — Shape the Instep (Optional but Nice)
From the toe seam, sew a small section (1–2 inches / 2–5 cm) along the top middle to keep it snug.
Your slipper now looks like a little shoe—and stretches to fit!
✨ Optional Finishing Ideas
-
Crochet edge: Single crochet around opening using a bright contrasting yarn.
-
Pom-poms: Add one on the toe for a cute classic look.
-
Buttons: Sew decorative buttons along the instep.
-
Duplicate stitch: Add hearts, stars, initials, or zigzags.
-
Furry cuff: Knit or crochet a fluffy border using faux-fur yarn.
🎁 Why This Pattern Works for Beginners
-
No shaping (no increasing or decreasing)
-
Only one stitch (knit stitch)
-
Works up fast (perfect for gifts)
-
Easy to adjust length or width
-
Can be personalized endlessly with color changes or decorations
📌 Helpful Tip
If you’re worried about slipper soles wearing out, sew a few lines of puffy fabric paint or silicone dots on the bottom as anti-slip grips.
🧦 Want a version with ribbing, a two-color chevron, or crochet edging instructions?
Tell me the style you want and I’ll write a customized variation!
Watch video: