 by
by Here’s a clear, beginner-friendly, step-by-step guide on How to Make Knitted Slippers — warm, cozy, and perfect for gifting or wearing at home. I’ll keep it simple, detailed, and suitable even if this is your very first knitting project!
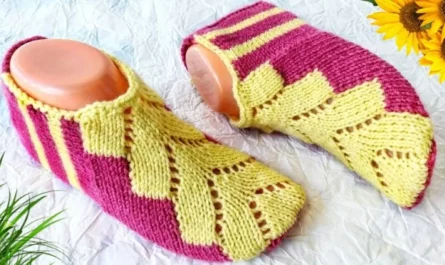
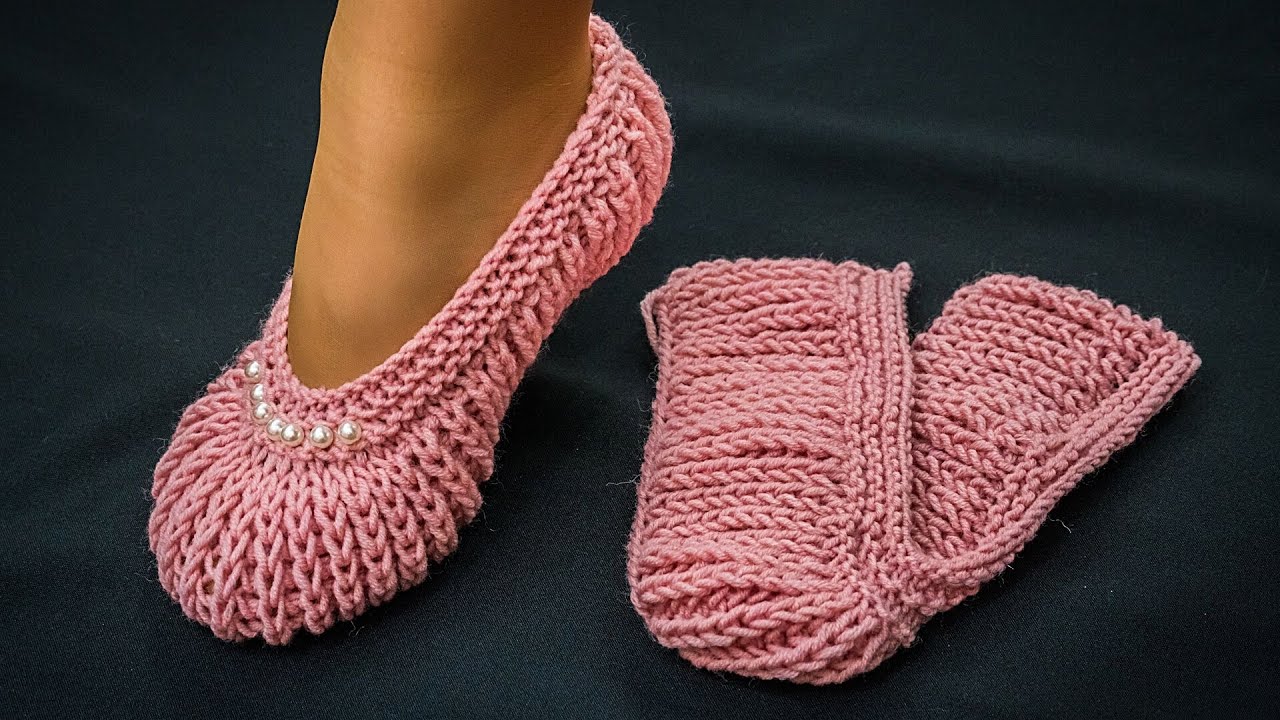
🧶 How to Make Knitted Slippers for Beginners (Super Cozy & Easy!)
These slippers are knit flat (like a simple rectangle) and then sewn up. No complicated shaping. No special skills needed beyond casting on, knit stitch, purl stitch, and casting off.
⭐ What You Need
-
Yarn: Chunky or super-chunky yarn (makes the project fast and extra cozy)
-
Needles: Size 8–10 mm (US 11–15) depending on yarn thickness
-
Tapestry needle: For sewing seams
-
Scissors
📏 Step 1: Measure or Choose Size
These slippers are flexible, but here’s a general guide:
| Shoe Size | Approx. Length to Knit |
|---|---|
| Small (EU 36–37 / US 6–7) | 24–26 cm |
| Medium (EU 38–39 / US 8–9) | 26–28 cm |
| Large (EU 40–41 / US 10–11) | 28–30 cm |
Width is determined by how many stitches you cast on.
🧵 Step 2: Cast On
Cast on 28 stitches (for most adult sizes when using chunky yarn).
If you want them wider/narrower:
-
Add 2–4 stitches for wider feet
-
Reduce 2–4 stitches for narrow feet
🧶 Step 3: Knit the Rectangle
You will knit one long rectangle that gets folded into a slipper.
Option A: Garter Stitch (easiest, very stretchy)
Knit every row.
Option B: Rib Stitch (snug fit)
Repeat:
-
Row 1: K2, P2 across
-
Row 2: K2, P2 across
This makes the slippers hug the foot nicely.
Knit until your piece measures the length you need (see sizing table).
✂️ Step 4: Bind Off
Bind off loosely so the opening isn’t tight.
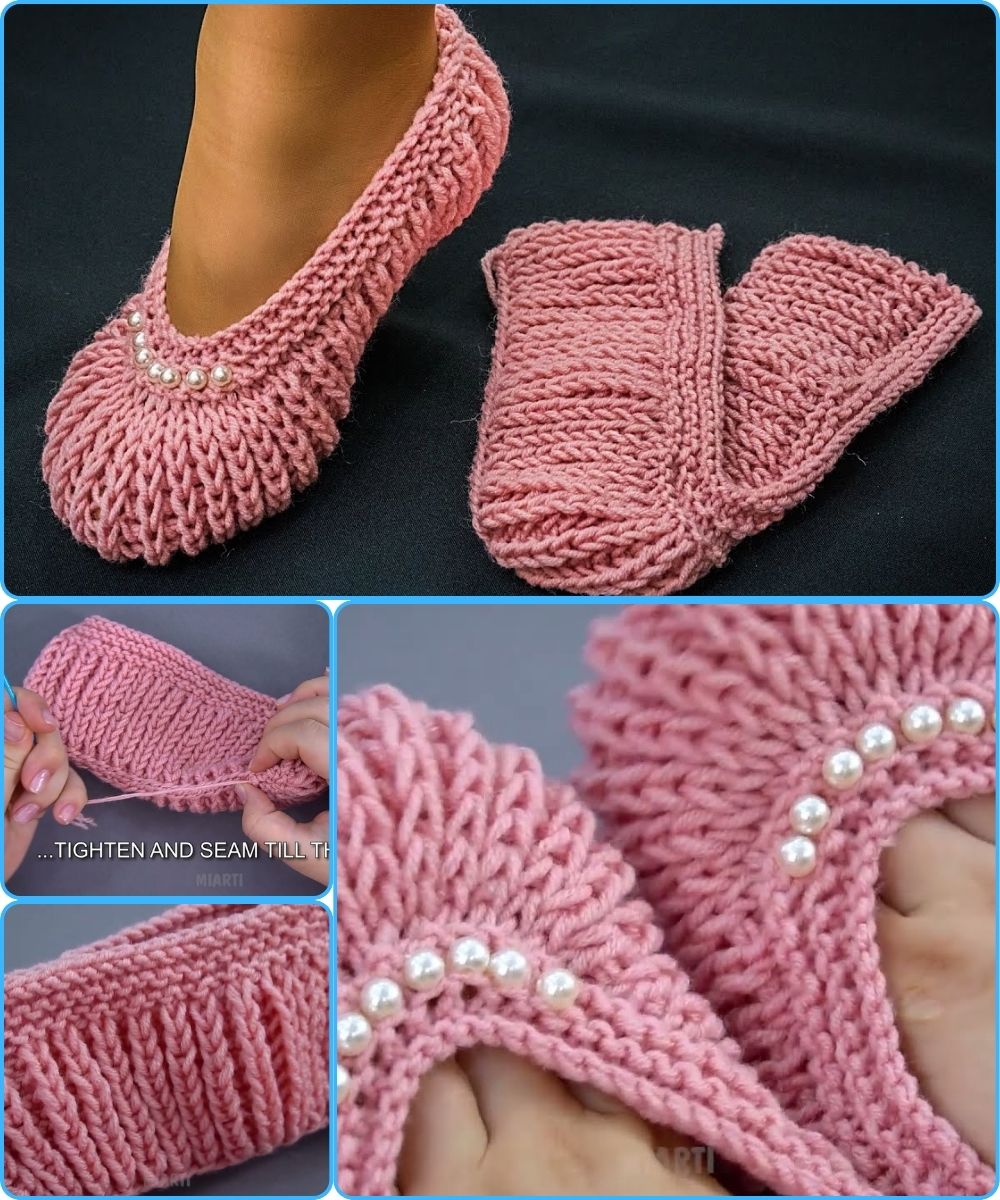
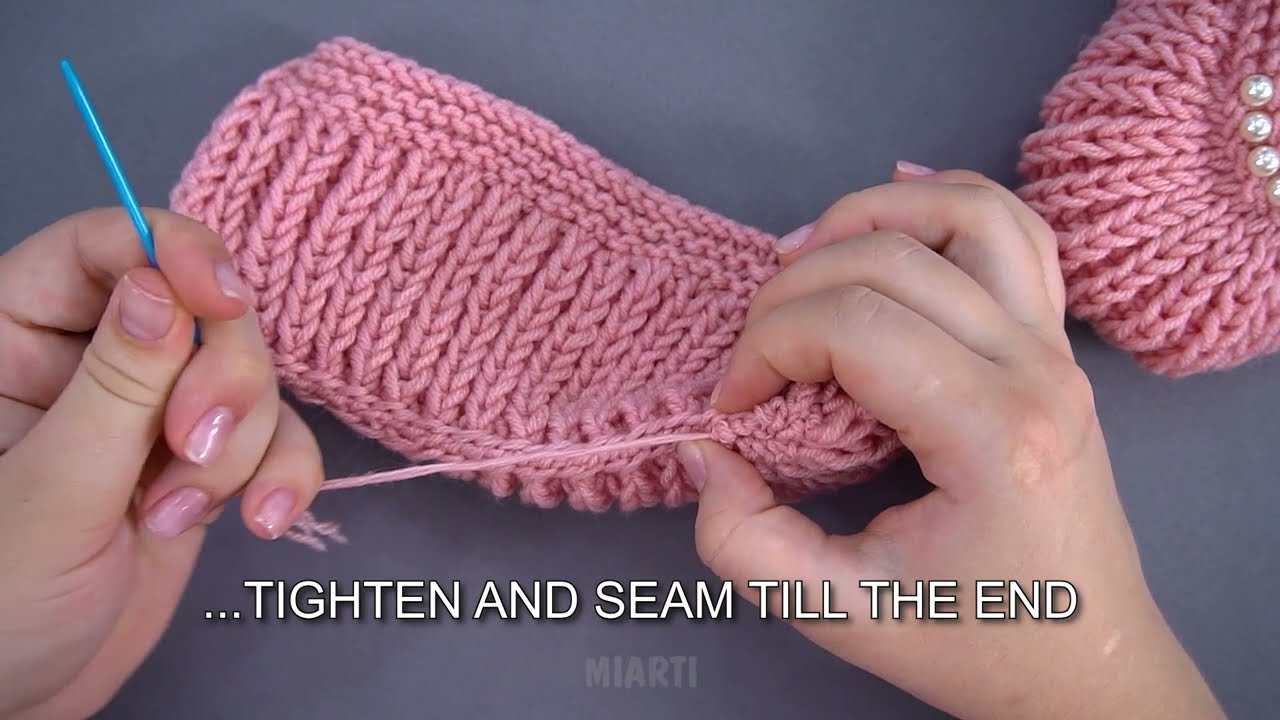
🪡 Step 5: Sew the Slipper Shape
This is the magic part!
Lay your rectangle flat and follow these steps:
1. Fold in Half, Short Ends Together
This will form:
-
The toe
-
The heel opening
2. Sew the Toe
-
Start at one short end.
-
Sew about ⅔ of the way up to create the toe box.
-
Leave the last ⅓ open for the ankle area.
3. Sew the Heel Only Halfway
From the back end, sew only about halfway up.
This gives a rounded heel and a comfortable fit.
👣 Step 6: Try On & Adjust
-
If the toe feels too pointy → undo a little and sew less.
-
If heel loose → sew up a bit more.
-
If too tight → undo a few stitches of the seam.
This project is very forgiving!

🌟 Optional: Add a Cuff
To make them look like little boots:
Pick up stitches around the ankle opening:
-
Knit 5–10 rows in K2, P2 rib
-
Bind off loosely
Super warm and cute!
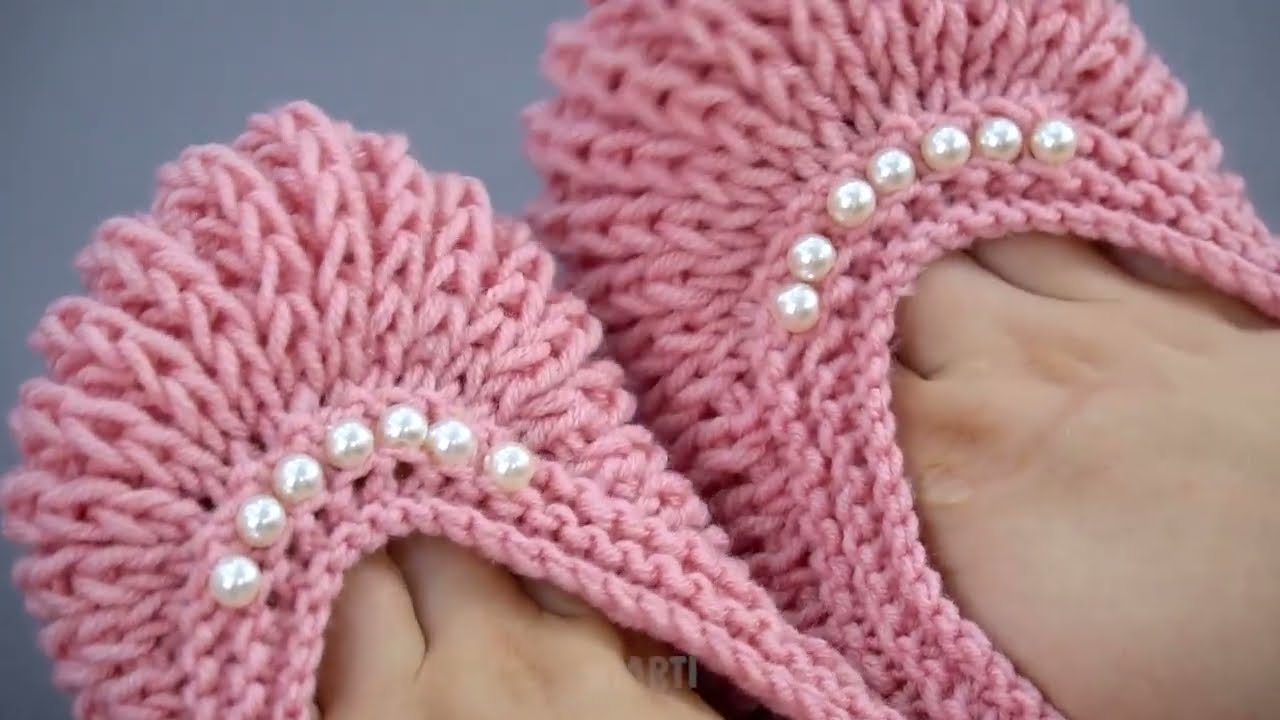
✨ Optional Add-Ons
-
Add pompoms or buttons
-
Knit with two yarn colors
-
Add anti-slip dots (fabric paint works well)
-
Use faux fur yarn around the cuff for extra coziness
🧦 Beginner Tips
-
Chunky yarn hides mistakes — perfect for beginners
-
Use a dull tapestry needle for easy seaming
-
Garter stitch gives lots of stretch (best for beginners)
-
Don’t worry if stitches aren’t perfect; slippers relax with wear
🙌 Want a pattern for a specific size?
I can write you:
-
A child’s size version
-
Men’s size
-
A crochet version
-
A two-needle or magic-loop version
-
A more decorative pattern
Just tell me!
Watch video: