 by
by Sure! Here’s a detailed guide on how to make a DIY “Totally Sealed Entrance Tote Bag”, which is a reusable bag designed to keep its contents secure from dust, water, and outside air — perfect for groceries, gym clothes, or delicate items.
🧵 DIY “Totally Sealed Entrance Tote Bag”
✅ Features:
-
Fully sealed zippered entrance
-
Optional waterproof inner lining
-
Reinforced handles for heavy loads
-
Stylish and eco-friendly
✂️ Materials Needed:
| Material | Purpose |
|---|---|
| Outer Fabric (e.g. canvas, denim, or recycled fabric) – 1 yard | For the body of the bag |
| Inner Lining (e.g. ripstop nylon, waterproof PUL, or cotton) – 1 yard | For added protection or waterproofing |
| Zipper (20–24 inch, heavy-duty) | To create a completely sealed top entrance |
| Thread (polyester or heavy-duty) | Durable stitching |
| Webbing or Fabric Strips (for handles) – 2 pieces, 20–26″ | Strong straps |
| Sewing Machine & Needles | For assembly |
| Pins or Clips, Measuring Tape, Scissors/Rotary Cutter | Tools |
Optional:
-
Fabric sealant (for seams)
-
Velcro or magnetic closures (for added sealing)
-
Fusible interfacing (for structure)
🧰 Step-by-Step Instructions:
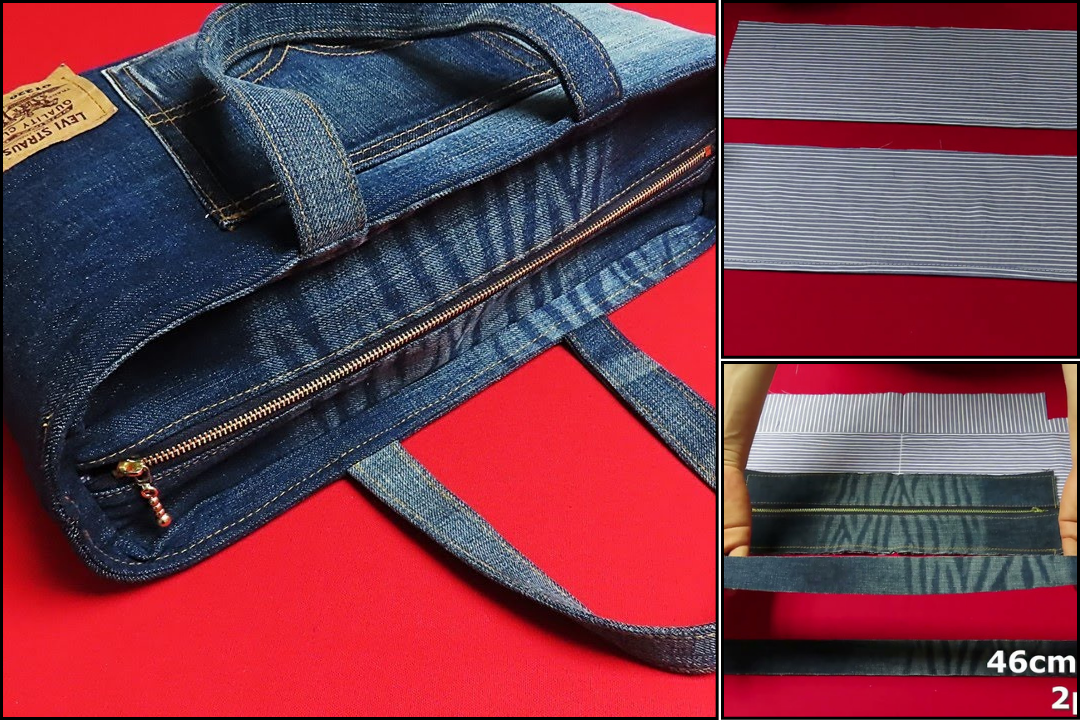
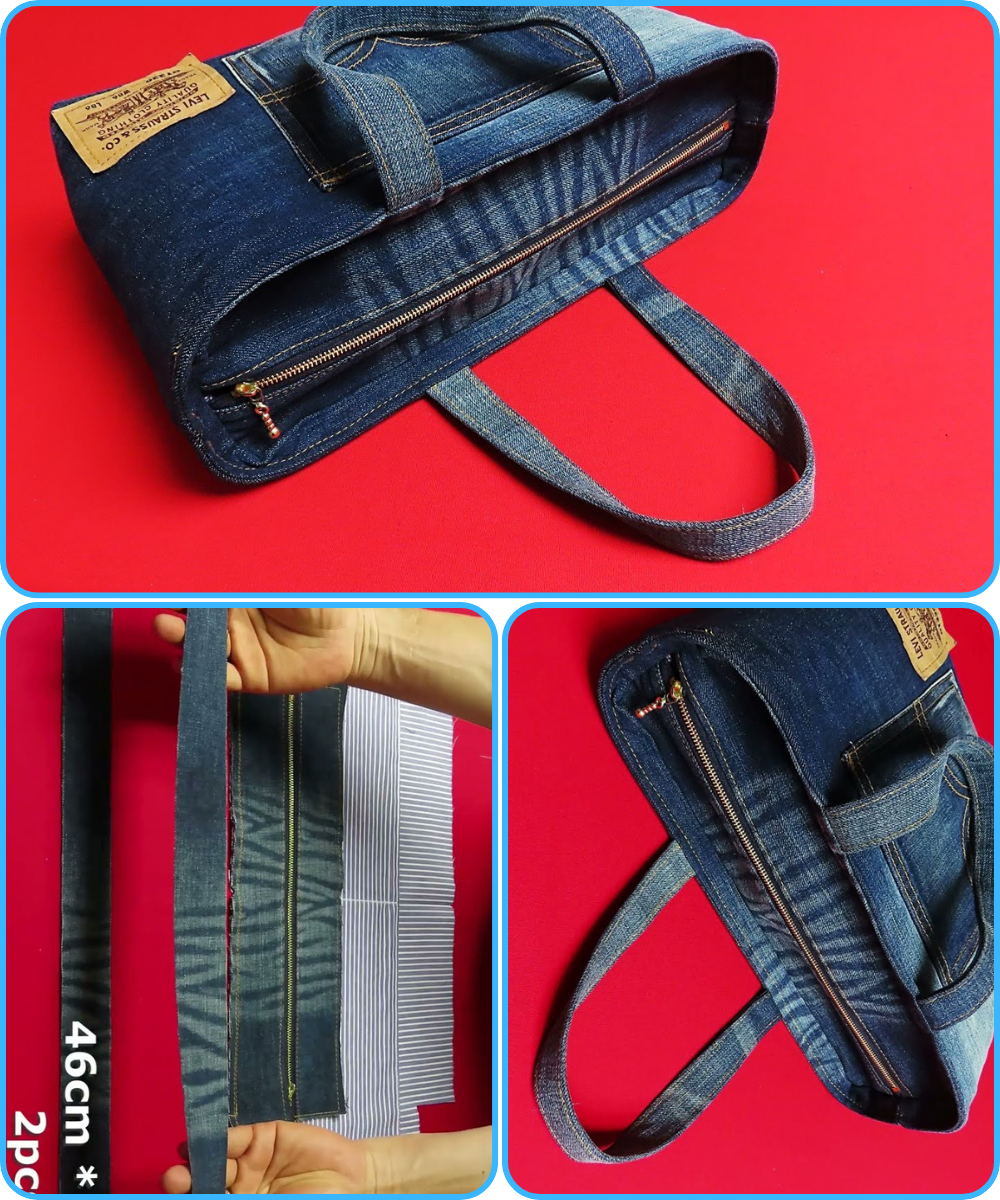
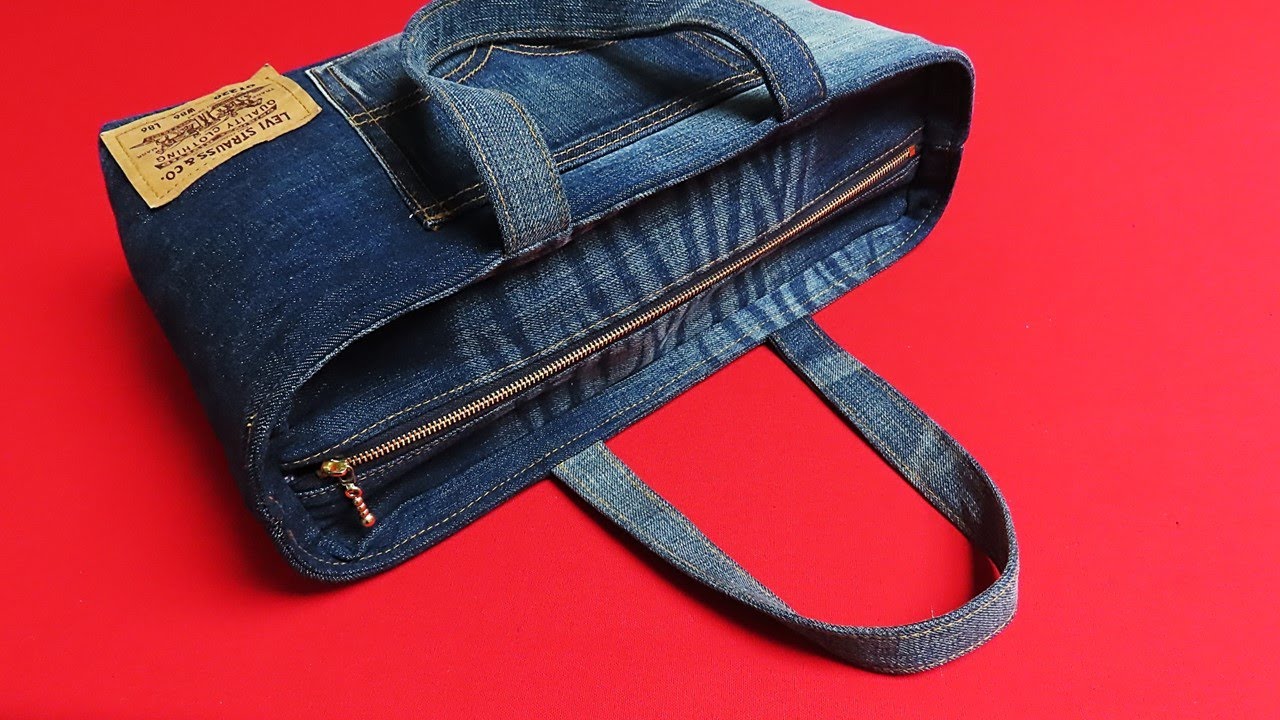
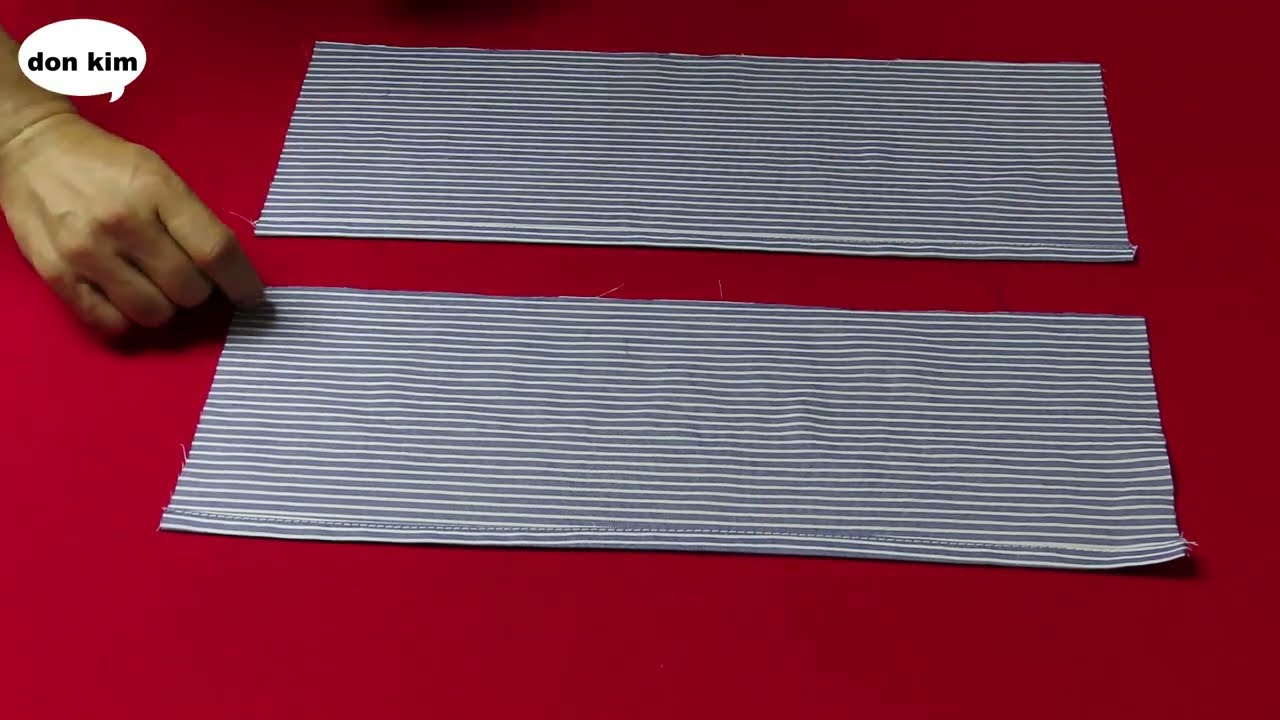
Step 1: Cut Your Fabric
Cut the following pieces:
-
Outer Fabric: 2 rectangles (e.g. 16″ x 18″)
-
Lining Fabric: 2 rectangles (same size)
-
Zipper panel: 2 strips (e.g. 3″ x 18″)
-
Handles: 2 straps (1.5″ x 22″ or desired length)
You can adjust the dimensions based on how large you want your tote.
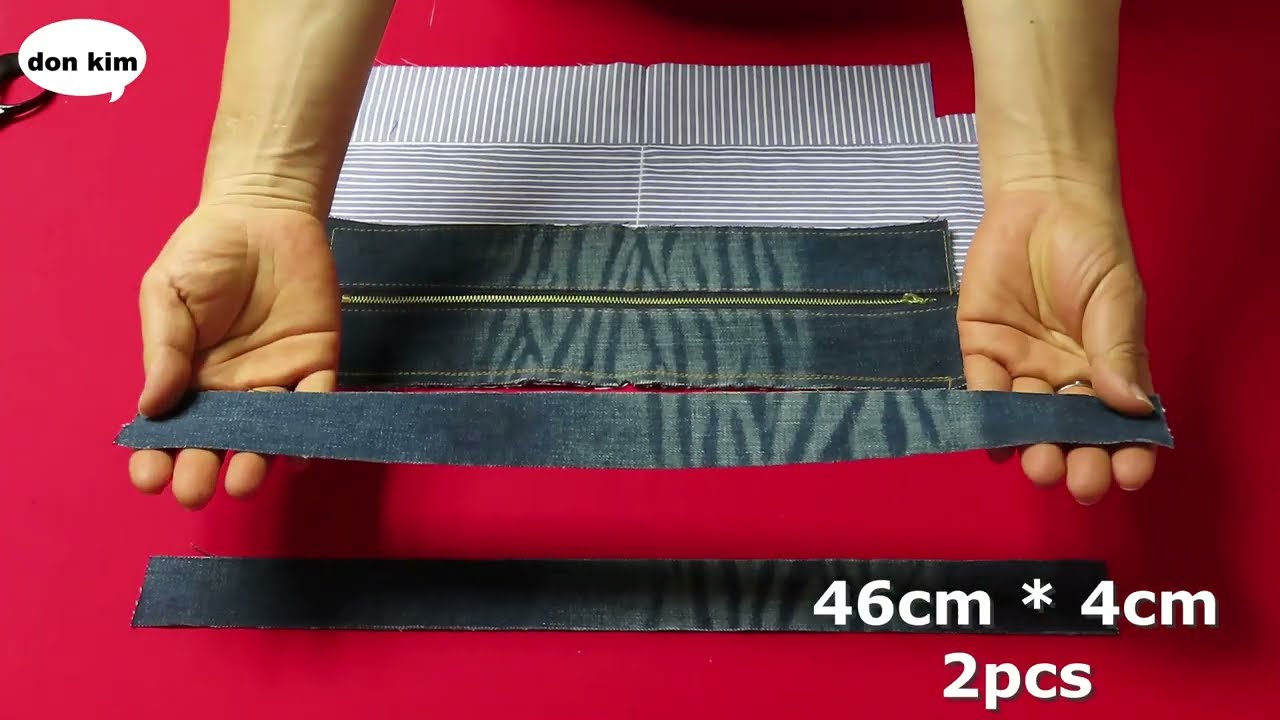
Step 2: Prepare the Zipper Panel
-
Fold the zipper panel strips in half lengthwise and press.
-
Place the zipper right-side-up.
-
Sandwich the zipper between the folded panel pieces, aligning the raw edges with the zipper tape.
-
Sew the zipper in place on both sides using a zipper foot.
-
Topstitch for a clean, professional finish.
Step 3: Assemble Outer Shell
-
With right sides together, pin the front and back outer panels.
-
Sew the sides and bottom with a ½” seam allowance.
-
To give the tote a flat base, box the corners:
-
At each bottom corner, pinch the fabric so the side and bottom seams align.
-
Measure 3” across the corner and mark a line.
-
Sew across this line and trim off excess fabric.
-
Step 4: Assemble the Lining
Repeat the same process as above for the lining fabric. If you’re using waterproof lining, be careful not to puncture too many holes to avoid leakage.
Step 5: Add the Handles
-
Pin handles to the right side of the outer shell (approx. 4 inches in from each side).
-
Baste them in place.
-
Optional: Reinforce with a box and “X” stitch for added strength.
Step 6: Join Bag Shell, Zipper Panel, and Lining
-
With the outer bag right-side-out and the lining wrong-side-out, insert the outer bag into the lining.
-
Pin the zipper panel (with the zipper already attached) between the two layers.
-
Align the top edges and sew all around the top, attaching everything together.
-
Leave a small gap in the lining for turning.

Step 7: Turn & Finish
-
Pull the entire bag through the opening in the lining.
-
Push the lining into the bag.
-
Sew the gap in the lining closed with a small topstitch or hand-stitch.
-
Topstitch around the top edge for reinforcement and neatness.
✅ Optional Sealing Enhancements
-
Use fabric seam sealant inside lining seams to waterproof.
-
Add Velcro or magnetic snaps inside the zipper panel to double-seal the opening.
-
Insert wire or boning into the zipper panel for a structured “snap-shut” top.
🧼 Care Instructions:
-
Machine washable (cold water, gentle cycle)
-
Air dry to maintain fabric integrity
-
Do not bleach or iron waterproof lining
🎉 Done! You’ve Made a “Totally Sealed Entrance Tote Bag”
This tote is stylish, highly functional, and better for the planet. You can customize it with patches, embroidery, or labels. Want to make it thermal-insulated next? I can help with that too!
Would you like printable templates or a pattern sketch to go with this?
Watch video: